Advertisement
Quick Links
ASSEMBLY
INSTRUCTION
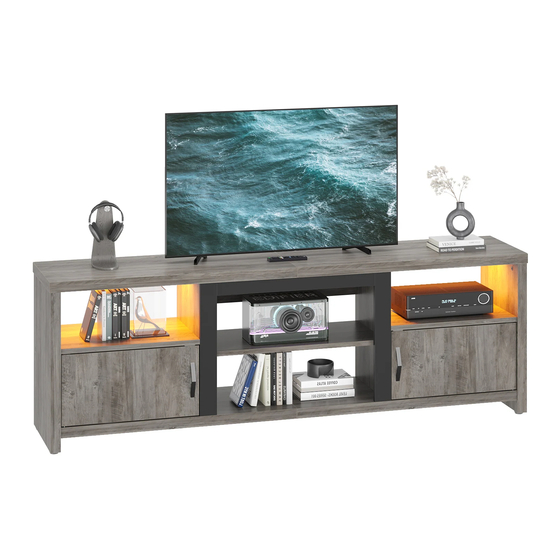
71" RGB TV Stand/Fireplace TV stand
L101217Y
(Fireplace not included)
L101217ZFP
(Fireplace included)
Know more about Bestier from
L101217Y/L101217ZFP
CUSTOMER SUPPORT
CONTACT US BY:
PHONE: 888-666-1086
EMAIL: Service@bestier.net
Thanks for choosing Bestier!
Feel free to contact us if you need any help.
Please kindly share your shopping experience
with us on the platform if you are satisfied with it.
V001-061223-01
1
Advertisement

Subscribe to Our Youtube Channel
Related Manuals for Bestier L101217Y


Summary of Contents for Bestier L101217Y
- Page 1 CUSTOMER SUPPORT CONTACT US BY: PHONE: 888-666-1086 EMAIL: Service@bestier.net Know more about Bestier from Thanks for choosing Bestier! Feel free to contact us if you need any help. Please kindly share your shopping experience with us on the platform if you are satisfied with it.
-
Page 2: Helpful Hints
Identify, sort and count all the parts with tags. cleaners for this item. Find out installation position according to the Push, pull or drag this item carefully. drawing and install it in correct steps. DETAILS UNIT:INCH/CM L101217Y (Fireplace not included) L101217ZFP (Fireplace included) L101217Y/L101217ZFP... -
Page 3: Part List
DETAILS PART LIST L101217Y/L101217ZFP... - Page 4 PART LIST 005-400LED L101217Y/L101217ZFP...
-
Page 5: Accessory List
ACCESSORY LIST ST6x45mm 24+1 ST6x35mm Ø15mm 32+2 36+4 Ø8x30mm 12+1 M6x20mm ST7x60mm ST7x38mm M4x20mm ST3x14mm 16+1 ST3.5x12mm 20+1 ST4x16mm ST4x35mm Ø8mm Ø5x17mm L101217Y/L101217ZFP... -
Page 6: Detailed Installation
Detailed Installation for Accessory A B C Place another panel via the dowel. Screw cam dowel on the panel. Pay attention to the direction of cam lock when Tighten up cam lock clockwise until it stops. putting it into hole. L101217Y/L101217ZFP... - Page 7 Tear off the whole protective paper, and flatten the strip light so that the LED light strip is completely adhered to the wood. Lock the remaining fixings. L101217Y/L101217ZFP...
- Page 8 18 ST6x35mm Ø8x30mm Hole Direction Ø15mm L101217Y/L101217ZFP...
- Page 9 ST6x45mm Ø8x30mm M6x20mm L101217Y/L101217ZFP...
- Page 10 Ø15mm Ø8x30mm ※ Two persons are needed. ü L101217Y/L101217ZFP...
- Page 11 ※ Two persons are needed : one person for holding;Then another person move the bottom ,And tighten the screw "F". ST7x60mm ST3x14mm Ø8x30mm L101217Y/L101217ZFP...
- Page 12 Ø15mm Hole Direction Hole Direction L101217Y/L101217ZFP...
- Page 13 ST6x45mm Ø8x30mm L101217Y/L101217ZFP...
- Page 14 Ø15mm Please refer to "Detailed Installation for LED Strip" on page "7". 005-400LED x 12 ST3.5x12mm ST4x16mm L101217Y/L101217ZFP...
- Page 15 12 ST6x45mm M6x20mm L101217Y/L101217ZFP...
- Page 16 ※ Two persons are needed. x 10 Ø15mm Back ST3x14mm L101217Y/L101217ZFP...
- Page 17 Left door Right door ST3.5x12mm M4x20mm ST3x14mm L101217Y/L101217ZFP...
- Page 18 Right door Left door L101217Y/L101217ZFP...
- Page 19 Right door Left door ※ Please adjust the pivot positon slightly to make sure the gap between both doors are aligned ST3.5x12mm L101217Y/L101217ZFP...
- Page 20 L101217Y (Fireplace not included) If the product you purchased does not include the fireplace, please install the product according to the step 22 to 28. (Fireplace included) L101217ZFP If the product you purchased includes the fireplace, please install the product according to the step 29 to 35.
- Page 21 L101217Y Back Ø5x17mm L101217Y Back L101217Y/L101217ZFP...
- Page 22 L101217Y Back Ø15mm L101217Y Back ST7x38mm L101217Y/L101217ZFP...
- Page 23 L101217Y Back Take out the insulator before using the remote control. ※ L101217Y MARK WALL L101217Y/L101217ZFP...
- Page 24 L101217Y WALL WALL WALL ST4x35mm Ø8mm Please fasten this item to wall for protection and safety. ※ 1. Drill 2 holes in the wall and insert "M" into holes. ※ You may need to use rubber mallet for tapping "M" .
- Page 25 If you chose fireplace TV stand ※ ,Please continue with the following steps. Back Put the fireplace into the TV stand ※ L101217ZFP please refer to the fireplace assembly installation ※ to fix the fireplace to the TV stand. Back L101217Y/L101217ZFP...
- Page 26 L101217ZFP Back Ø15mm ST4x16mm L101217ZFP Back ST7x38mm L101217Y/L101217ZFP...
- Page 27 L101217ZFP Back Take out the insulator before using the remote control. ※ L101217ZFP MARK WALL please refer to the fireplace assembly installation to operate the fireplace . ※ L101217Y/L101217ZFP...
- Page 28 Please fasten this item to wall for protection and safety. ※ 1. Drill 2 holes in the wall and insert "M" into holes. ※ You may need to use rubber mallet for tapping "M" . 2. Use "L" to attach "M" with 21 . L101217Y/L101217ZFP...
Need help?
Do you have a question about the L101217Y and is the answer not in the manual?
Questions and answers