Table of Contents
Advertisement
Quick Links
Advertisement
Table of Contents

Related Manuals for Genesis SimpliPure SPG800R0


Summary of Contents for Genesis SimpliPure SPG800R0
-
Page 3: Installation Instructions
Installation Instructions Before Installation Inspect the Package Open the box and take out the system housing, all the components and quick connect fittings. Inspect them for any damaged during shipping. If there are any parts cracked or broken, please do not proceed with the installation and c ontac t Disc ount Water Softeners, Inc . -
Page 5: Product Introduction
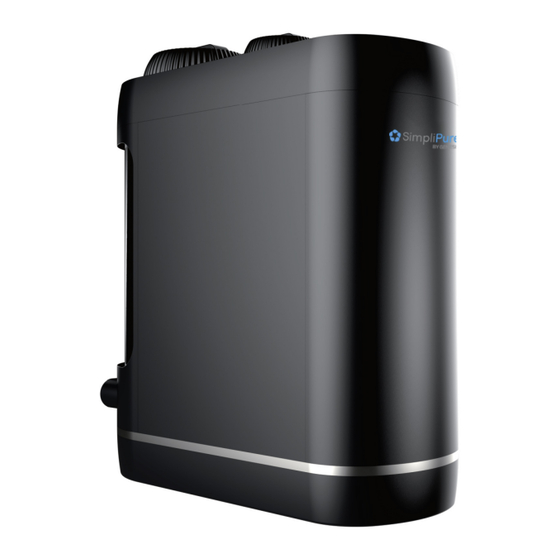
Product Introduction The brief introduction of various parts and sample connections are presented as follows. Please identify and get familiar with these parts and connection points for a smooth installation. -
Page 6: Installation Tips
Installation Tips How to Use the Quick-Connect Fittings Mark for .---+-- Full Insert ✓ To connect: • Push the tubing into the fitting until you reach the mark on the tubing. NOTE: If the tubing is not fully inserted, it will cause leakage. •... -
Page 7: Installation Steps
How to Drill a Hole into Your Sink or Countertop (Optional) NOTE: Please confirm if there is an existing hole available to install the RO faucet. If not, please drill a hole in accordance with the following steps. It's highly recommended to watch the YouTube video "How to Drill Faucet Holes" for better understanding of the process. - Page 8 Figure 4 Step 2: Install the RO Faucet (Non-Air Gap Faucet) NOTE: If there is no hole in your kitchen sink or countertop, Figure 5 you have to drill one ( 1 ") or use the hole in the soap dispenser. Refer to Page 5.
- Page 9 Step 3: Install the Drain Saddle 1. Choose a spot on the drainpipe that is convenient for installing the drain saddle and drill a 1/4" hole. Be sure not to penetrate the opposite side of the pipe; NOTE: It's recommended to install the drain saddle on the vertical drainpipe. 2.
-
Page 10: Step 5: Connect Tubing
Step 5: Connect Tubing NOTE: Confirm the tubing length you need and cut the tubing if it's too long, referring to "How to Use the Quick-Connect Fittings" on page 4. 1. Install the Input Water Tubing and the Purified Water Tubing •... - Page 11 Step 6: Start up the System 1. Turn on the cold water supply valve and check for leaks. 2. Insert the power plug into the socket. NOTE: If the system can't be powered on after you insert the power plug, check the power under the sink, as this mostly occurs when the power under the sink is powered off.
-
Page 12: Section 1: Working Mode Display
Owner's Manual Display and Operation Section 1: Working Mode Display When making water, the filter and power indicators are illuminated (Figure 11 ). Filter life indicators display in real time and their level depends on their life span. Filtering indicator is off when the system stops making water, and the rest of the indicators are still on. -
Page 13: Section 3: Filter Replacement Guide
There are helpful electronic filter indicators (CBPA/ROCB) on the front panel that will notify you to perform routine filter replacement by level c hange. Be sure to reset the filter life indicator every time you replace your filter. Display Status: NOTE: The indicators will notify you according to the usage time or processing capacity of the filters, whichever comes first. - Page 14 Figure 12 How to Reset the Filter Life Indicator: 1. Press the filter life reset indicator for 5 seconds (Figure 13). Release the indicator when you hear a beep. Now filters are ready to be reset; 2. Press the reset indicator and choose the ROCB filter or CBPA filter (there is no need to choose if only one filter expired).
-
Page 15: System Maintenance
How to Flush the Filter After Replacement: For the CBPA filter: Turn on the RO faucet to flush for 5 minutes; For the ROCB filter: Turn on the RO faucet to flush for 30 minutes. NOTE: If you replace the CBPA filter and ROCB filter at the same time, turn on the faucet to flush for 30 minutes. -
Page 16: Troubleshooting
Troubleshooting • If the System Cannot Be Powered on After You Insert the Power Plug a. Check the power under the sink, as this mostly occurs when the power under the sink is powered off. Also, check the connection between the power plug and the power outlet, and ensure that the system has been plugged correctly into the power outlet, as this may occur in a few cases. -
Page 17: Water Leakage
• Water Leakage a. Check all joints, fittings and tubing connections to locate the leakage. Make sure the filters are well installed. • Filtered Water from the RO Faucet Tastes Like Tap Water a. Incorrect tubing installation: Make sure the waste water tubing is not connected with the RO faucet. -
Page 18: Limited Product Warranty
Limited Product Warranty The warranty of our product covers defects in materials and workmanship from the original date of purchase. During the 24 month warranty period, we will replace or repair any part which is deemed to be defective, if the product has not been subjected to tampering, alteration, lack of regular maintenance or improper use after delivery.
Need help?
Do you have a question about the SimpliPure SPG800R0 and is the answer not in the manual?
Questions and answers