Table of Contents
Advertisement
Quick Links
Download this manual
See also:
Owner's Manual
Advertisement
Table of Contents

Subscribe to Our Youtube Channel
Related Manuals for Genesis Power Series


Summary of Contents for Genesis Power Series
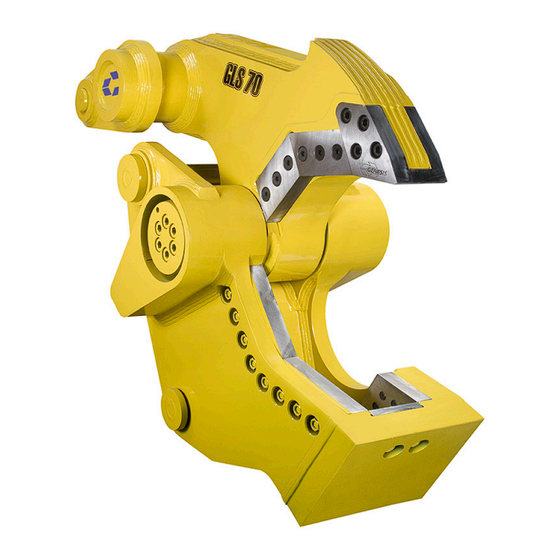
- Page 1 Power Series Linkage Tools GLS, GRS, GCC, GMP SAFETY, OPERATOR’S & PARTS MANUAL Rebar Shear (GRS) Linkage Shear (GLS) Mechanical Pulverizer (GMP) Concrete Cracker (GCC)
-
Page 2: Contact Information
Central America & Colombia Cra 13A #89-38 / Ofi 613 Bogota, Colombia Phone: +57 1 610 8160 / 795 8747 E-mail: contact@themsagroup.com View and download all manuals: genesisattachments.com/manuals Patents: genesisattachments.com/products/patents © 2019 Genesis Attachments, LLC Genesis Power Series Linkage Tools... -
Page 3: Preface
To ensure years of safe, dependable service, only trained and authorized persons should operate and service your Genesis attachment. It is the responsibility of the product’s owner to ensure the operator is trained in the safe operation of the product and has available this manual for review. -
Page 4: Table Of Contents
Eight-Hour Checklist Grease BOLT TORQUE SPECIFICATIONS Visual Reference for GLS Bolt Torque Visual Reference for GRS Bolt Torque Visual Reference for GCC Bolt Torque Visual Reference for GMP Bolt Torque © 2019 Genesis Attachments, LLC Genesis Power Series Linkage Tools... - Page 5 Concrete Cracking Blades Blade Removal Blade Rotation Jaw Stop Pulverizing Teeth GENERAL WELDING GUIDELINES Welding Ground Clamp Welding Rules BUILD-UP HARD-SURFACING HARD-SURFACING PATTERNS TROUBLE-SHOOTING GUIDE WARRANTY Claim Procedure Blade Warranty © 2019 Genesis Attachments, LLC Genesis Power Series Linkage Tools...
- Page 6 PARTS ORDER FORM PARTS GLS Blades and Wear Parts GRS Blades and Wear Parts GCC Blades and Wear Parts GMP Blades and Wear Parts Power Series Pivot Group TOOL LIST CONTACT INFORMATION © 2019 Genesis Attachments, LLC Genesis Power Series Linkage Tools...
-
Page 7: Safety Statements
This statement is used where minor or moderate injury could result if the instructions are not followed properly. NOTICE This statement is used where property damage could result if the instructions are not followed properly. © 2019 Genesis Attachments, LLC Genesis Power Series Linkage Tools... -
Page 8: Operational Safety
3 Be properly seated in the operator’s seat. 3 Do not attempt to operate until you have read and fully understand this manual and the OEM manual for the carrier. © 2019 Genesis Attachments, LLC Genesis Power Series Linkage Tools... -
Page 9: Check The Equipment
Stability Your Genesis attachment is sized for carrier stability. However, improper operation, faulty mainte- nance or unauthorized modifications may cause instability. 3 Know the working ranges and capacities of the carrier to avoid tipping. -
Page 10: Know The Work Area
3 Slowly operate all functions to check for proper operation and to bleed air from the hydrau- lic system. To shut down: 3 Return your Genesis attachment to a rest position on the ground. 3 Shut off the carrier engine. 3 Work controls in all directions to relieve hydraulic pressure, per excavator manufacturer’s instructions. -
Page 11: Safely Operate Equipment
3 A heavy load can cause equipment instability. Use extreme care during travel. Slow down on turns and watch out for bumps. The equipment may need additional counter-weights to counterbalance the weight of the attachment. © 2019 Genesis Attachments, LLC Genesis Power Series Linkage Tools 11... -
Page 12: Transporting The Attachment
Current in high voltage lines may arc some distance from the wire to a nearby ground. Keep all parts of the machine at least 50 feet (16m) away from power lines. © 2019 Genesis Attachments, LLC Genesis Power Series Linkage Tools... -
Page 13: Prioritized Oil Flow
It is recommended to use dust suppression (such as water) or dust col- lection (such as a vacuum) along with personal protective equipment if necessary during the operation of any attachment that may cause high levels of silica dust. © 2019 Genesis Attachments, LLC Genesis Power Series Linkage Tools 13... -
Page 14: Process Material Safely
Failure to do so may cause serious injury or death. • Use your Genesis attachment only as directed in this manual. Do not use the attachment to lift and move other objects. Doing so may cause instability and tipping. -
Page 15: Attachment Markings
ATTACHMENT MARKINGS Decals are necessary for safe operation and maintenance. To reorder, contact your Genesis dealer or call 715-395-5252. Logo Model Serial Number (Weld-on) © 2019 Genesis Attachments, LLC Genesis Power Series Linkage Tools 15... -
Page 16: Pad Installation
PAD INSTALLATION Preparation of the excavator prior to attachment delivery will make installation safer and easier. Contact Genesis or your Genesis dealer for assistance. Curl the excavator stick under so the bottom of the stick is facing upward. Use the mounting dimensions provided on your installation drawing to locate the correct placement of the stabilizer pad on the bottom of the stick. -
Page 17: Attachment Installation
Remove the bucket or other attachment following the manufacturer’s procedure. Retract the bucket cylinder and associated linkage. All Power Series Linkage Tools are designed to sit flat on the ground. The attachment must be on a firm, level surface with the jaws closed. -
Page 18: Maintenance Safety
Do not exceed bolt torque specifications. Do not weld on structural components without consulting Genesis. Doing so may cause structural failure and void the warranty. Do not work on the attachment before ensuring it will not move. Completely lower the boom to the ground or a rest position and relieve hydraulic pressure. -
Page 19: Maintenance Schedule
Inspect and grease components every eight hours of operation, as indicated below. Use the main- tenance procedures described in this manual. If you are not able to safely and competently per- form these procedures, have a Genesis dealer perform them. Extreme operating conditions may require shortened maintenance intervals. -
Page 20: Bolt Torque Specifications
BOLT TORQUE SPECIFICATIONS Genesis typically uses dry torque measurements. Prior to using the chart below, clean all bolt holes, bolts and nuts to remove dirt, grease and oil. See the Visual Reference below or Part Lists to identify bolt type. -
Page 21: Visual Reference For Gls Bolt Torque
Guide Blade Bolts (510 Nm) (822 Nm) 376 Ft-lbs 606 Ft-lbs Razor Blade Bolts (510 Nm) (822 Nm) 1545 Ft-lbs 1545 Ft-lbs End Cap Bolts (2095 Nm) (2095 Nm) © 2019 Genesis Attachments, LLC Genesis Power Series Linkage Tools 21... -
Page 22: Visual Reference For Grs Bolt Torque
BOLT TORQUE SPECIFICATIONS Visual Reference for GRS Bolt Torque Item Description GRS 70 & 90 900 Ft-lbs Cutting Blade Bolts (1220 Nm) 1545 Ft-lbs End Cap Bolts (2095 Nm) © 2019 Genesis Attachments, LLC Genesis Power Series Linkage Tools... -
Page 23: Visual Reference For Gcc Bolt Torque
Item Description GCC 50 GCC 70 & 90 606 Ft-lbs 900 Ft-lbs Blade Bolts (822 Nm) (1220 Nm) 1545 Ft-lbs 1545 Ft-lbs End Cap Bolts (2095 Nm) (2095 Nm) © 2019 Genesis Attachments, LLC Genesis Power Series Linkage Tools 23... -
Page 24: Visual Reference For Gmp Bolt Torque
Item Description GMP 50 GMP 70 & 90 450 Ft-lbs 778 Ft-lbs Tooth Bed Bolts (610 Nm) (1055 Nm) 1545 Ft-lbs 1545 Ft-lbs End Cap Bolts (2095 Nm) (2095 Nm) © 2019 Genesis Attachments, LLC Genesis Power Series Linkage Tools... -
Page 25: Linkage Shear Maintenance
Blade Bolts Torque blade bolts every eight hours to the specifications listed in the torque chart in this manual. Check for broken bolts daily and replace them immediately. © 2019 Genesis Attachments, LLC Genesis Power Series Linkage Tools 25... -
Page 26: Piercing Blades
↓ 1/2” • Width of blades, top to bottom, may taper 0.060” 3/16” Maximum radius ↓ (2mm) total. Bottom edges may be worn to a maxi- mum radius of 3/16”. © 2019 Genesis Attachments, LLC Genesis Power Series Linkage Tools... - Page 27 This is not a common issue, but one that should be noted as part of routine tip maintenance to prevent unnecessary costs and downtime. If this situation is encountered, contact the Genesis Parts or Service Departments for further instruc- tions.
-
Page 28: Piercing Blade Replacement
If gap exceeds 0.010”, call the Genesis Service Department. If no gap exists, remove Check gap blades, lightly grind facing surfaces and repeat steps 5-8. -
Page 29: Guide Blade
Guide Blade Replacement Remove guide blade and shims. Install new guide blade with no shims. Check blade gap and shim as needed. © 2019 Genesis Attachments, LLC Genesis Power Series Linkage Tools 29... -
Page 30: Primary And Secondary Blades
Rotate blades to use all four cutting edges. Always use Genesis-approved blades. Blades that do not meet Genesis specifications can cause major problems, and using them may void the war- ranty. -
Page 31: Adjustment Plates
Clean the adjustment plates as necessary. Replacement plates can be ordered from your Genesis dealer or the Genesis Parts Department with the serial number of your attachment. Offset dowel or fastener holes are located in each adjustment plate. When replacing adjustment plates, make sure these holes are aligned with the corresponding holes in the blade seat. -
Page 32: Primary And Secondary Blade Gap
Primary and Secondary Blade Gap After each blade rotation, shim the lower blades to keep the gap within the specifications listed in the table below. Do not shim the upper blades. Use only Genesis shim kits. Primary and Secondary Blade Gap... -
Page 33: Razor Blade
Inspect the jaw stop every eight hours of operation, checking for cracked or damaged welds. CAUTION To prevent serious excavator damage, replace the stop immediately if cracked or damaged welds are found. © 2019 Genesis Attachments, LLC Genesis Power Series Linkage Tools 33... -
Page 34: Rebar Shear Maintenance
1/4” is worn from the sides. Tips may be built up and ground flush with blades to extend tip life. 1/4” Radius 1/2” Radius © 2019 Genesis Attachments, LLC Genesis Power Series Linkage Tools... -
Page 35: Primary And Secondary Blades
Rotate blades to use all four cutting edges. Always use Genesis-approved blades. Blades that do not meet Genesis specifications can cause major problems, and using them may void the war- ranty. -
Page 36: Primary And Secondary Blade Rotation
Primary and Secondary Blade Gap After each blade rotation, shim lower blades to keep the gap within the range of 0.031” to 0.062”. Do not shim the upper blades. Use only Genesis shim kits. Blade Gap Measuring Procedure Slowly close jaws until blades begin to bypass. Stop the jaw and check the gap with a feeler gauge. -
Page 37: Blade Shimming
Inspect the jaw stop every eight hours of operation, checking for cracking or dam- aged welds. CAUTION To prevent serious excavator damage, replace the stop immediately if cracked or damaged welds are found. © 2019 Genesis Attachments, LLC Genesis Power Series Linkage Tools 37... -
Page 38: Concrete Cracker Maintenance
Rotate blades to use both cutting edges. Always use Genesis-approved blades. Blades that do not meet Genesis specifications can cause major problems, and using them may void the warranty. -
Page 39: Blade Rotation
Inspect the jaw stop every eight hours of operation, checking for cracking or damaged welds. CAUTION To prevent serious excavator damage, replace the stop immediately if cracked or damaged welds are found. © 2019 Genesis Attachments, LLC Genesis Power Series Linkage Tools 39... -
Page 40: Pulverizing Teeth
The bypass of the outside rows of teeth is tight enough to cut re- bar (front teeth). Maintaining square edges in these areas (both upper and lower) will allow continued cutting. © 2019 Genesis Attachments, LLC Genesis Power Series Linkage Tools... -
Page 41: General Welding Guidelines
Cover the area with a heat blanket and allow it to cool slowly, approximately eight hours. • Do not put the attachment into operation until the welds have been allowed to cool. © 2019 Genesis Attachments, LLC Genesis Power Series Linkage Tools 41... -
Page 42: Build-Up
These are high-wear areas. If allowed to wear too far, parent material starts to fold into the countersinks, and it becomes time-consuming to clean out this area when access is needed for blade rotation and replacement. © 2019 Genesis Attachments, LLC Genesis Power Series Linkage Tools... -
Page 43: Hard-Surfacing
1” to 1-1/2” (25 - 38 mm) to the parent material. 1/4” from edge See the following page for hard-surfacing illustrations and instructions specific to each area of the jaws. © 2019 Genesis Attachments, LLC Genesis Power Series Linkage Tools 43... -
Page 44: Hard-Surfacing Patterns
HARD-SURFACING PATTERNS Where parallel lines are shown, apply single passes approximately 1” apart. Where crosshatch is shown, apply stringer beads at 45˚ angles to form 1” squares. © 2019 Genesis Attachments, LLC Genesis Power Series Linkage Tools... -
Page 45: Trouble-Shooting Guide
Worn blades Worn piercing tips CAUTION *Moving the stiff arm back one hole (further from the tool) from the factory-recommended position may result in linkage toggle and bucket cylinder damage. © 2019 Genesis Attachments, LLC Genesis Power Series Linkage Tools 45... -
Page 46: Warranty
Digital pictures are very helpful for diagnosing problems and recommending repairs. Contact the Genesis Service Department before making alterations, changes or repairs to any component that is going to be considered for warranty. Not doing so will void all Genesis warranty consideration. -
Page 47: Parts Order Policy And Procedure
A determination to accept or deny the claim will be made based on the information avail- able to Genesis. Warranty on purchased parts other than wear components is 6 months. There is no warranty period on wear parts or components. -
Page 48: Parts Order Form
Phone: Contact: Shipping Address: E-mail: Billing Address: Purchase Order: Shipping Method: Model: Serial Number: Quantity Part Number Description Price E-mail to the Genesis Parts Department: genesisparts@genesisattachments.com For assistance, call 715-395-5252 © 2019 Genesis Attachments, LLC Genesis Power Series Linkage Tools... -
Page 49: Parts
PARTS The following pages contain illustrations and part lists for Power Series Linkage Tools. These pho- tos and generalized drawings identify major components and may not be identical in fine detail to a particular attachment. The part lists included here are intended to aid in operation and maintenance. Part numbers listed are those currently used. -
Page 50: Gls Blades And Wear Parts
1103538 RH Tip Blade 4500395 1103539 1103539 LH Tip Blade 4500398 1103540 1103540 Guide Blade 4500399 1101955 1101955 Razor Blade 4500464 1103661 1103659 Blade Shims 4500470 1103660 1103660 Guide Shims © 2019 Genesis Attachments, LLC Genesis Power Series Linkage Tools... -
Page 51: Grs Blades And Wear Parts
4501330 Weld-on Piercing Tips 2 sets 4501006 4501607 Lower Blade Shims F0510350 F0510350 Upper Blade Bolts F0510350 F0510450 Lower Blade Bolts F0910008 F0910008 Hex Nuts F1300100 F1300100 Flat Washers © 2019 Genesis Attachments, LLC Genesis Power Series Linkage Tools 51... -
Page 52: Gcc Blades And Wear Parts
See Model F0588300 (8) F0510350 (8) F0510350 (10) Lower Blade Bolts See Model F0908809 (12) F0910008 (12) F0910008 (15) Hex Nuts See Model F300088 (12) F1300100 (12) F1300100 (15) Flat Washers © 2019 Genesis Attachments, LLC Genesis Power Series Linkage Tools... -
Page 53: Gmp Blades And Wear Parts
Upper Tooth Bed 4502041 4501698 4501805 Lower Tooth Bed 3500530 3500530 3500530 Pucks See Model F0120070 (18) F0124070 (19) F0124070 (20) Bolts See Model F1202037 (18) F1202444 (19) F1202444 (20) Washers © 2019 Genesis Attachments, LLC Genesis Power Series Linkage Tools 53... -
Page 54: Power Series Pivot Group
3100130 GLS 3100131 3100131 3100131 LH Bearing S0190270 S0190270 S0190270 O-Ring 4500123 GCC 4500123 GMP/GCC 4502057 GMP/GCC 4501967 GMP 4501709 GRS Main Shaft 4501997 GLS 4501709 GRS 4501694 GLS 4501694 GLS © 2019 Genesis Attachments, LLC Genesis Power Series Linkage Tools... -
Page 55: Tool List
TOOL LIST The following is a list of tools available for purchase from Genesis. This list may not include every tool used for your attachment, such as those that would also commonly be used for maintaining an excavator. Part Number... -
Page 56: Contact Information
CONTACT INFORMATION World Headquarters Europe/Africa/Middle East Genesis Attachments Genesis GmbH 1000 Genesis Drive Teramostrasse 23 Superior, WI 54880 USA 87700 Memmingen, Germany Toll Free: 888-SHEAR-IT Phone: +49 83 31 9 25 98 0 (888-743-2748) Fax: +49 83 31 9 25 98 80 genesis-europe.com...
Need help?
Do you have a question about the Power Series and is the answer not in the manual?
Questions and answers