
Related Manuals for Danfoss 3 Series


Summary of Contents for Danfoss 3 Series
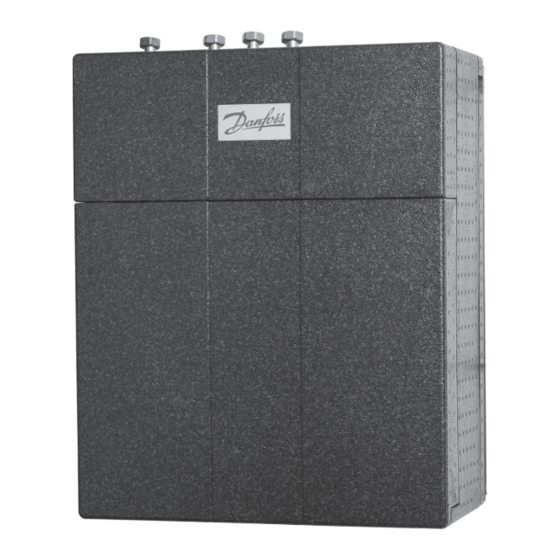
- Page 1 Operating Guide Termix VX-IV - 3 Series DS Fully insulated LGB53080 © Danfoss | 2022.11...
-
Page 2: Table Of Contents
Termix VX-IV - 3 Series DS Fully insulated Table of contents Introduction..............3 Operating Guide - Components ........19 Warranty and product liability ........3 Heating controls ............19 Glossary of technical terms ..........4 RAVK controller (35-75 °C) ..............19 Thermoactuators ................... -
Page 3: Introduction
For further information regarding disposal, please refer to the section “disposal”. Warranty and product liability Danfoss A/S’ area of responsibility does not include balancing, scope of works or mounting and correct connection of the unit. If changes are carried out to the HIU’s configuration or structure, the manufacturer can assume no responsibility. -
Page 4: Glossary Of Technical Terms
Termix VX-IV - 3 Series DS Fully insulated Glossary of technical terms Heat network supply Heat network return Heating supply Heating return Key to symbols Heat network Space heating Underfloor heating Materials Corrosion protection All pipes and components are manufactured in stainless steel and brass. -
Page 5: Unit Label
Termix VX-IV - 3 Series DS Fully insulated Unit label The unit label is affixed to the back plate (Image of a unit label is shown as an example). Should the unit label become unreadable, damaged or fall off completely, then it must be replaced. -
Page 6: Functional Specification
Termix VX-IV - 3 Series DS Fully insulated Functional specification The HIU is intended for connecting to a heat network for the production of space heating. The unit must be connected to the household installation in a frost-free location. Technical specifications Specifications: Max. -
Page 7: Safety Notes
Termix VX-IV - 3 Series DS Fully insulated Safety notes Authorised personnel Read the instructions before start-up Assembly, installation, commissioning and maintenance must The instructions must be read through before installation only be carried out by a qualified and authorised HVAC or electrical and commissioning of the unit. -
Page 8: Handling, Transport And Storage
Termix VX-IV - 3 Series DS Fully insulated Handling, transport and storage Handling All lifting and handling of the HIU must be carried out in an ergonomically responsible manner. Transport and storage The unit must be properly packed during both transit and storage. -
Page 9: Lifting Instructions
Termix VX-IV - 3 Series DS Fully insulated Lifting instructions Temporarily remove the inspection hatch. Temporarily remove the service hatch. Lift the HIU in the following two places: 1. With your left hand around the DHR pipe. 2. With your right hand around the primary strainer. -
Page 10: Mounting And Installation
Termix VX-IV - 3 Series DS Fully insulated Mounting and installation The existing installation should be flushed out prior to installation. Follow the symbols indicated on the HIU for correct connection of the pipes. Please refer to the section “Key to symbols”. -
Page 11: Dismantling The Insulation
Termix VX-IV - 3 Series DS Fully insulated Dismantling the insulation Disassembly of the inspection- and service hatch Disassembly of the side frame LGB53080 © Danfoss | 2022.11| 11... -
Page 12: Design
Termix VX-IV - 3 Series DS Fully insulated Design Your HIU may look different from the HIU shown Heat exchanger, HTG Circulator pump Expansion tank Electrical wiring box Sensor pocket, energy meter Fitting piece, energy meter Safety valve Filling/drain valve... -
Page 13: Schematic Description - Termix Vx-Iv Rad
Termix VX-IV - 3 Series DS Fully insulated Schematic description - Termix VX-IV RAD Mounting rail Heating Heat Network Supply Supply Heating Heat Network 4 bar Return Return Your HIU may look different from the HIU shown Isolation valve Sensor pocket, energy meter... -
Page 14: Electrical Connections And Wiring
Termix VX-IV - 3 Series DS Fully insulated Electrical connections and wiring Before connecting the unit to an electrical supply, please note the following: Safety notes Please read the relevant parts of the safety notes. Authorised personnel All electrical installation work may only be carried out by an 230 V authorised electrician. -
Page 15: Wiring Diagram - Radiator Heating
Termix VX-IV - 3 Series DS Fully insulated Wiring diagram - radiator heating Wiring diagram - underfloor heating LGB53080 © Danfoss | 2022.11| 15... -
Page 16: Fitting Of Energy Meter
Termix VX-IV - 3 Series DS Fully insulated Fitting of energy meter Fitting piece The HIU is equipped with a fitting piece for the energy meter. Mounting the energy meters: see diagram • Close isolation valves Close the isolation valves on Heat network supply and Heat network return, if there is water in the system. -
Page 17: Commissioning
Termix VX-IV - 3 Series DS Fully insulated Commissioning Before start-up check that: • Pipes are connected in accordance with the symbols indicated on the HIU. Re-tighten connections • Then slowly open the isolation valve(s) so that the HIU fills with water. -
Page 18: Start-Up
Termix VX-IV - 3 Series DS Fully insulated Step 1: Remove the inspection hatch and service hatch. Step 2: Remove the cap and connect a hose. Step 3: Open the valve. Step 4: After filling up the secondary heating system, close the valve, disconnect the flexible hose, refit the cap and insulation. -
Page 19: Operating Guide - Components
Termix VX-IV - 3 Series DS Fully insulated Operating Guide - Components Heating controls RAVK controller (35-75 °C) Temperature setting Relation between scale numbers 1-5 and closing temperature. (the values given are approximate) see diagram 1 = 30 °C 2 = 40 °C 3 = 52 °C... -
Page 20: Thermoactuators
Termix VX-IV - 3 Series DS Fully insulated Thermoactuators Activating the thermoactuators The thermoactuators are supplied with a “first open” function, which means that they are slightly open for frost protection until the electrical see diagram controller is installed. During commissioning, the “first open”function is disabled by removing the red mounting split on the thermoactuator. -
Page 21: Grundfos Upm3 Auto Instructions
Termix VX-IV - 3 Series DS Fully insulated Grundfos UPM3 AUTO instructions Control mode Each push on the button switches to the next program setting. The choice of operation mode depends on the type of heating system and the pressure loss in the system. -
Page 22: Imit Thermostat
Termix VX-IV - 3 Series DS Fully insulated IMIT Thermostat The IMIT thermostat is used to limit the underfloor heating flow temperature. The IMIT thermostat is preset to 60 °C and will shut off the pump and the primary on/off valve when the flow to the underfloor see diagram heating exceeds 60 °C. - Page 23 Termix VX-IV - 3 Series DS Fully insulated Expansion tank see diagram Heat Exchanger The heat exchanger is produced in acid-resistant, stainless steel see diagram Fill/drain valve 20 48 Air vent, manual secondary side see diagram Air vent, manual Primary side.
-
Page 24: Maintenance
Termix VX-IV - 3 Series DS Fully insulated Maintenance The HIU requires little monitoring, apart from routine checks. It is recommended that you read the energy meter at regular intervals and write down the meter readings. Regular inspections of the HIU in accordance with these instructions are... -
Page 25: Troubleshooting
Termix VX-IV - 3 Series DS Fully insulated Troubleshooting Area of operation Problem Possible cause Solution The strainer in the supply Clean the strainer or return line is clogged up Set the thermostat of the temperature controller to Incorrect set-point on the the correct value according to the section “Temperature... -
Page 26: Deactivation And Dismantling
Termix VX-IV - 3 Series DS Fully insulated Deactivation and dismantling Before beginning the task of dismantling, it must be ensured that: • All isolation valves on connections are closed. Gloves It is recommended that suitable work • The 230V plug has been removed from the socket. -
Page 27: Declaration Of Conformity
Termix VX-IV - 3 Series DS Fully insulated Declaration of conformity LGB53080 © Danfoss | 2022.11| 27... -
Page 28: Pre Hand Over Check List
Termix VX-IV - 3 Series DS Fully insulated Pre hand over check list Date: Unit No.: Carried out by: Description: Pos. Page Remark: Connection connected correctly All connections tightened Primary system flushed, through flushing bypass 2 Strainers checked Differential pressure controller adjusted...
Need help?
Do you have a question about the 3 Series and is the answer not in the manual?
Questions and answers