Table of Contents
Advertisement
Available languages
Available languages
Quick Links
Advertisement
Chapters
Table of Contents

Related Manuals for Skandika Abisko


Summary of Contents for Skandika Abisko
- Page 1 Abisko Art.Nr. SF-3100 / SF-3101 / SF-3102...
-
Page 2: Table Of Contents
Fehlerbehebung / Pflege Regelmäßige Wartung Aufwärmen und Abwärmen Garantiebedingungen skandika.com/ service Die Videos zum Auf- und SF-3100/3101/3102 Abisko SF-3100/3101 Abisko Abbau sowie FAQ und die Anleitungen zum Down- Klasse: HA Standard: EN ISO 20957 loaden findest Du auf Max. Benutzergewicht: 135 kg unserer Skandika Service Bitte lesen Sie vor Gebrauch die Anleitung. -
Page 3: Sicherheitshinweise
SICHERHEITSHINWEISE WARNUNG Um die Verletzungsgefahr zu reduzieren, muss diese Anleitung vor dem Gebrauch vollständig gelesen und verstanden werden! Dieses Gerät ist ausschließlich für den Heimgebrauch in Übereinstimmung mit den Anweisungen in dieser Anleitung vorgesehen. Lesen Sie die Gebrauchsanleitung sorgfältig durch, bevor Sie das Gerät einsetzen und bewahren Sie die Gebrauchsanleitung für die weitere Nutzung auf. -
Page 4: Teileidentifikation / Seriennummer
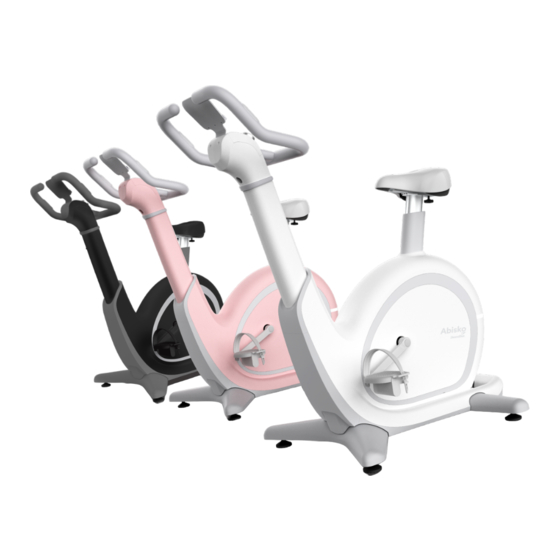
TEILEIDENTIFIKATION / SERIENNUMMER MAIN PARTS OF YOUR SNAILCLE BIKE Mobile devices holder Halterung für Mobilgeräte Handgriff Handlebar set Scroll-Rad zur Resistance control scroll wheel Widerstandseinstellung Saddle Sattel Sattelstütze Seat post Pedal with strap Pedale mit Pedalriemen Tail light Stromanschluss DC inlet Leveler feet Standfüße mit Höhenausgleich WARNING... - Page 5 EXPLOSIONSZEICHNUNGEN / TEILELISTE A - HAUPTGERÄT...
-
Page 6: Explosionszeichnungen / Teileliste
EXPLOSIONSZEICHNUNGEN / TEILELISTE B. FRONT STABLIZER ASSEMBLY B - VORDERER STANDFUSS C. REAR STABLIZER ASSEMBLY C. REAR STABLIZER ASSEMBLY C - HINTERER STANDFUSS BLIZER ASSEMBLY D. HANDLE BAR SET ASSEMBLY LIZER ASSEMBLY D - HANDGRIFF-EINHEIT... - Page 7 EXPLOSIONSZEICHNUNGEN / TEILELISTE Teil Nr. Beschreibung Menge Teil Nr. Beschreibung Menge Rechte Abdeckung Frontstütze Linke Abdeckung Sattelstütze Oberteil, hinterer Standfuß Anzeigepanel Rechte Stützenabdeckung Schieberegler Linke Stützenabdeckung Schraube M8x20 Kontrollpanel Abdeckung (R) Schraube ST4.2x16 Kontrollpanel Abdeckung (L) Schraube ST4.2x12 Kontrollpanel-Oberteil Schwungrad-Abdstandsstück Abdeckung Lichtleiste Schraube ST4.2x15 Rechte Einfassung...
-
Page 8: Aufbauanleitung
AUFBAUANLEITUNG QUIRED DC adaptor Pedal Left & Right Front stablizer set Netzteil Linkes / Rechtes Pedal Vorderer Standfuß Hinterer Standfuß Griffset Gebrauchsanleitung Rear stablizer set Handlebar set Owner’s manual 1x Schraube M8x20 6x Schraube M10x45 Inbusschlüssel Maulschlüssel Allen bolt M8x20 Allen bolt M10x45 Allen wrench Open wrench... - Page 9 ASSEMBLY STEP 2 AUFBAUANLEITUNG en top of Snailcle bike carton box. Take out Assem- Turn Manual and Owner’s Manual. upwa SCHRITT 1 Take Öffnen Sie den Karton auf der Oberseite und asse entnehmen Sie die Aufbau- und Bedienungsan- until CAUTION: leitung.
- Page 10 AUFBAUANLEITUNG SCHRITT 2 Montieren Sie den vorderen Standfuß (B) mit 4 Schrauben (75) und den den hinteren Standfuß (C) mit 2 Schrauben (75) am Rahmen wie abgebildet. ASSEMBLY STEP 4 Verbinden Sie dann die Sensorkabel (95 und 96) jeweils mit den vorgesehenen Anschlüssen (90) am vorderen und hinteren Standfuß...
- Page 11 ASSEMBLY STEP 5 AUFBAUANLEITUNG SCHRITT 3 styrofoam Styropor Drehen Sie die Baugruppe ab die- sem Schritt um und stellen Sie das Gerät mit den Füßen auf den Bo- den. Entfernen Sie die Styroporplatte von der Hauptrahmenbaugruppe. Connect CONTROL BOARD CABLE-LOWER( ) and CONTROL BOARD CABLE-UPPER( ) together carefully.
- Page 12 AUFBAUANLEITUNG ASSEMBLY STEP 7 SCHRITT 5 Montieren Sie die beiden Pedale (links = 49 und rechts = 50) an den Pedalarmen (46/47) wie A Attach right side PEDAL-R ( ) to the right side abgebildet. Bringen Sie dann die beiden Pedalriemen an. CRANK ARM-R ( ) using OPEN WRENCH (included),fully tighten the Pedal.
-
Page 13: Bedienungsanleitung
This is an AI exercise bike, before ride on it, pressure transducer needs to recover ABISKO müssen Sie bitte die Skandika Fitness App he- the power, please DO NOT ride on it untill the tail light finish red flash,then machine... - Page 14 BEDIENUNGSANLEITUNG UMSTELLUNG DER ANZEIGEEINHEIT DER GERÄTEANZEIGE Drücken und halten Sie die beiden Tasten für die Sattelverstellung auf der linken Seite des Hangriffs für ca. 3 Sekunden, um die Anzeige auf „metrisch“ (km) einzustellen. Für die Umstel- lung auf „imperial“ (Meilen) drücken und halten Sie die Tasten für die Griffverstellung auf der rechten Seite entsprechend.
-
Page 15: Brustgurt Verbinden
BRUSTGURT VERBINDEN BENUTZUNG DES BRUSTGURTS ABISKO ist mit einem eingebauten Empfänger für die drahtlose Pulsfrequenz-Übertragung SKANDIKA mittels des Bluetooth-Brustgurtes (nicht im Lieferumfang enthalten) ausgestat- SKANDIKA tet. Der Puls kann während des Trainings sowohl in der Fitness App als auch in Kinomap abgerufen werden. -
Page 16: Verbindung Zur Kinomap-App
VERBINDUNG ZUR KINOMAP-APP KINOMAP Gerätecomputer kann Bluetooth (Frequenz: 2,4 GHz) mit der App „KinoMap“ verbunden werden. Die kostenlose Kinomap App verhilft Ihnen zu einem kraftvollen Training, das Spaß macht! Wählen Sie eines von den Videos der Kinomap und legen Sie los. Ihre Position wird JETZT BEI immer auf der Karte dargestellt. -
Page 17: Gerät Ausrichten / Transportieren
owest position uch the GERÄT AUSRICHTEN / TRANSPORTIEREN set down, turn lizer until the GERÄT AUSRICHTEN Ihr Gerät sollte immer gerade stehen. Für einen möglichst ebenen Stand befinden sich höhenverstellbare Füße unter den Standfü- ßen vorne und hinten. Stellen Sie diese Nivellierfüße so ein, dass das Gerät gerade steht und während der Benutzung nicht schaukeln kann. -
Page 18: Fehlerbehebung /Pflege
FEHLERBEHEBUNG /PFLEGE FEHLERBEHEBUNG Problem: Ungewöhnliche Geräuschentwicklung. Erklärung / Lösung: Dieses Gerät ist mit Riemenantrieb, hochwertigen Lagern und EMS- Bremswiderstand ausgestattet, um die Geräuschentwicklung zu minimieren. Leichte mecha- nische Geräusche sind jedoch normal und werden durch die Übertragung großer Energiemen- gen auf ein sich schnell drehendes Schwungrad verursacht. Alle Lager, Riemen und anderen rotierenden Teile erzeugen ein gewisses Geräusch, das durch das Gehäuse und den Rahmen übertragen wird. -
Page 19: Regelmäßige Wartung
REGELMÄSSIGE WARTUNG REGELMÄSSIGE WARTUNG Das Sicherheitsniveau des Gerätes kann nur aufrechterhalten werden, wenn es regelmäßig auf Schäden und Verschleiß untersucht wird. Verschlissene bzw. defekte Komponenten soll- ten ersetzt und das Gerät bis zur vollständigen Instandsetzung nicht weiter benutzt werden. Wir empfehlen, die folgenden Wartungsroutinen entsprechend auszuführen: Täglich bzw. -
Page 20: Aufwärmen Und Abwärmen
AUFWÄRMEN UND ABWÄRMEN AUFWÄRMEN und ABWÄRMEN Ein erfolgreiches Trainingsprogramm besteht aus einer Aufwärmphase, einer Trainingsphase und dem Abkühlen (Abwärmen). Die Trainingshäufigkeit sollte für Anfänger bei 2- bis 3-mal die Woche angesetzt werden, immer mit mindestens einem Tag Pause zwischen den Trainingseinheiten. Nach einigen Monaten kann die Häufigkeit auf 4- bis 5-mal wöchentlich gesteigert werden. -
Page 21: Garantiebedingungen
Altgerät umschlossen sind, sowie Lampen, die zerstörungsfrei entnommen werden können und führen diese einer separaten Sammlung zu. Diese können giftige Schwermetalle enthalten und unterliegen der Sondermüllbehandlung. Im Zuge ständiger Für Ersatzteile kontaktieren Sie bitte folgende E-Mail-Adresse: service@skandika.de Produktverbesse- rungen behalten... - Page 22 Aligning / transporting the unit Troubleshooting / Care Regular maintenance Warm-up and cool-down Guarantee conditions skandika.com/ service Please visit the Skandika SF-3100/3101/3102 Abisko SF-3100/3101 Abisko Service portal on our website for setup & help Class: HA Standard: EN ISO 20957 videos, FAQs and downloa- Max.
-
Page 23: Safety Precautions
SAFETY PRECAUTIONS WARNING To reduce risk of injury, read and understand this instruction manual before using the device! This machine is intended for home use only in accordance with the instructions provided in this manual. Read the instruction manual carefully before using this device and keep the instruction manual for future use. SAFETY PRECAUTIONS Keep children and pets away from the machine at all 13. - Page 24 PARTS IDENTIFICATION / SERIAL NUMBER MAIN PARTS OF YOUR SNAILCLE BIKE Mobile devices holder Handlebar set Resistance control scroll wheel Saddle Seat post Pedal with strap Tail light DC inlet Leveler feet WARNING DC adaptor WARNING There are several areas during the assembly process that special attention must be paid. It is very important to follo There are several areas during the assembly process that special attention must be paid.
- Page 25 EXPLOSION DRAWINGS / PARTS LIST A - MAIN FRAME ASSEMBLY...
- Page 26 EXPLOSION DRAWINGS / PARTS LIST B. FRONT STABLIZER ASSEMBLY B - FRONT STAND C. REAR STABLIZER ASSEMBLY C. REAR STABLIZER ASSEMBLY C - REAR STAND BLIZER ASSEMBLY D. HANDLE BAR SET ASSEMBLY LIZER ASSEMBLY D - HANDLE BAR SET...
-
Page 27: Explosion Drawings / Parts List
EXPLOSION DRAWINGS / PARTS LIST Part nr. Description Q‘ty Part nr. Description Q‘ty Right cover Front post Left cover Seatpost Top cover, rear stand Display panel Right support cover Slider Left support cover Screw M8x20 Control panel cover (R) Screw ST4.2x16 Control panel cover (L) Screw ST4.2x12 Control panel top... -
Page 28: Set-Up Instructions
SET-UP INSTRUCTIONS QUIRED DC adaptor Pedal Left & Right Front stablizer set DC adaptor Left / right pedal Front stand Rear stand Handlebars Instruction manual Rear stablizer set Handlebar set Owner’s manual 1x Screw M8x20 6x Screw M10x45 Allen key Open-end spanner Allen bolt M8x20 Allen bolt M10x45 Allen wrench... - Page 29 ASSEMBLY STEP 2 SET-UP INSTRUCTIONS en top of Snailcle bike carton box. Take out Assem- Turn Manual and Owner’s Manual. upwa STEP 1 Take Open the box on the top and take out the as- asse sembly and operating instructions. Turn the box until CAUTION: over and pull the outer box upwards.
- Page 30 SET-UP INSTRUCTIONS STEP 2 Mount the front stand (B) with 4 screws (75) and the rear stand (C) with 2 screws (75) to the frame as shown. ASSEMBLY STEP 4 Then connect the sensor cables (95 and 96) respectively to the provided connectors (90) on the front and rear stand as shown.
- Page 31 ASSEMBLY STEP 5 SET-UP INSTRUCTIONS STEP 3 styrofoam Polystrene From this step, turn the assembly over and place the unit with its feet on the floor. Remove the polystyrene plate from the main frame assembly. Connect CONTROL BOARD CABLE-LOWER( ) and CONTROL BOARD CABLE-UPPER( ) together carefully.
- Page 32 SET-UP INSTRUCTIONS ASSEMBLY STEP 7 STEP 5 Mount the two pedals (left = 49 and right = 50) on the pedal arms (46/47) as shown. Then A Attach right side PEDAL-R ( ) to the right side attach the two pedal straps. CRANK ARM-R ( ) using OPEN WRENCH (included),fully tighten the Pedal.
-
Page 33: Operating Instructions
Back in the Skandika Fitness app, the saddle, and handlebars are then automatically adjusted to the height measured for you. You can then still manually change the height for the saddle and the handle by pressing the corresponding button on the handle. - Page 34 OPERATING INSTRUCTIONS CHANGING THE DISPLAY UNIT Press and hold the two saddle adjustment buttons on the left side of the handle for approx. 3 seconds to set the display to „metric“ (km). To change to „imperial“ (miles), press and hold the handle adjustment buttons on the right side accordingly.
-
Page 35: Chest-Belt Connection
CHEST-BELT CONNECTION USING THE CHEST BELT ABISKO is equipped with a built-in receiver for wireless heart rate transmission using the SKANDIKA Bluetooth chest strap (not included). The heart rate can be called up during trai- SKANDIKA ning both in the Fitness app and in Kinomap. -
Page 36: Connecting To Kinomap App
CONNECTING TO KINOMAP-APP KINOMAP The device computer can be connected to the „KinoMap“ app via Bluetooth (frequency: 2.4 GHz). The free KinoMap app turns your device into a powerful and fun fitness product! Choose from the geotagged video on Kinomap and go! Your position is shown in the video and as icon on the map. -
Page 37: Aligning / Transporting The Unit
owest position uch the ALIGNING / TRANSPORTING THE UNIT set down, turn lizer until the ALIGNING THE UNIT Your unit should always stand upright. For the most level stand possible, there are height-adjustable feet under the front and rear stands. Adjust these levelling feet so that the appliance stands straight and cannot rock during use. -
Page 38: Troubleshooting / Care
TROUBLESHOOTING / CARE TROUBLESHOOTING Problem: Unusual noises. Explanation / Solution: This unit is equipped with belt drive, high quality bearings and EMS braking resistor to minimise noise. However, slight mechanical noise is normal and is caused by the transfer of large amounts of energy to a rapidly rotating flywheel. All bearings, belts and other rotating parts produce some noise that is transmitted through the housing and frame. -
Page 39: Regular Maintenance
REGULAR MAINTENANCE REGULAR MAINTENANCE The safety level of the unit can only be maintained if it is regularly inspected for damage and wear. Worn or defective components should be replaced and the unit should not be used un- til it is fully repaired. We recommend that the following maintenance routines be carried out accordingly: Daily or before and after each use: •... -
Page 40: Warm-Up And Cool-Down
WARM-UP AND COOL-DOWN WARM-UP and COOL-DOWN A successful exercise program consists of a warm-up, aerobic exercise and a cool-down. Exercise for at least two or preferably three times a week, resting for a day between workouts. After several months, you may increase the frequency to four or five times per week. -
Page 41: Guarantee Conditions
When recycling the materials and finding other utilisation for used equipment, you are making a significant contribution towards protecting our environment. Ask at your council about the respective local disposal sites. In accordance with our policy For spare parts please contact: service@skandika.de of continual product impro- Service centre: vement, we reserve the right MAX Trader GmbH, Wilhelm-Beckmann-Straße 19, 45307 Essen, Germany... - Page 42 FAQ et les instructions de Classe: HA Standard: EN ISO 20957 téléchargement sur notre Max. Poids de l'utilisateur: 135 kg page de service Skandika. Veuillez lire les instructions avant utilisation. Pour plus d‘informations, Ne convient pas à des fins thérapeutiques. vous pouvez simplement...
-
Page 43: Informations De Sécurité
INFORMATIONS DE SÉCURITÉ AVERTISSEMENT Pour réduire les risques de blessures, veuillez lire attentivement ce mode d’emploi avant d‘utiliser l’appareil ! Cet appareil est uniquement destiné à une utilisation domestique conformément aux instructions contenues dans ce mode d’emploi. Lisez attentivement le mode d’emploi avant d’utiliser l’appareil et conservez bien ce mode d’emploi. -
Page 44: Identification Des Pièces / Numéro De Série
IDENTIFICATION DES PIÈCES / NUMÉRO DE SÉRIE MAIN PARTS OF YOUR SNAILCLE BIKE Mobile devices holder Support pour appareils mobiles Poignée Handlebar set Molette de défilement pour Resistance control scroll wheel réglage de la résistance Saddle Selle Tige de selle Seat post Pedal with strap Pédales avec courroies... - Page 45 VUES ÉCLATÉES / LISTE DES PIÈCES A - UNITÉ PRINCIPALE...
- Page 46 VUES ÉCLATÉES / LISTE DES PIÈCES B. FRONT STABLIZER ASSEMBLY B - PIED AVANT C. REAR STABLIZER ASSEMBLY C. REAR STABLIZER ASSEMBLY C - PIED ARRIÈRE BLIZER ASSEMBLY D. HANDLE BAR SET ASSEMBLY LIZER ASSEMBLY D - UNITÉ DE POIGNÉE...
-
Page 47: Vues Éclatées / Liste Des Pièces
VUES ÉCLATÉES / LISTE DES PIÈCES Description Qté Description Qté N° pièce N° pièce Couverture droite Support avant Couvercle gauche Tige de selle Partie supérieure, pied arrière Panneau d'affichage Couverture du montant droit Curseur Couvercle du montant gauche Vis M8x20 Couvercle du panneau de contrôle (R) Vis ST4.2x16 Couvercle du panneau de contrôle (L) -
Page 48: Instructions De Montage
INSTRUCTIONS DE MONTAGE QUIRED DC adaptor Pedal Left & Right Front stablizer set Alimentation Pédale gauche / droite Pied avant Pied arrière Set de poignées Mode d‘emploi Rear stablizer set Handlebar set Owner’s manual 1x Vis M8x20 6x Vis M10x45 Clé... - Page 49 ASSEMBLY STEP 2 INSTRUCTIONS DE MONTAGE en top of Snailcle bike carton box. Take out Assem- Turn Manual and Owner’s Manual. upwa ÉTAPE 1 Take Ouvrez le carton sur le dessus et retirez les ins- asse tructions de montage et d’utilisation. Retournez until CAUTION: le carton et retirez le carton extérieur en le tirant...
- Page 50 INSTRUCTIONS DE MONTAGE ÉTAPE 2 Montez le pied avant (B) avec 4 vis (75) et le pied arrière (C) avec 2 vis (75) sur le cadre comme indiqué. ASSEMBLY STEP 4 Raccordez ensuite les câbles des capteurs (95 et 96) aux connecteurs prévus (90) sur le pied avant et le pied arrière, comme indiqué.
- Page 51 ASSEMBLY STEP 5 INSTRUCTIONS DE MONTAGE ÉTAPE 3 styrofoam Polystyrène A partir de cette étape, retournez l‘ensemble et posez l‘appareil sur le sol avec les pieds. Retirez la plaque de polystyrène de l‘ensemble du cadre principal. Connect CONTROL BOARD CABLE-LOWER( ) and CONTROL BOARD CABLE-UPPER( ) together carefully.
- Page 52 INSTRUCTIONS DE MONTAGE ASSEMBLY STEP 7 ÉTAPE 5 Montez les deux pédales (gauche = 49 et droite = 50) sur les bras de pédales (46/47) comme A Attach right side PEDAL-R ( ) to the right side illustré. Fixez ensuite les deux courroies de pédales. CRANK ARM-R ( ) using OPEN WRENCH (included),fully tighten the Pedal.
- Page 53 This is an AI exercise bike, before ride on it, pressure transducer needs to recover et la connecter à l’ergomètre ABISKO via Bluetooth. Vous la the power, please DO NOT ride on it untill the tail light finish red flash,then machine...
-
Page 54: Mode D'emploi
MODE D‘EMPLOI CHANGEMENT DE L‘UNITÉ D‘AFFICHAGE DE L‘APPAREIL Pour régler l‘affichage sur „métrique“ (km), appuyez et maintenez enfoncés les deux boutons de réglage de la selle du côté gauche de la poignée pendant environ 3 secondes. Pour passer à l‘“im- périal“... -
Page 55: Connecter La Sangle Pectorale
CONNECTER LA SANGLE PECTORALE UTILISATION DE LA SANGLE PECTORALE ABISKO est équipé d‘un récepteur intégré pour la transmission sans fil de la fréquence cardiaque au moyen de la sangle cardiofréquencemètre Bluetooth SKANDIKA (non comprise dans la livraison). Le pouls peut être consulté pendant l‘entraînement aussi bien dans l‘application... -
Page 56: Connexion À L'application Kinomap
CONNEXION À L‘APPLICATION KINOMAP KINOMAP L‘ordinateur de l‘appareil peut être connecté via Bluetooth (fréquence : 2,4 GHz) à l‘application „KinoMap“. Transformez votre appareil en un produit fitness amusant et puissant ! Choisissez parmi les vidéos géolocalisées disponibles sur Kinomap et c’est parti ! Votre position est indiquée dans la vidéo, ainsi qu’à... -
Page 57: Aligner / Transporter L'appareil
owest position uch the ALIGNER / TRANSPORTER APPAREIL set down, turn lizer until the ALIGNER L‘APPAREIL Votre appareil doit toujours être bien droit. Pour une position aussi plane que possible, des pieds réglables en hauteur se trouvent sous les pieds avant et arrière. Réglez ces pieds de nivellement de manière à ce que l‘appareil soit bien droit et ne se balance pas pendant l‘utilisation. - Page 58 DÉPANNAGE / ENTRETIEN DÉPANNAGE Problème : Bruits inhabituels. Explication / Solution : Cet appareil est équipé d‘un entraînement par courroie, de roulements de haute qualité et d‘une résistance de freinage EMS afin de minimiser le bruit. Toutefois, de légers bruits mécaniques sont normaux et sont causés par la transmission de grandes quanti- tés d‘énergie à...
-
Page 59: Maintenance Régulière
MAINTENANCE RÉGULIÈRE MAINTENANCE RÉGULIÈRE Le niveau de sécurité de l‘appareil ne peut être maintenu que s‘il est régulièrement inspecté pour détecter les dommages et l‘usure. Les composants usés ou défectueux doivent être rem- placés et l‘appareil ne doit plus être utilisé jusqu‘à sa remise en état complète. Nous recom- mandons d‘effectuer les routines d‘entretien suivantes en conséquence : Tous les jours ou avant et après chaque utilisation : •... -
Page 60: Échauffement Et Récupération
ÉCHAUFFEMENT ET RÉCUPÉRATION ÉCHAUFFEMENT et RÉCUPÉRATION Un programme d‘exercices réussi consiste en un échauffement, un exercice aérobique et une récupération Entraînez-vous de préférence au moins deux ou trois fois par semaine, avec une pause d’un jour entre les séances d‘entraînement. Après plusieurs mois, vous pouvez augmenter la fréquence à quatre ou cinq fois par semaine. Échauffement La phase améliore la circulation sanguine et aide les muscles à... -
Page 61: Conditions De Garantie
Nos produits et emballages se recyclent, ne les jetez pas! Trouvez où les déposer sur le site www.quefairedemesdechets.fr Dans le cadre du travail Pour d’accessoires ou de pièces de rechange, veuillez contacter : service@skandika.de continu d’amélioration des produits, nous nous réser- Centre de service clients : vons le droit de procéder à... - Page 64 Vertrieb & Service durch / Sales & Service by Ventes et services par MAX Trader GmbH Wilhelm-Beckmann-Straße 19 45307 Essen Germany SF-310x Ergometer Abisko 12/2023 Ver. 1.4...
Need help?
Do you have a question about the Abisko and is the answer not in the manual?
Questions and answers