
Related Manuals for Gtech AirFOX Platinum AF01


Summary of Contents for Gtech AirFOX Platinum AF01
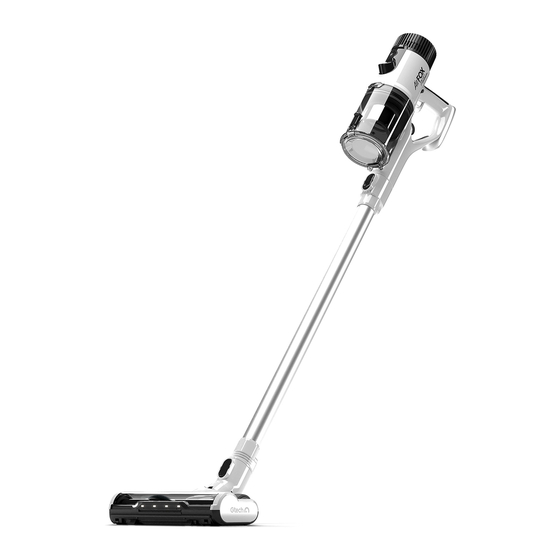
- Page 1 AF01 Model: OPERATING MANUAL 5615_AirFOX_manual_aw.indd 1 5615_AirFOX_manual_aw.indd 1 09/10/2023 09:46 09/10/2023 09:46...
-
Page 2: Important Safeguards
• This appliance includes Li-Ion batteries; do • Only use batteries and chargers supplied not incinerate batteries or expose to by Gtech. high temperatures, as they may explode. • Never modify the charger in any way. • Liquid ejected from the battery may cause •... -
Page 3: Intended Use
• Ensure the battery is removed before • Only use replacement parts or accessories changing tools. provided or recommended by Gtech. • For household use only. 5615_AirFOX_manual_aw.indd 3 5615_AirFOX_manual_aw.indd 3 09/10/2023 09:46... -
Page 4: What's In The Box
Thank you for choosing Gtech “Welcome to the Gtech family. I started Gtech to create sensible, easy to use products that do a great job, and hope you get many years of trouble-free performance from your new product.” Nick Grey –... - Page 5 Assembly To assemble the AirFOX into floor cleaning mode, attach the Power floor head, extension tube and battery to the main vacuum. Pay attention to correctly align the conectors. Tool configurations The tools can be fitted in a variety of cominations whether powered, like the floor head and power brush, or inert like the hose, brush tool, upholstery tool and crevice tool.
-
Page 6: Power Head Removal
Power head removal Press the latch and pull to dis-assemble the Gently pull the Power Brush from the product tube and accessory connections. to remove. The battery should be removed when changing attachments. Operation For short bursts of cleaning: press and hold For continuous operation: press and hold the the power button to switch on. -
Page 7: Power Mode
Power Mode AUTO AUTO AUTO AUTO The mode button changes the power of the ECO – reduced power, longest run time AirFOX. While the vacuum is running touch Auto – adjusts to optimum power for the dust the mode button to cycle through the three load conditions settings. -
Page 8: Power Brush
Power brush The small power brush is attached and Like the power floor head, it can be attached removed in the same way as the power floor directly to the AirFOX or to the extension tube. head. “Parking” the AirFOX Engage the tube into the floor head when The handle will only remain upright if the parking in the upright position. -
Page 9: Removing The Battery
Removing the battery Battery state of charge AUTO To remove the battery press the latch and pull The display shows how much charge the the battery to remove from product. battery has. Battery charging The battery can be charged on the unit, off the unit, or on the wall mount. The battery can also be charged via the wall mount. -
Page 10: Emptying The Bin
AUTO When charging the battery has a flashing If on the unit the display will show the capacity during charging. green light. When fully charged the light will be continuous green. Emptying the bin Hold the product over a rubbish bin and release the latch to empty the dirt. -
Page 11: Cleaning The Filter
Cleaning the filter AUTO If the display indicator flashes red and the Release the lock button if necessary to power product powers off during use the filter might off and reset the display. need cleaning. Remove the battery..and lift the dust bin away from the product. Pull the lever... - Page 12 Cleaning the filter Remove the filter assembly from the bin. Twist to release the metal shroud and pull away from the filter. Tap the filter to remove any loose debris. Wash both the filter and filter shroud under a The filter can be gently brushed but do not rub tap with cold water.
- Page 13 Push the metal shroud onto the filter and twist Return the filter assembly to the bin, lining up to lock in place. the tab on the filter with the recess in the bin..checking it is correctly aligned. Locate the dust bin onto the product and push until it clicks into place.
-
Page 14: Clearing Blockages
Clearing Blockages AUTO If the suction is low or if the display indicator Remove the tube, floor head, dust bin, and flashes red and the product powers off during any accessory tools and check through the use there may be a blockage. openings for any blockages. - Page 15 Removing and cleaning the brush bar AUTO If the brush bar jams during use the display Before re-starting clear the obstruction and indicator will flash red and the product will remove and clean the brush bar if necessary. power off. Release the lock button if necessary to power off and reset the display.
- Page 16 While the brush bar is removed you can take The hair removal tool helps you cut any hair that the opportunity to remove any hair from the may become wrapped around the brushbar. brush bar housing comb as indicated. Never operate the product without the brush bar in place.
- Page 17 Removing the small power head brushbar Using a coin or similar implement turn the end The brushbar can then be easily removed and cap until it unlocks and remove it. cleaned. 5615_AirFOX_manual_aw.indd 17 5615_AirFOX_manual_aw.indd 17 09/10/2023 09:46 09/10/2023 09:46...
-
Page 18: Wall Mount
Wall mount 113cm minimum height Install your wall mount at least 113cm from The wall mount will need a small amount of the floor. Screws and wall plugs have been assembly on attaching to the wall. included. Recommended drill size 6mm. Check the wall area is free of water pipes or electrical cables. -
Page 19: Product Care
Product Care Your product doesn’t need much maintenance: keep the filter clean, check for blockages, remove hair from the brushbar and charge the battery. Wipe it with a dry cloth if it gets dirty, including the area under the bin. Never wash it with liquid, run it under a tap or use it without the filter. -
Page 20: Product Support
FAQs and how-to-videos, as well as genuine spares and replacement parts compatible with your product. Visit: www.gtech.co.uk/support Online Live chat support support@gtech.co.uk How to Videos GTECH MULTI TECHNICAL SPECIFICATION Battery model 271A001 Battery 37V Li-Ion Charging period 5 hours Battery charger output 42V DC 0.5A... - Page 21 If your product is within its warranty and has a fault that cannot be resolved from the troubleshooting section or online support, please do the following: • Contact our Gtech Customer Care Helpline on UK: 08000 308 794, who will go through any troubleshooting with you to identify the fault.
- Page 22 5615_AirFOX_manual_aw.indd 22 5615_AirFOX_manual_aw.indd 22 09/10/2023 09:46 09/10/2023 09:46...
-
Page 23: Product Recycling
To find your nearest centre and discover how easy it is to recycle electrical products visit www.recycle-more.co.uk Gtech products are marked with the symbol indicat- Alternatively contact your local council or civic amenity ing they can be recycled, and are covered by legislation site. - Page 24 Grey Technology Limited Brindley Road, Warndon, Worcester WR4 9FB, UK email: support@gtech.co.uk telephone: 08000 308794 www.gtech.co.uk 5615_AirFOX_manual_aw.indd 24 5615_AirFOX_manual_aw.indd 24 09/10/2023 09:46 09/10/2023 09:46...
Need help?
Do you have a question about the AirFOX Platinum AF01 and is the answer not in the manual?
Questions and answers
stops all the time - have to pull trigger to start - shows red grid on dial
The red grid on the dial indicates a blockage or that the brush bar is jammed. When this happens, the display flashes red and the product powers off to prevent damage. To fix this, remove the battery, check for blockages in the tube, floor head, dust bin, and accessories, and clean the brush bar if needed. The product stops and requires the trigger to be pulled again after the issue is cleared and reset.
This answer is automatically generated