Table of Contents
Advertisement
Quick Links
Advertisement
Table of Contents

Related Manuals for Cosmo COS-DWD24FBR


Summary of Contents for Cosmo COS-DWD24FBR
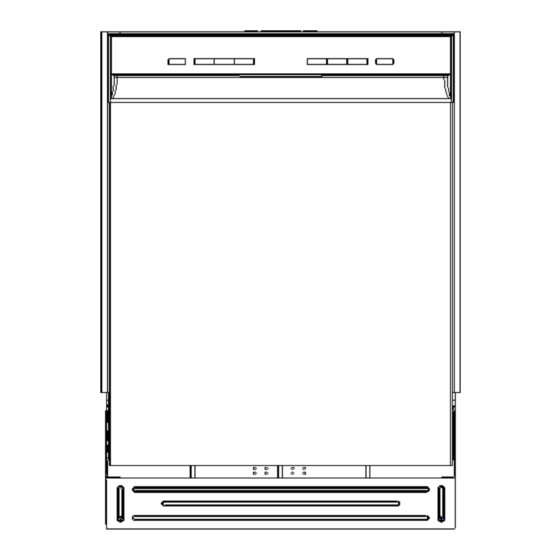
- Page 1 DISHWASHER COS-DWD24FBR 24 IN. BUILT-IN DISHWASHER INSTALLATION MANUAL IMPORTANT: READ AND SAVE THESE INSTRUCTIONS. FOR RESIDENTIAL USE ONLY. INSTALLER: PLEASE LEAVE THESE INSTRUCTIONS WITH THIS UNIT FOR THE OWNER. OWNER: PLEASE RETAIN THESE INSTRUCTIONS FOR FUTURE REFERENCE. Rev.23.12...
- Page 2 COSMO Appliances are designed according to the strictest safety and performance standard for the North American market. We follow the most advanced manufacturing philosophy.
-
Page 3: Table Of Contents
TABLE OF CONTENTS DISHWASHER SAFETY ................. 4 INSTALLATION REQUIREMENTS ............6 Tools and Parts ..................6 Location Requirements ................8 Drain Requirements ................10 Water Supply Requirements ...............11 Electrical Requirements ................11 INSTALLATION INSTRUCTIONS ............12 Unpack Dishwasher ................12 Remove Kick Plate ................13 Check Door Balance ................14 Adjust Leveling Legs ................ -
Page 4: Dishwasher Safety
DISHWASHER SAFETY READ ALL INSTRUCTIONS BEFORE USING THE APPLIANCE Your safety and the safety of others are very important. We have provided many important safety messages in this manual and on your appliance. Always read and obey all safety messages. This is the safety alert symbol. - Page 5 WARNING/GROUNDING INSTRUCTIONS Improper connection of the equipment-grounding conductor can result In a risk of electric shock. Check with a qualified electrician or service representative if you are in doubt whether the appliance is properly grounded. Do not modify the plug if provided with the appliance.
-
Page 6: Installation Requirements
INSTALLATION REQUIREMENTS TOOLS AND PARTS Gather the required tools and parts before starting installation. PARTS SUPPLIED Flat-head Wood Screws Adjustment cap (4) ST4x30mm (4) Screw-type Hose Clamp (1) PARTS NEEDED (NOT PROVIDED) UL Listed Wire Nuts (3) 3/4" FHT x 3/8" OD Strain Relief compression 90 elbow (if not included in hose kit) - Page 7 TOOLS NEEDED Phillips-head 5/16" and 1/4" Level Screwdriver Nutdriver Flashlight 6" Adjustable Wrench Measuring Tape Carpenters Square Safety Glasses Bucket Flat-bladed Gloves Screwdriver NEW INSTALLATIONS (ONLY) PARTS NEEDED Hand Shut-off Valve Waste Tee Air Gap for drain hose (if required) (house plumbing, if applicable) Coupler (extending...
-
Page 8: Location Requirements
TOOLS NEEDED Tubing Cutter Hole Saw Set Drill and Bits Wire Stripper KEY CONNECTION POINTS Front Water Connection Electrical Junction Box LOCATION REQUIREMENTS IMPORTANT: • Do not run drain lines, water lines or electrical wiring where they can interfere with or contact dishwasher motors or legs. •... - Page 9 OPENING DIMENSIONS • The rough cabinet opening must be at least 23.8" (60.5 cm) wide, 22.8" (58 cm) deep and 34" (86.4 cm) high, and provide easy access to water, electricity and a drain. • When installed in a corner location, a 2" (5.1 cm) minimum clearance is required between the side of the dishwasher and the adjacent wall, cabinet or other appliance.
-
Page 10: Drain Requirements
PRODUCT DIMENSIONS... -
Page 11: Water Supply Requirements
DRAIN CONNECTION HEIGHT The drain connection method depends on the height of the drain hose connection. IMPORTANT: Failure to connect the drain hose at a height of 18" with air gap (not provided) OR to create a drain loop with a minimum height of 32"... -
Page 12: Installation Instructions
Step 1: UNPACK DISHWASHER IMPORTANT: If you received a damaged dishwasher, you should immediately contact Cosmo Customer Service. SUFFOCATION HAZARD • To avoid danger of suffocation, keep plastic bag and other packing material away from babies and children. -
Page 13: Remove Kick Plate
SUFFOCATION HAZARD • Before you throw away your old appliance, remove the door or lid so that children cannot hide or get trapped inside your old appliance. • Failure to follow these instructions can result in death or brain damage. 1. -
Page 14: Check Door Balance
STEP 3: CHECK DOOR BALANCE With another person holding the dishwasher to prevent it from tipping, open the door slowly. • If the door drops too freely, increase the spring tension. • If the door closes too hard, decrease the spring tension. To adjust the spring tension: 1. -
Page 15: Adjust Leveling Legs
3. Extend the leveling legs from the base of the dishwasher by the length indicated in the following chart. Take into account any built-up flooring which may need to be added to the rear foot adjustment. NOTES: • If the floor was built up in for the front of the dishwasher, account for this difference when adjusting the rear leveling legs. -
Page 16: Prepare Installation Opening
STEP 5: PREPARE INSTALLATION OPENING (if needed) • The wiring and plumbing may enter the opening from either the right- hand or left-hand side of the rear wall, the side cabinets, or the floor within the shaded area. See “Location Requirements” for dimensions. Possible Utility Hole Locations IMPORTANT: Any plumbing or electrical line run outside of the shaded area... -
Page 17: Verify Existing Utility Connections
STEP 6: VERIFY EXISTING UTILITY CONNECTIONS WATER CONNECTION 1. Check that the water line reaches to the front, left-hand side of opening where the water connection will be made as shown in the following diagram. water direct line wire 6" (15.2 cm) 3"... -
Page 18: When There Are No Existing Utility Connections
WHEN THERE ARE NO EXISTING UTILITY CONNECTIONS PREPARE TO CONNECT POWER SUPPLY Connect to the Power Supply using one of two Methods: Direct Wire Cable (Method 1) or Power Cord (Method 2). Follow the instructions specific to your installation. WARNING: Electrical Shock Hazard •... - Page 19 Method 2 - Power Supply Cord IMPORTANT: • Use UL Listed power cord kit marked for use with dishwasher. • The power cord and connections must comply with the National Electrical Code, Section 422 and/or local codes and ordinances. Recommended cord length is 54" min. and 64" max. •...
- Page 20 3. Attach copper tubing to the manual shutoff valve. Preferred Locations Optional Locations 4. Slowly feed the copper tubing through the hole into the opening. Continue feeding the tubing, until there is enough length to connect to the inlet (front, left-hand side of the dishwasher) yet remain within the required boundary.
-
Page 21: Connect Drain Hose To Dishwasher
CONNECT DRAIN HOSE TO HOME PLUMBING 1. Grasp the sides of the dishwasher at the edges of the door panel, and place the dishwasher in front of the opening. 2. Insert the drain hose into the hole in the cabinet wall. 3. -
Page 22: Level Dishwasher
NOTE: Do not push against the front of the panel or on the console – they will dent. Reposition dishwasher by Do not push against front door grasping both sides with hands. panel with knee. Damage to the door panel will occur. 4. -
Page 23: Connect To Power Supply
5. Place level on door and rack track inside the tub as shown. Check that dishwasher is level from side to side, and from back to front. If the dishwasher is not level, adjust front legs up or down until dishwasher is level. - Page 24 3. Install a UL listed/CSA approved strain relief. 4. Route the direct wire cable in the channel on the right-hand side of the dishwasher base. Make sure that the dishwasher is not resting on and/ or pinching the wire. 5. Pull direct wire through strain relief in terminal box. Strain Relief 6.
- Page 25 CONNECT POWER CORD WARNING: Electrical Shock Hazard • Plug into a grounded 3 prong outlet. • Do not remove the ground prong from the power cord plug. • Do not use an adapter. • Do not use an extension cord. •...
-
Page 26: Connect To Water Supply
6. Connect the wires as follows using UL listed wire nuts of the appropriate size to connect power cord to 16-gauge dishwasher wire. Power supply wire: Terminal box wire: white white black black ground wire ground connector NOTES: • Use cUL/UL listed wire nuts of the appropriate size to connect your household wiring to 16-gauge dishwasher wiring. -
Page 27: Connect To House Drain System
3. Tighten the compression nut until snug. Do not overtighten. 4. Place a paper towel under elbow, and then turn on the water supply to check for leaks. NOTE: After installation, the elbow should face the dishwasher card slot at the right on the bottom. - Page 28 2. The molded end of the drain hose will fit 5/8" (1.6 cm), 3/4" (1.9 cm) or 1" (2.5 cm) diameter connections on an air gap, waste tee or disposal. Cut on the marked line as required for your installation. Cutting Lines 1"...
- Page 29 4. Use a rubber hose connector* with a screw type clamp* to connect air gap to garbage disposal inlet. NOTE: This connection must be located before the drain trap and at least 20" (50.8 cm) above the floor where dishwasher will be installed. Drain Hose - Cut Here if Needed Screw-Type Clamps...
- Page 30 Option 3 – (Garbage Disposal - No Air Gap): 1. Remove the knockout drain plug from the disposal inlet. Using a screwdriver and hammer, firmly tap the plug. The plug will separate and fall into the disposal. Disposal Inlet 2. Remove the drain plug from the disposal. Disposal Drain Plug IMPORTANT: If you need to cut the drain hose to fit the diameter of the connection, cut only the rubber end of the hose, as shown earlier in this...
-
Page 31: Secure Dishwasher
Option 4 – (No Garbage Disposal - No Air Gap): IMPORTANT: If you need to cut the drain hose to fit the diameter of the connection, cut only the rubber end of the hose, as shown earlier in this section (do not cut into the ridged section). 1. - Page 32 Installation to Adjacent Cabinets 1. Remove the plastic tub caps from the inside of the dishwasher tub. 2. Drive a wood screw (ST4x30mm) through the hole in the side of the dishwasher into the cabinet frame. IMPORTANT: Drive the screws straight and flush. Protruding screw heads will scratch the side of the dishwasher.
-
Page 33: Pre-Test Checklist
PRE-TEST CHECKLIST 1. Check that the power is OFF. 2. Check door opening and closing. If door does not open and close freely or tends to fall, check spring adjustments. See “Check Door Balance.” 3. Check that wiring is secure under the dishwasher, not pinched or in contact with door springs or other components. -
Page 34: Test Dishwasher
TEST DISHWASHER WARNING: Electrical Shock Hazard • Electrically ground dishwasher. • Connect ground wire to green ground connector in terminal box. If connecting with a power cord: • Plug into a grounded 3-prong outlet. • Do not use an adapter. •... -
Page 35: Replace The Kick Plate
5. Check for leaks under the dishwasher. If a leak is found, turn power and water supply off, then tighten connections. Restore power after leak is corrected. 6. Check for leaks around the door. A leak around the door could be caused by door rubbing or hitting against adjacent cabinetry. -
Page 36: Warranty
LIMITED WARRANTY WARRANTY AND SERVICE TO RECEIVE WARRANTY SERVICE, YOUR PRODUCT MUST BE REGISTERED. TO REGISTER AND REVIEW FULL WARRANTY DETAILS, VISIT: WWW.COSMOAPPLIANCES.COM/WARRANTY SCAN TO REGISTER CUSTOMER SUPPORT TO CHAT WITH US LIVE FOR ASSISTANCE, VISIT: WWW.COSMOAPPLIANCES.COM/CHAT SCAN TO CHAT... - Page 37 IMPORTANT Do Not Return This Product To The Store If you have a problem with this product, please contact COSMO Customer Support at +1 (888) 784-3108 DATED PROOF OF PURCHASE, MODEL #, AND SERIAL # REQUIRED FOR WARRANTY SERVICE. IMPORTANT Ne pas Réexpédier ce Produit au Magasin...
- Page 38 MEMO...
- Page 39 MEMO...
- Page 40 APPLIANCES Cosmo is constantly making efforts to improve the quality and performance of our products, so we may make changes to our appliances without updating this manual. Electronic version of this manual is available at: www.cosmoappliances.com...
Need help?
Do you have a question about the COS-DWD24FBR and is the answer not in the manual?
Questions and answers