
Related Manuals for LawnMaster BC451


Summary of Contents for LawnMaster BC451
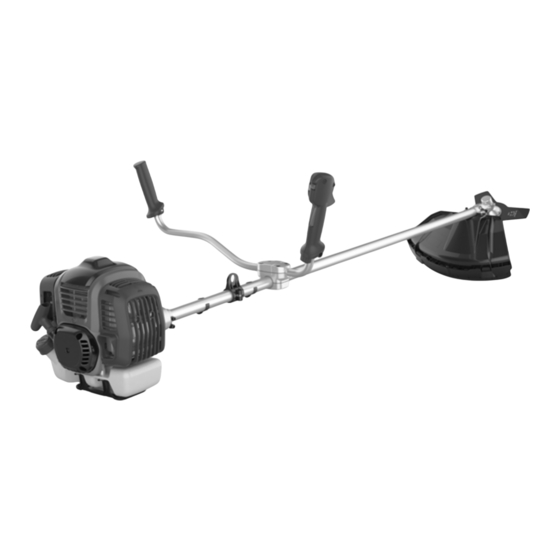
- Page 1 45CC BRUSH CUTTER SAFETY AND OPERATING MANUAL LMCG260EH PLEASE READ THIS MANUAL CAREFULLY BEFORE OPERATING THE UNIT BC451 PROUDLY A STEELFORT PRODUCT NZ OWNED...
-
Page 2: Table Of Contents
TABLE OF CONTENTS OPERATOR SAFETY GETTING STARTED Assembly FEATURES & TECHNICAL DATA OPERATION Fuel & Oil Mixture Rules for Operation Preparing for Operation STARTING THE BRUSH CUTTER Starting the Engine Fitting the Belt Cutting with the Brush Cutter Extending the Cutting Line Stopping the Engine MAINTENANCE &... -
Page 3: Operator Safety
Thank you for purchasing our LawnMaster BC451 DANGER Brushcutter , the information contained within this manual will help you to have many years of safe TOXIC FUMES and trouble free use of this Lawnmaster product. • The exhaust of the engine contains carbon monoxide, an odorless, colorless poison gas. - Page 4 • Repair or replace all damaged and or defective • It is necessary reduction in power due to use in parts immediately. higher temperatures, altitudes and humidity as • Locate all operating controls and safety labels. below conditions. • Make sure all the safety instructions are in correct working condition.
-
Page 5: Getting Started
INSTALL THE MAIN BODY • Always hold the brush cutter with two hands • Always use the harness when operating, adjust Connect the engine (A) to the tube (B) with four the length of the harness to ensure it is suitable screws (C). - Page 6 CONNECT THE TROTTLE CABLE AND STOP SWITCH WIRES Remove the air filter cover Install the throttle cable (A) through the carburettor bracket (B) 13. Install the air filter cover. WARNING Do not tighten the screws until you have set the handle in optimal working position.
- Page 7 assembled correctly before use! TAKE OFF ADDITONAL GUARD Screw off the screw (B); (Fig. 3-3) NYLON HEAD Push the clip (C), and pull out the additional guard. (Fig.3-4) RELEASE THE NUT (FIG.6) Line up the two holes of flange and shield, use one screw driver to hold the flange as below and turn the socket wrench clockwise, the nut will be released FIG.3-4...
- Page 8 REPLACING LINE 7. Clip the housing back onto the line trimmer Unclip the housing from the line trimmer and remove spool from the spindle. Remove all remaining cutting line from the spool. Cut 2m of line. Fold in half and attach the mid- dle of the line into the grove/slot located in the center of the spool.
-
Page 9: Features & Technical Data
FEATURES & TECHNICAL DATA Tube Air Filter Cover Allen Keys S5 Throttle Trigger Choke Lever 20. Allen Keys S4 Engine Switch Fuel Tank Cap Trimmer Head Throttle Trigger Lockout 3T Blade Harness Suspension Point Gearbox Fuel Mixture Container Cable Guard Fixture 24. -
Page 10: Operation
OPERATION PETROL Use 91 and above unleaded fuel. We recommend unleaded petrol as it leaves fewer 1. FUEL & OIL MIXTURE residues inside the motor and on the ignition plug, and prolongs the life cycle of the exhaust system. Never use old or dirty petrol or oil/petrol mixtures Never use oil for 4-cycle engine use or water-cooled 2-cycle engine. -
Page 11: Rules For Operation
2. RULES FOR SAFE OPERATION 3. PREPARING FOR OPERATION WARNING IMPORTANT Failure to follow proper fuel mix instructions may Read the “Rules for Safe Operation “with care and cause damage to the engine. follow the instructions in the manual to operate the unit safely. - Page 12 Press the fuel pump several times until it fills with fuel. (Fig.12) FIG.15 WARNING FIG.12 Ensure the cutting attachment stops when the engine is idling. Note that initial engine startup may require Turn the engine switch to the ”I “position. multiple attempts for the fuel to reach the motor.
-
Page 13: Cutting With The Brush Cutter
When unsure or lacking knowledge Clip the BC451 on to the harness about specific accessories, it is advised to contact Adjust the full vest harness if required to your LawnMaster Sercie Dealer. -
Page 14: Stopping The Engine
WARNING STOPPING THE ENGINE Avoid metal wire or wire encased in plastic in the cutting head to prevent injuries. To extend the line, Release the throttle trigger and let it run idling run the motor at full speed and tap the cutting head for a few minutes. - Page 15 Check all cables and connections. Check the clutch, clutch springs and the clutch drum for wear. Replace if necessary by an authorised LawnMaster Service Agent. Replace the spark plug. Check that the spark plug is fitted with a spark plug cap.
-
Page 16: Air Filter
MAINTENANCE EVERY THREE EVERY SIX Should be carried out at REGULAR BEFORE USE MONTHLY OR MONTHS OR MONTHS OR INTERVALS in each of the indicated EVERY TIME AFTER 25 months or after a certain number of AFTER 50 AFTER 100 hours of operation (whichever comes HOURS HOURS... -
Page 17: Cleaning
Install /reinstall the spark plug carefully by • Keep all nuts and screws tight to be sure the hand. equipment is in safe working condition. Once the spark plug has been seated, tighten it • Never store the equipment with petrol in the with a socket spanner. -
Page 18: Troubleshooting
TROUBLESHOOTING PROBLEM CHECK CONDITION CAUSE SOLUTION Fuel filter blocked Clean or replace The fuel does Fuel supply Clean or replace not arrive at the blocked carburetor Fuel at the Ask your LM Carburetor carburetor dealer for advice The fuel does Ask your LM not arrive at the Carburetor... -
Page 19: Warranty
Only genuine spare parts can be used for repairs and this must be carried out by an authorised LawnMaster Services Dealer to maintain warranty. - Page 20 FIND US www.lawnmaster.co.nz lawnmasternz Steelfort Steelfort Auckland 500 Rangitikei Street, Private Bag 11045 880 Great South Road, Penrose Palmerston North, 4412, New Zealand Auckland, 1061, New Zealand 06 350 1350 09 573 1324...
Need help?
Do you have a question about the BC451 and is the answer not in the manual?
Questions and answers