BST ekr 500 digital Installation And Commissioning Manual
Unit touch
Hide thumbs
Also See for ekr 500 digital:
- Installation and operating manual (204 pages) ,
- Operating manual (163 pages) ,
- Translation of the original manual (67 pages)

Related Manuals for BST ekr 500 digital


Summary of Contents for BST ekr 500 digital
- Page 1 Web Guiding System Installation and Commissioning Manual ekr 500 digital Unit Touch MD.497.EN.08 Translation of the Original Manual...
- Page 2 BST GmbH Remusweg 1 D-33729 Bielefeld Tel.: +49 (0) 521 400 70 0 Fax: +49 (0) 5206 999 999 E-Mail: info@bst.group Internet: www.bst.group This documentation is protected by copyright. The translation as well as reproduction and distribution in any form is forbidden without the approval...
-
Page 3: Table Of Contents
Message Output "System OK" .................. 31 4.1.8 Bus Interface ....................... 31 4.1.9 Weight and Dimensions .................... 32 ekr commander Control Panel .................. 33 4.2.1 Ambient Conditions .................... 33 4.2.2 Protection Category .................... 33 ekr 500 digital Unit Touch – Installation and Commissioning Manual... - Page 4 Terminal Strip X16 - Digital Outputs 1 ... 4.............. 70 Plug Connection ...................... 71 7.9.1 X60 - Actuator Connection EMS 17/18/21/22 ............ 71 7.9.2 X70 - Power Supply ..................... 72 ekr 500 digital Unit Touch – Installation and Commissioning Manual...
- Page 5 Reversing the Operating Direction of the Arrow Keys .......... 129 8.18.5 Entering the Position Offset for the Sensor Slides ............ 131 8.19 Commissioning the Electronic Remote Precision Adjustment (Optional).... 133 8.19.1 EFE 1.......................... 133 8.19.2 EFE 1000........................ 134 ekr 500 digital Unit Touch – Installation and Commissioning Manual...
- Page 6 Application with CCD Cameras.................. 157 13.2.1 Application with CCD CAM 100................. 157 13.2.2 Application with CCDPro 30000/5000 .............. 158 13.3 Application with Sensor Positioner FVG POS 100 ............. 158 Index...................... 159 ekr 500 digital Unit Touch – Installation and Commissioning Manual...
-
Page 7: About This Document
Here you can find how to avoid the danger. ► NOTICE Danger that may lead to damage to assets! There is no risk of injury. Here you can find how to avoid the danger. ► ekr 500 digital Unit Touch – Installation and Commissioning Manual 7/162... -
Page 8: Symbols
Operations using the keys are indicated by the following symbols: Press key ①. ► Press key ① or key ②. ► Press key ① and key ② at the same time. ► 8/162 ekr 500 digital Unit Touch – Installation and Commissioning Manual... -
Page 9: More Detailed Information
The latest version of these instructions in all available languages as well as further documents on this system can be found in the Internet on our help portal BST.Help. Simply click on the docu- ment number in the table. The link will lead you directly to the se- lected document on BST.Help. -
Page 10: About Safety
The product may only be operated with the components ■ belonging to the system. The only third-party components exempt from the above are those supplied by BST or explicitly approved for use with the system. Parts that are not in perfect condition must immediately be ■... -
Page 11: Non-Intended Use
Operation of the product near to sources of interference, e.g. ■ electro-magnetic fields (high voltage lines) or sources of heat Operation of the product under the influence of chemical, ■ electro-chemical or electrical factors ekr 500 digital Unit Touch – Installation and Commissioning Manual 11/162... -
Page 12: Non-Intended Modification Of Electronic Data
Non-intended Modification of Electronic Data No virus scanners, firewalls or similar items may be installed on ■ any products of BST GmbH. Virus scanners or other scan or registration programs must not (be able to) access products via networks. Writing, deleting and editing of system data / files on BST ■... -
Page 13: Safety Instructions
Danger of cutting on sharp edges of the material web! Severe cutting injuries caused by the edges of the moving material web. Never touch the edges of moving material webs. ► ekr 500 digital Unit Touch – Installation and Commissioning Manual 13/162... - Page 14 When returning electronic assembly elements, adhere to DIN ► EN 100015 (“Protection of protection of electrostatic-sensitive devices”). To transport electronic components, only use suitably marked, ► electrically conductive ESD packaging. 14/162 ekr 500 digital Unit Touch – Installation and Commissioning Manual...
-
Page 15: Qualification Of The Personnel
Operating instructions for the entire system ■ National guidelines, laws and applicable guidelines for protecting ■ employees, general safety at workplaces and for accident pre- vention ekr 500 digital Unit Touch – Installation and Commissioning Manual 15/162... -
Page 16: Duties Of The Operating Company And Personnel
Only personnel are assigned that are qualified and trained for ■ the respective task The responsibility of the personnel is determined for the task ■ to be completed and that the personnel are informed 16/162 ekr 500 digital Unit Touch – Installation and Commissioning Manual... -
Page 17: Duties Of The Personnel
4. Initiate first aid measures. 5. Warn the emergency doctor and / or fire brigade. 6. Inform the responsible person at the operating location. 7. Clear the access route for the emergency vehicles. ekr 500 digital Unit Touch – Installation and Commissioning Manual 17/162... -
Page 18: Personal Protective Equipment
The warranty terms are specified in the sales documentation. 2.8.1 Disclaimer BST GmbH is not liable for damage or defects arising from any incorrect or non-intended use of the product, see Non-intended Use, page 11. Liability for defects does also not apply if the fault originates from... -
Page 19: Exceptions To The Disclaimer
About Safety 2.8.2 Exceptions to the Disclaimer In the cases listed above BST GmbH shall also not be liable (for damages) unless: The damage results from a willful or grossly negligent breach of ■ duty on the part of BST GmbH or its legal representatives or... -
Page 20: Design And Function
In this case the connection between the controller and the control panel is completed using a cable extension that is available as an optional extra. Fig. 2: Controller with ekr commander control panel detached 20/162 ekr 500 digital Unit Touch – Installation and Commissioning Manual... -
Page 21: Function
The actuator will move the guiding device (rotating frame guide or swivel roll guide) until the material web returns to its SETPOINT position. ekr 500 digital Unit Touch – Installation and Commissioning Manual 21/162... -
Page 22: Message Output "System Ok
Supply voltage outside the permissible range External motor output stage fault A description of the individual faults can be found in the operating manual of the ekr 500 digital Unit Touch controller (document number MD.492). 22/162 ekr 500 digital Unit Touch – Installation and Commissioning Manual... -
Page 23: Connectable Components
CLS CAM 100 optional EFE 1 EFE 1000 Sensor positioner Remote control, keyboard lock FVG POS 100 Bus line * Required accessory parts see connection diagram Fig. 4: Connectable components ekr 500 digital Unit Touch – Installation and Commissioning Manual 23/162... -
Page 24: Designation Of The Sensors
The top of the material is also the side of the web that has no direct contact with the deflection pulleys of the guiding device. Fig. 5: Examples for the definition of Sensor ① and Sensor ② 24/162 ekr 500 digital Unit Touch – Installation and Commissioning Manual... -
Page 25: Line, Contrast And Object Sensor (Sensor 3)
⑥ Printed line In order to achieve optimum guiding results, the distance between the sensors and the outfeed roll ① of the guiding device must be kept as small as possible. ekr 500 digital Unit Touch – Installation and Commissioning Manual 25/162... -
Page 26: Ccd Cameras (Sensor 1/2)
Fig. 9: Web center-line guiding with two CCD cameras Adjustment of the CAN address of the CCD camera(s), see separate instruction manual. CCD Camera Instruction Manual (Document Number) CCDPro 30000/5000 MD.167 CCD CAM 100 MD.465 26/162 ekr 500 digital Unit Touch – Installation and Commissioning Manual... -
Page 27: Accessories
Operating voltage Date of manufacture ⑧ (Calendar week / Year) ⑨ Protection type ⑩ Nominal current consumption Data matrix code, ⑪ Code Content = 30 digit serial number (IDC) ekr 500 digital Unit Touch – Installation and Commissioning Manual 27/162... -
Page 28: Technical Specifications
Terminal strip X6 / plug X70 Voltage 24 V⎓ ± 10% (including ripple) Current Max. 4 A (including actuator) Connection Plugged in from the outside using a 3-pin plug as per CEN 175301-803 (DIN 43650) 28/162 ekr 500 digital Unit Touch – Installation and Commissioning Manual... -
Page 29: Power Supply
Servo center transducer OMG 4, OMG 8, CK 37 (terminal strip X10) Input signal According to Namur specifications Power supply According to Namur specifications Connection Internally on the spring-cage terminal block ekr 500 digital Unit Touch – Installation and Commissioning Manual 29/162... -
Page 30: Digital Inputs / Outputs
400 ms if over- current occurs with motor current in one direction (no polarity change): > 1.9 A (EMS 21, EMS 22, ECO EMS 22) > 1.1 A (EMS 10, EMS 16, EMS 17, EMS 18) > 0.4 A (EMS 5) Connection Socket M12 30/162 ekr 500 digital Unit Touch – Installation and Commissioning Manual... -
Page 31: Message Output "System Ok
Connection Plugged in from the outside using a 4-pin micro style M8 connector Terminal strip X101 If required, the bus interface can be switched to galvanic isolation (Jumper JX1) ekr 500 digital Unit Touch – Installation and Commissioning Manual 31/162... -
Page 32: Weight And Dimensions
Controller without control panel Weight Approx. 1.18 kg Dimensions (details in mm) Fig. 11: Dimensions of the controller with ekr commander control panel fitted Fig. 12: Dimensions of the controller without ekr commander control panel 32/162 ekr 500 digital Unit Touch – Installation and Commissioning Manual... -
Page 33: Ekr Commander Control Panel
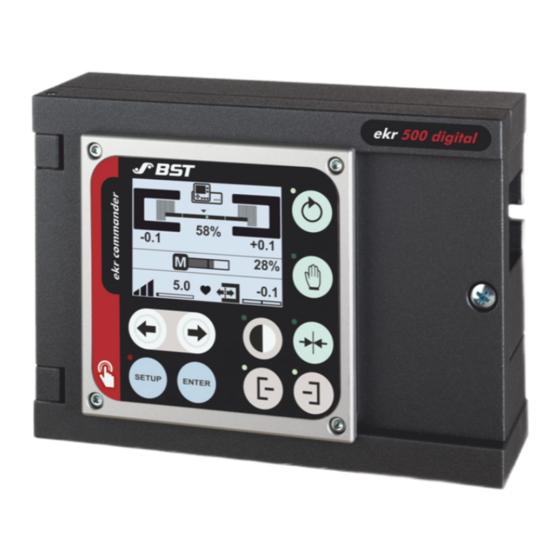
Voltage 24 V⎓ 4.2.4 Touchscreen Display LCD touchscreen display Resolution 320 x 240 pixels Illumination LED background lighting 4.2.5 Weight and Dimensions ekr commander control panel Weight Approx. 0.28 kg ekr 500 digital Unit Touch – Installation and Commissioning Manual 33/162... -
Page 34: Power Pack
The power packs must fulfill the requirements of the IEC 61010-1 for energy limited current circuits. When being used in countries that have defined deviations to IEC 61010-1, these must also be observed. 34/162 ekr 500 digital Unit Touch – Installation and Commissioning Manual... -
Page 35: Sensors
Linearity ± 0.2 mm Output signal 0 to 10 V⎓ (±2.5%) (analogue mode) Output signal CAN bus (digital mode) Polarity reversal protection (supply) Short circuit protection (analogue output) Operation display LED (2-coloured) ekr 500 digital Unit Touch – Installation and Commissioning Manual 35/162... - Page 36 Storage temperature -10 to +70 °C Protection category IP 54 Noise emission < 70 dB Weight < 500 g Housing dimensions See separate product data sheet RoHS conformity * in digital mode 36/162 ekr 500 digital Unit Touch – Installation and Commissioning Manual...
-
Page 37: Line And Contrast Sensor Cls Pro 600
RoHS conformity * in digital mode 4.4.2 Line and Contrast Sensor CLS Pro 600 Technical specifications, see separate operating manual of the CLS Pro 600 line and contrast sensor, document number MD.323. ekr 500 digital Unit Touch – Installation and Commissioning Manual 37/162... -
Page 38: Object Sensor Cls Cam 100
Technical specifications, see separate operating manual of the CCD CAM 100 CCD camera, document number MD.465. Sensor Positioner Technical specifications, see separate operating manual of the FVG POS 100 sensor positioner, document number MD.476. 38/162 ekr 500 digital Unit Touch – Installation and Commissioning Manual... -
Page 39: Electric Motor Powered Actuators
1.3 : 1 2.4 : 1 4.2 : 1 EMS 18/C 1.3 : 1 2.4 : 1 16 x 5 4.2 : 1 1.3 : 1 2.4 : 1 4.2 : 1 ekr 500 digital Unit Touch – Installation and Commissioning Manual 39/162... - Page 40 10 : 1 10,000 25 x 5 7 : 1 4,300 295* 10 : 1 10,000 ECO EMS 22 5 : 1 20 x 5 1,500 * Tolerance stroke max. -2 % 40/162 ekr 500 digital Unit Touch – Installation and Commissioning Manual...
-
Page 41: Rohs Conformity
RoHS* Directive). The limits values for hazardous substances in electrical and electronic equipment specified there are not ex- ceeded by this product. * Abbreviation for Restriction of Hazardous Substances ekr 500 digital Unit Touch – Installation and Commissioning Manual 41/162... -
Page 42: Transport, Delivery And Storage
Secure the goods to be transported on the transport device so ► that they cannot slip, fall-over, knock or fall down, e.g. using lashing straps and edge protectors. Lift and put the transport goods down carefully. ► 42/162 ekr 500 digital Unit Touch – Installation and Commissioning Manual... -
Page 43: Scope Of Delivery
On palettes or on a shelf to protect against moisture on the ■ floor Protected against dust and dirt (e.g. covered with film) ■ For permissible ambient temperatures and humidity, see chapter Technical Specifications, page 28. ekr 500 digital Unit Touch – Installation and Commissioning Manual 43/162... -
Page 44: Installation
Cordon-off the work area in order to prevent access by unau- ► thorized persons (e.g. by setting up barriers). Make sure that all parts of the machine where the BST ► components have to be installed have a sufficient load bearing capacity. -
Page 45: Selecting The Installation Location
Installation Do not climb onto or walk on BST components or unsuitable ► parts of the machine. Ensure that there is sufficient free headroom. If the free head- ► room is restricted, the relevant components causing the height restrictions must be padded and danger-warning signs must be attached to them (yellow / black). -
Page 46: Installing The Controller
The controller and the control panel must be installed on a ver- tical area (standing). Installation on a horizontal area (lying down) is not permitted! Fig. 14: Permitted installation position (standing) 46/162 ekr 500 digital Unit Touch – Installation and Commissioning Manual... -
Page 47: Securing Hole Template
The figure shows the free space around the housing of the con- troller that is needed to open the housing cover completely. Fig. 16: Space needed to open the housing cover ekr 500 digital Unit Touch – Installation and Commissioning Manual 47/162... -
Page 48: Installing The Controller
5. Close the housing cover ① and screw it in place. 6. If necessary, adapt the position of the control panel to the installation position of the controller (see Turning the Control Panel, page 49). 48/162 ekr 500 digital Unit Touch – Installation and Commissioning Manual... -
Page 49: Turning The Control Panel
5. Use the four securing screws ① to attach the control panel ② to the controller. Fig. 19: Cable routing on the rear of the control panel ekr 500 digital Unit Touch – Installation and Commissioning Manual 49/162... -
Page 50: Installing The Control Panel
It is also possible to combine cable extensions of different lengths. However, the maximum permitted full length of 20 m of the connecting cable between the controller and the control panel must never be exceeded! 50/162 ekr 500 digital Unit Touch – Installation and Commissioning Manual... - Page 51 After installation work, check that the bolts are screwed tight. ► 1. Disconnect the plug ① on the connecting cable ② for the control panel from the controller. ekr 500 digital Unit Touch – Installation and Commissioning Manual 51/162...
- Page 52 5. Use the four M3 screws ③ to screw the control panel ④ on. The four hexagon socket screws that secured the control panel to the controller when the unit was delivered can be used for this. 52/162 ekr 500 digital Unit Touch – Installation and Commissioning Manual...
- Page 53 After installation work, check that the bolts are screwed tight. ► To install the control panel in the operator panel, you need the optional installation kit (order number 133 459). ekr 500 digital Unit Touch – Installation and Commissioning Manual 53/162...
- Page 54 In doing so, pull the connecting cable and the plug ① carefully through the hole ⑥ in the controller housing. 4. Make an installation cut-out (see Installation Cut-Out, page 53). 54/162 ekr 500 digital Unit Touch – Installation and Commissioning Manual...
- Page 55 8. Use the optional cable extension to connect up the control panel to the controller (see Cable Extension, page 50). 9. Plug the cable extension plug into socket X100 on the controller. ekr 500 digital Unit Touch – Installation and Commissioning Manual 55/162...
- Page 56 Malfunctions or loss of data due to strong magnetic fields! Keep sufficient distance between magnetic data carriers (e.g. ► credit cards, EC cards, disks, etc.), electronic devices (e.g. monitors, computers, clocks, etc.), hearing aids, pacemakers and magnetic fields. 56/162 ekr 500 digital Unit Touch – Installation and Commissioning Manual...
- Page 57 3. Use the optional cable extension to connect up the control panel to the controller (see Cable Extension, page 50). 4. Plug the cable extension plug into socket X100 of the controller. ekr 500 digital Unit Touch – Installation and Commissioning Manual 57/162...
-
Page 58: Electrical Connection
Before connecting, make sure that the mains voltage corres- ► ponds with the details specified on the nameplate of the com- ponents. Select the correct terminals and polarity when connecting the ► power supply. 58/162 ekr 500 digital Unit Touch – Installation and Commissioning Manual... -
Page 59: Cable Routing
Fig. 23: Separate routing of signal and supply cables ① Cable duct ③ Supply cable ② Signal cable Establish cable connections between the components according ► to the connecting diagram. ekr 500 digital Unit Touch – Installation and Commissioning Manual 59/162... -
Page 60: Connecting The Cables
After connecting, in both cases check the correct fit of the cable. ► 60/162 ekr 500 digital Unit Touch – Installation and Commissioning Manual... -
Page 61: Emc Suitable Wiring
Feed the cable into the clamping insert and ► bend the screen braiding back over the clamping insert. Push the clamping insert into the interme- ► diate support. Fit the screws. ► ekr 500 digital Unit Touch – Installation and Commissioning Manual 61/162... -
Page 62: Ensuring Equipotential Bonding
Remove the paint coating in the contact area. ► Through-hole Threaded hole Fig. 24: Use of fan type washers ① Screw ④ Washer ② Nut ⑤ Grounding cable ③ Serrated washer 62/162 ekr 500 digital Unit Touch – Installation and Commissioning Manual... -
Page 63: Connections On The Controller
* An optionally available CAN bus distributor is required for the simultaneous connection of several bus participants to the control- ler (see separate operating instructions of the components to be connected). ekr 500 digital Unit Touch – Installation and Commissioning Manual 63/162... -
Page 64: Terminal Strips
The following figure shows the position of the terminal strips (X…) on the processor board of the controller. Fig. 26: Terminal strips on the processor board ① Nameplate ② Hardware version 64/162 ekr 500 digital Unit Touch – Installation and Commissioning Manual... -
Page 65: Terminal Assignment
Guiding mode (CLS Pro 600 or CLS CAM 100) Connection additional ekr commander control panel Connection servo center transducer OMG 4, OMG 8, CK 37 Connection electronic remote precision adjustment EFE 1 Controller interlock Message output “System OK” ekr 500 digital Unit Touch – Installation and Commissioning Manual 65/162... -
Page 66: Terminal Strip X1 - Sensor 1/2 (Analogue Connection)
Input machine speed 0 … +10 V⎓ Ground machine speed 7.8.3 Terminal Strip X6 - Power Supply Function Wire colour Comments Terminal white Ground power supply +24 V⎓ brown Equipotential bonding green Connected to the enclosure 66/162 ekr 500 digital Unit Touch – Installation and Commissioning Manual... -
Page 67: Terminal Strip X7 - Actuator, Omg 4
Output B to actuator yellow Ground Actuator A (+) grey Output A to actuator Actuator B (-) pink Output B to actuator Identification actuator blue Identification actuator Position Position feedback ekr 500 digital Unit Touch – Installation and Commissioning Manual 67/162... -
Page 68: Terminal Strip X8 - Sensor 1/2 (Can Bus)
Drive Module 160 / additional ekr commander control panel CAN6-H CAN6-H (insulated) white CAN 6 high IGND blue Ground CAN 6 (not connected to GND) CAN6-L CAN6-L (insulated) black CAN 6 low 68/162 ekr 500 digital Unit Touch – Installation and Commissioning Manual... -
Page 69: Terminal Strip X10 - Controller Interlock, Omg 4, Omg 8, Ck 37, Efe 1
7.8.9 Terminal Strip X12 - CAN Bus 4 Function Wire colour Comments Terminal +24 V⎓ Power supply CAN 4 CAN4-H CAN 4 high Ground CAN 4 CAN4-L CAN 4 low ekr 500 digital Unit Touch – Installation and Commissioning Manual 69/162... -
Page 70: Terminal Strip X14 - Digital Inputs 1
Terminal +24 V⎓ Output +24 V⎓, max. 200 mA Output 1 Output 2 See the truth table for digital outputs (Truth Tables, page 136) Output 3 Output 4 Ground for outputs 1 … 4 70/162 ekr 500 digital Unit Touch – Installation and Commissioning Manual... -
Page 71: Plug Connection
Signal Wire colour Note +24 V⎓ white PWM (+) brown PWM (0 V⎓) green 0 V⎓ yellow Leads internally to terminal strip X7 PWM (+) grey PWM (0 V⎓) pink Internal Pull UP blue 0 – 10 V⎓ / 0 – 24 V⎓ ekr 500 digital Unit Touch – Installation and Commissioning Manual 71/162... -
Page 72: X70 - Power Supply
The contact marked by the symbol is only used for establishing the equipotential bonding (working earth). The contact is not a connection for protective earth. This unit does not require protective earthing. 72/162 ekr 500 digital Unit Touch – Installation and Commissioning Manual... -
Page 73: X100
Fig. 29: Contact assignment in the plug connector Contact Signal Wire colour Comments +24 V⎓ output brown Leads internally to CAN-H white terminal strip X8 CAN-GND green or X9 CAN-L yellow ekr 500 digital Unit Touch – Installation and Commissioning Manual 73/162... -
Page 74: Commissioning
NOTICE Damage to the actuator when operating with transport safety device fitted! Before commissioning, remove the transport safety device on ► the actuator and guiding device. 74/162 ekr 500 digital Unit Touch – Installation and Commissioning Manual... -
Page 75: Requirements
(controller, sensors, actuator, ...) have been made. The controller is connected to the power supply. ■ All transport locking devices on the guiding device and actuator ■ have been removed. ekr 500 digital Unit Touch – Installation and Commissioning Manual 75/162... -
Page 76: Setting The Dil Switches Of The Controller
You can display the position of the switches on the processor board of the controller using a special service display. The procedure for calling up the service display is described in the operating manual of the ekr 500 digital Unit Touch controller, document number MD.492. 8.3.1... -
Page 77: Using The Dil Switch
The other end of the tweezers engages on the movable slider. 2. Move both ends of the tweezers towards each other applying a little pressure in order to move the slider to the desired position. ekr 500 digital Unit Touch – Installation and Commissioning Manual 77/162... -
Page 78: Setting Dil Switch S4
Position feedback EMS 17 … 22** (potentiometer) OMG 8, CK 37 No servo center transducer (operating mode Center positioning cannot be selected) OMG 4 * in conjunction with Motordrive ECO ** not for actuator ECO EMS 22 78/162 ekr 500 digital Unit Touch – Installation and Commissioning Manual... -
Page 79: Setting Dil Switch S5
500 kBit Applies only for connector socket X101 with galvanic separation. The connector 125 kBit sockets X100, X102, X103 are always 250 kBit operated with 500 Kbit and without 1 Mbit galvanic separation. ekr 500 digital Unit Touch – Installation and Commissioning Manual 79/162... -
Page 80: Setting Dil Switch S6
Voltage input Activate analogue 0 …+10 V⎓ S7.1 Sensor 1 input for sensor 1 Current input (S5.2 = ON) 0 … 20 mA Voltage input Activate analogue 0 …+10 V⎓ S7.2 Sensor 2 input for sensor 2 Current input (S5.3 = ON) 0 … 20 mA 80/162 ekr 500 digital Unit Touch – Installation and Commissioning Manual... -
Page 81: Setting The Dil Switches Of The Control Panel
5. Re-insert stopper A. 6. Connect the plug on the connecting cable for the control panel into socket X100 (standard control panel) or X101 (additional control panel). ekr 500 digital Unit Touch – Installation and Commissioning Manual 81/162... -
Page 82: Setting The Jumper
Damage to the components from working on live parts. Before opening the controller, switch off the power supply. ► Plug in or remove jumper JX1 according to the application. ► 82/162 ekr 500 digital Unit Touch – Installation and Commissioning Manual... -
Page 83: Checking The Device Addresses
3. Check the setting of the rotary switch S1 on the processor board. The rotary switch S1 must be set to position 1. 4. Switch the rotary switch S1 to position 1 if necessary. 5. Close the controller’s housing cover. ekr 500 digital Unit Touch – Installation and Commissioning Manual 83/162... -
Page 84: Control Panel Device Address
4. Switch the rotary switch S1 to position 1 if necessary. 5. Re-insert stopper B. 6. Connect the plug on the connecting cable for the control panel into the socket X100 of controller. 84/162 ekr 500 digital Unit Touch – Installation and Commissioning Manual... -
Page 85: Setting The Terminating Resistors
Additional ekr commander control panel (remote control) ■ The procedure for setting the internal terminating resistors of the other bus participants can be obtained from the separate operating instructions of the devices connected. ekr 500 digital Unit Touch – Installation and Commissioning Manual 85/162... - Page 86 3. Check the setting of the sliding switch S3 on the processor board. 4. If necessary, change the position of the sliding switch S3. 5. Close the controller’s housing cover. 6. Switch on the power supply again. 86/162 ekr 500 digital Unit Touch – Installation and Commissioning Manual...
-
Page 87: Terminating Resistor Of The Control Panel
Fig. 36: DIL switch S2 on the control panel board DIL switch Condition Function Comments Internal terminating resistor switched off S2.4 Internal terminating Factory setting resistor switched on ekr 500 digital Unit Touch – Installation and Commissioning Manual 87/162... - Page 88 4. If necessary, switch DIL switch S2.4 to position ON. 5. Re-insert stopper A. 6. Connect the plug on the connecting cable for the control panel into socket X100 of controller. 88/162 ekr 500 digital Unit Touch – Installation and Commissioning Manual...
-
Page 89: Calling Up The Setup Menu
The LED of the key illuminates. The controller switches to manual mode. 2. Press the SETUP key. The controller changes to setup mode. The first page of the setup menu appears in the display. ekr 500 digital Unit Touch – Installation and Commissioning Manual 89/162... - Page 90 Entering the position offsets Offsets, page 117 Activating the displays and Configurable displays setting menus that can be and setting menus See operating manual* displayed using the swiping (swiping function) function 90/162 ekr 500 digital Unit Touch – Installation and Commissioning Manual...
- Page 91 Showing the network set- ing manual C2E Coupler, Ethernet coupler) tings of the C2E Coupler document number MD.420 * Operating manual ekr 500 digital Unit Touch, document number MD.492 ekr 500 digital Unit Touch – Installation and Commissioning Manual 91/162...
-
Page 92: Setting The Dimension Unit
The button of the selected dimension unit is displayed with a blue background. 3. Confirm your selection with the button. The setup menu is displayed. 92/162 ekr 500 digital Unit Touch – Installation and Commissioning Manual... -
Page 93: Setting The Motor Rotation Direction
(see Setting DIL Switch S5, page 79). Change DIL switch S4.6 on the processor board of Drive Module 160 (see separate operating EMS 23 instructions Drive Module 160, document number MD.359). ekr 500 digital Unit Touch – Installation and Commissioning Manual 93/162... -
Page 94: Commissioning The Actuator Without Position Feedback
Reversing the guiding direction Change DIL switch S4.2 on the processor board of the controller ► (see Setting DIL Switch S4, page 78). 94/162 ekr 500 digital Unit Touch – Installation and Commissioning Manual... -
Page 95: Setting The Gain Of The Servo Center Transducer
Pressing both arrow keys at the same time will reset the gain to a value of 20.0. 5. Press the ENTER key. The gain setting is complete. ekr 500 digital Unit Touch – Installation and Commissioning Manual 95/162... - Page 96 For setting the gain using the touchscreen function please refer to the operating manual ekr 500 digital Unit Touch, document num- ber MD.492. 96/162 ekr 500 digital Unit Touch – Installation and Commissioning Manual...
-
Page 97: Commissioning The Actuator With Position Feedback
Reversing the guiding direction Change DIL switch S4.2 on the processor board of the controller ► (see Setting DIL Switch S4, page 78). ekr 500 digital Unit Touch – Installation and Commissioning Manual 97/162... -
Page 98: Setting Stroke Limitation And Servo-Center Position
⑤ display of the operating state of the normalized display (on / off) ⑥ Current position of the actuator (numeric display) ⑦ Current position of the actuator (graphical display) 98/162 ekr 500 digital Unit Touch – Installation and Commissioning Manual... - Page 99 The current position is accepted as position for software limit switch 2. The button is displayed with a blue background. The new position value (1800 in the example) is displayed on the button. ekr 500 digital Unit Touch – Installation and Commissioning Manual 99/162...
- Page 100 1. Press the button. The setting menu is closed. All edited parameter values are saved. The setup menu is displayed. 2. Press the SETUP key to return to the operation display. 100/162 ekr 500 digital Unit Touch – Installation and Commissioning Manual...
-
Page 101: Activating The Normalized Display Of The Actuator Position
Normalized display Unit: mm / inch When operating the controller with the CLS CAM 100 object sensor, it is mandatory to activate the normalized display of the actuator position. ekr 500 digital Unit Touch – Installation and Commissioning Manual 101/162... - Page 102 2. Keep the left arrow key pressed until the actuator has reached its left end position. The warning symbol Left limit switch active appears in the actuator operation display. 102/162 ekr 500 digital Unit Touch – Installation and Commissioning Manual...
- Page 103 End position distance = A2 – A1 7. Enter the determined distance of the end positions in the corresponding input field in the Actuator setup menu (see Activating the Normalized Display, page 102). ekr 500 digital Unit Touch – Installation and Commissioning Manual 103/162...
-
Page 104: Activating Position Control
2. Switch the position control on or off by pressing the adjacent button. When the position control is switched on, the button is dis- played with a blue background. 104/162 ekr 500 digital Unit Touch – Installation and Commissioning Manual... -
Page 105: Setting The Guiding Direction
Reversing the guiding direction Change DIL switch S4.1 on the processor board of the controller ► (see Setting DIL Switch S4, page 78). ekr 500 digital Unit Touch – Installation and Commissioning Manual 105/162... -
Page 106: Guiding Direction For Line / Contrast / Feature Guiding (Sensor 3)
The procedure is described in the operating manual ekr 500 digital Unit Touch, document number MD.492. During the material setup the controller is automatically adjusted to the properties of the material to be scanned. 106/162 ekr 500 digital Unit Touch – Installation and Commissioning Manual... -
Page 107: Adjusting The Controller Gain
›› The material web is pulled in and is tensioned. ›› The guiding device is not in an end position. ekr 500 digital Unit Touch – Installation and Commissioning Manual 107/162... - Page 108 During operation, the controller gain can also be adjusted via the touchscreen function. For setting the controller gain using the touchscreen function please refer to the operating manual ekr 500 digital Unit Touch, document number MD.492. 108/162...
-
Page 109: Commissioning The Ccd Camera
8.16 Commissioning the CCD Camera 8.16.1 CCD Camera Calibration The CCD cameras connected are calibrated either by means of the ekr 500 digital Unit Touch controller or directly on the CCD camera depending on the camera type and operating mode (see table). Camera type... - Page 110 (width of bar µm, width of hole µm) in the public list of parameters WebWidthCalib. The parameters of the public list of parameters WebWidthCalib are described in the operating manual ekr 500 digital Unit Touch, document number MD.492. 110/162 ekr 500 digital Unit Touch – Installation and Commissioning Manual...
- Page 111 ④, the area to the left of the of the first hole and the right of the last hole of the template must be covered by a material ② impervious to light. ekr 500 digital Unit Touch – Installation and Commissioning Manual 111/162...
- Page 112 ② Number of visible contrast transitions 3. Press the > arrow button. The calibration procedure starts. During the calibration, the symbol of an hour glass appears in the display for approx. 30 seconds. 112/162 ekr 500 digital Unit Touch – Installation and Commissioning Manual...
- Page 113 (sensor 1 or sensor 2). With a two-camera system, the material thickness compensa- tion must be carried out after each other for both cameras. ekr 500 digital Unit Touch – Installation and Commissioning Manual 113/162...
- Page 114 Distance from the sensor level of the CCD camera to the upper edge of the calibration template to the upper edge of the calibration template Fig. 54: Definition of the distance A 114/162 ekr 500 digital Unit Touch – Installation and Commissioning Manual...
- Page 115 10. Enter the distance value determined into the editing field. 11. Press the button. The new distance value is saved. The setting menu is closed. ð The setup menu is displayed. ekr 500 digital Unit Touch – Installation and Commissioning Manual 115/162...
-
Page 116: Setting The Material Thickness (After Changing The Material)
Material thickness compensation for the entry. Procedure, see Performing a Material Thickness Compensation, page 113, step 7. Fig. 57: Entry of the material thickness ① Material web ③ Material thickness set ② Light source 116/162 ekr 500 digital Unit Touch – Installation and Commissioning Manual... -
Page 117: Entering The Position Offsets
When entering the position offset, it is essential to observe the prefix sign (+/-). ekr 500 digital Unit Touch – Installation and Commissioning Manual 117/162... - Page 118 (see example 2). 4. Confirm your entry with the button. The position offsets entered will be accepted. The setup menu is displayed. 118/162 ekr 500 digital Unit Touch – Installation and Commissioning Manual...
-
Page 119: Commissioning The Sensor Positioner
Buttons for switched on functions are displayed with a blue background. 4. Press the SETUP key. The settings made are saved. The setup menu is displayed. ekr 500 digital Unit Touch – Installation and Commissioning Manual 119/162... -
Page 120: Overview Setting Menu
Input of the distance of the right sensor slide to the reference for the right sensor slide point. The different functions and settings are described in detail in the following chapters. 120/162 ekr 500 digital Unit Touch – Installation and Commissioning Manual... -
Page 121: Activating Retract Mode
The button selected is displayed with a blue background. The corresponding retract mode is activated. 2. Press the SETUP key. The settings made are saved. The setup menu is displayed. ekr 500 digital Unit Touch – Installation and Commissioning Manual 121/162... -
Page 122: Activating Automatic Setpoint Acceptance
To switch the function Automatic setpoint acceptance on / off, ► press the adjacent button. When the function is switched on, the button is displayed with a blue background. 122/162 ekr 500 digital Unit Touch – Installation and Commissioning Manual... -
Page 123: Setting Automatic Sensor Tracking
2. Enter the desired distance value A (2.5 mm in the example) to define the hysteresis area in the input field. 3. Press the SETUP key. The settings made are saved. The setup menu is displayed. ekr 500 digital Unit Touch – Installation and Commissioning Manual 123/162... -
Page 124: Activating Automatic Edge Sensor Standardization
Automatic edge sensor standardization is activated. The button is displayed with a blue background. 2. Press the SETUP key. The settings made are saved. The setup menu is displayed. 124/162 ekr 500 digital Unit Touch – Installation and Commissioning Manual... -
Page 125: Entering The Position Offset For The Sensor Slides
When entering the position offset, it is essential to observe the prefix sign (+/-). ekr 500 digital Unit Touch – Installation and Commissioning Manual 125/162... - Page 126 (see example 2). 9. Press the SETUP key. The settings made are saved. The setup menu is displayed. 126/162 ekr 500 digital Unit Touch – Installation and Commissioning Manual...
-
Page 127: Commissioning The Positioning Unit
Commissioning 8.18 Commissioning the Positioning Unit 8.18.1 Utilization The ekr 500 digital Unit Touch controller has connections for two positioning units. The positioning units enable the motorized positioning of sensors or tools. The main field of application of the positioning unit is the motorized positioning of a BST CLS Pro 600 line and contrast sensor (Sensor ... -
Page 128: Calling Up The Setting Menu
Input of the distance of the sensor slide of positioning for positioning unit 2 unit 2 to the reference point The different functions and settings are described in detail in the following chapters. 128/162 ekr 500 digital Unit Touch – Installation and Commissioning Manual... -
Page 129: Reversing The Operating Direction Of The Arrow Keys
If the sensor slide moves in the opposite direction, you must re- verse the operating direction of the arrow keys for the positioning unit selected. ekr 500 digital Unit Touch – Installation and Commissioning Manual 129/162... - Page 130 2. Reverse the operating direction of the arrow keys for the posi- tioning unit selected by tapping the corresponding button. If the operating direction is reversed, the button is displayed with a blue background. 130/162 ekr 500 digital Unit Touch – Installation and Commissioning Manual...
-
Page 131: Entering The Position Offset For The Sensor Slides
When entering the position offset, it is essential to observe the prefix sign (+/-). ekr 500 digital Unit Touch – Installation and Commissioning Manual 131/162... - Page 132 (see example 2). 8. Press the SETUP key. The settings made are saved. The setup menu is displayed. 132/162 ekr 500 digital Unit Touch – Installation and Commissioning Manual...
-
Page 133: Commissioning The Electronic Remote Precision Adjustment (Optional)
Reversing the operating direction Swap the connecting cables of the remote precision adjustment ► at terminals 6 and 8 of terminal strip X10 in the controller. ekr 500 digital Unit Touch – Installation and Commissioning Manual 133/162... -
Page 134: Efe 1000
Reversing the operating direction of the arrow keys Swap the connecting cables at terminals 15 and 18 of terminal ► strips X14 and X15 in the controller. 134/162 ekr 500 digital Unit Touch – Installation and Commissioning Manual... -
Page 135: Remote Control (Digital Inputs / Outputs)
If a signal (+24 V⎓) is activated at the respective terminals of the controller, the corresponding LED H13 to H16 lights up on the processor board of the controller (see Status Display of Digital Outputs, page 152). ekr 500 digital Unit Touch – Installation and Commissioning Manual 135/162... -
Page 136: Truth Tables
Software limit switch active / motor overcurrent / guiding device in end position Brake function (actuator EMS 23B) Not used 1 = high (+24 V⎓) — = reserved 0 = low (0 V⎓ (GND) or terminal open) * 1 = function active, 0 = function inactive X = not relevant , t : min. 100 ms high 136/162 ekr 500 digital Unit Touch – Installation and Commissioning Manual... -
Page 137: Digital Inputs / Outputs Configuration
The currently selected function table is displayed in the list with blue background. 3. Use the scroll bar on the right side to scroll the list up or down until the desired function table is displayed. ekr 500 digital Unit Touch – Installation and Commissioning Manual 137/162... - Page 138 Setup lock Not used Position of the guiding device corrected in operating mode automatic Software limit switch active/Motor overcurrent/Guiding device in end position Outputs Brake function (actuator EMS 23B) Not used 138/162 ekr 500 digital Unit Touch – Installation and Commissioning Manual...
- Page 139 External limit switch 2 (stroke limitation) Position of the guiding device corrected in operating mode automatic Software limit switch active/Motor overcurrent/Guiding device in end position Outputs Brake function (actuator EMS 23B) Not used ekr 500 digital Unit Touch – Installation and Commissioning Manual 139/162...
- Page 140 Controller interlock (only for automatic mode) Setup lock 1 = OK relay is used for status of the line monitoring Warning line position Error line position Outputs Warning line width Error line width 140/162 ekr 500 digital Unit Touch – Installation and Commissioning Manual...
- Page 141 Selection of Parameter Set For The Guiding Setpoint, page 149) Position of the guiding device corrected in operating mode automatic Software limit switch active/Motor overcurrent/Guiding device in end position Outputs Brake function (actuator EMS 23B) Not used ekr 500 digital Unit Touch – Installation and Commissioning Manual 141/162...
- Page 142 Selection of Parameter Set For The Guiding Setpoint, page 149) Position of the guiding device corrected in operating mode automatic Software limit switch active/Motor overcurrent/Guiding device in end position Outputs Brake function (actuator EMS 23B) Not used 142/162 ekr 500 digital Unit Touch – Installation and Commissioning Manual...
- Page 143 Position of the guiding device corrected in operating mode automatic Software limit switch active/Motor overcurrent/Guiding device in end position Outputs Brake function (actuator EMS 23B) Controller interlock (only for automatic mode) ekr 500 digital Unit Touch – Installation and Commissioning Manual 143/162...
- Page 144 Moving the sensor slide of positioning unit 2 to the right Not used Position of the guiding device corrected in operating mode automatic Software limit switch active/Motor overcurrent/Guiding device in end position Outputs Brake function (actuator EMS 23B) Not used 144/162 ekr 500 digital Unit Touch – Installation and Commissioning Manual...
- Page 145 Software limit switch active/Motor overcurrent/Guiding device in end position Outputs Material in Sensor 1* Material in Sensor 2* * Indicates that there is material within the sensor scanning area (even with full coverage of the sensor scanning area) ekr 500 digital Unit Touch – Installation and Commissioning Manual 145/162...
- Page 146 The selected sensor has detected a web edge.** Outputs Sensor 1 has detected a web edge.** Sensor 2 has detected a web edge.** ** With full coverage of the sensor scanning area no web edge will be detected. 146/162 ekr 500 digital Unit Touch – Installation and Commissioning Manual...
- Page 147 Position of the guiding device corrected in operating mode automatic Software limit switch active/Motor overcurrent/Guiding device in end position Outputs Brake function (actuator EMS 23B) Not used Function table 14 Reserved for special applications ekr 500 digital Unit Touch – Installation and Commissioning Manual 147/162...
- Page 148 Not used Position of the guiding device corrected in operating mode automatic Software limit switch active/Motor overcurrent/Guiding device in end position Outputs Brake function (actuator EMS 23B) Controller interlock (blocking) 148/162 ekr 500 digital Unit Touch – Installation and Commissioning Manual...
- Page 149 Function table 1 (Table 1) or 4 (Table 4) for allocation of the digital inputs and outputs is active (see Selection of Function Table, page 137). Terminal assignment Terminal Parameter set 1 = high (+24 V⎓) 0 = low (0 V⎓ (GND) or terminal open) ekr 500 digital Unit Touch – Installation and Commissioning Manual 149/162...
-
Page 150: Remote Control With External Control Keyboard Ekr Commander
In this case an additional ekr commander control panel used as remote control can be connected to the bus interface (socket X101) of the controller. 150/162 ekr 500 digital Unit Touch – Installation and Commissioning Manual... -
Page 151: Service Leds
H17 – H18 CAN bus status Device status Status of the message output “System OK” H28 – H29 Status of the power supply Status of the internal Ethernet interface Status of the controller interlock ekr 500 digital Unit Touch – Installation and Commissioning Manual 151/162... -
Page 152: Status Display Of Remote Control Inputs
(position of the guiding device corrected in operating mode automatic) Output 2 active (software limit switch active / motor overcurrent / guiding device in end position) H15 Output 3 active H16 Output 4 active 152/162 ekr 500 digital Unit Touch – Installation and Commissioning Manual... -
Page 153: Display Of Can Bus Status
H29 3.3 V Operating voltage 3.3 V⎓ available 10.7 Status Display of Controller Interlock Name Condition Meaning (red) Controller is enabled H53 LOCK Controller is blocked (motor output stage is switched off) ekr 500 digital Unit Touch – Installation and Commissioning Manual 153/162... -
Page 154: Accessories And Spare Parts
* The following accessory parts are required for connecting one CCD camera: 1x CAN bus distributor (pos. 11) ■ 1x CAN-Bus adapter (pos. 12) ■ 1x CAN-Bus power adapter (pos. 13) ■ 154/162 ekr 500 digital Unit Touch – Installation and Commissioning Manual... -
Page 155: Customer Services
Serial number and date of manufacture (see name plate) ■ Customer Services Address BST GmbH Service Remusweg 1 D-33729 Bielefeld Germany Tel.: +49 (0) 521 400 70 767 E-Mail: service@bst.group http: www.bst.group ekr 500 digital Unit Touch – Installation and Commissioning Manual 155/162... -
Page 156: Connection Diagram
Unit Touch X101 EMS 18 CLS Pro 600 IR 2011 IR 2011 IR 2012 IR 2012 US 2010 US 2010 Fig. 68: Connecting diagram for standard applications with edge sensor 156/162 ekr 500 digital Unit Touch – Installation and Commissioning Manual... -
Page 157: Application With Ccd Cameras
10 m (118 449) ekr 500 digital Unit Touch X101 EMS 18 CLS Pro 600 X100 X100 CCD CAM 100 CCD CAM 100 Fig. 69: Connection diagram for applications with CCD CAM 100 ekr 500 digital Unit Touch – Installation and Commissioning Manual 157/162... -
Page 158: Application With Ccdpro 30000/5000
13.3 Application with Sensor Positioner FVG POS 100 You will find the connection diagrams for applications with the FVG POS 100 sensor positioner in the separate operating instruc- tions FVG POS 100 sensor positioner, document number MD.467. 158/162 ekr 500 digital Unit Touch – Installation and Commissioning Manual... -
Page 159: Index
Output motor output stage ...... 30 Material thickness setting...... 116 Power supply .......... 28 CCD camera calibration ........ 112 Processor board .......... 64 Calibration steps .......... 109 Protection category ........ 28 Calibration template ........ 110 ekr 500 digital Unit Touch – Installation and Commissioning Manual 159/162... - Page 160 Setting jumper JX1 ......... 82 Technical data .......... 36 EFE 1 Activating ............ 78 Commissioning.......... 133 Keyboard interlock........ 136 EFE 1000 Commissioning.......... 134 Electrical connection Cable routing.......... 59 Liability for defects ......... 18 160/162 ekr 500 digital Unit Touch – Installation and Commissioning Manual...
- Page 161 Line and contrast sensor CLS Pro 600 .... 37 Controller .......... 28, 34 Object sensor CLS CAM 100 ...... 38 Processor board.......... 64 Technical data .......... 36 Product - Use .......... 10 US 2010 ............ 37 ekr 500 digital Unit Touch – Installation and Commissioning Manual 161/162...
- Page 162 Terminating resistor ........ 85 Control panel .......... 87 Controller ............ 85 Touchscreen display ........ 33 Transport ............ 42 Truth tables........... 137 Unpacking ............ 43 US 2010 Technical specifications ......... 37 Non-intended.......... 11 Virus Scanners .......... 12 162/162 ekr 500 digital Unit Touch – Installation and Commissioning Manual...
Need help?
Do you have a question about the ekr 500 digital and is the answer not in the manual?
Questions and answers