
Subscribe to Our Youtube Channel
Related Manuals for Russell Hobbs RH2TTDW101


Summary of Contents for Russell Hobbs RH2TTDW101
- Page 1 DISHWASHER RH2TTDW101 Operating Manual TABLE TOP DISHWASHER REGISTER CLEAN YOUR Clean the filters and PRODUCT the inside of the appliance every cycle TODAY CYCLE...
-
Page 2: Guarantee
P a g e GUARANTEE At Russell Hobbs, we take all our customer feedback seriously. 0345 208 8750 Feel free to contact our Product Care Team, on who will be more than happy to assist you. This product is guaranteed for 12 months from the date of the original purchase. -
Page 3: Table Of Contents
P a g e CONTENTS Page Section Guarantee Helpful Information Saving Water & Energy Important Safety Instructions Electrical Safety Instructions Water Safety Instructions Product Overview Control Panel Installation Guidance First Time Use Salt & Water Hardness Loading the Appliance Detergent Programs Usage Instructions Cleaning Instructions... -
Page 4: Helpful Information
P a g e HELPFUL INFORMATION • The ECO programme is suitable to clean normally soiled tableware, it is the most efficient programme in terms of its combined energy and water consumption, and that it is used to assess compliance with the EU ecodesign legislation •... -
Page 5: Saving Water & Energy
P a g e SAVING WATER & ENERGY • Only start a wash cycle when the dishwasher is full. • While waiting for the dishwasher to be filled, prevent unpleasant odours with the Rapid Wash. • Select a wash cycle that is suited to the type of dishes/crockery and to the soil level of the dishes/crockery using (see the washing program section): - for dishes with a normal soil level, use the Eco wash cycle, which guarantees low energy and water... -
Page 6: Important Safety Instructions
P a g e IMPORTANT SAFETY INSTRUCTIONS • It is hazardous for anyone other than a competent person to carry out any service or repair operation that involves the removal of a cover which gives protection against exposure to electrical parts. •... - Page 7 P a g e IMPORTANT SAFETY INSTRUCTIONS • Use only parts and accessories supplied with the appliance, or sourced directly from the manufacturer. The use of accessory attachments not recommended by the manufacturer may cause fire, electric shock or injury. •...
-
Page 8: Electrical Safety Instructions
P a g e ELECTRICAL SAFETY INSTRUCTIONS • This appliance must be plugged into an earthed socket. • Before switching on, ensure the voltage of your electricity supply is the same as that indicated on the rating plate. This product is designed to operate on AC220–240V;... -
Page 9: Water Safety Instructions
P a g e WATER SAFETY INSTRUCTIONS • The dishwasher should not be placed on top of the water hoses or the electricity supply cable. • If the inlet hose is not long enough, contact a specialist store or an authorised technician •... -
Page 10: Product Overview
P a g e | 10 PRODUCT OVERVIEW 1. Door Handle Salt Container 2. Control Panel Filter 3. Water Fill Tank Detergent Location Basket 4. Internal LED Light Cutlery Tray 5. Upper Spray Arm 6. Lower Spray Arm RH2TTDW201 Table Top Dishwasher Revision 1.5... -
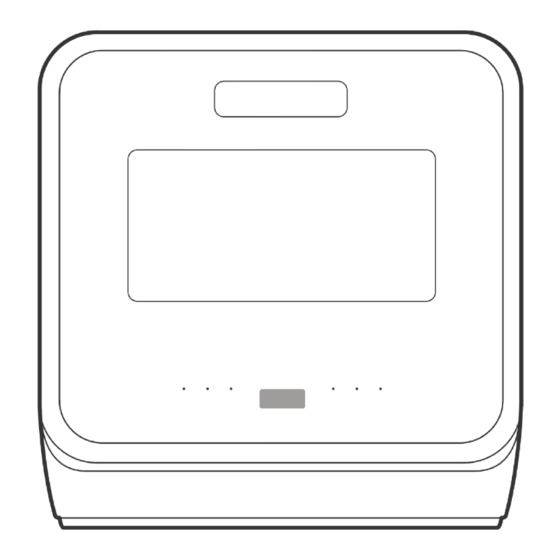
Page 11: Control Panel
P a g e | 11 CONTROL PANEL 1. On/Off Delay 1-24 2. Program Select Fruit Wash a. P1 Eco Baby Care b. P2 1 Hour Steam+ c. P3 Rapid Wash Start/Pause d. P4 Glass Display 3. Function a. Storage b. -
Page 12: Installation Guidance
P a g e | 12 INSTALLATION GUIDANCE CAUTION This is heavy. Ensure care is used when moving the appliance. Water Intake: This appliance can either be plumbed in using the supplied water connection, or filled with water using the internal water tank. - Page 13 P a g e | 13 INSTALLATION – WASTE PIPE The waste water drainage pipe may already be attached to the machine. If it is not, or has come loose, it can be refitted using a screwdriver and tightening the clamp on the pipe. Run the drainage pipe into a sink, bucket or waste water discharge pipe, ensuring that it is always lower than where it comes out of the appliance.
- Page 14 P a g e | 14 INSTALLATION – WATER INLET Your appliance can be filled either through a plumbed water intake, or manually filled. Plumbed Water The supplied water inlet pipe is attached to the inlet at the rear of the appliance by removing the White cap and screwing on the inlet pipe.
-
Page 15: First Time Use
P a g e | 15 FIRST TIME USE Before first use, the appliance must be loaded with dishwasher salt. • Remove the basket from the bottom of the appliance • Unscrew the cap from the salt container • Add 1 Litre of water to the salt container. •... - Page 16 P a g e | 16 ADJUSTING SALT FOR WATER HARDNESS The water hardness/salt level must be set according the water condition in your local area. The water softener is designed to remove minerals and salts from the water, which would have a detrimental or adverse effect on the operation of the appliance.
-
Page 17: Loading The Appliance
P a g e | 17 LOADING THE APPLIANCE NOTE – Ensure all dishes and cutlery are dishwasher proof, or they may become damaged. Items such as wooden utensils, bone china, copper, or synthetic materials are not suitable. Always check with the manufacturer. WARNING –... - Page 18 P a g e | 18 LOADING THE APPLIANCE We recommend specific loading to ensure maximum performance*. • Cutlery must be placed on the provided cutlery tray. Knife Serving fork Fork Soup spoon Teaspoon Dessert spoon Ladle The bottom basket rack can be laid flat for larger items. *in accordance with EN60436:2020/A11:2020 RH2TTDW201 Table Top Dishwasher Revision 1.5...
-
Page 19: Detergent
P a g e | 19 DETERGENT Detergent should be used on every cycle. This appliance uses less detergent than a conventional dishwasher, so must be adjusted accordingly. Shorter programs will not dissolve full tablets, or more than 1 tablespoon of detergent. Detergent should be added to the appropriate location inside the appliance. -
Page 20: Programs
P a g e | 20 PROGRAMS Select the most appropriate cycle by pressing the ‘P’ button to cycle through the programs. Program Information Description Det. Time Energy Water Amt. (min) (kWh) Standard programme, Wash (50℃) 0.396 Suitable for normally Rinse soiled tableware and the Rinse (72℃) -
Page 21: Usage Instructions
P a g e | 21 USAGE INSTRUCTIONS Load the appliance in an appropriate manner as outlined in this manual, add the required detergent, and close the door. Once the door is closed, turn the appliance on and follow the water fill instructions in this manual. -
Page 22: Cleaning Instructions
P a g e | 22 CLEANING INSTRUCTIONS WARNING – Never operate this appliance without the filters installed. WARNING – before cleaning or maintenance, make sure the appliance is switched off at the mains, and any residual water is drained, with the tap switched off. -
Page 23: Error Codes
P a g e | 23 ERROR CODES Longer than • Flow meter failure expected inlet • Drain valve failure time • Pump failure • Only a qualified technician can repair Not reaching • Heating tube anomaly the required • Thermostat anomaly temperature •... -
Page 24: Problem Solving
P a g e | 24 PROBLEM SOLVING Appliance does not turn • Check it is plugged in • Check the plug socket operates correctly using another appliance • Check the fuse Water not removed • Check the drain hoses are not twisted or from appliance at the trapped end of the cycle... - Page 25 P a g e | 25 If you are still experiencing difficulties with the appliance, please contact us BEFORE returning the appliance to the retailer it was purchased from: Website: mda.russellhobbs.com Telephone: 0345 208 8750 Address: Product Care Customer Service, Green Bank Business Park, Hindley Green, Wigan, WN2 4AY RH2TTDW201 Table Top Dishwasher Revision 1.5...
-
Page 26: Technical Specification
Product fiche created in pursuant to Commission Regulation (EU) 2019/2022 of 1 October 2019 Supplier's name or Trade Mark: Russell Hobbs Supplier's Address: Unit 1, Green Bank Business Park, Wigan, WN2 4AY / PCT (NI) Ltd, Belfast, BT5 5AD. Model Identifier: RH2TTDW101 W/B Product Type Freestanding Value Value Height 43.5... - Page 27 P a g e | 27 IMPORTANT! CLEAN Wash the filters and inside with warm water every cycle. CYCLE This product is guaranteed for 12 months from the date of the original purchase. If any defect arises due to faulty materials or workmanship, the faulty product must be returned to the place of purchase.
- Page 28 Made by Product Care Trading Limited under license from Spectrum Brands (UK) Limited. Product Care Trading Limited, Wigan, WN2 4AY/ PCT (NI) Ltd, Belfast, BT5 5AD. Russell Hobbs is the registered trademark of Spectrum Brands (UK) Ltd. Russell Hobbs Support: call 0345 208 8750 or visit mda.russellhobbs.com...
Need help?
Do you have a question about the RH2TTDW101 and is the answer not in the manual?
Questions and answers
Doesn,t work at all.akes a motor noise and the tap water symbol is on despite it,s being manually filled
The issue could be that there is not enough water pressure to operate. Even if the appliance is manually filled, it must be switched on during filling. If it was not switched on, the machine may not detect the water, causing the motor noise and displaying the tap water symbol.
This answer is automatically generated
Hi I’m quite unsure where to put the salt, I’ve removed the cap as instructed but there is not anywhere to put the salt?
After removing the cap, you put the salt into the salt container located at the bottom of the appliance. Use a funnel to add 130g of dishwasher-specific salt into the container.
This answer is automatically generated
How long is the drainage pipe on RH2TTDW101 W/B