
Related Manuals for Davey Spa Power SP800


Summary of Contents for Davey Spa Power SP800
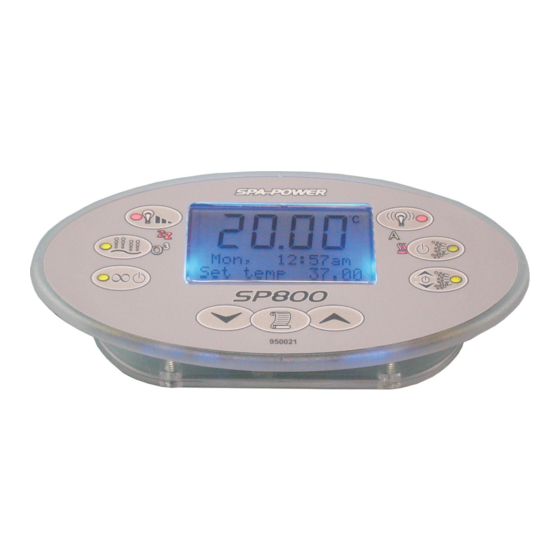
- Page 1 SP800 Models: SP800-20, SP800-30, Q800AU-20, Q800-30 Single/ 3 phase models incorporating variable speed drive pumps and audio equipment controls User’s Guide...
-
Page 2: Table Of Contents
The system must be installed in such a way live parts are not accessible by a person in the pool or SPA. If the supply cord is damaged, please refer to Davey water products or Davey authorised service agent for repair or replacement to avoid hazard. - Page 3 - Clock ........................Pg 20 7.4.1 - Setting the clock ....................Pg 21 - User Alarm ......................Pg 22 7.5.1 - Configuring a user alarm ................... Pg 22 7.5.2 - Disabling a user alarm ..................Pg 23 - Sleep timer......................Pg 23 7.6.1 - Configuring a sleep time ..................
-
Page 4: Introduction
1 Introduction Congratulations on choosing one of the top of the line Spa Power control systems by Davey Water Products. This controller offers a large range of possible accessories, a user friendly touchpad and superior components. It makes use of the latest electronics, display and sensor technology to provide you with the most sophisticated controller in its class. -
Page 5: Led Indicators
1.3 LED Indicators Auto (Non-24HR circ model) This LED is green when automatic control is enabled and off when pump 1 is under manual control. In automatic “PUMP AUTO” pump 1 runs as required to heat the pool and ensure minimum filtration times are met. If the indicator is blinking it means that the water sensor is not detecting any water in the heater housing. -
Page 6: Pump Selection Page
1.4 Pump Selection Page Before reading the following user guide please take note of your pump type then refer to the page stated to learn how to operate your spa pool controller. Use the table below to determine which pump type you have on your spa. -
Page 7: User Guide Quick Reference
Section 2.0 SP800 User’s Guide Quick Reference 2.1 Pump 1 Operation 2.1.1 Two Speed (No 24hr circulation pump) Pump 1A button: Push to change pump mode (PUMP AUTO, PUMP ON, PUMP OFF) Pump 1B button: Push to change pump speed (LOW, HIGH) 2.1.2 Two Speed (24hr circulation pump fitted) Pump 1A button: Push to turn pump on/off Pump 1B button: Push to change pump speed (LOW, HIGH) - Page 8 2.3 Variable Speed Blower Operation Push button to turn blower on/off and select speed Use the UP and DOWN buttons to adjust blower speed For more detailed information please see section 5. 2.4 Variable Colour Light Operation Light level button: Push to turn light on/off and alter brightness. Light mode button: Push to change the light effects.
-
Page 9: Pump Operation
Pump Operation 3.1 Pump 1 (Two speed, no 24HR circulation pump fitted) Pump 1 is controlled via two touch pad buttons - one to turn the pump on/off and another to change its speed. When the spa is running in PUMP AUTO mode, pressing either button will deactivate that mode and set the pump running in low speed. -
Page 10: Pump 1 (Two Speed, 24Hr Circulation Pump Fitted)
3.3 Pump 1 (Two speed, 24HR circulation pump fitted) This pump is controlled via two touch pad buttons one to turn the pump on/off and another to change its speed. The mode and pump speed selected by these buttons are shown for a few seconds on the LCD display as well as being indicated by the pump button LEDs. -
Page 11: Pump 1A & 1B (Single Speed Pumps, 24Hr Circulation Pump Fitted)
3.5 Pump 1A & 1B (Single speed pumps, 24hr circulation pump fitted) Two pushes of the Pump 1A button cycles the pump as follows: Push 1 (Pump On) LCD displays “PUMP ON”, button LED green. Push 2 (Pump Off) LCD displays “PUMP OFF”, button LED off. Two pushes of the Pump 1B button cycles the pump as follows: Push 1 (Pump On) LCD displays “PUMP ON”, button LED green. -
Page 12: Pump Speed Mode
Two pushes of the Pump 1B button cycles the pump as follows: Push 1 (Pump On) LCD displays “PUMP ON”, button LED green. Push 2 (Pump Off) LCD displays “PUMP OFF”, button LED off. Notes: 1. If Pump 1B is left on, this pump will automatically switch off after 25 minutes. 2. -
Page 13: Auxillary On/Off
4 Auxiliary On/Off (pump, blower, light) Two pushes of the Auxiliary button cycles the outlet as follows: Push 1 (Aux 1) LCD displays “AUX 1 OFF”, button LED off. Push (On/Off) The Scroll button can be used to turn the Auxiliary 1 input ON or OFF. Push 2 (Aux Off LCD displays “AUX OFF”, button LED off. -
Page 14: Adjustable Speed Mode(Spvsb)
5.1 Adjustable Speed Mode (SPVSB) In the adjustable speed mode the UP and DOWN buttons are used to set the blower to one of 9 dif- ferent speeds. On the first press of UP or DOWN the LCD will display “BLOWER SPEED” along with a bar graph showing the current speed setting. -
Page 15: Adjustable Light Intensity Mode
6.1 Adjustable Light Intensity Mode In the adjustable light intensity mode the UP and DOWN buttons are used to set the light between 2 and 100 percent of maximum intensity. On the first press of UP/DOWN the LCD will display “LIGHT ADJUST”... -
Page 16: Adjusting The Light Effect Mode Speed
6.2.1 Adjusting The Light Effect Mode Speed When a light effect mode has been selected (“SMOOTH CHANGE” to “STEP CHANGE” see above) the speed at which the light cycles through the available colours may be manually adjusted. On the first press of UP/DOWN the LCD will display “EFFECT SPEED” along with a bar graph showing the current setting. -
Page 17: Menu Structure
7 Menu Structure... -
Page 18: Main Menu
7 Navigating The Menu System The SP800 menu system provides a simple interface that allows you to view and modify most user options. These options include set temperature, sleep times, filtration time and filtration period to name a few. Throughout the entire menu system only three touch pad buttons are used - DOWN, SCROLL and UP. Generally, while you are within the menu system the lower line of text on the LCD Display will show the function of each of these buttons. -
Page 19: Set Temp
7.2 Set Temp (Temperature control) Select MAIN menu then push UP button once The SP800 automatically controls the main pump and heater to filter the water and maintain it at the desired temperature set by the user. The user can leave the system to look after the spa and know it will be at the correct temperature whenever he or she wants to use it. -
Page 20: User Timer
7.3 User Timer The user timer is a general-purpose countdown minute timer that can be preset to start at anywhere between 1 and 99 minutes. You can set it when you get into the spa to have it remind you when it’s time to get out. -
Page 21: Setting The Clock
7.4.1 Setting The Clock 1. Select the clock menu item from within the main menu. 2. Press the SCROLL button to begin setting the clock. 3. Use the UP and DOWN buttons to select the desired clock mode (12hr or 24hr). 4. -
Page 22: User Alarm
7.5 User Alarms The SP800 controller has nine user programmable alarms that you can configure to go off at a preset time while you are using the spa. These alarms function similarly to a regular clock alarm but with the additional benefit that you can also specify which days the alarm should operate. -
Page 23: Disabling A User Alarm
7.5.2 Disabling A User Alarm If you want to disable a user alarm follow the procedure outlined above until you reach step 4. At this point use the UP and DOWN buttons to adjust the weekday setting until no days are selected (see display below). Press the SCROLL button to save the new setting and return to the user alarms submenu. - Page 24 3. Press SCROLL to start modifying the sleep start day. 4. Use the UP and DOWN buttons to select the desired weekdays that the sleep period will operate. There are 15 possible weekday settings to choose from -Monday to Sunday and various combinations of each. 5.
-
Page 25: Disabling A Sleep Time Period
7.6.2 Disabling A Sleep Time Period If you want to disable a sleep period follow the procedure outlined in Configuring a sleep time until you reach step 4. At this point use the UP and DOWN buttons to adjust the weekday setting until no days are selected. -
Page 26: Maintenance Timer Configuration
7.7.1 Maintenance Timer Configuration The installer, serviceman or owner can fill in the table below to help keep track of what settings have been entered into the controller. Timer Name Period (Weeks) Description/Notes 1. General Service 2. Cabinet Service 3. Replace Filter 4. -
Page 27: Configuring A Maintenance Timer
4. Press the DOWN button to reset the week count to zero. 5. Press the SCROLL button to confirm and move to the next field. 7.7.3 Configuring A Maintenance Timer Follow these steps to modify the total number of weeks or the number of elapsed weeks for a given maintenance timer: 1. -
Page 28: Miscellaneous Options Submenu
7.8 Miscellaneous Options Submenu The miscellaneous options menu contains convenience options that primarily allow you to customise the look of the poolside touch panel. None of the options have any effect upon the basic spa control functions such as pump operation or heating. Select MAIN menu then push UP button seven times 7.8.1 Key Clicks (on/off) By default the touch pad will beep whenever a button is pressed, however key clicks (beeps) may be... -
Page 29: Main Display
7.8.2 Main Display The SP800 touch pad LCD consists of two lines of text and four numerical digits. The display typically shows three quantities - pool temperature, set temperature and the clock (weekday and time). By default the pool temperature is displayed on the numerical digits leaving the clock and set temperature on the two lines of text. -
Page 30: Panel And Pool Light Synchronisation (On/Off)
Please note that the backlight intensity setting only has effect when the pool is in use. After 90 minutes of touch pad inactivity (no button presses) the backlight intensity will automatically return to a fixed 34% setting. This is to ensure long life of the backlight LEDs. As soon as you press a button on the touch pad your custom setting will be restored. -
Page 31: Heat Control
7.9.3 Heat Pump The Davey SP800 and SP800 Controllers are fitted with heat pump connectivity to control your heat pump as a heating or cooling device. If a heat pump is fitted, the options for heating and cooling are: HP HEAT ONLY Only the heat pump will operate - in heating mode (default option). -
Page 32: Changing The Heat Pump Setting (If Enabled)
corresponding Heating or Cooling mode. If set to Heating mode, set the heat pump temperature to the maximum available on the heat pump. If set to Cooling mode, set the heat pump temperature to the minimum available on the heat pump. The spa controller has been designed to operate with any generic heat pump that does not require soft shutdown. -
Page 33: Adjusting The Filtration Time
This feature is especially useful in warmer climates where very little automatic heating (and hence water filtration) is necessary to keep the pool water at the set temperature. Automatic filtration consists of two user adjustable settings - Filtration Time and Filtration Period. These settings are located in the advanced options submenu. -
Page 34: Ozone On When Spa Is In Use (If Fitted)
7.9.10 Ozone On When Spa is in Use (if fitted) The user has the ability to turn the ozone off when the spa is being used. If a button on the touchpad is pressed then the controller will turn the ozone unit off and wait 30 minutes before turning it back on. 7.9.11 Changing the Ozone Setting (if enabled) 1. -
Page 35: Stereo Controls
7.11 Stereo Controls The SP800 is designed to interact with a Sony DSX-S100 Digital Media Player via infra-red if installed. The SP800 is able to replicate most of the functionality of the Sony RM-X151 Remote Commander supplied with the unit. Ensure you familiarise yourself with the Operating Instructions provided with the DSX-S100. MAIN MENU STEREO CONTROLS STEREO CONTROLS... -
Page 36: Changing Tracks/Tuning/Seeking
Push DOWN to move backward. MAIN MENU STEREO CONTROLS STEREO CONTROLS (ESC) SOURCE next OFF PAUSE next MUTE Push UP to move forward. Push STEREO CONTROLS FOLDER PREsetCH STEREO CONTROLS Push SOURCE next OFF next MODE next EXIT MAIN MENU STEREO CONTROLS STEREO CONTROLS 7.11.5 Changing Tracks/Tuning/Seeking... -
Page 37: Additional Features
8 Additional Features 8.1 Touch Pad Key Lock The SP800 touch pad buttons can be locked to prevent unauthorised people from using the spa or modifying set up options. While the key lock is active button presses are ignored, however the LCD Display will temporarily show “KEYS LOCKED”... -
Page 38: Display Reversing
8.5 Display Reversing The display can be reversed so it can be read from inside or outside of the spa pool, the display will revert back to default state after 30 minutes of inactivity. To reverse the display press the UP and DOWN buttons simultaneously To restore the display press the UP and DOWN buttons again. -
Page 39: Self Diagnostic Error Codes
9 Self-Diagnostic Error Codes The Spa Power 800 controller has extensive self diagnostic capabilities. In the event of a problem it will indicate a warning or error according to the nature of the problem. The spa will continue operating if a warning is produced but user intervention or service is required for errors. - Page 40 Error 4 (“NO WATER SENSOR”) - No Water Sensor This error indicates a problem with the optical water sensor in the heater. The problem may be caused by the sensor being disconnected or by damage to the sensor. Try to reset the spa. If there is still a problem then contact your spa pool supplier.Error 5 (“OVER TEMP”) Over Temperature This error indicates that one of the digital temperature sensors in either the heater or pool has detected a temperature of 45ºC or more.
- Page 41 Warnings Warning 1 (“TEMP SENSOR FAILURE”) - Temperature sensor failure This warning indicates that one of the two digital temperature sensors in either the heater or pool is no longer functioning correctly. The spa is able to continue operating using the other sensor, however there is probably a fault.
- Page 42 Levels of sanitiser are important to prevent the build up of bacteria, and algae in the pool water. Chlorine is not the only sanitiser available to do this. Other sanitisers are Bromine, Ozone. Damage to the element, thermostat pockets and associated metalwork due to the poor maintenance of water chemistry is not covered by warranty. Your Local Davey Dealer is:...
- Page 44 Use of an App is not a substitute for the User’s own vigilance in ensuring the product is working to expectation. Use of a Smart Product App is at the User’s own risk. To the fullest extent permitted by law Davey disclaims any warranties regarding the accuracy, completeness or reliability of App data.
Need help?
Do you have a question about the Spa Power SP800 and is the answer not in the manual?
Questions and answers