Advertisement
Controlling Logic/MainStage
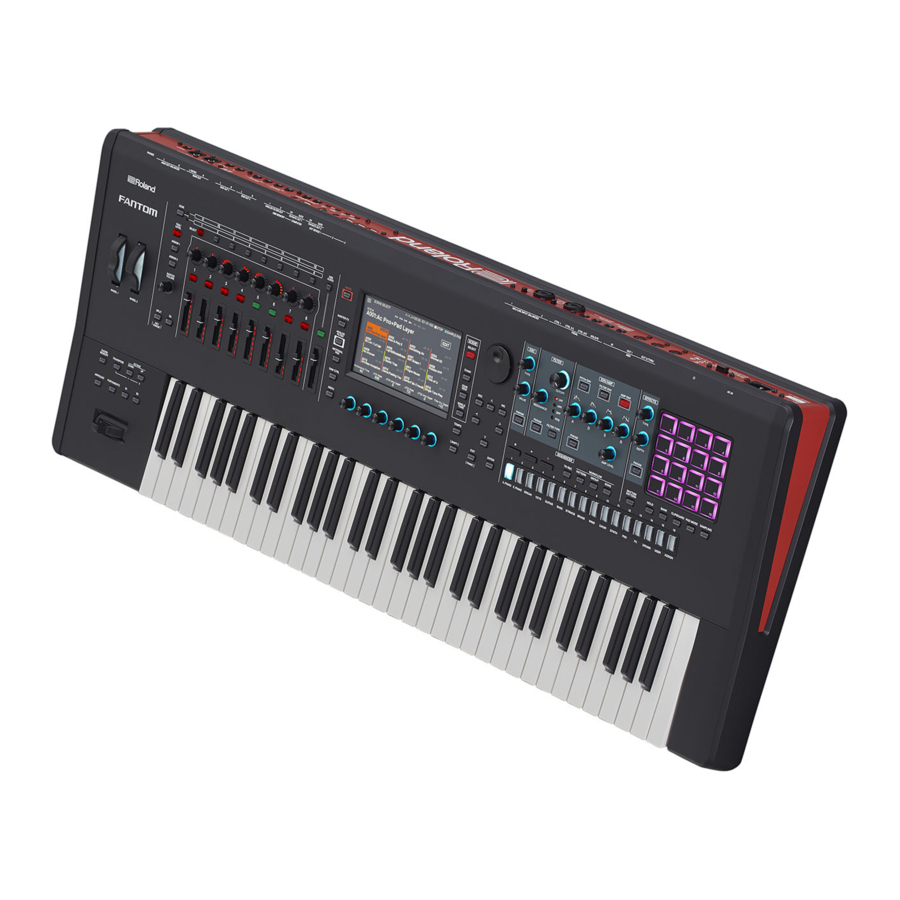
Introduction
By using the Logic/MainStage plug-in, you can control Logic Pro X or MainStage from the FANTOM.
The main operations of Logic Pro X/MainStage can be performed directly from the FANTOM, and you can use numerous controllers including the FANTOM's screen, sliders/knobs, buttons, and pads.
 NOTE
NOTE
This document explains procedures for the following versions of Logic Pro X and MainStage.
Logic Pro X: 10.4.4
MainStage: 3.4.2
Menus and other aspects might differ for other versions.
In this document, we refer to "the Logic/MainStage plug-in," but in the case of MainStage, this functionality is actually provided not as a plug-in but by installing a dedicated profile. If you are using MainStage, any references in this document to "plug-in" should be read as "profile."
Preparing to Use the Plug-In
Preparing the FANTOM
Specify the FANTOM's USB drive.
- Press the [MENU] button.
- Touch <SYSTEM>.
- Touch the <GENERAL> tab.
- Select "USB Driver," and set it to "VENDOR."
- Press the [WRITE] button to save the system settings.
- Turn the FANTOM's power off and on again.
Installing the USB Driver
Install the USB driver on your Mac.
- From the product support page, download the FANTOM Driver.
To obtain the latest USB driver, access the following URL and download the driver for the model you're using. https://www.roland.com/support/ - Install the driver as directed by the procedure given on the download page.
Installing the Plug-In
Install the Logic/MainStage plug-in on your Mac.
- Download the plug-in from the product support page. Access the following URL and download the plug-in https://www.roland.com/support/
- Decompress the downloaded ZIP file.
Logic Pro X users
- Double-click "FantomLogicCSPlugin_1.0.0.pkg."
Installation begins.
MainStage users
- Double-click "Fantom_MainStageProfile_1.0.0.pkg."
Installation begins.
- Proceed with installation as directed by the screen.
- When the indication "Installation is completed" appears, click the [Close] button.
Using the DAW Control Plug-In
Logic Pro X users
- Use a USB cable to connect the FANTOM to your Mac.
- Start Logic Pro X.
- In Logic Pro X, open the project that you want to use.
- From the [Logic Pro X] menu, select [Control Surfaces] 0 [Setup] to open the setting screen.
- From the list, choose "FANTOM-6 7 8."
- As the input port and output port, specify "FANTOM-6 7 8 DAW CTRL."
- Press the FANTOM's [DAW CTRL] button to make it light.
If the connection is successful, the DAW CTRL function is enabled and the following screen is shown on the FANTOM's display. - Select the "type" to connect using DAW CTRL.
In this example, tap <MAINSTAGE / LOGIC>.

- When you want to stop using DAW control, press the lit [DAW CTRL] button to turn off the DAW CTRL function.

 MEMO
MEMO
Control Surface port selection is available only if show Advanced Tool is selected and "Additional Option"0"Control Surface" is selected.
MainStage users
- Use a USB cable to connect the FANTOM to your Mac.
- Start MainStage.
- In MainStage, open the concert that you want to use.
- Press the FANTOM's [DAW CTRL] button to make it light.
If the connection is successful, the DAW CTRL function is enabled and the following screen is shown on the FANTOM's display. - Select the "type" to connect using DAW CTRL.
In this example, tap <MAINSTAGE / LOGIC>.

- When you want to stop using DAW control, press the lit [DAW CTRL] button to turn off the DAW CTRL function.

MEMO
When you turn on the DAW CTRL function, there might be cases in which sound cannot be produced for a short time. This is due to the processing needed to load the Concert data for MainStage, and is not a malfunction.
NOTE
If the connection is not correct, a screen like the following appears.

- Verify that the USB cable is correctly connected.
- Check whether the driver is correctly installed.
Controlling Logic Pro X
When controlling Logic Pro X, you'll switch between three screens: the Mixer screen, the Track Edit screen, and the Transport screen.
In addition to using the [E1]–[E6] knobs, you can perform operations by directly touching or dragging icons and sliders in the screen.
Mixer Screen

| Icon | Explanation |
| Window Select | Switches screens. |
| Position | Indicates the locator position. |
| Transport | Performs play, stop, fast-forward, rewind, and record operations on Logic Pro X. |
| Set Marker | Sets a marker. |
| Redo | Executes redo. |
| Undo | Executes undo. |
| MIXER Window | Specifies each track's volume, pan, and solo/mute settings. |
MEMO
Depending on the track that's selected, some parameters might not be shown. Changes made in Logic such as the track name might not be immediately reflected in the FANTOM's screen.
| Knob | Explanation | |
| [E1] knob | Press the knob to switch between Track/Bank. | |
| Track | Turn the knob to switch tracks. | |
| Bank | Turn the knob to switch banks. | |
| [E2] knob | Press the knob to switch between Cursor/Value. | |
| Cursor | Turn the knob to move the cursor position. | |
| Value | Turn the knob to specify the value of the parameter selected by the cursor. | |
| [E3] knob Position | Turn the knob to specify the locate position. | |
| [E4] knob | Press the knob to switch cycle on/off. | |
| Start | Turn the knob to specify the start position of the cycle region. | |
| [E5] knob | Press the knob to switch cycle on/off. | |
| End | Turn the knob to specify the end point of the cycle region. | |
| [E6] knob | Press the knob to lock/unlock the master volume. If this is locked, turning the [E6] knob will not change the value. | |
| Master Volume | Turn the knob to set the master volume. | |
Track Edit Screen

| Icon | Explanation |
| Window Select | Switches screens. |
| Position | Indicates the locator position. |
| Transport | Performs play, stop, fast-forward, rewind, and record operations on Logic Pro X. |
| Set Marker | Sets a marker. |
| Redo | Executes redo. |
| Undo | Executes undo. |
| Track of Bank | Selects the track within the bank. |
| Track Mixer | Adjusts the volume, pan, and solo/mute settings of the selected track. |
| Smart Control | Adjusts the Smart Control parameters of the selected track. |
MEMO
Depending on the track that's selected, some parameters might not be shown. Changes made in Logic to the Smart Control parameter names and Track names etc. might not be immediately reflected in the FANTOM's screen.
| Knob | Explanation | |
| [E1] knob | Press the knob to switch between Track/Bank. | |
| Track | Turn the knob to switch tracks. | |
| Bank | Turn the knob to switch banks. | |
| [E2] knob | Press the knob to switch between Cursor/Value. | |
| Cursor | Turn the knob to move the cursor position. | |
| Value | Turn the knob to specify the value of the parameter selected by the cursor. | |
| [E3] knob Position | Turn the knob to specify the locate position. | |
| [E4] knob | Press the knob to switch cycle on/off. | |
| Start | Turn the knob to specify the start position of the cycle region. | |
| [E5] knob | Press the knob to switch cycle on/off. | |
| End | Turn the knob to specify the end point of the cycle region. | |
| [E6] knob | Press the knob to lock/unlock the master volume. If this is locked, turning the [E6] knob will not change the value. | |
| Master Volume | Turn the knob to set the master volume. | |
Transport Screen

Tab.1
| Icon | Explanation |
| Window Select | Switches screens. |
| Position | Indicates the locator position. |
| Transport | Performs play, stop, fast-forward, rewind, and record operations on Logic Pro X. |
| Set Marker | Sets a marker. |
| Redo | Executes redo. |
| Undo | Executes undo. |
| Position of Locate | Indicates the locate position. |
| Status Indicator | Indicates the cycle status. |
| Cycle Position | Indicates the cycle region. |
Tab.2
| Knob | Explanation | |
| [E2] knob Level | Turn the knob to set the master volume. | |
| [E3] knob Position | Turn the knob to specify the locate position. | |
| [E4] knob | Press the knob to switch cycle on/off. | |
| Start | Turn the knob to specify the start position of the cycle region. | |
| [E5] knob | Press the knob to switch cycle on/off. | |
| End | Turn the knob to specify the end point of the cycle region. | |
| [E6] knob | Press the knob to lock/unlock the master volume. If this is locked, turning the [E6] knob will not change the value. | |
| Master Volume | Turn the knob to set the master volume. | |
Shift Menu Screen
If you hold down the FANTOM's [SHIFT] button, the Shift menu screen appears, allowing you to perform other operations. While continuing to hold down the [SHIFT] button, touch an icon or operate the [E1]–[E6] knobs.
You can access the Shift menu screen from any screen.

| Icon | Explanation | |
| Save | Saves the project. The already-saved project is overwritten. | |
| Track Menu | Edits the track settings. | |
| +Track MIDI | Adds a MIDI track. | |
| +Track Audio | Adds an Audio track. | |
| Delete Track | Deletes the track. | |
| Open/Close Browser | Opens the corresponding browser in Logic Pro X. | |
| List Editor | Opens the list editor in Logic Pro X. | |
| Note Pad | Opens the note pad in Logic Pro X. | |
| LOOP Browser | Opens the loop browser in Logic Pro X. | |
| Media Browser | Opens the media browser in Logic Pro X. | |
| Count In/Metronome | Edits the count-in and metronome settings. | |
| Count In | Turns the count-in on/off. | |
| Metronome | Turns the metronome on/off. | |
| [E1] knob | Press the knob to switch between Recall Solo/Clear. | |
| Recall Solo | ||
| [E2] knob | Press the knob to unmute all tracks. | |
| Unmute All | ||
| [E3] knob Move | Turn the knob to move the cycle position region while preserving its length. | |
| [E4] knob Bar | Press the knob to switch to "measures" as the unit for adjusting the cycle region start position and end position. | |
| [E5] knob Beat | Press the knob to switch to "beats" as the unit for adjusting the cycle region start position and end position. | |
| [E6] knob | Press the knob to lock/unlock the master volume. If locked, turning the [E6] knob will not change anything. | |
| Master Volume | Turn the knob to adjust the master volume. | |
Using the Control Knobs and Sliders for Control
When the DAW CTRL function is on, you can use the FANTOM's control knobs and sliders to operate Logic Pro X.
- Press the [ASSIGN1] button and [ASSIGN2] button simultaneously.

The two buttons are lit green. - Use control knobs [1]–[8] and sliders [1]–[8] to operate Logic Pro X.

| Controller | Explanation |
| Control knobs [1]–[8] | Control the Smart Control parameters of the selected track. |
| Sliders [1]–[8] | Adjust the volume of each track. |
- Press any one of the [PAN/LEVEL], [ASSIGN 1], or [ASSIGN 2] buttons to return to normal operation.
MEMO
When you turn off the DAW CTRL function, the knob indications return to the function that had been previously selected. You cannot set these functions when the DAW CTRL function is off.
Using the Sequencer Buttons for Control
When the DAW CTRL function is on, you can use the buttons of the FANTOM's sequencer section to operate Logic Pro X.
| Controller | Explanation |
| [■ STOP] button | Stops the Logic Pro X project. |
| [►PLAY] button | Plays the Logic Pro X project. |
| [● REC] button | Records on the Logic Pro X project. |
Using the Pads for Control
When "DAW Control" is selected as the PAD MODE for the FANTOM, you can use the FANTOM's pads to control Logic Pro X.
| Pad | Function | Explanation |
| [1]–[4] | Recall Screen Set 1–4 | Recall screen sets 1–4. |
| [5] | ZOOM Horizontal IN | Zooms-in horizontally. |
| [6] | ZOOM Horizontal OUT | Zooms-out horizontally. |
| [7] | ZOOM Vertical IN | Zooms-in vertically. |
| [8] | ZOOM Vertical OUT | Zooms-out vertically. |
| [9] | Open Marker List / Close Window | Opens/closes the marker list. |
| [13] | Go to Next Marker | Moves to the next marker. |
| [14] | Go to Previous Marker | Moves to the previous marker. |
| [15] | Song Position by measure | Advances the locate position by one measure. |
| [16] | Play or Stop | While playing, operates as the stop button. While stopped, operates as the play button. |
MEMO
- When PAD MODE is set to "DAW Control," you can continue using the pads to control Logic Pro X even if you turn off the DAW CTRL function.
- [5]–[8] make sure that Logic Pro X window is selected on Mac, in some case this command can not work.
Controlling MainStage
When controlling MainStage, you'll use the Control Screen.
In addition to using the [E1]–[E6] knobs, you can perform operations by directly touching or dragging icons and sliders in the screen.
Control Screen

| Icon | Explanation |
| Patch List | Shows the patch list. |
| Current Set Name | Shows the name of the currently selected set. |
| Current Patch List | Shows the name of the currently selected patch. |
| Smart Control | Edit the Smart Control parameters. |
MEMO
- Changes made in MainStage to parameter names such as the Set name, Track name, and Smart Control parameter names might not be immediately reflected in the FANTOM's screen.
- The Smart Control parameter values change according to the settings in MainStage. It is not necessarily the case that operations on the FANTOM will be able to set the parameter all the way to its minimum value or maximum value. Make prior settings in MainStage as necessary to reach the desired range.
- In case of problem, select the Mainstage → Edit → "Assignement & Mappings" tab and check if the port is set as follows.
FANTOM 6 7 8
→ Pitch Bend, Expression, Sustain, Modulation
FANTOM 6 7 8 DAW CTRL
→ Volume, Smart Knobs
If the MainStage project was already assigned to another controller, it can happen it takes of setting.
| Knob | Explanation | |
| [E1] knob Set- | Press the knob to recall the previous set. | |
| [E2] knob Set+ | Press the knob to recall the next set. | |
| [E3] knob Patch- | Press the knob to recall the previous patch. | |
| [E4] knob Patch+ | Press the knob to recall the next patch. | |
| [E6] knob | Press the knob to lock/unlock the master volume. When locked, turning the [E6] knob does not change anything. | |
| Master Volume | Turn the knob to adjust the master volume. | |
Using the Control Knobs for Control
When the DAW CTRL function is on, you can use the FANTOM's control knobs to operate MainStage.
- Press the [ASSIGN1] button and [ASSIGN2] button simultaneously.

The two buttons are lit green.
- Use control knobs [1]–[8] to operate MainStage.

| Controller | Explanation |
| Control knobs [1]–[8] | Control the Smart Control parameters. |
- Press any one of the [PAN/LEVEL], [ASSIGN 1], or [ASSIGN 2] buttons to return to normal operation.
MEMO
When you turn off the DAW CTRL function, the knob indications return to the function that had been previously selected. You cannot set these functions when the DAW CTRL function is off.
Using the Pads for Control
When "DAW Control" is selected as the PAD MODE for the FANTOM, you can use the FANTOM's pads to control MainStage.
| Pad | Function | Explanation |
| [1] | Next Set | Recalls the next set. |
| [2] | Previous Set | Recalls the previous set. |
| [3] | Next Patch | Recalls the next patch. |
| [4] | Previous Patch | Recalls the previous patch. |
| [13] | MIDI PC INC | Sends a Program Change message. The value sent is incremented by one each time you press the pad. |
| [14] | MICI PC DEC | Sends a Program Change message. The value sent is decremented by one each time you press the pad. |
MEMO
When PAD MODE is set to "DAW Control," you can continue using the pads to control MainStage even if you turn off the DAW CTRL function.
Controlling Ableton Live
Follow these steps to control the major functions of Ableton Live from the FANTOM, and to access many of the FANTOM's controllers like the screen, sliders/knobs, buttons, pads and so on (applies to version 2.5 or later).
Getting Ready
Preparing the FANTOM
Specify the FANTOM's USB drive.
- Press the [MENU] button.
- Touch <SYSTEM>.
- Touch <GENERAL> tab.
- Select "USB Driver," and set it to "VENDOR."
- Press the [WRITE] button to save the system settings.
- Turn the FANTOM's power off and on again.
Installing the USB Driver
For windows users
Here are the steps to install the USB driver in Windows.
- Connect your computer to the FANTOM's USB port via USB cable.
The driver is installed automatically.
* Do not use a USB cable that is designed only for charging. Charge-only cables cannot transmit data.
* The driver is not installed if your computer is not connected to the Internet.
For mac users
Install the USB driver on your Mac.
- From the product support page, download the FANTOM Driver.
To obtain the latest USB driver, access the following URL and download the driver for the model you're using. https://www.roland.com/support/ - Install the driver as directed by the procedure given on the download page.
Connecting
Configuring Ableton Live
- Start Ableton Live.
- Open the Preferences and select the "Link/MIDI" tab.
- In Control Surface, select "FANTOM," and set the INPUT/OUTPUT to "FANTOM-6 7 8 DAW CTRL".
Configuring the FANTOM
- Press the FANTOM's [DAW CTRL] button to make it light.
If the connection is successful, the DAW CTRL function is enabled and the following screen is shown on the FANTOM's display. - Select the "type" to connect using DAW CTRL.
In this example, tap <ABLETON LIVE>.

- When you want to stop using DAW control, press the lit [DAW CTRL] button to turn off the DAW CTRL function.

NOTE
If the connection is not correct, a screen like the following appears.

- Verify that the USB cable is correctly connected.
- Check whether the driver is correctly installed.
Operating Ableton Live
Switch between the SESSION VIEW and MIXER VIEW screens when controlling Ableton Live.
Aside from the [E1]–[E6] knobs, you can directly touch or drag the icons and sliders on the screen to operate the software.
SESSION VIEW screen

Tab.1
| Item | Explanation | |
| Shortcut | Use these to call up the commands. | |
 | SESSION VIEW Switches to SESSION VIEW. | |
 | MIXER VIEW Switches to MIXER VIEW. | |
 | MIDI Arrangement Overdub When this is turned on, the newly-recorded MIDI data is mixed with the MIDI clips in the arrangement. | |
 | Automation Arm When this is turned on, any manual edits you make to the parameters are recorded in the session clips and arrangement. | |
 | Re-Enable Automation All parameter automation that was disabled for the clip is enabled again. | |
 | Capture MIDI The phrase (MIDI notes) you just played is created as a new clip in each MIDI track being monitored. | |
 | Session Record Button Starts or stops overdub recording of clips for tracks that can be played back or recorded. | |
 | Play Button Resumes playback of the clip. | |
 | Stop Button Clip playback stops when the playback time set in Follow Action Time is exceeded. Note that this setting takes priority over the clip loop/ region setting. | |
 | Arrangement Record Button Starts recording to the arrangement. | |
 | Metronome Enables the metronome. | |
| Scene | The scene display on the right side do not change. | |
Tab.2
| Knob | Explanation | |
| [E1] knob | Turn the knob to select the clip or track. The direction of movement changes each time you press the [E6] knob (vertical: clip; horizontal: track). | |
| Clip cursor | ||
| [E3] knob | Turn the knob to set the tempo. | |
| Tempo | ||
| [E4] knob | This has the same effect as pressing the stop button for all tracks. | |
| Stop All Clips | ||
| [E5] knob | Reverts to the previous state. | |
| Undo | ||
| [E6] knob | Turn the knob to move the display position. | |
| Screen display position | The direction of movement switches between horizontal and vertical each time you press the knob. | |
MIXER VIEW screen

Tab.1
| Item | Explanation | |
| Send | Two send knobs are shown from the top for the audio track. | |
| Shortcut | Use these to call up the commands. → "SESSION VIEW screen" | |
| Master | The master track is always shown on the right side. | |
| Track Activator |  | Enable this to hear the track. |
| Solo/Cue |  | When the solo/cue switch for the session mixer master track is set to solo, all other tracks are muted and only the current track can be heard. When the solo/cue switch for the session mixer master track is set to cue, the current track is sent to the channel specified by the cue output selector. |
| Arm Recording |  | You can record when this is enabled. |
Tab.2
| Knob | Explanation | |
| [E1] knob | Turn the knob to select the track. | |
| Track | ||
| [E2] knob | Turn the knobs to move the cursor within the track. | |
| Cursor | ||
| [E3] knob | Turn the knob to set the tempo. | |
| Tempo | ||
| [E5] knob | Reverts to the previous state. | |
| Undo | ||
| [E6] knob | Turn the knob to move the display position. | |
| Screen display position | ||
DAW CTRL for Operating the Control Knobs and Sliders (ASSIGN1 + ASSIGN2)
You can use a DAW CTRL controller to adjust even more parameters.

PAD MODE (DAW CTRL) for Operating the Pads
The drum rack can be played using DAW CTRL in PAD mode.
 for Operating the Pads")
Documents / Resources
References
Download manual
Here you can download full pdf version of manual, it may contain additional safety instructions, warranty information, FCC rules, etc.
Advertisement


Need help?
Do you have a question about the FANTOM-6 and is the answer not in the manual?
Questions and answers