Table of Contents
Advertisement
Advertisement
Table of Contents

Related Manuals for Vivitar Vivicam 3750


Summary of Contents for Vivitar Vivicam 3750
-
Page 1: User Manual
V3750 User Manual English 041020TP... -
Page 2: Fcc Statement
FCC STATEMENT This device complies with Part 15 of the FCC Rules. Operation is subject to the following two conditions: (1) This device may not cause harmful interference, and (2) This device must accept any interference received, including interference that may cause undesired operation Note: This equipment has been tested and found to comply with the limits for Class B digital devices,... -
Page 3: Trademark Information
TRADEMARK INFORMATION Microsoft and Windows are U.S. registered trademarks of Microsoft Corporation. ® ® Pentium ® is a registered trademark of Intel Corporation. Macintosh is a trademark of Apple Computer, Inc. and MMC are trademarks. Other names and products may be trademarks or registered trademarks of their re spective owners. - Page 4 WARNINGS Do not use this camera if it is emitting smoke (or an unusual odor), if it becomes unusually hot to the touch, produces a peculiar noise, or exhibits any other abnormal conditions. Operating the camera in any of these circumstances may cause a fire or an electrical shock.
- Page 5 CAUTIONS Do not place this camera in a location affected by oil fumes or steam, such as near a cooking stove or humidifier. This may cause a fire or an electrical shock. Do not leave this camera in a location subject to extremely high temperatures, such as in a sealed vehicle or in direct sunlight.
-
Page 6: Table Of Contents
CONTENTS INTRODUCTION Overview ... 8 Package Contents ... 9 GETTING TO KNOW YOUR VIVICAM 3750 Features ... 11 LCD Monitor Icons ... 12 GETTING STARTED Installing Batteries ... 14 Inserting an SD Memory Card (optional accessory) ... 15 Attaching the Hand Strap ... 16 Setting the Date and Time ... - Page 7 TRANSFERRING RECORDED IMAGES AND VIDEOS TO YOUR COMPUTER Step 1: Install the USB Mass-Storage Driver ... 32 Step 2: Connecting the ViviCam 3750 to Your Computer ... 33 Step 3: Downloading Image and Video Files ... 34 INSTALLING PHOTOSUITE...35 INSTALLING PHOTOVISTA...36 INSTALLING ACROBAT READER...37...
- Page 8 Step 2: Connecting the ViviCam 3750 to Your Computer ... 40 Step 3: Running Your Application Software ... 41 MENU OPTIONS Record Menu ... 42 SETUP MENU ... 42 EV & WHITE BALANCE ... 43 Movie Menu ... 44 Playback Menu ... 45 SETUP MENU ...
-
Page 9: Introduction Overview
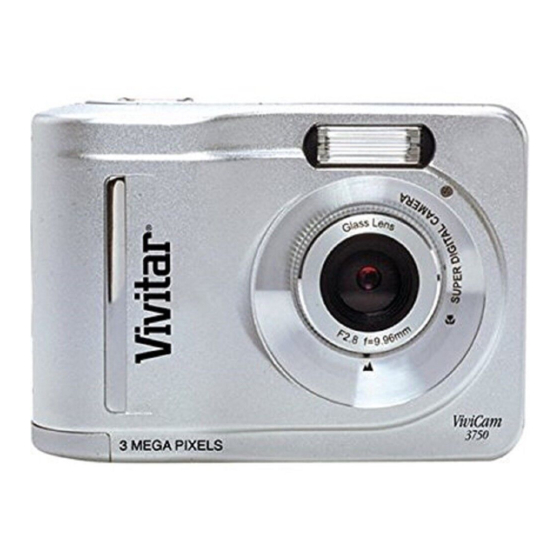
INTRODUCTION Overview Your new digital ViviCam 3750 delivers high quality images using a 3.1 Mega pixel sensor. Using the TFT color image LCD monitor, you can compose images and then examine them in detail. A auto-flash sensor automatically detects the shooting (lighting) conditions and determines whether the flash should be used. -
Page 10: Package Contents
Camera pouch Note: The accessories that come with your ViviCam 3750 may be different from those described in this manual due to the fact that different retailers often specify slightly different product inclusions and accessories to suit their market requirements, customer demographics, and geographical preferences. -
Page 11: Getting To Know Your Vivicam 3750
GETTING TO KNOW YOUR VIVICAM 3750 EN-10... -
Page 12: Features
Features 1. Shutter button 2. Focus dial Portrait focus Normal focus 3. Flash 4. Lens 5. Hand strap eyelet 6. VIDEO OUT jack 7. USB connector 8. Self-timer LED 9. LED indicator 10. LCD monitor Arrow button (up) Quality/Resolution button Display button Arrow button (left) Self-timer button... -
Page 13: Lcd Monitor Icons
LCD Monitor Icons Display icons - Still Image Record Mode: 1. Record mode 2. Battery level Full battery power Medium battery power Low battery power Virtually no battery power 3. Flash mode Automatic flash Automatic with Red-eye reduction Flash off 4. - Page 14 Display icons - Movie Mode: 1. Movie mode 2. Battery level 3. Recordable movie time available 4. Memory card indicator 5. EV compensation 6. White balance 7. Recording indicator (blinking) Display icons - Still-Image Playback Mode: 1. Playback mode 2. Battery level 3.
-
Page 15: Getting Started
GETTING STARTED You can use 2 AA size batteries (Alkaline, Ni-MH) to power the camera. Installing Batteries 1. Make sure the camera is turned off. 2. Slide the battery/memory card cover in the direction of the [OPEN] arrow. 3. Insert the batteries, noting correct polarity (+ and -). 4. -
Page 16: Inserting An Sd Memory Card (Optional Accessory)
Inserting an SD Memory Card (optional accessory) The ViviCam 3750 comes with internal memory, allowing you to store images and video clips in the camera. However, you can expand the memory capacity by using an optional SD (Secure Digital) memory card so that you can store additional images and video clips. -
Page 17: Attaching The Hand Strap
Attaching the Hand Strap To prevent accidental dropping of the ViviCam 3750, always use the strap. Attach the hand strap as follows: 1. Thread the small loop of the hand strap through the hand strap eyelet on the camera. 2. Pull the large loop through the small loop until the strap is firmly secured. -
Page 18: Setting Image Resolution And Quality
These settings affect the number of images that can be stored in memory, or on a memory card. As you get to know the ViviCam 3750, it is recommended that you try each quality and resolution setting to get an appreciation for the effects that these settings will have on your images. - Page 19 16MB internal memory or using an optional memory card from 8MB to 512MB: * The above data shows the standard testing results. The actual capacity varies according to the shooting conditions and setting. Note that the ViviCam 3750 has 16MB of internal memory of which 14MB can be used for image storage.
-
Page 20: Record Mode Capturing Images
RECORD MODE Capturing Images Your ViviCam 3750 is equipped with a color LCD monitor to compose images. 1. Turn the camera on by pressing the power (The ViviCam 3750 will always power-up in still-image record mode.) 2. If not in record mode, toggle the mode. -
Page 21: Normal Focus
Normal Focus The normal focus setting, suitable for scenery shooting, is used when the distance to the subject is greater than 5 feet. 1. Power on the camera. Make sure the camera is in Record mode. 2. Set the focus dial located on the front side of the camera to the position. -
Page 22: Self-Timer
Self-Timer The self-timer duration is ten seconds. Activate the self-timer by pressing the shutter button. The self-timer LED blinks slowly for seven seconds and then blinks rapidly for the last three seconds. This allows you to get into the scene when capturing group images. -
Page 23: Flash
Flash The flash is designed to function automatically when lighting conditions warrant the use of flash. You can capture an image using a flash mode suitable to your circumstances. If you change the flash mode, the camera will retain that setting even if the camera is turned off. - Page 24 The ViviCam 3750 has three flash modes: Automatic Flash (default), Automatic with Red-eye reduction and Flash Off. The modes appear, cyclically, when you press the button. The table below will help you choose the appropriate flash mode: Flash mode Description...
-
Page 25: Playback Mode
You can also view your images on the TV screen. First connect one end of the video cable to the VIDEO OUT jack of the ViviCam 3750. Then connect the other end to the video input jack of the TV. Toggle the... -
Page 26: Zoom Playback
Zoom Playback While reviewing your images, you may enlarge a selected portion of an image. This magnification allows you to view fine details. 1. Power on the camera, and toggle the to the mode. 2. Select the image that you want to view using the button. -
Page 27: Displaying Thumbnail Images
Displaying Thumbnail Images This function allows you to view as many as nine thumbnail images on the LCD monitor simultaneously so you may search for a particular image. 1. Power on the camera, and toggle the 2. Toggle the button until the thumbnail screen appears. -
Page 28: Deleting Images
Deleting Images You can delete an image or video clip or all images and video clips at once by using the Erase function in the Playback menu. To delete one image or video clip: 1. Press the button and move to ERASE by using the 2. - Page 29 To delete all images or video clips (at once): 1. Press the button and move to ERASE by using the 2. Select ERASE ALL by using the press the OK button. ERASE ALL menu appears on the screen. 3. Select [YES] by using the OK button to delete all images.
-
Page 30: Movie Mode Recording Video Clips
MOVIE MODE Recording Video Clips The movie mode allows you to record video clips at a resolution of 320 x 240 pixels. 1. Power on the camera, and toggle the to the mode. The amount of time available for movie recording is displayed on the LCD monitor. -
Page 31: Viewing Video Clips
Viewing Video Clips To view a recorded video clip, follow these steps: 1. Power on the camera, and toggle the 2. Select the video clip you wish to view using the 3. Press the OK button to start. To pause playback at any time, press the OK button. * Press the OK button again to resume playback. -
Page 32: Transferring Recorded Images And Videos To Your Computer
To transfer images/video clips from the camera to your computer, follow these steps: Step 1: Install the USB mass-storage driver (Windows 98 only) Step 2: Connecting the ViviCam 3750 to your computer Step 3: Downloading image and video files System Requirements (Windows) -
Page 33: Step 1: Install The Usb Mass-Storage Driver
2. Click “DRIVER”. Follow the on-screen instructions to complete the installation. After the USB driver has been installed, restart your computer. Macintosh OS X computers For Mac OS X or higher, the computer will automatically recognize the ViviCam 3750 and load its own USB drivers. EN-32... -
Page 34: Step 2: Connecting The Vivicam 3750 To Your Computer
Note: When transferring images to the computer, there is no need to install any batteries into the ViviCam 3750. The camera will automatically power on when connected to the computer via USB cable. EN-33... -
Page 35: Step 3: Downloading Image And Video Files
Step 3: Downloading Image and Video Files When the camera is turned on and connected to your computer, it is considered to be a disk drive, just like a floppy disk or CD. You can download (transfer) images by copying them from the “removable disk” (“untitled” disk on a Macintosh) to your computer hard drive. -
Page 36: Installing Photosuite
Get your images ready and explore this amazing program. To install PhotoSuite: 1. Insert the CD-ROM that came with the ViviCam 3750 into your CD-ROM drive. The welcome screen appears. -
Page 37: Installing Photovista
To install PhotoVista: 1. Insert the CD-ROM that came with the ViviCam 3750 into your CD-ROM drive. The welcome screen appears. 2. Click “PHOTO VISTA”. Follow the on-screen instructions to complete the installation. -
Page 38: Installing Acrobat Reader
Follow the on-screen instructions to complete the installation. For Mac users: 1. Insert the CD-ROM that came with the ViviCam 3750 into the CD-ROM drive. 2. Select and double-click “Acrobat Reader”. 3. Select and double-click the language that you want. -
Page 39: User's Manual On Cd-Rom
Alternatively, browse the CD-ROM to find the PDF file. For Mac users: 1. Insert the CD-ROM that came with the ViviCam 3750 into the CD-ROM drive. 2. Select and double-click “Manual”. 3. Select and double-click the language that you want. -
Page 40: Using The Vivicam 3750 As A Pc Camera
USING THE VIVICAM 3750 AS A PC CAMERA Your ViviCam 3750 can act as a PC camera, which allows you to videoconference with business associates, or have a real-time conversation with friends or family. To use the ViviCam 3750 as a PC camera, follow these steps:... -
Page 41: Step 1: Install The Pc Camera Driver
5. Position the camera steadily on top of your computer monitor or use a tripod. Note: When using ViviCam 3750 as a PC camera, there is no need to install any batteries into the camera. The camera will automatically power on when connected to the computer via USB cable. -
Page 42: Step 3: Running Your Application Software
Step 3: Running Your Application Software (i.e. Windows NetMeeting) To use Windows NetMeeting for videoconferencing: 1. Go to Start Programs NetMeeting to launch the NetMeeting program. 2. Click the Start Video button to view live video. 3. Click the Place Call button. 4. -
Page 43: Menu Options Record Menu
MENU OPTIONS Record Menu You can use the Record menu to adjust exposure and white balance. You can also access the Setup menu in the Record menu. To access the Record menu, toggle the button to the mode and press the button. -
Page 44: Ev & White Balance
EV & WHITE BALANCE Exposure (EV) Your ViviCam 3750 adjusts the exposure of each scene automatically. However, if the subject is very dark, or very bright, you may override the camera's automatic exposure determination to make the subject brighter or darker. This is called EV compensation. -
Page 45: Movie Menu
White Balance Your ViviCam 3750 adjusts the white balance of each scene automatically. However, the images that your camera captures will appear different under different lighting conditions (daylight, cloudy, fluorescent, tungsten lights). Unlike your eyes, which can easily adjust to different lighting conditions (lighting temperatures), a digital camera cannot always differentiate between lighting types. -
Page 46: Playback Menu
Playback Menu Use the playback menu to create an on-camera slide show or transfer images from internal memory to a memory card. You can also use the Playback menu to delete one or all images. To access the playback menu, press the button in the mode and navigate... -
Page 47: Setup Menu
Setup Menu Select your general camera preferences in the Setup mode. Navigate to the option you wish to configure by using the button. LCD BRIGHTNESS This option adjusts the brightness of the LCD monitor. To adjust the LCD brightness, you may increase or decrease the LCD brightness by using the button. -
Page 48: Sound
SOUND The ViviCam 3750 produces a sound (beep) each time you press a camera button, if this function is enabled. Select [ON] or [OFF] by using the button. FORMAT MEDIA This utility formats the internal memory (or memory card) and erases all stored images and data. -
Page 49: Light Frequency
LIGHT FREQUENCY This ViviCam 3750 supports different lighting frequencies: 50Hz and 60Hz. When photographing under fluorescent lighting, select the correct frequency setting depending on your local area's voltage. This function is only effective if you set the White Balance (Fluorescent) setting. -
Page 50: Connecting The Vivicam 3750 To Other Devices
CONNECTING THE VIVICAM 3750 TO OTHER DEVICES EN-49... -
Page 51: Vivicam 3750 Specifications
VIVICAM 3750 SPECIFICATIONS Item Description Sensor Approx. 3.1 Mega pixels Image resolution 2048(F/N): 2048 x 1536 pixels 1600: 1600 x 1200 pixels 1280: 1280 x 960 pixels Approx. 1.5" color TFT LCD Self-timer 10-second delay Zoom 4X digital zoom Capture modes... - Page 52 Shutter Speed 1/15~1/1000 sec. Files formats JPEG, AVI (Motion JPEG) for video clip File standards JPEG, EXIF 2.1, M-JPEG Interface (Ports) VIDEO OUT jack, USB connector Power 2 AA Alkaline (1.5V) or Ni-MH (1.5V) batteries Dimensions 3.3" x 2.4" x 1.2" (84.2 x 61.4 x 30.8 mm) (W x H x D) (exclusive of protruding features) Weight Approx.
Need help?
Do you have a question about the Vivicam 3750 and is the answer not in the manual?
Questions and answers