Table of Contents
Advertisement
Advertisement
Table of Contents

Related Manuals for Vivitar Vivicam 3740


Summary of Contents for Vivitar Vivicam 3740
- Page 1 V3740 Digital Camera User manual 020901V...
-
Page 2: About This Manual
About this Manual This manual makes using the Digital Camera as easy as possible. Information in this document has been carefully checked for accuracy; however, no guarantee is given to the correctness of the contents. The information in this document is subject to change without notice. -
Page 3: Table Of Contents
Table of Contents Chapter 1 – Getting Started... 1 Safety Information... 2 Included Components... 3 Camera Overview ... 4 Front View... 4 Back View... 6 Right View... 8 Installing the Memory Card ... 9 Installing the Batteries... 11 Choosing a Language ... 13 Chapter 2 –... - Page 4 Chapter 5 – Mode / Operation Guide... 28 Capture Mode... 28 FLASH Menu... 29 PRESET Menu ... 30 RESOLUTION... 31 SELF-TIMER ... 32 CONTINUOUS ... 33 Movie Mode... 34 Digital zoom ... 34 Focus ... 35 Landscape ... 35 Portrait ... 35 Playback Mode ...
-
Page 5: Chapter 1 - Getting Started
Chapter 1 – Getting Started This chapter describes the features of the camera along with the components, a camera overview, and instructions on getting started. Features • Digital zoom (4X) • Up to 2048 x 1536 resolution • Interpolated resolution up to 6.6 Megapixels (2976 x 2232) •... -
Page 6: Safety Information
Digital Camera User Manual Safety Information Do not disassemble the camera. Touching the product's internal parts could result in injury. In the event of a malfunction or if the camera is accidentally broken open, take the product to an authorized service center for inspection. -
Page 7: Included Components
Included Components Your digital camera comes equipped with the following components. Please check to make sure all items are included. 1. User manual 2. Digital Camera 3. Two (2) AA Alkaline Batteries 4. Installation CD-ROM 5. USB Cable Included Components 6. -
Page 8: Camera Overview
Digital Camera User Manual Camera Overview The front, rear, bottom, and top views of the digital camera are shown on the following pages. Take a moment to review these illustrations to familiarize yourself with the terms used in this manual. - Page 9 Capture, Movie, or Playback. 3. Power Button: Press this button to turn on the digital camera. Press it again to turn it off. 4. Built-in Flash: The flash allows the camera to take pictures in low light conditions and can be used in bright conditions to remove unwanted shadows.
-
Page 10: Back View
Digital Camera User Manual Back View 1. LCD Screen: Use the LCD Screen to preview photos. While in the Setup menu, use the LCD Screen to view configuration details. 2. Left Button: Use the Left Button to cycle to the left during picture playback. - Page 11 4. Right Button: Use Right Button to cycle to the right during picture Playback. In capture mode and movie mode, use the Right Button to increase the EV level. 5. Zoom-out/down Button: Use the Zoom-out Button to zoom-out on your subject while in Capture mode.
-
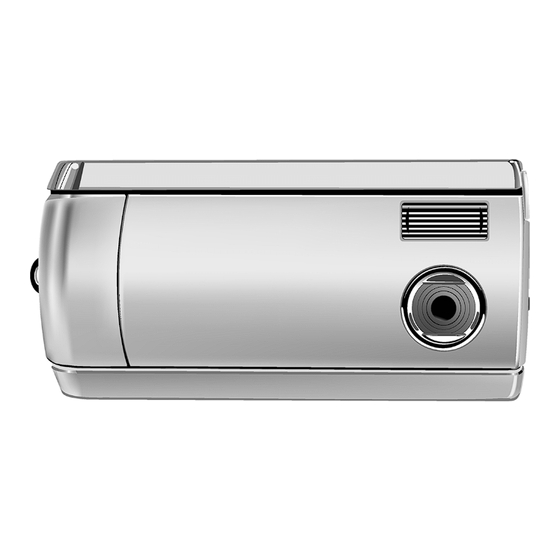
Page 12: Right View
Digital Camera User Manual Right View 1. Battery / Memory Card Cover: Opens to allow access to the battery chambers as well as the memory card slot. 2. Battery Chamber: Takes two AA Alkaline, NiMH, or Lithium batteries. 3. Memory Card Slot: Accepts an MMC or SD Card to store images. -
Page 13: Installing The Memory Card
Installing the Memory Card To install the memory card: 1. Turn off the camera. 2. Open the battery / memory card compartment by pressing the cover and sliding it in the direction of the arrow as shown. Installing the Memory Card... - Page 14 Digital Camera User Manual 3. Insert the memory card with the notched corner facing the outside edge of the camera (gold circuitry facing toward the back of the camera). 4. Close the battery / memory card cover. Notch...
-
Page 15: Installing The Batteries
Installing the Batteries To install or replace the batteries: 1. Turn off the camera. 2. Open the battery compartment on the bottom of the camera by pressing the cover and sliding it in the direction of the arrow as shown. Installing the Batteries... - Page 16 Digital Camera User Manual 3. Insert the batteries into the chamber making sure that the positive properly oriented, as indicated by the battery icons in the compartment. 4. Close the battery cover. and negative ends are...
-
Page 17: Choosing A Language
Choosing a Language The digital camera can display text in English, Spanish, German, French, Italian, Dutch, Chinese, and Japanese. To select a different language: 1. Turn the camera on. 2. Press the MENU Button to display the menu. 3. Use the down button (W) to select SETUP then press the right button (+) to enter the SETUP menu . - Page 18 Digital Camera User Manual 4. Use the down button ( W) to select LANGUAGE and then press the right button (+). 5. Use the up and down button to select the language you want to use and then press the right button to set the language.
-
Page 19: Chapter 2 - Taking Pictures
Chapter 2 – Taking Pictures This chapter shows you how to take pictures with your digital camera. Preparing the Camera To prepare the camera for taking pictures: You can either slide the camera into a protector or simply take the picture while the camera is in the protector. -
Page 20: Selecting The Camera Mode
Digital Camera User Manual Selecting the Camera Mode Slide the Mode Switch to the mode you wish to use. For basic "point and click" picture taking, use the Capture mode indicated by the camera icon Adjust the white balance setting by pressing the MENU button, selecting PRESET, then selecting: AWB (Auto White Balance), SUN, FLORESCENT, or SHADE. -
Page 21: Zooming And Shooting
Zooming and Shooting You can use the Zoom-in (T) or Zoom-out (W) buttons to narrow or widen the camera's field of view. Use the LCD Screen to preview the effects of the zoom function. Automatic Image Processing The camera adjusts the shot to compensate for ambient lighting, and, in auto-flash mode, detects whether or not the flash is required. -
Page 22: Protecting The Camera
Digital Camera User Manual Protecting the Camera When you are finished taking pictures, press the power button to turn it off. Reverse the camera protector and slide the camera into the protector. The hard case will protect the camera against accidental damage of the lens, TFT LCD screen, or wear and tear on internal electronic parts. -
Page 23: Chapter 3 - Reviewing Your Pictures
Chapter 3 – Reviewing Your Pictures One benefit of digital cameras is that you can immediately preview the shot you just took. Switching to Playback Mode To view the pictures that you have stored in internal memory or on the SD Card, slide the Mode Switch to Playback Mode Full-Screen Review The default Playback method is to show each individual... -
Page 24: Thumbnail Review
Digital Camera User Manual Note: The digital zoom function doesn't work in 6.6 M (2976 X 2232) Economy mode. Thumbnail Review If you press the Zoom-Out button (W) when the zoom ratio is at 0.5X (default), the camera switches to Thumbnail Review mode. -
Page 25: Chapter 4 - Connecting To A Computer
Chapter 4 – Connecting to a Computer The digital camera stores pictures as digital data rather than on film. Instead of making a trip to a developer and printing from negatives, you can copy your pictures to a computer for long-term storage. Once transferred, your... -
Page 26: Installing Software
Digital Camera User Manual Installing Software Follow these instructions to install the digital camera drivers and software on your system. CAUTION: Have your Windows Installation CD-ROM ready beforehand, as you may be prompted to insert it during the installation process. - Page 27 Step 2: Card Reader / PC Camera Driver Installation 1. To install the necessary drivers for Card Reader mode and PC Camera mode, first set the correct operational mode for that function. For example, set the Mode Switch to Movie mode to install those drivers, and to any other mode to install Card Reader drivers.
-
Page 28: Making The Connection
Digital Camera User Manual 4. The Windows Add Hardware Wizard will automatically detect the camera and lead you through the installation procedures. 5. You will need to do this once for each mode (PC Camera and Card Reader). NOTE: Reboot your computer before using the camera and software for the first time. -
Page 29: Copying Photos To A Pc
Copying Photos to a PC When connected to your computer in Card Reader mode, the digital camera behaves exactly like any other disk drive attached to your computer. This makes copying the images to your hard drive as easy as copying files from a floppy disk, zip drive or CD-ROM. -
Page 30: Using Pc Camera Mode
Digital Camera User Manual Using PC Camera Mode To use the camera as a PC Camera, you must set the USB in PC Camera mode in the setup menu and then connect it to the computer via the USB port. - Page 31 Microsoft NetMeeting™. CAUTION: Do not disconnect the USB cable when the digital camera is functioning as a PC Camera (i.e. when the application's window shows the camera video output or when the application is recording video).
-
Page 32: Chapter 5 - Mode / Operation Guide
Chapter 5 – Mode / Operation Guide The digital camera has three modes of operation. Slide the Mode Switch to select the mode. This chapter describes these modes and their function. Capture Mode Capture mode is used for taking still pictures. The following buttons are used. -
Page 33: Flash Menu
• DISP Button: Cycles through the following LCD Screen settings: LCD backlight and status information all turned on; LCD and backlight on but no status information. FLASH Menu The Flash menu determines how the flash is used. 1. Press the MENU button to show the menu system. 2. -
Page 34: Preset Menu
Digital Camera User Manual PRESET Menu This mode is selected in the CAPTURE mode menu. Change the preset white balance setting to suit the lighting conditions in which the picture is taken. • AWB: Use the AWB setting to obtain the optimum image brightness (exposure) when the subject is much brighter or darker than the background. -
Page 35: Resolution
RESOLUTION Adjust the image quality and resolution by selecting RESOLUTION from the menu display. There are five different picture resolutions available: 6.6M 3.0M 0.7M Small Photo The higher the quality, the clearer your picture will be, but at the same time the image file size will be larger, and therefore you will be able to store fewer pictures in memory. -
Page 36: Self-Timer
Digital Camera User Manual SELF-TIMER This option gives you the ability to take hands-free photos, such as self-portraits or group photos. To Take a Group Photo 1. Position the camera on a stable surface (such as a tripod) and frame the shot. -
Page 37: Continuous
CONTINUOUS Use the continuous setting to take three consecutive images. To setup a continuous shot 1. Press the MENU button to show the menus. 2. Use the up and down button to select CONTINUOUS. Press the right button to select the option. -
Page 38: Movie Mode
Digital Camera User Manual Movie Mode Movie mode allows you record movie clips to your camera's on-board memory or flash card. To record a movie clip 1. Turn the Mode switch to the Movie Clip mode setting. 2. Frame your shot, after the camera's LCD screen turns on. -
Page 39: Focus
Focus A lens focus switch is located on the left side of the camera. Select the focus mode by sliding the focus switch. Landscape This focus is optimized for taking landscape pictures, with the lens focus universally distributed to encompass everything within the frame. -
Page 40: Playback Mode
Playback Mode Playback mode is used to view photos stored in the digital camera's on-board memory or on a flash memory card. To view the photos, slide the Mode switch to Playback mode. (Press the DISP button to turn on the LCD screen.) -
Page 41: Delete
Delete 1. Press the left or right button to display the image you want to delete. 2. Press the MENU button to enter the menu system. 3. Use the up or down button to select DELETE. Press the right button to enter the menu. 4. -
Page 42: Setup Menu
Digital Camera User Manual Setup Menu The Setup menu configures the camera. Follow these instructions to use the Setup menu. 1. Press the MENU button. 2. Use the down button to select SETUP, and then press the right button to enter the Setup menu . -
Page 43: Language
Setup Menu Language The digital camera can display menu items in the following languages: English, French, Spanish, German, Italian, Dutch, Chinese, and Japanese. For more details on setting the default language, refer to page 13. -
Page 44: Auto Off
Digital Camera User Manual Auto Off You can determine whether the digital camera turns itself off automatically after a period of inactivity. DISABLE: The camera stays on until it is turned off manually. 60 SEC: The camera turns off if it is not used for 60 seconds. -
Page 45: Buzzer
Setup Menu Buzzer When this feature is turned on, the camera makes a beep when you push a button. To activate the beeps, select the BUZZER option from the Setup menu. Select ON and press the right button to confirm the selection. -
Page 46: Tv Out
Digital Camera User Manual TV Out When you connect the camera to a television set with the included video cable, you have the option to choose a transmission format compatible with that of your TV. This allows you to record video images sent to the TV with a VCR. -
Page 47: Opening
Opening You can choose to display a startup screen when the camera is turned on. To turn the startup screen on or off, scroll down to the OPENING option, press the right button, select YES or NO, and press the right button to confirm. Press the MENU button to exit the menu. - Page 48 Digital Camera User Manual...
-
Page 49: Memory Type
Memory Type You can choose whether you want to store photos in the on-board (internal) memory or on a flash card. Follow these instructions to set the default storage media. 1. Turn the camera on. 2. Press the MENU button to display the menu system. -
Page 50: Usb
5. Use the up and down button to select 6. Press the Menu button to exit. The digital camera can be used with any commercially available video software as a video camera. Simply connect it to your PC with the supplied USB cable, select the PC Camera in the setup menu. -
Page 51: Chapter 6 - Using The Lcd Screen
Chapter 6 – Using the LCD Screen Icons on the LCD Screen show the status of camera settings and functions such as quality, zoom ratio, and number of pictures. These icons are displayed in every camera mode except Setup mode. This chapter describes the LCD Screen icons and their meanings. - Page 52 Digital Camera User Manual Movie Mode Movie Mode White Balance Mode Battery Status Playback Mode Remaining Pictures Playback Mode Battery Status EV Value Memory Type Total Pictures Image Type...
- Page 53 LCD Icon Description Icon Name Description Auto Flash The camera senses whether the flash is needed by detecting the amount of ambient light. Flash Off Flash is turned off, regardless of the amount of light available. Flash On Flash is always on, regardless of light available. Portrait This preset is optimized for taking "head shots"...
- Page 54 Digital Camera User Manual Icon Name Battery Indicator Continuous Auto White Balance Shade Fluorescent Fine Normal Economic Photo Description Indicates the level of battery power remaining. Use the continuous setting to obtain the three continuous images when you want to take serious pictures in one touch The camera automatically determines the White Balance setting.
-
Page 55: Appendix 1 - Button Function Guide
Appendix 1 – Button Function Guide Mode Shutter Single LCD W Text Capture Capture LCD W/O Text Select LCD W Text Photo Playback Play/Stop LCD W/O AVI file Text Start / LCD W Text Stop Recordin Movie LCD W/O Text Menu DISP Menu... -
Page 56: Appendix 2 - Specification
Appendix 2 – Specification Image Sensor Digital Zoom Still image capture Video Clip Movie mode PC camera mode Color TFT LCD Auto-exposure Preset mode Flash mode File format PC Interface Video Output Software Driver Power source Storage interface Dimension Weight Regulation and Certification Type: CMOS... -
Page 57: Appendix 3 - Troubleshooting Guide
Appendix 3 – Troubleshooting Guide Problem Possible cause The camera The camera is has no power. turned off. The batteries are discharged. The batteries are inserted incorrectly. The camera Internal memory / won’t take a Memory card full? picture. Is the camera connected to a computer? The flash... - Page 58 OK to bring up the 'Safe To Remove Hardware' confirmation. E. Disconnect the Digital Camera from your PC. Please check to make sure your hard drive's DMA setting is enabled, as follows: From the Windows Start menu, select Settings, then Control Panel.
Need help?
Do you have a question about the Vivicam 3740 and is the answer not in the manual?
Questions and answers