
Related Manuals for Verizon One Talk T64LTE 4G


Summary of Contents for Verizon One Talk T64LTE 4G
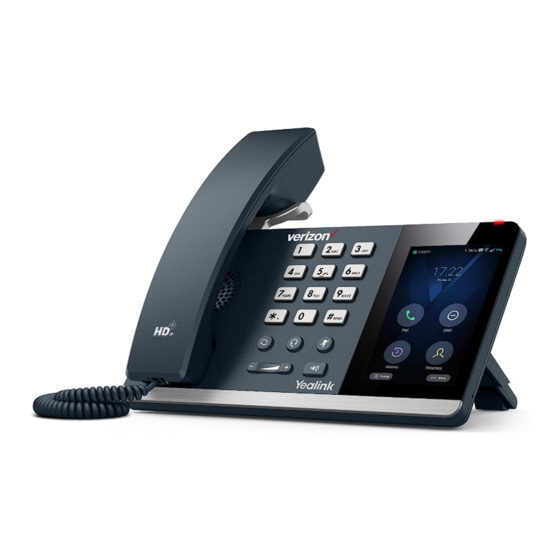
- Page 1 One Talk T64LTE 4G Desk Phone User Guide verizon.com/support/one-talk/ verizon.com/support/yealink/...
-
Page 2: Table Of Contents
User guide Table of contents Before you begin ..........................6 Getting started ............................ 6 T64LTE hardware ..................................6 Power LED indicator ................................7 Screen and icons ..................................8 Control center and notification center ..........................8 The Home screen ................................9 Dss screen .................................. - Page 3 User guide Performing a direct (blind) transfer ............................ 32 Performing Semi-Attended/Attended Transfer ........................33 Conference calls ..................................33 Local conference ................................34 Setting up a local conference call ............................34 Creating a hybrid conference ............................34 Holding or resuming a conference call ..........................34 Muting or unmuting a conference call ..........................
- Page 4 User guide Editing Pictures ................................. 45 Rotating Pictures ................................45 Adding a Filter for Pictures ..............................46 Adding a Frame for Pictures ............................. 46 Cropping Pictures ................................46 Coloring Pictures ................................47 Setting a Picture as Wallpaper ............................47 Printing Pictures ................................47 Deleting Pictures/Videos ..............................
- Page 5 User guide Disabling Bluetooth Device Discovery ........................... 63 Renaming the paired Bluetooth device ..........................64 Unpairing the Bluetooth device ............................. 64 Sending files via Bluetooth ..............................64 Receiving files via Bluetooth ..............................64 Disconnecting the Bluetooth device ............................65 Deactivating the Bluetooth mode............................65 Wireless network ..........................
-
Page 6: Before You Begin
User guide Before you begin This guide provides information you need to quickly use your new phone. Make sure you place the phone on a location with strong 4G signal to ascertain the proper activation and functioning of the device. The phone can only be fully activated over LTE. If the phone does not properly go through the eSIM provisioning the first time, if you were to set it up to LAN mode, the phone will be unable to register. -
Page 7: Power Led Indicator
User guide Speaker Provide audio output during hands-free. Keypad Enable you to enter numbers, letters, and special characters. Speakerphone Toggle the speakerphone (hands-free) mode or not. The LED indicator glows green when the speakerphone is activated. Mute Key Toggle the microphone on or off. The LED indicator glows red when the mute feature is activated. -
Page 8: Screen And Icons
User guide Screen and icons The user screens and icon indicators can help you navigate and understand the important information on the phone's status. Control center and notification center Control center or notification center allows you to access some features or view important notifications quickly. Procedure Swipe down from the top of the screen. -
Page 9: The Home Screen
User guide The Home screen On the home screen, you can view the phone's current state, add line keys, and access the dialing, Directory and history screens. Name Description Status bar Displays the label of the current account and icons. LTE information 4G LTE Signal strength Telephone... -
Page 10: Dss Screen
User guide Dss screen The Dsskey screen displays phone’s line keys Application Description Tap to add a line key. Line Key List Shows the line key labels. You can customize the line keys. Page Keys Tap to turn to the corresponding page. Call Screen All of your active and held calls are displayed on the calls screen. -
Page 11: Status Icons
User guide Status icons Icons Description Mute mode: Mute mode is enabled. 4G LTE active: The device is connected to a 4G LTE wireless network. Signal Strength: Cellular network signal strength. Network not available: No wireless network is available. Wi-Fi active: Wi-Fi is active. Wi-Fi available: A Wi-Fi network is available. -
Page 12: English Input Method
User guide When you use the onscreen keyboard, the following things you need to know: If you want to Action Position the cursor. Tap to the position. Select all characters. Long tap the entered character(s). Cut/Copy characters. Long tap the entered character(s). Drag to select the characters you want to cut/copy. -
Page 13: Using The Phone Keypad And Dial Pad
User guide features. • Done Key: Tap to confirm the settings. • Send Key: Tap to dial out the number. Delete Key • Tap to delete the entered characters one by one. • Long tap to delete two or more characters. to switch to the numeric &... -
Page 14: Esim Activation And Device Registration
User guide eSIM activation and device registration 1. When the phone is powered on for the first time, it will automatically go through the 4G LTE network activation process. After your eSIM card is activated, the 4G signal will be displayed in the upper-right corner of the phone screen. After the eSIM activation, the phone will trigger the bootup process to download the configuration files when it connects to the LTE network. - Page 15 User guide After the configuration file is deployed, the phone will reboot to trigger the E911 location identification and register the LTE account automatically. Please update your phone’s location, as needed. 5. You can view the phone number by navigating to Status > LTE.
-
Page 16: Sms
User guide You can use this feature to send or receive messages. Sending messages . Go to Message > Text Message > New Message. Enter the target number in the To field and the desired text in the input box on the New Message page. 3. -
Page 17: Receiving Messages
User guide Receiving messages When you receive a message, the page is displayed as below: 2. Do one of the following: Tap View to view the message details. -
Page 18: Viewing The Sent Box
User guide Tap Exit to return to the idle page if you are busy at that time. You can tap Message > Text Message > Inbox to view the message when you are available. The green message icon means you have a new, unread message. This will turn grey after you read the message. -
Page 19: Quick Reply
User guide Quick reply When reading the received message, you can tap Quick replies to go to the Quick Replies page and select the desired text to reply. LTE or LAN mode switching The LTE Desk phone can only perform the first-time activation via LTE. However, once the phone is active at any point in time the phone is also capable to operate in LAN mode for those cases where the LTE signal is either too low or non-existent. -
Page 20: Switching From Lan To Lte
User guide After switching to LAN mode, you can connect to a LAN or Wi-Fi and sign in to a SIP account (up to 16 accounts). Go to Settings > Basic Settings > Switch Account mode, select LAN mode, and tap the check icon in the top-right corner. -
Page 21: Available 4G Signal, Lte Account Login Failure
User guide • Poor 4G signal • Airplane mode enabled, unavailable 4G Signal • Available 4G signal under LAN mode Available 4G signal, LTE Account Login Failure Situation Dialog Operation LTE account login failure No LTE signal detected, Click OK and the dialog (caused by base station faulty, switch the account to disappears automatically but... -
Page 22: Poor 4G Signal
User guide Poor 4G Signal Situation Dialog Operation • Click OK and the dialog disappears The 4G signal LTE Signal strength is too low for automatically. is poor and the device to properly operate. not stable Move the phone to a better location •... - Page 23 User guide When you connect the phone to the LTE network but not the wired network, and you enable the Airplane Mode, the LTE network, the wired network, and connected Wi-Fi are all disabled. Situation Dialog Operation Airplane mode enabled No Ethernet/Broadband No service.
- Page 24 User guide Situation Dialog Operation When the phone detects To register via LAN/Wi-Fi Click OK, then the phone will available LAN signal mode, the phone needs to reboot to switch to the LAN reboot, press OK to mode. continue. Click Cancel, the dialog disappears and you are still in LTE mode with Airplane mode enabled.
-
Page 25: Available 4G Signal Under Lan Mode
User guide Available 4G signal under LAN mode Prerequisites Airplane mode is disabled. The phone is under LAN mode. Your administrator has enabled the mode detecting feature, which allows the phone to automatically detect the 4G signal under LAN mode. Situation Dialog Operation... -
Page 26: Call Features
User guide Notes: The dialog will pop up only when the phone is idle. It will not pop up when you are having a call, upgrading the phone, or under other situations. If you ignore the dialog, the dialog will disappear automatically when the phone detects no available 4G signal. Otherwise, it will not disappear. -
Page 27: Redialing A Number
User guide Procedure Tap Hold to place the original call on hold. Select New Call. Enter the desired number or select a contact. Select Send Redialing a number The phone keeps a record of all the placed calls. You can recall the contact you recently called. Procedure Press the Redial key. -
Page 28: Answering Calls
User guide Answering calls When you receive a call, you can choose to answer it manually or automatically. Answering a call When you receive an incoming call, the phone rings and the screen displays the information of the incoming call. You can choose to answer the incoming call. -
Page 29: Forwarding An Incoming Call Manually
User guide 2. Tap the desired forwarding type. 3. Turn off the desired forwarding type. 4. Select > Forwarding an Incoming Call Manually You can manually forward the call to another contact while your phone rings. Procedure 1. When the phone is ringing, tap 2. -
Page 30: Rejecting A Call Manually
User guide Rejecting a call manually You can reject a call manually, and the call may be sent to voice mail. The rejected calls are displayed in the Received Calls list in your History list. Procedure Select Ignore. Rejecting Anonymous Calls You can reject incoming calls from the callers who have hidden their identities. -
Page 31: Ending Calls
User guide Deactivating DND You can deactivate DND when you are ready to resume receiving calls again. Procedure 1. Do one of the following: • on the homescreen. • Tap Exit DND mode on the idle screen. The DND icon disappears from the status bar. Ending calls You can end the current call at any time. -
Page 32: Holding And Resuming Calls
User guide manually or until the phone restarts. Procedure Press the mute key when the phone is idle. • The mute key LED glows red, and the mute icon appears on the idle screen. Press mute key again to deactivate the mute state. Holding and resuming calls You can place an active call on hold and resume the call when you are ready. -
Page 33: Performing Semi-Attended/Attended Transfer
User guide Procedure Press the Transfer key during a call. Do one of the following: • Enter the number you want to transfer the call to, and press the Transfer. The phone will prompt a dialog box as the following shows: Select Direct to complete the transfer. -
Page 34: Local Conference
User guide • Avoid tapping or rustling papers near the microphone. • Speak in your normal voice without shouting. Local conference You can create up to six-way local conference. Setting up a local conference call Procedure Place a call to the first party. Select Conference to place a new call. -
Page 35: Call Recording
User guide Select End Call Call recording You can record up to 12 hours in one file. By default, the recorded files are saved in the internal SD card. But if there is a USB flash drive connected to the rear USB port of your phone, the recorded files will be saved in the storage device according to the priority: USB flash drive>internal SD card. -
Page 36: Checking Storage Space
User guide Checking storage space You can check the total space or available space of the phone or connected USB flash drive. Procedure Go to Settings > More > Storage. Advanced call features You can perform some server-dependent tasks on the phone. Contact your system administrator to find out if your phone supports these advanced call features. -
Page 37: Retrieving A Parked Call
User guide If the call is parked successfully, you will hear a voice prompt that the call is parked. Retrieving a parked call Procedure Pick up the handset, press the Speakerphone key or tap the line key. Select Retrieve on the dialing screen. The phone will dial the park retrieve code which is configured in advance. -
Page 38: Directory
User guide Connect to dial out the voice mail access code directly. Directory The phone provides several types of phone directories, which can be customized by your system administrator. Local directory You can store up to 1000 contacts and 48 groups in your local directory, you can search, add, edit and delete a contact. Managing the local directory groups You can manage the Local Directory groups when the phone is idle. -
Page 39: Viewing Contacts
User guide Select the desired account from the Account field. Select the desired photo from the Photo field. Save the change. Viewing contacts You can view the local contacts from the Local Directory on your phone. Procedure Tap Directory. If you want to view a contact to the specified contact group, select the contact group first. The contact names are displayed in alphabetical order. -
Page 40: Searching For Contacts
User guide Tap Directory. Tap the desired contact. Select Blocklist. The phone prompts you to move this contact to the blocklist or not. Select OK. Searching for contacts In the Local Directory, you can enter search criteria to find your desired contact quickly. Procedure Tap Directory. -
Page 41: Deleting A Blocklist Contact
User guide contact normally. Deleting a blocklist contact If you want to answer a call from a specific contact, you need to remove it from the Blocklist. Procedure Go to Directory > Blocklist. Select the desired contact. Select Delete. The phone prompts you to delete the contact or not. Select OK Deleting all blocklist contacts You can delete all contacts from the Blocklist when you are ready to answer calls from them again. -
Page 42: Saving A Mobile Contact To The Local Directory
User guide the mobile contacts will not be displayed. Saving a mobile contact to the local directory You can save any mobile contact to the Local Directory, to conveniently call this contact after disconnecting the mobile phone from the phone. Before you begin Make sure your Bluetooth-enabled mobile phone has been paired with your IP phones, and mobile contact sync feature is enabled. -
Page 43: Viewing Remote Phone Book Contacts
User guide In the Remote Phone Book, you can enter search criteria to find your desired contact quickly. Procedure Go to Directory > Local Directory > Remote Phone Book. Do one of the following: Select Enter your search criteria in the search field. Select the desired letter (for example, T) along the right side to jump to contacts whose names start with T or t. -
Page 44: Viewing History Records
User guide Placed Call Forwarded Call Viewing history records The history record saves the call information such as the caller's name and number, local line and call duration. Procedure Tap History. Select the desired list. Tap ① after the desired entry. Saving a history record to local directory To identify someone’s call the next time, you can save a history record to the Local Directory. -
Page 45: System Applications
User guide You can delete all call records from the call history list. Procedure Tap History. Long tap an entry. Tap the radio box on the top-right of the screen. Select > Delete calls. The phone prompts you to delete all contacts or not. Select OK. -
Page 46: Adding A Filter For Pictures
User guide Tap the desired picture. > Rotate left/Rotate right to rotate the picture left/right Tap SAVE. Adding a Filter for Pictures You can add a filter for the picture to change its display style. Procedure Swipe down from the top of the screen. to launch the Gallery. -
Page 47: Coloring Pictures
User guide Tap Mirror to flip the picture symmetrically. Tap Draw to draw the picture. Tap SAVE. Coloring Pictures You can color pictures to make the pictures displayed better. Procedure Swipe down from the top of the screen. to launch the Gallery. Tap the desired picture. -
Page 48: Sharing Pictures/Videos Via Bluetooth
User guide to launch the Gallery. Tap the desired album. Do one of the following: Long tap the desired picture/video. Go to > Select item. Select the pictures/videos you want to delete. You can also tap n items selected (n represents the number of pictures you selected) and then tap Select all to select all pictures. -
Page 49: Recording Audio
User guide stamp. Recording audio By default, the recorded audio is saved in the internal SD card. You can connect a USB flash drive to your phone, the recorded audio will be saved in the USB flash drive instead of the internal SD card. Note: For more information on how to attach a USB flash drive, please refer to the Quick Start Guide for your phone. -
Page 50: Fast Forwarding/Rewinding A Playback
User guide to pause playing the recording. The icon appears on the phone screen. to resume the playback. Fast Forwarding/rewinding a playback While a recorded file plays, you can fast forward or rewind the playback at any time. Procedure Drag the slider to skip forward the playing or rewind the playing. If you have set marks for the recorded audio, you can drag the slider to the position with a red flag to listen to the marked moments. -
Page 51: Renaming The Recording
User guide Tap Copy to USB. The prompt “XX Copied” (XX indicates the date when the recorded audio is copied to the USB flash drive) appears under the corresponding recorded audio. Renaming the recording You can rename the recording for better recognition. Procedure Do one of the following: Swipe down from the top of the screen and tap Recorder. -
Page 52: Customizing Your Phone
User guide Do one of the following: Swipe down from the top of the screen and tap Recorder. Go to More > Recorder. You can see the storage space. Customizing your phone You can make your phone more personalized by customizing various settings. Changing the Administrator Password By default, you require an administrator password to access the Advanced/Advanced Settings menu. -
Page 53: Adding A Wallpaper From A Usb Flash Drive
User guide Do one of the following to enter the control center: Swipe down from the top of the screen. Tap More. Go to Settings > Basic Settings > Display > Wallpaper. Select Gallery or Wallpapers and then select the desired image. Select Set wallpaper. -
Page 54: Changing The Language
User guide Backlight Time: The delay time to change the brightness of the phone screen when the phone is inactive. Backlight time includes the following settings: • Always On: Backlight is on permanently. • 15s, 30s, 1min, 2min, 5min, 10min or 30min: Backlight is changed when the phone is inactive after the designated time. -
Page 55: Time & Date
User guide Procedure Do one of the following to enter the control center: Swipe down from the top of the screen. Tap More. Go to Settings > Basic Settings > Language & Input > Current Input. Select the desired input method. You can also long tap the space key on the onscreen keyboard to change the input method. -
Page 56: Phone Lock And Administrator Password
User guide Go to Settings > Basic Settings > Time & Date > Time & Date Format. Select the desired time format or date format. Save the change. Phone lock and Administrator Password Phone lock helps you protect your phone from unauthorized use. Accessing the Advanced Settings with Administrator Password To enter the advanced settings on your phone, enter the default password: @N3ta!k2@2* Setting the phone lock... -
Page 57: Changing Your Phone Unlock Pin
User guide Select OK. The lock icon disappears from the phone screen. Changing your phone unlock PIN The default unlock PIN is “123”. For security reasons, you should change the default unlock PIN as soon as possible. Procedure Do one of the following to enter the control center: Swipe down from the top of the screen. -
Page 58: Adjusting The Volume
User guide You can change the basic audio settings on your phone. Adjusting the volume You can adjust the volume of the ringer, media, and audio during a call. \ Procedure Press the Volume key. Setting the ring tone You can set distinctive ring tones for groups or contacts in your Local Directory so that you can identify the caller when your phone rings. -
Page 59: Setting A Ring Tone For A Contact
User guide Save the change. Setting a ring tone for a contact You can select a unique ring tone for various contacts in your Local Directory. This helps you quickly identify callers according to the ring tones. Procedure Tap Directory > Local Directory. Select the desired contact group first. -
Page 60: Enabling Silent Mode
User guide Save the change. Enabling silent mode If you turn on the silent mode, your phone won't produce a ring tone/key tone/touch sound/notification sound from phone's speaker. Procedure 1. Do one of the following: Go to Settings > Basic Settings > Sound, turn on Silent Mode, save the change. Press the Volume key to adjust the ringer volume to the minimum. -
Page 61: Pairing And Connecting The Bluetooth-Enabled Mobile Phone
User guide Pairing and connecting the Bluetooth-enabled mobile phone When you need to use the phone to handle the mobile phone's calls, you can pair and connect the Bluetooth- enabled mobile phone. You can only connect one Bluetooth device at a time. After connection, the phone will automatically find an avail- able line key and assign the line key for Mobile Account. -
Page 62: Enabling The Mobile Contacts Sync Feature
User guide Enabling the mobile contacts sync feature You can choose to enable the phone to sync the mobile contacts. Before you begin Make sure that the Bluetooth-enabled mobile phone is paired and connected to your phone and the phone audio feature is enabled. -
Page 63: Configuring The Phone Audio Feature
User guide Place a call. Tap the Mobile Account line key first, and then place a call or multiple calls to the mobile contacts. Answer a call. An incoming call to your mobile phone is also shown on the phones, you can answer the call on the phone. -
Page 64: Renaming The Paired Bluetooth Device
User guide After the Bluetooth is activated, the phone is automatically placed in Open Discover mode to make it visible to other Bluetooth devices. You can choose to disable this feature to not allow your phone to show as an available device on other Bluetooth devices. Procedure Do one of the following: Swipe down from the top of the screen and long tap the Bluetooth icon. -
Page 65: Disconnecting The Bluetooth Device
User guide Tap Accept to start receiving the file. The phone prompts “The file will be received. Check progress in the Notification panel.”. The icon will be displayed in the status bar. (Optional.) Swipe down from the top of the screen. Tap the notification “Bluetooth share: Received files”. -
Page 66: Connecting To An Available Wireless Network Manually
User guide When the phone is connected to a wireless network, the Wi-Fi icon will display in the status bar. Connecting to an available wireless network manually You can use the password provided by your system administrator to connect the phone to a secured wireless net- work. Before you begin Make sure that the Wi-Fi mode is activated. -
Page 67: Disconnect From A Wireless Network
User guide Swipe down from the top of the screen and long tap the Wi-Fi icon. Go to More > Settings > Basic Settings > Wi-Fi. Select Wi-Fi Status. (Optional.) Drag up and down to scroll through the list of wireless network information. Disconnect from a wireless network You can disconnect the wireless network connection from your phone. -
Page 68: Rebooting Your Phone
User guide Do one of the following to enter the control center: Swipe down from the top of the screen. Tap More. Go to Settings > Status > General. Tap the Warning field. The phone prompts you to clear the warning icon or not. Tap OK. -
Page 69: Updating The Phone Configuration
User guide Updating the phone configuration Your system administrator may ask you to update the configuration for your phone to apply any changes to system settings, which you can do without restarting it. Procedure Do one of the following to enter the control center: Swipe down from the top of the screen. -
Page 70: Notices
User guide Notices The specifications and information regarding the products in this guide are subject to change without notice. All statements, information and recommendations in this guide are believed to be accurate and presented without warranty of any kind, express or implied. Users must take full responsibility for their application of products. Technical support For additional support information please visit the One Talk support site (verizonwireless.com/support/one-talk/) for the latest guides, FAQs, product documents and more. -
Page 71: Important 911 Emergency Response Information
Data and voice functionality (including the ability to make and receive 911 calls) will not be available during a power outage, broadband connection failure or other service disruption. Neither Verizon Wireless nor any of its affiliates shall be liable for any service outage and/or inability to access emergency service personnel, nor shall Verizon Wireless or any of its affiliates be responsible for the acts or omissions of emergency response center personnel. -
Page 72: Danger-Electric Shock And Fire
Danger–electric shock and fire Electric current from power, telephone and communication cables is hazardous and could result in electric shock and/or fire. Learn more Terms and Conditions apply. For more information, visit www.onetalk.com Network details & coverage maps at vzw.com. © 2023 Verizon...
Need help?
Do you have a question about the One Talk T64LTE 4G and is the answer not in the manual?
Questions and answers