Table of Contents
Advertisement
Available languages
Available languages
Quick Links
Advertisement
Chapters
Table of Contents

Related Manuals for CYBEX GOLD


Summary of Contents for CYBEX GOLD
- Page 1 Eos Stroller/Travel System Carriola/Sistema de viaje Eos Owner’s Manual Manual del propietario READ this Owner’s Manual carefully before first use, and keep it for future reference. LEA con cuidado este manual del propietario antes de usar el producto por primera vez y guárdelo para uso futuro.
-
Page 2: Table Of Contents
Reclining the Toddler Seat ......................Removing the Toddler Seat ......................Reversing the Seat Position......................Converting to Carriage Mode ..................... Using Your Stroller with CYBEX Infant Car Seats ............36 Stroller Configurations ....................38 Care and Maintenance ....................39 Removing/Replacing Softgoods ....................Care Instructions ........................ -
Page 3: Child Requirements
We will not sell, rent, or share your personal information. To register your product, please complete and mail the card that came with it or visit our online registration at http://register.cybex-online.com/us/carseats. For future reference, record the Model Number and Date of Manufacture below. You can find this information on one of the rear stroller legs. -
Page 4: Warnings
CYBEX infant car seat • To avoid stroller instability and tip-overs, and keep all instructions available for DO NOT load Cupholder with over 0.45... - Page 5 WARNING! READ AND FOLLOW ALL WARNINGS AND INSTRUCTIONS! FAILURE TO DO SO COULD RESULT IN SERIOUS INJURY OR DEATH! • ALWAYS exercise care when going over sure child is not in the seat or near the stroller when folding or unfolding. curbs or steps, and never use stroller for anything other than transporting your •...
- Page 6 WARNING! READ AND FOLLOW ALL WARNINGS AND INSTRUCTIONS! FAILURE TO DO SO COULD RESULT IN SERIOUS INJURY OR DEATH! • AVOID STRANGULATION: • NEVER lift or carry the stroller by the Bumper Bar in Carriage or Toddler Seat – DO NOT suspend strings or toys from Mode.
- Page 7 WARNING! READ AND FOLLOW ALL WARNINGS AND INSTRUCTIONS! FAILURE TO DO SO COULD RESULT IN SERIOUS INJURY OR DEATH! • TO AVOID FALLS: • ONLY use the stroller in Carriage Mode for a child up to 6 months of age or 9.1 –...
-
Page 8: Overview Of The Eos Stroller/Travel System
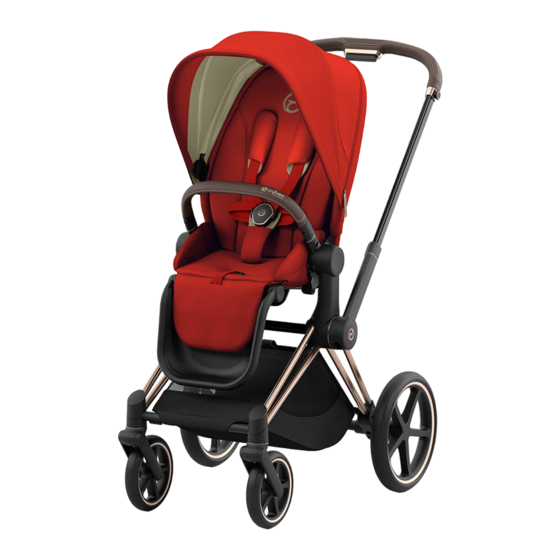
Overview of the Eos Stroller/Travel System Front of Stroller Canopy Parent’s Handle Cupholder Adjustable Handle Buttons Fold Release Levers Toddler Seat Release Button Seat Mount Footrest Adjustment Button Footrest 10. Swivel Wheels 11. Shoulder Straps 12. Bumper Bar 13. Harness Covers 14. - Page 9 Overview of the Eos Stroller/Travel System Rear of Stroller 15. Canopy Window 16. Recline Handle 17. Recline Adjuster Strap 18. Storage Basket 19. Side Frame Lock 20. Brakes 1&...
-
Page 10: Identification Of Parts
Identification of Parts IMPORTANT: If you are missing parts, do not use stroller and call 1-877-242-5676 to order replacement parts. Frame Seat/Carriage Bumper Bar Front Wheel Rear Wheel (2) Car Seat Adapters Cupholder (1) Assembly (2) -
Page 11: Choosing Mode Of Use
Choosing Mode of Use Your stroller seat can be used in either Carriage Mode or Toddler Seat Mode but is shipped in Toddler Seat Mode with the Footrest pivoted 90° downward. You will need to follow the instructions completely to make sure you set up your stroller in your preferred mode of use. After the frame and wheels have been assembled, you can choose to set the stroller up in Carriage or Toddler Seat Mode using the instructions on pages 34 - 35. -
Page 12: Assembling Your Stroller
Assembling Your Stroller WARNING! To avoid injury to fingers or hands, care must be taken when folding or unfolding stroller to prevent finger injury in hinge areas. Press buttons and rotate Handle up as shown. To protect flooring, place a protective covering (carton) beneath the stroller during assembly. - Page 13 Assembling Your Stroller Grab the Parent’s Handle and pull upward until the stroller opens fully with an audible CLICK. CLICK! Make sure the stroller locks in the open position by pushing down on the Parent’s Handle.
- Page 14 Assembling Your Stroller Turn the stroller so the front of the stroller is facing upwards, as shown. To attach Front Wheels, line up the metal pin with the hole in the front wheel mount and push on to frame as shown until it CLICKS into place.
- Page 15 Assembling Your Stroller Turn the stroller upside down, as shown, so the rear of the stroller is facing upwards. To attach Rear Wheels, push wheel onto rear leg tube until it CLICKS into place. Repeat on other side. Pull on wheels to make sure both of them are securely attached.
- Page 16 Assembling Your Stroller To set up seat in Toddler Seat Mode, flip Toddler Seat over and verify the two Buckles on the seat are connected as shown. 10. To attach Toddler Seat, slide seat onto the mounts until they CLICK into place as shown.
- Page 17 Assembling Your Stroller 11. PULL UP on seat to make sure it is securely attached to the mounts. 12. To attach Bumper Bar, push tabs into openings on stroller. Make sure Bumper Bar locks into position with audible CLICKS. CLICK!
- Page 18 Assembling Your Stroller 13. PULL on the Bumper Bar to make sure it is locked into place. 14. To remove the Bumper Bar, push both tabs and remove the bar from the stroller.
- Page 19 Assembling Your Stroller 15. To attach Cupholder, slide down on the mount on the side of the Frame as shown.
-
Page 20: Using Your Stroller
Using Your Stroller Brakes WARNING! Always lock Brakes. Make sure Brakes are on by trying to push the stroller. To lock, push lever DOWN at bottom of Brake as shown. To unlock, push lever DOWN at top of Brake as shown. -
Page 21: Canopy
Using Your Stroller Canopy To extend Canopy, pull it forward as shown. To close, push Canopy toward Parent’s Handle as shown. - Page 22 Using Your Stroller Canopy Open or close Canopy window as shown. To remove Canopy: • unfasten Canopy mounts from sides of stroller • unfasten hook-and- loop fasteners on rear of seat and pull fabric off the Handle To re-attach, reverse the steps.
-
Page 23: Folding And Unfolding The Stroller
Using Your Stroller Folding and Unfolding the Stroller WARNING! Care must be taken when folding or unfolding stroller to prevent finger injury in hinge areas. NEVER fold the stroller when the Toddler Seat is parent- facing or in Carriage Mode. FOLDING THE STROLLER Adjust seat back to upright position, lock the rear Brakes, close the Canopy,... - Page 24 Using Your Stroller Folding and Unfolding the Stroller Rotate handle down 90° for stability until the Side Frame Lock closes. You may need to push stroller together in CLICK! order for the Side Frame Lock to fully lock into place with an audible CLICK. Double check Side Frame Lock is securely closed.
- Page 25 Using Your Stroller Folding and Unfolding the Stroller UNFOLDING THE STROLLER To unfold the stroller, unlatch the Side Frame Lock. Continue holding the lock open while unfolding the stroller. CLICK! Grab the Parent's Handle and pull upward until the stroller opens fully with an audible CLICK.
- Page 26 Using Your Stroller Parent's Handle To adjust the Parent's Handle, push the buttons on the outside of the Parent's Handle and adjust up or down to desired position.
-
Page 27: Harness
Using Your Stroller Footrest To adjust the Footrest, push both buttons and lift the Footrest up or down to desired position. - Page 28 Using Your Stroller Harness WARNING! To avoid serious injury from falling or sliding out, ALWAYS use the internal harness system while in Toddler Seat Mode or Carriage Mode. To attach the harness, CLICK Buckles into the Buckle strap. Adjust buckle strap and pull shoulder straps to tighten.
- Page 29 Using Your Stroller Harness For a snug, comfortable fit, adjust height of strap and tighten, pull down on free end of strap. The shoulder strap can be adjusted to different heights. To adjust, remove both shoulder straps from the slots and feed them into the new slot, as shown.
-
Page 30: Parent's Handle
Using Your Stroller Harness To loosen straps, push up on retainer and pull the shoulder strap down. To unlock harness, push the button on the Buckle Strap. -
Page 31: Reclining The Toddler Seat
Using Your Stroller Reclining the Toddler Seat WARNING! To avoid serious injury, DO NOT raise or recline seat with child in stroller. To recline toddler seat, lift handle at the top of the seat and rotate seat into one of three positions. -
Page 32: Removing The Toddler Seat
Using Your Stroller Removing the Toddler Seat To remove toddler seat, push in the buttons on both sides of the seat and lift seat up as shown. -
Page 33: Reversing The Seat Position
Using Your Stroller Reversing Seat Position WARNING! To avoid falls, NEVER lift or carry toddler seat by the Bumper Bar or with child in it. The toddler seat is not a carrier. To remove and use in rear-facing mode, push in the release buttons on both sides of the stroller Frame. -
Page 34: Converting To Carriage Mode
Using Your Stroller Converting to Carriage Mode WARNING! To avoid serious injury, NEVER use this stroller in Carriage Mode unless the straps under the seat are UNBUCKLED and the seat has been properly converted as indicated in the steps below. With the stroller in Toddler Seat Mode, loosen the recline adjustment strap on the back of the stroller, then lift recline... - Page 35 Using Your Stroller Converting to Carriage Mode Unbuckle the two straps under the seat and raise the Footrest into a horizontal position NOTE: The straps MUST be unbuckled (see pg. 34) and the Footrest must be horizontal before placing the child into the seating area.
-
Page 36: Using Your Stroller With Cybex Infant Car Seats
Using Your Stroller Using Your Stroller with CYBEX Infant Car Seats Remove toddler seat from stroller frame if attached. Install Infant Car Seat Adapters to stroller frame. Line up Infant Car Seat with Car Seat Adapters. Insert car seat onto adapters... - Page 37 Using Your Stroller Using Your Stroller with CYBEX Infant Car Seats To remove the infant car seat, lock Brakes then pull the infant car seat release handle with one hand while lifting up on the carry handle with the other hand.
-
Page 38: Stroller Configurations
Using Your Stroller Stroller Configurations... -
Page 39: Care And Maintenance
Care and Maintenance Removing/Replacing Softgoods REMOVING SOFTGOODS With stroller in Toddler Seat Mode, push both tabs and remove bumper bar from the stroller. Remove Toddler Seat from the stroller frame. - Page 40 Care and Maintenance Removing/Replacing Softgoods Remove Canopy from Toddler Seat (see pg. 22). From bottom of Toddler Seat, unfasten buttons behind Seat Mounts.
- Page 41 Care and Maintenance Removing/Replacing Softgoods Unfasten tab at top of Toddler Seat and unzip fabric around Toddler Seat frame. Remove fabric from Toddler Seat frame. NOTE: It may be necessary to lift the Recline Lever to fully remove fabric from Toddler Seat Frame.
- Page 42 Care and Maintenance Removing/Replacing Softgoods REPLACING SOFTGOODS Pull fabric around Toddler Seat frame. Zip fabric around Toddler Seat frame and fasten tab at top of Toddler Seat.
- Page 43 Care and Maintenance Removing/Replacing Softgoods From bottom of Toddler Seat, fasten buttons behind Seat Mounts. Attach Canopy to Toddler Seat.
- Page 44 Care and Maintenance Removing/Replacing Softgoods Attach Toddler Seat until it CLICKS into place on both sides of the stroller frame. CLICK! Attach Bumper bar to Toddler Seat until an audible CLICK is heard. CLICK!
-
Page 45: Care Instructions
Care and Maintenance Care Instructions SPOT CLEANING INSTRUCTIONS MACHINE WASH INSTRUCTIONS • Clean minor spills and stains on cloth or • Wash separately with gentle action in plastic surfaces with cold water and mild warm water. soap. Air dry. • DO NOT bleach. -
Page 46: Limited Warranty
LIMITED WARRANTY CYBEX warrants to the original consumer purchaser that this product will be free from defects in material and workmanship for two (2) years from the date of original purchase (the “Warranty Period”). During the Warranty Period, CYBEX, at its option, may repair or replace this product if it is found by the manufacturer to be defective in material or workmanship. - Page 47 Owner’s Manual. In no event will CYBEX or the dealer selling this product be liable to you for any damages, including incidental or consequential damages, arising out of the use or inability to use this product.
- Page 48 Para retirar el asiento del niño pequeño ..................Inversión de la posición del asiento .................... Conversión al modo de moisés ....................Uso de su carriola con los asientos de bebé para el automóvil de CYBEX ....36 Configuraciones de la carriola ..................38 Cuidado y mantenimiento ....................74 Retirar/reemplazar las partes blandas ..................
-
Page 49: Requisitos Del Niño
Para registrar su producto, llene con todos los datos y envíe por correo postal la tarjeta que se incluye o visite nuestro registro en línea en http://register.cybex-online.com/us/carseats. Para referencia futura, anote el número de modelo y la fecha de fabricación abajo. Puede encontrar esta información en una de las patas traseras de la carriola. -
Page 50: Advertencias
CYBEX y conserve todas las • Para evitar la inestabilidad y los vuelcos instrucciones disponibles como referencia. - Page 51 ¡ADVERTENCIA! ¡LEA Y SIGA TODAS LAS ADVERTENCIAS E INSTRUCCIONES! ¡SU INCUMPLIMIENTO PUEDE PROVOCAR LESIONES GRAVES O LA MUERTE! • SIEMPRE al subir o bajar aceras o peldaños sufran lesiones en los dedos causadas por las áreas con bisagras. Asegúrese de que y nunca use la carriola para ningún otro el niño no esté...
- Page 52 ¡ADVERTENCIA! ¡LEA Y SIGA TODAS LAS ADVERTENCIAS E INSTRUCCIONES! ¡SU INCUMPLIMIENTO PUEDE PROVOCAR LESIONES GRAVES O LA MUERTE! • EVITE EL ESTRANGULAMIENTO: • NUNCA levante ni transporte la carriola por la barra de tope en el modo de moisés o de –...
- Page 53 ¡ADVERTENCIA! ¡LEA Y SIGA TODAS LAS ADVERTENCIAS E INSTRUCCIONES! ¡SU INCUMPLIMIENTO PUEDE PROVOCAR LESIONES GRAVES O LA MUERTE! • PARA EVITAR CAÍDAS: esté configurado en el modo reclinado de moisés, como se indica en las instrucciones. – NUNCA retire el asiento para niños pequeños de la carriola mientras el niño Utilice la carriola SÓLO en el modo de •...
-
Page 54: Resumen De La Carriola/Sistema De Viaje Eosc
Resumen de la carriola/sistema de viaje Eos Parte delantera de la carriola Capota Asa para los padres Portavasos Botones para ajustar el asa Palancas de liberación del pliegue Botón de liberación del asiento para niños pequeños Montaje del asiento Botón de ajuste del reposapiés Reposapiés 10. - Page 55 Resumen de la carriola/sistema de viaje Eos Parte trasera de la carriola 15. Ventanilla de la capota 16. Asa de reclinación 17. Correa de ajuste de reclinación 18. Canasta de almacenamiento 19. Bloqueo del armazón lateral 20. Frenos 1&...
-
Page 56: Identificación De Las Partes
Identificación de las partes IMPORTANTE: Si le faltan piezas, no utilice la carriola y llame al 1-877-242-5676 para pedir piezas de repuesto. Armazón Asiento/Carriola Barra de tope Adaptadores del Montaje de la Ruedas Portavasos (1) asiento para el rueda delantera (2) traseras (2) automóvil... -
Page 57: Cómo Elegir El Modo De Uso
Cómo elegir el modo de uso El asiento de su carriola puede usarse tanto en modo de moisés como en modo de asiento de niño pequeño, pero se envía en modo de asiento de niño pequeño con el reposapiés girado 90° hacia abajo. Deberá seguir las instrucciones por completo para asegurarse de instalar la carriola en el modo de uso que prefiera. - Page 58 Cómo ensamblar la carriola ¡ADVERTENCIA! Se debe tener cuidado al plegar o desplegar la carriola para evitar lesiones en los dedos o las manos causadas por las áreas con bisagras. Pulse los botones y gire el asa hacia arriba como se muestra. Para proteger el piso, coloque una cubierta protectora (caja) debajo de la carriola durante el montaje.
- Page 59 Cómo ensamblar la carriola Sujete el asa para los padres y jale hacia arriba hasta que la carriola se abra hasta escuchar un CLIC. ¡CLIC! Empuje hacia abajo el asa para los padres para asegurarse de que la carriola quede bloqueada en la posición abierta.
- Page 60 Cómo ensamblar la carriola Voltee la carriola de manera que la parte delantera de la carriola esté orientada hacia arriba, como se muestra. Para acoplar las ruedas delanteras, alinee el pasador de metal con el agujero en el montaje de la rueda ¡CLIC! delantera y empuje el armazón, como se muestra, hasta que encaje en su...
- Page 61 Cómo ensamblar la carriola Voltee la carriola boca abajo, como se muestra, de manera que la parte trasera de la carriola esté orientada hacia arriba. Para acoplar las ruedas traseras, empuje la rueda en el tubo de la pata trasera hasta que encaje en su lugar con un CLIC.
- Page 62 Cómo ensamblar la carriola Para configurar el asiento en el modo de asiento para niños pequeños, dele la vuelta y compruebe que las dos hebillas del asiento están conectadas como se muestra. 10. Para acoplar el asiento para niños pequeños, deslice el asiento en los ¡CLIC! montajes hasta que encaje en su lugar con un CLIC, como se muestra.
- Page 63 Cómo ensamblar la carriola 11. JALE HACIA ARRIBA el asiento para asegurarse que esté firmemente acoplado a los montajes. 12. Para acoplar la barra de tope, empuje las lengüetas en las aberturas de la carriola. Asegúrese de que la barra de tope quede bloqueada en su lugar al escuchar le CLIC.
- Page 64 Cómo ensamblar la carriola 13. Jale la barra de tope para asegurarse de que quede bloqueada en su lugar. 14. Para retirar la barra de tope, empuje ambas lengüetas y retire la barra de la carriola.
- Page 65 Cómo ensamblar la carriola 15. Para fijar el portavasos, deslice hacia abajo el soporte situado en el lateral del armazón, tal y como se muestra en la ilustración.
-
Page 66: Cómo Usar La Carriola Frenos
Cómo usar la carriola Frenos ¡ADVERTENCIA! Bloquee siempre los frenos. Intente empujar la carriola para asegurarse de que los frenos estén puestos. Para bloquear, empuje la palanca hacia ABAJO en la parte inferior del freno como se muestra. Para desbloquear, empuje la palanca hacia ABAJO en la parte superior del freno como se muestra. -
Page 67: Capota
Cómo usar la carriola Capota Para extender la capota, jálela hacia adelante, como se muestra. Para cerrarla, empuje la capota hacia el asa para los padres, como se muestra. - Page 68 Cómo usar la carriola Capota Abra o cierre la ventana de la capota como se muestra. Para retirar la capota: • desenganche los soportes de la capota de los laterales de la carriola • desabroche los cierres autoadherentes de la parte posterior del asiento y tire de la tela para sacarla del Para volver a colocar,...
-
Page 69: Plegado Y Desplegado De La Carriola
Cómo usar la carriola Plegado y desplegado de la carriola ¡ADVERTENCIA! Se debe tener cuidado al plegar o desplegar la carriola para evitar lesiones en los dedos causadas por las áreas con bisagras. NUNCA pliegue la carriola cuando el asiento del niño esté... - Page 70 Cómo usar la carriola Plegado y desplegado de la carriola Gire el asa 90° hacia abajo para estabilizarla hasta que se cierre el bloqueo lateral del armazón. Es ¡CLIC! posible que tenga que empujar la carriola para que el bloqueo lateral del armazón encaje completamente en su sitio con un CLIC audible.
- Page 71 Cómo usar la carriola Plegado y desplegado de la carriola PARA DESPLEGAR LA CARRIOLA Para desplegar la carriola, desenganche el bloqueo lateral del armazón. Continúe sosteniendo abierto el bloqueo mientras despliega la carriola. ¡CLIC! Agarre el asa para padres y tire hacia arriba hasta que la carriola se abra completamente al escuchar un CLIC.
- Page 72 Cómo usar la carriola Asa para los padres Para ajustar el asa para padres, pulse los botones de la parte exterior del asa para padres y ajústela hacia arriba o hacia abajo hasta la posición deseada.
-
Page 73: Reposapiés
Cómo usar la carriola Reposapiés Para ajustar el reposapiés, pulse los dos botones y suba o baje el reposapiés hasta la posición deseada. -
Page 74: Arnés
Cómo usar la carriola Arnés ¡ADVERTENCIA! Para evitar lesiones graves por caídas o deslizamientos, utilice SIEMPRE el sistema de arnés interno en el modo de asiento para niños pequeños o en el modo de moisés. Para fijar el arnés, HAGA CLIC en hebillas en la correa de la hebilla. - Page 75 Cómo usar la carriola Arnés Para un ajuste ceñido y cómodo, ajuste la altura de la correa y apriete, tire hacia abajo del extremo libre de la correa. La correa para el hombro se puede ajustar a diferentes alturas. Para ajustarlas, retire las dos correas de los hombros de las ranuras y introdúzcalas en la nueva ranura, como se muestra.
- Page 76 Cómo usar la carriola Arnés Para aflojar las correas, empuje hacia arriba el retenedor y tire de la correa del hombro hacia abajo. Para desbloquear el arnés, pulse el botón de la correa de la hebilla.
-
Page 77: Reclinado Del Asiento Para Niños Pequeños
Cómo usar la carriola Reclinado del asiento para niños pequeños ¡ADVERTENCIA! Para evitar lesiones graves, NO levante ni recline el asiento mientras el niño esté en la carriola. Para reclinar el asiento para niños pequeños, levante el asa en la parte superior del asiento y gire el asiento en una de las tres posiciones. -
Page 78: Para Retirar El Asiento Del Niño Pequeño
Cómo usar la carriola Para retirar el asiento del niño pequeño Para retirar el asiento para niños pequeños, empuje los botones en ambos lados del asiento y levante el asiento, como se muestra. -
Page 79: Inversión De La Posición Del Asiento
Cómo usar la carriola Inversión de la posición del asiento ¡ADVERTENCIA! Para evitar caídas, NUNCA levante o transporte el asiento para niños pequeños por la barra de tope o con el niño dentro. El asiento para niños pequeños no es un portabebés. Para extraerlo y utilizarlo en modo orientado hacia atrás, presione los botones de liberación situados a ambos lados del... - Page 80 Cómo usar la carriola Conversión al modo de moisés ¡ADVERTENCIA! Para evitar lesiones graves, NUNCA utilice esta carriola en el modo de moisés a menos que las correas debajo del asiento estén DESABROCHADAS y el asiento se haya convertido correctamente como se indica en los pasos a continuación.
- Page 81 Cómo usar la carriola Conversión al modo de moisés Desabroche las dos correas situadas debajo del asiento eleve el reposapiés hasta la posición horizontal NOTA: Las correas DEBEN estar desabrochadas (refiérase a la pág. 34) y el Reposapiés debe estar horizontales antes de colocar al niño en la zona de asiento.
-
Page 82: Uso De Su Carriola Con Los Asientos De Bebé Para El Automóvil De Cybex
Cómo usar la carriola Uso de su carriola con los asientos de bebé para el automóvil de CYBEX Retire el asiento para niños pequeños del armazón de la carriola si está acoplado. Instale los adaptadores del asiento infantil para automóvil en el armazón de la carriola. - Page 83 Cómo usar la carriola Uso de su carriola con los asientos de bebé para el automóvil de CYBEX Para extraer el asiento infantil para el automóvil, bloquee los frenos y, a continuación, tire del asa de liberación del asiento infantil para el automóvil con una mano mientras levanta el asa de moisés...
-
Page 84: Configuraciones De La Carriola
Cómo usar la carriola Configuraciones de la carriola... -
Page 85: Cuidado Y Mantenimiento
Cuidado y mantenimiento Retirar/reemplazar las partes blandas CÓMO RETIRAR LOS PRODUCTOS BLANDOS Con la carriola en modo de asiento para niños pequeños, empuje ambas lengüetas y retire la barra de tope. Retire el asiento del niño pequeño del armazón de la carriola. - Page 86 Cuidado y mantenimiento Retirar/reemplazar las partes blandas Retire la capota del asiento del niño pequeño (ver pág. 22). Desde la parte inferior del asiento del niño pequeño, desabroche los botones detrás de los soportes del asiento.
- Page 87 Cuidado y mantenimiento Retirar/reemplazar las partes blandas Desabroche la lengüeta de la parte superior del asiento para niños pequeños y abra el zíper de la tela alrededor del armazón del asiento para niños pequeños. Retire la tela del armazón del asiento para niños pequeños.
- Page 88 Cuidado y mantenimiento Retirar/reemplazar las partes blandas SUSTITUCIÓN DE PRODUCTOS BLANDOS Tire de la tela alrededor del armazón del asiento para niños pequeños. Cierre el cierre de la tela alrededor del armazón del asiento para niños pequeños y fije la lengüeta en la parte superior del asiento para niños pequeños.
- Page 89 Cuidado y mantenimiento Retirar/reemplazar las partes blandas Desde la parte inferior del asiento para niños pequeños, fije los botones detrás de los soportes del asiento. Sujete la capota al asiento del niño.
- Page 90 Cuidado y mantenimiento Retirar/reemplazar las partes blandas Coloque el asiento del niño hasta que ENCAJE en su sitio a ambos lados del armazón de la carriola. ¡CLIC! Sujete la barra de tope al asiento del niño hasta que oiga un CLIC. ¡CLIC!
-
Page 91: Instrucciones De Cuidado
Cuidado y mantenimiento Instrucciones de cuidado INSTRUCCIONES PARA INSTRUCCIONES DE LA LIMPIEZA DE MANCHAS LAVADO A MÁQUINA • Limpie las manchas y derrames • Lavar por separado con suavidad en menores sobre las superficies de tela agua tibia. y plástico con agua fría y jabón suave. •... -
Page 92: Garantía Limitada
(2) años a partir de la fecha de compra original (el “Período de garantía”). Durante el periodo de garantía, CYBEX, a su discreción, puede reparar o sustituir el producto si el fabricante determina que tiene defectos de material o mano de obra. - Page 93 Ni CYBEX ni el distribuidor que vende este producto autorizan a ninguna persona a crear ninguna otra garantía, obligación o responsabilidad legal en conexión con este producto.
- Page 94 1801 Commerce Drive | Piqua, OH 45356 | USA Tel: 1–877–242–5676 | correo electrónico: info.us@cybex-online.com | www.cybex-online.com © 2023 CYBEX Industrial Limited. Todos los derechos reservados. Impreso en China. Este producto y sus componentes están sujetos a cambios sin previo aviso.
Need help?
Do you have a question about the GOLD and is the answer not in the manual?
Questions and answers