Table of Contents
Advertisement
Quick Links
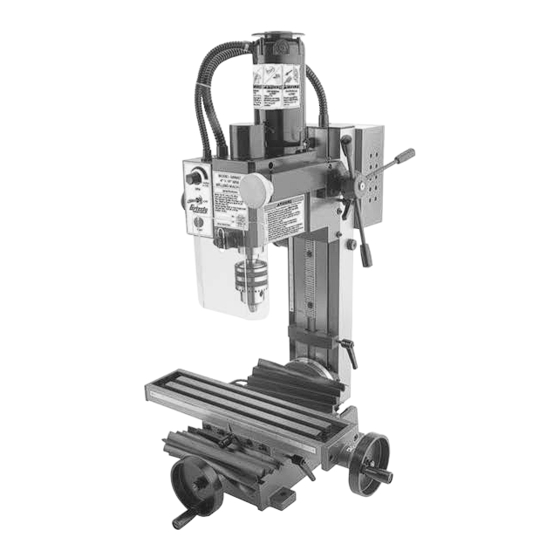
MODEL G8689Z
4" X 16" MINI MILLING
MACHINE
OWNER'S MANUAL
(For models manufactured since 07/23)
COPYRIGHT © AUGUST, 2023 BY GRIZZLY INDUSTRIAL, INC.
WARNING: NO PORTION OF THIS MANUAL MAY BE REPRODUCED IN ANY SHAPE
OR FORM WITHOUT THE WRITTEN APPROVAL OF GRIZZLY INDUSTRIAL, INC.
#CS22812 PRINTED IN CHINA
V1.08.23
***Keep for Future Reference***
Advertisement
Table of Contents

Subscribe to Our Youtube Channel
Related Manuals for Grizzly G8689Z


Summary of Contents for Grizzly G8689Z
- Page 1 (For models manufactured since 07/23) COPYRIGHT © AUGUST, 2023 BY GRIZZLY INDUSTRIAL, INC. WARNING: NO PORTION OF THIS MANUAL MAY BE REPRODUCED IN ANY SHAPE OR FORM WITHOUT THE WRITTEN APPROVAL OF GRIZZLY INDUSTRIAL, INC. #CS22812 PRINTED IN CHINA V1.08.23...
- Page 2 This manual provides critical safety instructions on the proper setup, operation, maintenance, and service of this machine/tool. Save this document, refer to it often, and use it to instruct other operators. Failure to read, understand and follow the instructions in this manual may result in fire or serious personal injury—including amputation, electrocution, or death.
-
Page 3: Table Of Contents
Table of Contents INTRODUCTION ..........2 SECTION 5: ACCESSORIES ......28 Contact Info............ 2 SECTION 6: MAINTENANCE ......30 Manual Accuracy ........... 2 Schedule ............30 Identification ........... 3 Cleaning & Protecting ........30 Controls & Components ......... 4 Lubrication ........... 30 Machine Data Sheet ........ -
Page 4: Introduction
Always consider safety first, as it applies to your individual working conditions. Use this and other machinery with caution and respect. Failure to do so could result in serious personal injury, damage to equip- ment, or poor work results. Model G8689Z (Mfd. Since 07/23) -
Page 5: Identification
Micro Downfeed Knob Speed Y-Axis Range Lock Handle Lever Y-Axis Headstock Handwheel Emergency X-Axis Stop Handwheel Button Column X-Axis Lock Handle Table To reduce your risk of serious injury, read this entire manual BEFORE using machine. Model G8689Z (Mfd. Since 07/23) -
Page 6: Controls & Components
RPM. Spindle speed stop position on column. ranges from 0–1100 RPM in low speed mode and 0–2500 RPM in high speed mode. K. Depth Stop: Limits depth of headstock and spindle travel for repeated operations. Model G8689Z (Mfd. Since 07/23) - Page 7 O. Column Tilt Scale: Indicates column tilt in relation to table. V. X-Axis Lock Handle: Tightens to prevent X-axis table movement for increased rigidity P. Z-Axis Scale: Indicates spindle and head- during operations when X-axis should not stock depth. move. Model G8689Z (Mfd. Since 07/23)
-
Page 8: Machine Data Sheet
MACHINE DATA SHEET Customer Service #: (570) 546-9663 · To Order Call: (800) 523-4777 · Fax #: (800) 438-5901 MODEL G8689Z 4" X 16" MINI MILLING MACHINE Product Dimensions: Weight................................101 lbs. Width (side-to-side) x Depth (front-to-back) x Height................20 x 20 x 30 in. - Page 9 The information contained herein is deemed accurate as of 8/9/2023 and represents our most recent product specifications. Model G8689Z PAGE 2 OF 2 Due to our ongoing improvement efforts, this information may not accurately describe items previously purchased. Model G8689Z (Mfd. Since 07/23)
-
Page 10: Section 1: Safety
Never operate under the influence of drugs or injury or blindness from flying particles. Everyday alcohol, when tired, or when distracted. eyeglasses are NOT approved safety glasses. Model G8689Z (Mfd. Since 07/23) - Page 11 Make sure they are properly installed, you experience difficulties performing the intend- undamaged, and working correctly BEFORE ed operation, stop using the machine! Contact our operating machine. Technical Support at (570) 546-9663. Model G8689Z (Mfd. Since 07/23)
-
Page 12: Additional Safety For Mill/Drills
OFF to avoid a possible sudden startup use. This will prevent them from being thrown by once power is restored. the spindle upon startup. -10- Model G8689Z (Mfd. Since 07/23) -
Page 13: Section 2: Power Supply
-11- Model G8689Z (Mfd. Since 07/23) - Page 14 Two-prong outlets do not meet the grounding requirements for this machine. Do not modify or use an adapter on the plug provided—if it will not fit the outlet, have a qualified electrician install the proper outlet with a verified ground. -12- Model G8689Z (Mfd. Since 07/23)
-
Page 15: Section 3: Setup
IMPORTANT: Save all packaging materials until you are completely satisfied with the machine and have resolved any issues between Grizzly or the shipping agent. You MUST have the original pack- aging to file a freight claim. It is also extremely helpful if you need to return your machine later. -
Page 16: Inventory
Figure 6. Loose inventory. Open-End Wrench 36mm ......1 G. T-Slot Nuts ⁄ "-16 ........2 H. Oil Bottle ............. 1 Spare Fuse 5A ........... 1 Hex Wrenches 3, 4, 5, 6mm ....1 Ea. -14- Model G8689Z (Mfd. Since 07/23) -
Page 17: Cleanup
NOTICE power connection to prevent unsupervised use. Avoid harsh solvents like acetone or brake parts cleaner that may damage painted sur- faces. Always test on a small, inconspicu- ous location first. -15- Model G8689Z (Mfd. Since 07/23) -
Page 18: Lifting & Placing
Figure 11, then connect sling ends to equipment. Column Lifting Sling Table Headstock Controls Y-Axis Lock Handle Figure 9. Components for preparing table for Figure 11. Example of lifting sling position. lifting. -16- Model G8689Z (Mfd. Since 07/23) -
Page 19: Leveling
Another option is a "direct mount" (see example below) where the machine is secured directly to the workbench with lag screws and washers. Figure 12. H2683 Master Machinist's Level. Lag Screw Flat Washer Machine Base Workbench Figure 14. "Direct Mount" setup. -17- Model G8689Z (Mfd. Since 07/23) -
Page 20: Test Run
Rotate spindle speed dial all the way counter- clockwise (see Figure 15). This resets power clockwise. Without opening Emergency Stop so machine can start. button, try to start spindle rotation by rotating spindle speed dial clockwise. Spindle should not rotate. -18- Model G8689Z (Mfd. Since 07/23) -
Page 21: Spindle Break-In
ON/OFF toggle switch to OFF position to turn machine DO NOT attempt to change speed range OFF. Congratulations! Spindle break-in is until spindle has come to complete stop, or complete! spindle gearing will be damaged. -19- Model G8689Z (Mfd. Since 07/23) -
Page 22: Section 4: Operations
Regardless of the content in this sec- tion, Grizzly Industrial will not be held liable for accidents caused by lack of training. -20- Model G8689Z (Mfd. Since 07/23) -
Page 23: Positioning Table
X-axis travel for when a tight tolerance is not required (see Figure 21). X-Axis Scale Y-Axis Lock Handle Y-Axis Handwheel Indicator Figure 19. Table adjustment components. Figure 21. Location of X-axis scale and indicator. -21- Model G8689Z (Mfd. Since 07/23) -
Page 24: Joining Drill Chuck & Arbor
Figure 22. Tapping drill chuck/arbor on block of wood. Attempt to separate drill chuck and arbor by hand —if they separate, repeat Steps 3–4. -22- Model G8689Z (Mfd. Since 07/23) - Page 25 Spindle Locking Pin Figure 27. Example of using hammer to unseat taper. Support tool with one hand and fully unthread drawbar with other hand. Figure 25. Spindle locking pin inserted. -23- Model G8689Z (Mfd. Since 07/23)
-
Page 26: Tilting Column
Shop Rags ......... As Needed For machining operations requiring an angle, the Wrench or Socket 17mm ........1 column of the Model G8689Z can be adjusted up to 45° in either direction of the vertical axis To install tooling: (Z-axis). -
Page 27: Using Spindle Downfeed
Using Spindle Downfeed The Model G8689Z is equipped with rapid and micro spindle downfeed controls, as shown in Figure 32. The rapid downfeed levers move the headstock up and down on the column quickly, similar to a drill press. The micro downfeed more precisely adjusts the headstock up and down. -
Page 28: Adjusting Depth Stop
(see depth stop if excessive force is used. Figure 32). — To secure headstock and spindle depth, like when milling a flat surface across workpiece face, tighten Z-axis lock handle. -26- Model G8689Z (Mfd. Since 07/23) -
Page 29: Setting Spindle Speed
Setting Setting Spindle Speed The Model G8689Z has two spindle speed rang- Spindle Speed es: a low speed range that spans from 0–1100 RPM and a high speed range that spans from 0–2500 RPM. Using the correct spindle speed is important for... -
Page 30: Section 5: Accessories
To reduce this risk, only install accessories ultra-smooth operation. The crank handle mea- recommended for this machine by Grizzly. sures 4" long and slides on and off when needed. NOTICE Refer to our website or latest catalog for additional recommended accessories. - Page 31 Figure 44. T26419 Syn-O-Gen Synthetic Grease. Figure 42. T25615 Milling for Home Machinists. www.grizzly.com 1-800-523-4777 order online at or call -29- Model G8689Z (Mfd. Since 07/23)
-
Page 32: Section 6: Maintenance
Failure to follow reasonable lubrication practices as instructed in this manual could lead to premature failure of machine components and will void warranty. -30- Model G8689Z (Mfd. Since 07/23) - Page 33 X-Axis Ways Figure 45. Location of X-axis ways. Y-Axis Ways Figure 48. Column tilt lubrication location. Figure 46. Location of Y-axis ways (way covers removed). -31- Model G8689Z (Mfd. Since 07/23)
- Page 34 Column Rack X-Axis Leadscrew Figure 51. Location of column rack. Figure 49. Location of X-axis leadscrew. Y-Axis Leadscrew Figure 50. Location of Y-axis leadscrew (way covers removed). -32- Model G8689Z (Mfd. Since 07/23)
-
Page 35: Section 7: Service
4. Replace broken or slipping gears. 5. Spindle bearings at fault. 5. Test by rotating spindle; rotational grinding/loose shaft requires bearing replacement. 6. Motor bearings at fault. 6. Test by rotating shaft; rotational grinding/loose shaft requires bearing replacement. -33- Model G8689Z (Mfd. Since 07/23) - Page 36 2. Adjust gibs (Page 35). Spindle 1. Machine operated at maximum speed for 1. Allow machine to cool; avoid operating at maximum overheats. extended period. speed for long times. 2. Poor spindle bearing lubrication. 2. Replace spindle bearings. -34- Model G8689Z (Mfd. Since 07/23)
-
Page 37: Adjusting Gibs
Figure 54. Location of Z-axis gib screws and jam nuts. When you are satisfied with gib adjustment, tighten jam screws without moving gib set screws. Figure 52. Example of adjusting X-axis gib. -35- Model G8689Z (Mfd. Since 07/23) -
Page 38: Adjusting X-Axis Leadscrew Backlash
Replace both carbon brushes at the same time when the motor no longer reaches full power, or when the brushes measure less than ⁄ " long (new brushes are ⁄ "). -36- Model G8689Z (Mfd. Since 07/23) -
Page 39: Tramming Spindle
(w/at least 0.0005" resolution) ......1 Indicator Holder Figure 58. Removing brush assembly. (mounted on the quill/spindle) ......1 Precision Parallel Block Install brush assemblies, then secure with (at least 9" in length) .......... 1 brush caps. -37- Model G8689Z (Mfd. Since 07/23) - Page 40 To measure spindle alignment along X-axis, 6–7 until you are satisfied with spindle place parallel block directly under spindle and axis alignment along table X-axis. indicator across length of table, as illustrated in Figure 61. -38- Model G8689Z (Mfd. Since 07/23)
-
Page 41: Section 8: Wiring
Technical Support at (570) 546-9663. The photos and diagrams included in this section are best viewed in color. You can view these pages in color at www.grizzly.com. -39- Model G8689Z (Mfd. Since 07/23) -
Page 42: Wiring Diagram
110 VAC 5-15 Plug CONTROL PANEL Ground Potentiometer WH24-2 4.7K Power Indicator P3 P1 ZD10 − ON/OFF Toggle Switch KEDU KNI-302 Emergency Stop Button Fuse Holder KEDU 02A1131 BF021 READ ELECTRICAL SAFETY -40- Model G8689Z (Mfd. Since 07/23) ON PAGE 39! -
Page 43: Electrical Component Photos
Electrical Component Photos Figure 63. Control box wiring. Figure 62. Electrical box wiring. READ ELECTRICAL SAFETY -41- Model G8689Z (Mfd. Since 07/23) ON PAGE 39! -
Page 44: Section 9: Parts
SECTION 9: PARTS We do our best to stock replacement parts when possible, but we cannot guarantee that all parts shown are available for purchase. Call (800) 523-4777 or visit www.grizzly.com/parts to check for availability. Table 31 21 22 28 17 13 BUY PARTS ONLINE AT GRIZZLY.COM! - Page 45 X-AXIS BEARING SEAT P8689Z038 CAP SCREW M6-1 X 25 P8689Z019 WORK TABLE P8689Z042 POINTER P8689Z020 X-AXIS LEADSCREW P8689Z092 FLAT SPRING P8689Z021 END COVER BUY PARTS ONLINE AT GRIZZLY.COM! -43- Model G8689Z (Mfd. Since 07/23) Scan QR code to visit our Parts Store.
-
Page 46: Headstock
Headstock 427-1 427-2 411-1 411-4 411-5 411-3 411-6 411-2 411-7 411-14 411-8 411-9 411-10 411-13 411-12 411-11 BUY PARTS ONLINE AT GRIZZLY.COM! -44- Model G8689Z (Mfd. Since 07/23) Scan QR code to visit our Parts Store. - Page 47 KEY 5 X 5 X 28 P8689Z406 STEEL BALL 5MM P8689Z481 DRILL CHUCK JT33 1/32"-1/2" P8689Z407 SHIFT LEVER HUB P8689Z482 ARBOR R8 X JT33 BUY PARTS ONLINE AT GRIZZLY.COM! -45- Model G8689Z (Mfd. Since 07/23) Scan QR code to visit our Parts Store.
-
Page 48: Column
Column 602 603 569-1 569-2 569-3 569-13 569-4 569-12 569-5 569-11 569-10 569-6 569-7 569-14 569-8 569-9 BUY PARTS ONLINE AT GRIZZLY.COM! -46- Model G8689Z (Mfd. Since 07/23) Scan QR code to visit our Parts Store. - Page 49 WRENCH 14 X 17MM OPEN-ENDS P8689Z570 LOCK NUT M24-3 P8689Z690 WRENCH 17 X 19MM OPEN-ENDS P8689Z571 FLANGE 10MM P8689Z691 WRENCH 36MM OPEN-END BUY PARTS ONLINE AT GRIZZLY.COM! -47- Model G8689Z (Mfd. Since 07/23) Scan QR code to visit our Parts Store.
-
Page 50: Labels & Cosmetics
Safety labels help reduce the risk of serious injury caused by machine hazards. If any label comes off or becomes unreadable, the owner of this machine MUST replace it in the original location before resuming operations. For replacements, contact (800) 523-4777 or www.grizzly.com. BUY PARTS ONLINE AT GRIZZLY.COM! -48- Model G8689Z (Mfd. -
Page 51: Warranty & Returns
WARRANTY & RETURNS Grizzly Industrial, Inc. warrants every product it sells for a period of 1 year to the original purchaser from the date of purchase. This warranty does not apply to defects due directly or indirectly to misuse, abuse, negligence, accidents, repairs or alterations or lack of maintenance.
Need help?
Do you have a question about the G8689Z and is the answer not in the manual?
Questions and answers