Schmalz SCPMb Maintenance Instruction
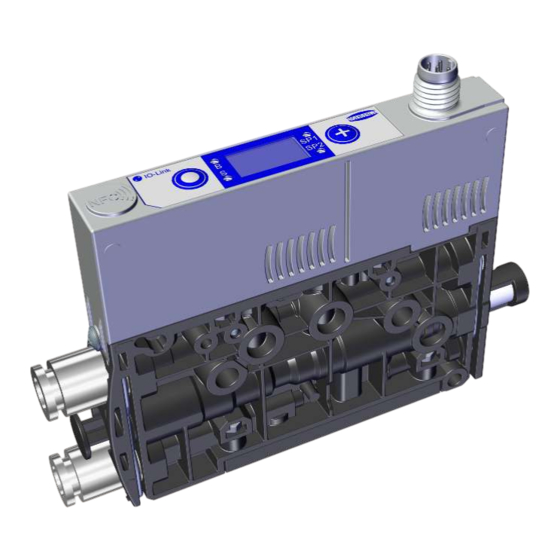
Compact ejector
Hide thumbs
Also See for SCPMb:
- Operating instructions manual (34 pages) ,
- Operating instructions manual (16 pages) ,
- Operating instructions manual (30 pages)

Related Manuals for Schmalz SCPMb


Summary of Contents for Schmalz SCPMb
- Page 1 Maintenance instructions Compact Ejector SCPMb, SCPMc, SCPMi, SCPMt (b, c, i) WWW.SCHMALZ.COM EN-US · 30.30.01.03570 · 00 · 08/23...
- Page 2 Published by © J. Schmalz GmbH, 08/23 This document is protected by copyright. J. Schmalz GmbH retains the rights established thereby. Repro- duction of the contents, in full or in part, is only permitted within the limits of the legal provisions of copyright law. Any modifications to or abridgments of the document are prohibited without explicit writ- ten agreement from J. Schmalz GmbH.
-
Page 3: Table Of Contents
Contents Contents 1 Important Information ........................... 4 Note on Using this Document...................... 4 The technical documentation is part of the product ................ 4 Symbols.............................. 4 Warnings in This Document ........................ 5 2 Maintenance .............................. 6 Safety Instructions .......................... 6 Illustrations............................ 6 Cleaning the Ejector .......................... -
Page 4: Important Information
ð Failure to follow the instructions in these Maintenance instructions may result in injuries! ð Schmalz is not liable for damage or malfunctions that result from failure to heed these instructions. If you still have questions after reading the technical documentation, contact Schmalz Service at: www.schmalz.com/services... -
Page 5: Warnings In This Document
1 Important Information 1.4 Warnings in This Document Warnings warn against hazards that may occur when handling the product. The signal word indicates the level of danger. Signal word Meaning Indicates a medium-risk hazard that could result in death or serious injury if WARNING not avoided. -
Page 6: Maintenance
2 Maintenance 2 Maintenance 2.1 Safety Instructions Maintenance work may only be carried out by qualified personnel. 4 Create atmospheric pressure in the ejector’s compressed air circuit before working on the system! WARNING Failure to follow the instructions in these Maintenance instructions may result in in- juries! 4 Read the Maintenance instructions carefully and observe the contents. -
Page 7: Replacing The Silencer Insert
2 Maintenance 2.4 Replacing the Silencer Insert Heavy infiltration of dust, oil, and so on, may contaminate the silencer insert and reduce the suction ca- pacity. Cleaning the silencer insert is not recommended due to the capillary effect of the porous material. If the suction capacity decreases, replace the silencer insert: ü... - Page 8 2 Maintenance 4. Pull the silencer insert out of the housing and dispose of it. 5. Insert the new silencer insert into the housing and reinstall the silencer. 6. Mount the clamp in the correct position. ð The clamp is mounted flush with the un- derside of the ejector and the clamp legs both lie in the grooves.
-
Page 9: Replacing The Valve
2 Maintenance 2.5 Replacing the Valve 1. Remove the two screws on the side. 2. Remove the upper part from the housing. ð (S) suction valve ð (A) blow off valve 3. Release and remove the two screws (1) on the faulty valve. -
Page 10: Changing The Piston
2 Maintenance 4. Remove the valve (2) from the housing. 5. Ensure that the sealing frame (3) is correctly mounted/fitted on the new valve. 6. Install the new valve in the reverse order. 2.6 Changing the Piston CAUTION The valve piston flies out of the housing borehole at high speed due to a strong compressed air pulse. - Page 11 2 Maintenance ü Deactivate the ejector and depressurize the pneumatic systems. 1. Place a small flat screwdriver on the ejector as shown and loosen the clamp. 2. Remove the clamp. 3. Remove the component (X) and spring (1) from the housing borehole. 4.
- Page 12 2 Maintenance 5. Move the valve piston (2) out of the housing borehole by introducing compressed air (p) into the compressed air connection (3). Start with a small amount of compressed air and slowly increase the pressure until the valve pis- ton (2) comes loose and moves out of the housing borehole.
-
Page 13: Replacing The Non-Return Valve
2 Maintenance 2.7 Replacing the Non-return Valve ü Deactivate the device and depressurize the pneumatic systems. 1. Loosen the four fastening screws of the hous- ing plate (1). 2. Remove the housing plate (1). 3. Remove the sealing frame (2). 4. Replace the valve flap (3) mounted in the housing plate (1). - Page 14 2 Maintenance 5. Insert the new sealing frame (2) into the ejec- tor housing in the correct position. 6. Check that all nuts (4 pieces) are fitted . At- tach the housing plate (1) to the ejector hous- ing in the correct position and tighten the four fastening screws with a tightening torque of 0.25 Nm 14 / 16...
-
Page 15: Spare And Wearing Parts
3 Spare and Wearing Parts 3 Spare and Wearing Parts Maintenance work may only be carried out by qualified personnel. WARNING Risk of injury due to incorrect maintenance or troubleshooting 4 Check the proper functioning of the product, especially the safety features, after every maintenance or troubleshooting operation. - Page 16 At Your Service Worldwide Vacuum automation Handling systems WWW.SCHMALZ.COM/AUTOMATION WWW.SCHMALZ.COM/EN-US/VACUUM-LIFTERS- AND-CRANE-SYSTEMS J. Schmalz GmbH Johannes-Schmalz-Str. 1 72293 Glatten, Germany T: +49 (0) 7443 2403-0 schmalz@schmalz.de WWW.SCHMALZ.COM...
Need help?
Do you have a question about the SCPMb and is the answer not in the manual?
Questions and answers