
Related Manuals for RIVERSMITH RIVEROUIVER SHORTCUT


Summary of Contents for RIVERSMITH RIVEROUIVER SHORTCUT
- Page 1 SHORTCUT R OOFTOP F LY R O D HO L D E R. LO C KE D. LOA DE D. REA DY TO F IS H. INSTALLATION GUIDE W W W. R I V E R S M I T H . C O M @ R I V E R S M I T H U S A Patent Pending...
- Page 2 CONTENTS INCLUDED PARTS TOOLS NEEDED & MOUNT ASSEMBLIES STEP 1 - PREPARE VEHICLE STEP 2 - PLACE ON YOUR VEHICLE STEP 3 (A,B,C) - POSITION MOUNTING BRACKET 8-10 STEP 4 (A,B,C) - SECURE MOUNTING BRACKET SAFET Y INFORMATION DRIVING MAINTENANCE...
- Page 3 • Rod Chairs • Reel Box Pads See full lineup of Accessories at www.riversmith.com The ShortCut RQ is built and tested to the highest possible standards to securely transport and protect your gear, however it is not meant as a long term storage solution.
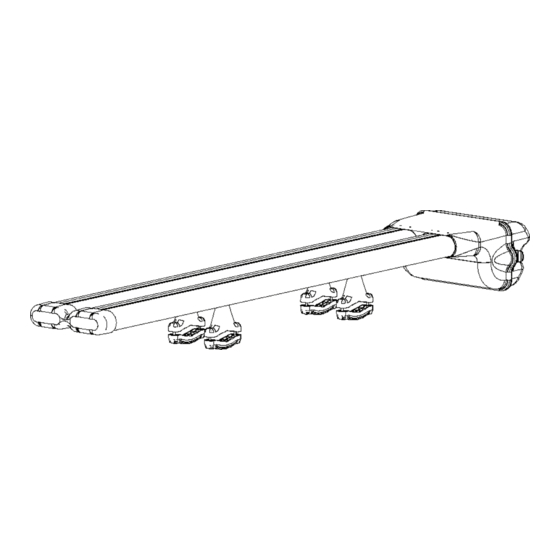
- Page 4 TOOLS NEEDED MOUNT ASSEMBLIES STANDARD MOUNT QUICK RELEASE MOUNT LOCK T-STUD T-STUD OR (DUMMY LOCK) 5MM MOUNTING 10MM HEX NUT (Inside BOLTS Riser) RISER LATCH TAB STRAP TENSION TENSION STRAP ADJUSTMENT BOLT BOTTOM BRACKET NOTE: Each set comes with one locking mount and the other mount has a “dummy lock”...
- Page 5 STEP 1 NOTE: Quick Release and LP T-Track Mounts are lower- profile than Standard Mounts and may require flipping the ShortCut RQ upside down to avoid the Reel Box hitting the roof of your vehicle. Prepare Vehicle - DO NOT TIGHTEN MOUNTING BRACKETS UNTIL STEP 3 Measure from center of front crossbar to estimated location of the...
- Page 6 STEP 2 Placing River Quiver on Your Vehicle Place on vehicle, optimizing side to side ShortCut RQ and front to back location. Monitor interference of rear hatches or doors. • Mark River Quiver where Quick Release Mounts should be positioned to attach to vehicle crossbars.
- Page 7 STEP 3A Position Standard Mounting Brackets Remove from vehicle and tighten nuts on T-Studs using 10mm nut driver so risers align with marks made previously. • DO NOT OVERTIGHTEN OR DAMAGE WILL OCCUR CONTINUE ON PAGE 8 IF USING STANDARD MOUNTING BRACKETS...
- Page 8 STEP 3B Position LP T-Track Mounting Brackets Remove from vehicle and tighten nuts on T-Studs using 10mm nut driver so LP T-Track Mounts align with marks made previously. • DO NOT OVERTIGHTEN OR DAMAGE WILL OCCUR CONTINUE ON PAGE 9 IF USING LP T-TRACK MOUNTING BRACKETS...
- Page 9 STEP 3C Position Quick Release Mounting Brackets Remove from vehicle and rotate the entire Quick Release Mount clockwise until secure and parallel with the extrusion. Ensure each mount aligns with marks made previously. Repeat for each mount. • DO NOT OVERTIGHTEN OR DAMAGE MAY OCCUR ROTATE CLOCKWISE TO TIGHTEN CORRECT SECURE ALIGNMENT...
- Page 10 STEP 4A Secure Standard Mounting Brackets Place back on vehicle and attach Mounting ShortCut RQ Brackets to Risers. Tighten Mounting Bracket Bolts or Mounting Bracket Locking Hardware evenly from side to side, one riser to the next with 4mm hex wrench or locking hardware key.
- Page 11 STEP 4B Secure LP T-Track Mounting Brackets Place back on vehicle by sliding the LP ShortCut RQ T-Track Mounts into T-track cross bars. Tighten Mounting Bracket Bolts evenly on each side, one LP T-Track Mount to the next with 4mm hex wrench. After fully tightening the bolts, install Security Caps over each bolt using the Security Key.
- Page 12 STEP 4C Secure Quick Release Mounting Brackets Place back on vehicle aligning each Quick ShortCut RQ Release Mount with the cross bars. Adjust the tension bolt for each tension strap with 4mm hex wrench until you are able to turn down each latch tab with secure tension around the cross bars.
- Page 13 SAFET Y INFORMATION • Improperly secured loads and incorrectly mounted racks or accessories can come loose causing damage to property, serious injury, or death. • Always place crossbars as far apart as possible before mounting ShortCut RQ. • Check all rack and accesory hardware: •...
- Page 14 DRIVING • Do not exceed posted speed limits or speeds appropriate for the terrain and conditions. • Off road driving is not recommended and could result in damage to vehicles, accessories, or gear. • Closely monitor overhead clearances. • Adjust speed for curves. •...
- Page 15 • To replace lost or damaged keys, record key/lock number and register product online at www.riversmith.com • In the case the mounting brackets need to be removed or replaced, the rivets holding the nose cone are removeable/reusable. Simply insert a flathead screwdriver under the nose cone within the T-Track and pry firmly upward/downward to release the press in rivet.
- Page 16 FOR ANY INCIDENTAL OR CONSEQUENTIAL DAMAGES TO NON-RIVER QUIVER PRODUCTS USED IN CONJUNCTION WITH RIVER QUIVER PRODUCTS. The warranty is only available in the United States. No Riversmith reseller, agent, or employee is authorized to make any modification, extension, or addition to this warranty.
Need help?
Do you have a question about the RIVEROUIVER SHORTCUT and is the answer not in the manual?
Questions and answers