Advertisement
Available languages
Available languages
Quick Links
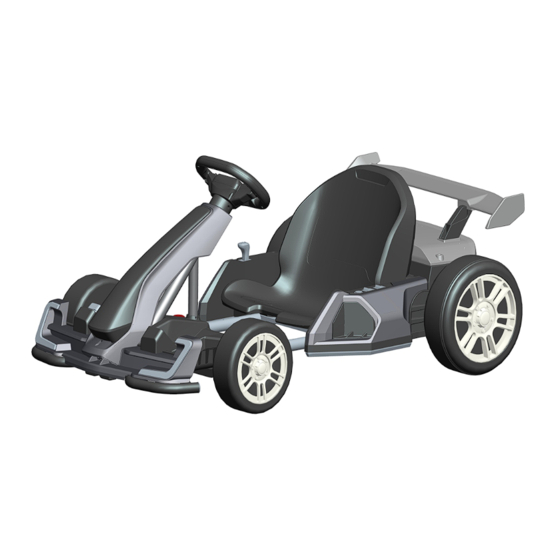
CHILDREN'S ELECTRIC DRIFT GO KART
Please read entire manual before starting assembly.
Keep this manual along with your purchase receipt for future reference.
WARNING:
CHOKING HAZARD-Small parts.
Not for children under 3 years.
CAUTION
Screws contain potentially
hazardous sharp points or sharp
edges. Adult assembly required.
Contents, colors and decorations may vary from those shown.
IMPORTANT, RETAIN FOR FUTURE REFERENCE: READ CAREFULLY
OWNER'S MANUAL
WARNING:
Toy must be assembled by adult before use.
WARNING
To reduce the risk of injury, adult
supervision is required. Never use on road
ways, near motor vehicles, on or near steep
inclines or steps,swimming pools or other
bodies of water. Always wear shoes, and
never allow more than one rider.
1
IN230700076V01_IT
370-287V90
EN
Advertisement

Related Manuals for HOMCOM 370-287V90


Summary of Contents for HOMCOM 370-287V90
- Page 1 IN230700076V01_IT 370-287V90 CHILDREN'S ELECTRIC DRIFT GO KART Please read entire manual before starting assembly. Keep this manual along with your purchase receipt for future reference. WARNING: WARNING: CHOKING HAZARD-Small parts. Toy must be assembled by adult before use. Not for children under 3 years.
- Page 2 Specifications: Battery: 24V/5AH*1 Motor: 24V 750# 150W*2 Suitable ages: 6+ years Maximum weight: 50kg Speed : 6-12km/h Power way: Charging type Charg: 12 hours ; Use: 83 hours Use of time: Charger: Input AC -240V, 50/60Hz, output DC 24V 1000 mA WARNING 1.The pictures in this instruction is only for explaining the operation and structure of the product, when there's any difference with the real product, please confirm with...
- Page 3 STORAGE BATTERY INFORMATION AND MAINTENANCE ● Please charge hours before first time use. ● Please use the suitable adapter to charge storage battery, otherwise the ride-on will be damaged. ● Please charge the car once the speed is slower than normal, otherwise it will decrease storage battery life.
- Page 4 PREVENT FIRE AND ELECTRIC SHOCK: - Use the only rechargeable battery and charger supplied with your vehicle. - NEVER substitute the battery or the charger with another brand. Using another battery or charger may cause a fire or explosion. - Do not use the battery or charger for any other product. Overheating, fire or explosion could occur.
- Page 5 Charger Socket Charge the Battery The first charge will take about 12 hours. 1.Insert the charger connector into the charger port. 2.Plug the charger into a standard 120V or 230V wall outlet. 3.After charging it complete( at least 8-10 hours, but not more than 24 hours, with first charge taking about 12 hours)unplug the charger from the wall outlet and unplug the battery connector from the charger port.
- Page 6 Spoiler Main body Faceguard Front Hub Caps-small Steering wheel Seat size Rear Hub Caps-big size Front Wheel Rear Wheel Rear Axle Steering Rod Steering Fork Toolbox Cover Fixed Part M4*12 M4*16...
-
Page 7: Assembly Instruction
Note: • Please identify all parts before assembly and save all packaging material until assembly is completed to ensure that no parts are discarded. • Metal parts have been coated with lubricant for protection during shipment. Wipe all metal parts with a paper towel to remove any excess lubricant. Assembly tools required: Socket tool x2 Screwdriver... - Page 8 Front Fork Assembly 1.Put the fork to the right place of the body. 2.Lift the screw until it is aligned with the hole and nut, insert a M5X30 screw , and tighten a M5 nut on the opposite side. Faceguard Assembly...
- Page 9 1.Lift the faceguard. 2.Plug the connector from the vehicle body into the connector on the faceguard. 3.Put the fixed part to the faceguard. 4.Tighten two M4x16 screws through the fixed part into the faceguard. 5.Tighten one M4x16 screw through the faceguard into the vehicle body. Steering Rod Assembly 1.
- Page 10 1. Lift the steering wheel. 2. Plug the connector from the steering wheel into the terminal on the faceguard. 3. Lift the screw until it is aligned with the hole and nut, insert a M5X53 screw, and tighten a M5 nut on the opposite side. Rear Axle A ssembly Insert the rear axle to the main body from left to right ,make the two side with the same length.
- Page 11 1. Slide the rear wheel onto the rear axel, and keep the rear wheel match up with the gear box. 2. Slide the M8X1.3 washer onto the rear axel. 3. Tighten a M8 screw nut to the end of the rear axle with a socket tool, take the same precedure on the other side at the same time.
- Page 12 1.Put the seat to the main body in the right place. 2.Fasten the seat with two M4X16 screws(left& right) by the screwdriver (not included) Connect the Power Supply Plug the connector from the battery to the terminal from the vehicle body, match the same color.
-
Page 13: Operating Your Vehicle
1.Fit the spoiler into the groove in the toolbox cover. 2.Fasten it with two M4X12 screws by the screwdriver(not included). 3.Fit the spoiler assembly into the groove at the back of the main body. Operating your vehicle... - Page 14 1. Power switch: Turns the product on and off. 2. Light Button 3. High/Low speed switch: Operates the product to move forward in high or low speed. 4. Drift/Sport Mode: Operates the product at the Sport Mode, press the Drift Mode if want to have the function.
-
Page 15: Troubleshooting
Troubleshooting Problem Possible Cause Solution Circuit breaker tripped Circuit breaker may "trip" and stop the vehicle if it is overloaded or the driving conditions too severe. The breaker will automatically reset after approximately 10 seconds, and the vehicle will operate normally. - Page 16 Problem Possible Cause Solution Check all wires and connectors. Make sure that the motor harness connector Loose wire or connectors is plugged into the battery tightly, and that there are no loose wires around the motor. Circuit breaker may "trip" and stop the vehicle if it is overloaded or the driving Car was conditions too severe.
- Page 17 Problem Possible Cause Solution A new battery should have been charged for at least 12hours before using the vehicle for the first time. After that, it must Undercharged be recharge the battery for at least 8-10 battery hours after each use. Never charge longer than 24 hours.
-
Page 18: Parts Diagram
Parts diagram Parts diagram Note: Some parts shown are assembled to both sides of the vehicle. No. Part Quantity No. Part Quantity 1. Steering Rod 10. Rear Hub Cap 2. Main Body 11. Rear Wheel 3. Lock Nut 12. Toolbox Cover 4. -
Page 19: Istruzioni Di Assemblaggio
IN230700076V01_IT 370-287V90 GO KART ELETTRICO PER BAMBINI Leggere il manuale per intero prima di iniziare il montaggio. Conservare questo manuale insieme alla ricevuta di acquisto per riferimenti futuri. AVVERTENZA: AVVERTENZA: Il giocattolo deve essere assemblato da un RISCHIO DI SOFFOCAMENTO-Parti adulto prima dell'uso. - Page 20 Specifiche: Batteria: 24V/5AH*1 Motore: 24V 750# 150W*2 Eta' Adatta: 6+ anni Peso Massimo: 50kg Velocita': 6-12km/h Alimentazione: Ricaricabile Ricarica: 8-12 ore ; Uso: 0.83 Tempistiche: Caricatore: Ingresso AC 100-240 V, 50/60Hz, produzione DC 24V 1000 AVVERTENZE 1.Le immagini in questo manuale servono solo per spiegare il funzionamento e la struttura del prodotto, se vi sono differenze con il prodotto reale, si prega di rifarsi a quest'ultimo.
- Page 21 INFORMAZIONI SULLA CONSERVAZIONE E MANUTENZIONE DELLA BATTERIA ● Si prega di ricaricare da a 12 ore prima del primo utilizzo. ● Utilizzare l'apposito adattatore per ricaricare la batteria, altrimenti danneggerete il veicolo. ● Si prega di ricaricare il veicolo una volta che la velocità di moto è inferiore a quella normale, altrimenti cio' ridurrà...
- Page 22 PREVENIRE INCENDI E SCOSSE ELETTRICHE: - Utilizzare solo la batteria ricaricabile e il carica batterie forniti con il veicolo. - NON sostituire MAI la batteria o il caricatore con quelli di un'altra marca. L'utilizzo di un'altra batteria o caricatore può causare un incendio o un'esplosione. - Non utilizzare la batteria o il carica batterie con altri prodotti.
- Page 23 ● Ricaricare la batteria dopo ogni utilizzo. La batteria puo' essere maneggiata solo da un adulto. Ricaricarla almeno una volta al mese quando il veicolo non viene utilizzato a lungo. ● Non lavare il veicolo con una canna ad acqua. Non lavarlo con acqua e sapone. Non guidare il veicolo in caso di pioggia o neve, in quanto l'acqua ne danneggerà...
- Page 24 Alimentatore Presa Caricare la batteria La prima ricarica richiederà circa 12 ore. 1. Inserire il connettore del caricatore nella porta del caricatore stesso. 2. Collegare il caricatore ad una presa di corrente a muro standard da 120 V o 230 V. 3.
- Page 25 Alettone Carena Protezione anteriore Coprimozzo anteriore Volante Sedile piccolo Coprimozzo anteriore Ruota anteriore Ruota posteriore grande Asse posteriore Piantone sterzo Forcella sterzo Coperchio cassetta degli Morsetto attrezzi M4*12 M4*16...
- Page 26 Avviso: • Identificare tutte le parti prima dell'assemblaggio e conservare tutto il materiale di imballaggio fino al completamento del montaggio per garantire che nessuna parte venga scartata. • Le parti metalliche sono state rivestite con lubrificante per proteggerle durante la spedizione.
- Page 27 Assemblaggio forcella anteriore 1. Montare la forchetta in posizione corretta nella carena. 2. Sollevare la vite fino ad allinearla con il foro e il dado, inserire una vite M5X30 e stringere un dado M5 sul lato opposto. Assemblaggio protezione anteriore...
- Page 28 1.Sollevare la protezione. 2. Inserire il connettore dalla carena del veicolo in quello della protezione. 3. Montare il morsetto sulla visiera. 4. Stringere due viti M4x16 attraverso il morsetto e alla protezione. 5. Stringere una vite M4x16 attraverso la protezione e alla carena. Assemblaggio del piantone dello sterzo 1.
- Page 29 1. Sollevare il volante. 2. Inserire il connettore del volante nel terminale sulla protezione anteriore . 3. Sollevare la vite finché non è allineata con il foro e il dado, inserire una vite M5X53 e stringere un dado M5 sul lato opposto. Assemblaggio asse posteriore Inserire l'asse posteriore nella carena passando da sinistra a destra, mantenere la stessa lunghezza sui due lati.
- Page 30 1. Far scorrere la ruota posteriore sull'asse posteriore e mantenerla allineata con la scatola del cambio. 2. Far scorrere la rondella M8X1,3 sull'asse posteriore . 3. Stringere un dado M8 all'estremità dell'asse posteriore con una chiave a bussola, eseguire la stessa procedura sull'altro lato contemporaneamente. 4.
- Page 31 1. Montare il sedile sula carena in posizione corretta. 2. Fissare il sedile con due viti M4X16 (sinistra e destra) con il cacciavite (non incluso). Connettere l’alimentazione Collegare il connettore dalla batteria al terminale dalla carena del veicolo, connetterli dello stesso colore.
- Page 32 1. Montare l’alettone nella scanalatura presente sul coperchio della cassetta degli attrezzi. 2. Stringere con due viti M4X12 usando il cacciavite (non incluso). 3. Fissare l’alettone nella scanalatura sul retro della carena. Utilizzare il veicolo...
- Page 33 1. Interruttore di alimentazione: accende e spegne il veicolo. 2. Pulsante fanali. 3. Interruttore alta/bassa velocità: aziona il veicolo per avanzare a velocità alta o bassa. 4. Modalità Drift/Sport: azionare il veicolo in modalità Sport, premere la modalità Drift se si desidera attivare la relativa funzione.
-
Page 34: Dépannage
Dépannage Problema Possibile Causa Soluzione L'interruttore può "scattare" e fermare il E’ scattato l’interruttore veicolo se è sovraccarico o se le condizioni di guida sono troppo inadeguate. L'interruttore si ripristinerà automaticamente dopo circa 10 secondi e il veicolo riprendera’ a funzionare normalmente. - Page 35 Problema Possibile Causa Soluzione Controllare tutti i cavi e connettori. Assicurarsi che il cablaggio del motore sia collegato saldamente alla batteria e Cavi o connettori allentati che non vi siano fili allentati attorno al motore. L'interruttore può "scattare" e fermare il veicolo se è...
- Page 36 Problema Possibile Causa Soluzione Una nuova batteria deve caricata per almeno 12 ore prima del primo utilizzo del veicolo. Quindi, è necessario ricaricare la batteria per almeno 8-10 ore dopo ogni utilizzo. Non ricaricarla mai più di 24 ore. Batteria scarica Controllare tutti i connettori;...
- Page 37 Diagramma delle parti Parts diagram Nota: alcune parti mostrate in figura sono assemblate da entrambi i lati del veicolo. NO. Parte Quantità NO. Parte Quantità 1. Piantone dello sterzo 10. Coprimozzo posteriore 2. Carena 11. Ruota posteriore 3. Controdado 12. Coperchio scatola attrezzi 4.
- Page 38 370-287V90 Model identifie AC 100-240 Input voltage Input AC frequency 50/60 Output voltage DC 24 Output current Output power Average active efficiency 87.5 Efficiency at low load (10 %) 84.25 No-load power consumption 0.08...
Need help?
Do you have a question about the 370-287V90 and is the answer not in the manual?
Questions and answers