Advertisement
Quick Links
IMPORTANT NOTE:
-
PLACE ALL PARTS ON A CLEAN AND SMOOTH SURFACE SUCH AS A RUG OR
CARPET TO AVOID THE PARTS FROM BEING SCRATCHED.
-
BEFORE YOU BEGIN, KINDLY FOLLOW THE ASSEMBLY INSTRUCTIONS STEP
BY STEP.
-
DO NOT TIGHTEN ALL SCREWS AND BOLTS UNTIL THE TABLE IS FULLY SET-
UP.
ASSEMBLY INSTRUCTIONS
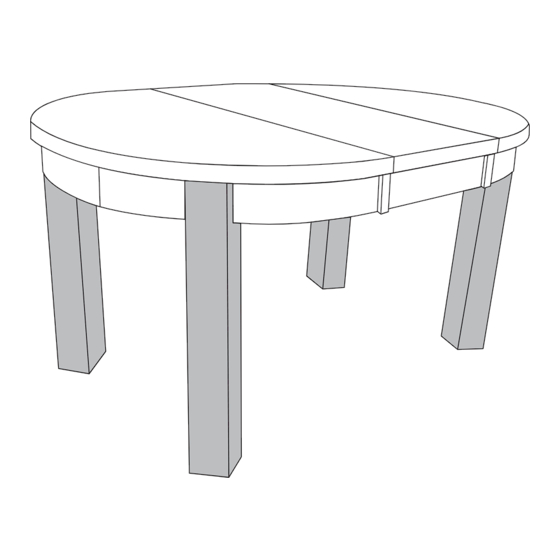
FALCON EXTENSION TABLE
WF306943
01-02
Advertisement

Related Manuals for BED BATH & Beyond FALCON WF306943


Summary of Contents for BED BATH & Beyond FALCON WF306943
- Page 1 ASSEMBLY INSTRUCTIONS FALCON EXTENSION TABLE WF306943 IMPORTANT NOTE: PLACE ALL PARTS ON A CLEAN AND SMOOTH SURFACE SUCH AS A RUG OR CARPET TO AVOID THE PARTS FROM BEING SCRATCHED. BEFORE YOU BEGIN, KINDLY FOLLOW THE ASSEMBLY INSTRUCTIONS STEP BY STEP. DO NOT TIGHTEN ALL SCREWS AND BOLTS UNTIL THE TABLE IS FULLY SET- 01-02...
- Page 2 WF306943 CARTON CONTENT: TABLE PART LISTS TABLE HARDWARE LISTS SKETCH NO. DESCRIPTION NO. DESCRIPTION SKETCH TABLE TOP JCBB SCREW M8 X 60MM 8PCS 4PCS 8PCS TABLE LEG SPRING WASHER M8 X 13.5MM 1PCS 8PCS EXTENSION TOP FLAT WASHER M8 X 18MM ALLEN KEY M5 X 25 X 75 ASSEMBLY COMPLETE! (WITH EXTENSION LENGTH)
-
Page 3: Important Note
ASSEMBLY INSTRUCTIONS FALCON DINING CHAIR WF306945 IMPORTANT NOTE: PLACE ALL PARTS ON A CLEAN AND SMOOTH SURFACE SUCH AS A RUG OR CARPET TO AVOID THE PARTS FROM BEING SCRATCHED. BEFORE YOU BEGIN, KINDLY FOLLOW THE ASSEMBLY INSTRUCTIONS STEP BY STEP. DO NOT TIGHTEN ALL SCREWS AND BOLTS UNTIL THE CHAIR IS FULLY SET- 01-03... - Page 4 WF306945 CARTON CONTENT: CHAIR PART LISTS CHAIR HARDWARE LISTS DESCRIPTION SKETCH DESCRIPTION SKETCH 4PCS 16PCS CHAIR BACK JCBC SCREW M6 X 70MM FRONT LEG (R) JCBC SCREW M6 X 50MM 4PCS 16PCS 4PCS 8PCS FRONT LEG (L) JCBC SCREW M6 X 35MM BOX SEAT 4PCS SPRING WASHER M6 X 13.5MM...
-
Page 5: Phillips Screwdriver
STEP 2 STEP 1 Attach Front Legs(2 & 3) to Place the Chair Back(1) on a flat & soft surface to prevent the assembled chair back (1) scratches. with box seat(4) by using Attach the Box Seat (4) to the Chair Back(1). flat washer(E), spring Secure from the center using flat washer(E), spring washer(D) and JCBC screw...
Need help?
Do you have a question about the FALCON WF306943 and is the answer not in the manual?
Questions and answers