
Related Manuals for Echo shindaiwa PB-8010


Summary of Contents for Echo shindaiwa PB-8010
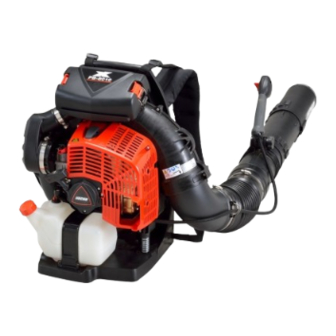
- Page 1 PB-8010 ECHO: EB810 shindaiwa: (Serial number: 38000001 and after) REVISED NOV. 2020 Ref. No. 403-21 Copyright(C)2020 YAMABIKO Corporation All rights reserved.
- Page 2 INTRODUCTION This service manual contains information for service and maintenance of ECHO BACKPACK BLOWER model PB-8010 and shindaiwa BACKPACK BLOWER model EB810. For systematic diagnosis, to avoid extra work, time loss and to meet Emission regulation, please refer to “Troubleshooting guide” that describes problems, testing, remedies and references.
-
Page 3: Table Of Contents
PB-8010, EB810 TABLE OF CONTENTS Page Page 1 SERVICE INFORMATION ........2 4-13 Adjusting carburetor ........34 Specifi cations ...........2 4-13-1 General adjusting rules ......34 Technical data ..........3 4-13-2 Initial setting Throttle adjust screw, Torque limits .............4 L mixture needle and H mixture needle ..34 Special repairing materials .......4 4-13-3 Adjusting carburetor ........35 Service limits ............5... -
Page 4: Service Information
PB-8010, EB810 SERVICE INFORMATION 1 SERVICE INFORMATION 1-1 Specifi cations Dimensions* Length mm (in) 362 (14.3) Width mm (in) 526 (20.7) Height mm (in) 544 (21.4) Dry weight** kg (lb) 11.2 (24.7) YAMABIKO, stratifi ed scavenging, air-cooled, Engine Type two-stroke, single cylinder Rotation Counterclockwise as viewed from the output end Displacement... -
Page 5: Technical Data
PB-8010, EB810 SERVICE INFORMATION 1-2 Technical data Engine Compression pressure MPa (kgf/cm ) (psi) 1.03 (10.5) (150) Ignition system Spark plug gap mm(in) 0.6 - 0.7 (0.024 - 0.028) Spark test Tester gap w/ spark plug mm(in) 4.0 (0.16) Tester gap w/o spark plug mm(in) 6.0 (0.24) Secondary coil resistance... -
Page 6: Torque Limits
PB-8010, EB810 SERVICE INFORMATION 1-3 Torque limits Descriptions Size kgf•cm N•m in•lbf Starter system Starter case** M5 * 45 - 65 4.5 - 6.5 40 - 55 Ignition system Magneto rotor (Flywheel) 300 - 400 30 - 40 260 - 348 Ignition coil 30 - 45 3 - 4.5... -
Page 7: Service Limits
PB-8010, EB810 SERVICE INFORMATION 1-5 Service limits 5K243 5K228 5K229 5K230 5K231 5K016 5K042 5K244 5K219 5K171 5K232 mm (in) Description A Cylinder bore When plating is worn and aluminum can be seen B Piston outer diameter Min. 52.88 (2.082) C Piston pin bore Max. -
Page 8: Special Tools
PB-8010, EB810 SERVICE INFORMATION 1-6 Special tools Part Number Description Reference X602-000340 Torx wrench (T27) Removing and installing torx bolt 897802-33330 Tachometer PET-1000R Measuring engine speed to adjust carburetor 897800-79931 Spark tester Checking ignition system 91004 Module air gap gauge Adjusting pole shoe air gaps Y089-000111 Puller Removing magneto rotor (fl... -
Page 9: Starter System
PB-8010, EB810 STARTER SYSTEM 2 STARTER SYSTEM (A) Starter case (B) Collar (C) Rewind spring (D) Rope reel (E) Washer (F) Spring (G) Shutter (H) Thrust washer (J) Starter rope (K) Rope guide (L) Starter grip (M) Grip cap (N) Pawl (2 pcs) -
Page 10: Disassembling Starter Assembly
PB-8010, EB810 STARTER SYSTEM 2-1 Disassembling starter assembly 1. Remove 3 bolts (A) and remove starter assem- bly (B) from unit. 2. Pull out starter rope (C) about 30 cm (12 in) and hold rope reel (D) by hand. Hook excess rope on rope reel notch (d1) as shown. -
Page 11: Replacing Starter Rope
PB-8010, EB810 STARTER SYSTEM 2-2 Replacing starter rope 1. Pull out knot (c1) from starter grip and untie knot (c1). 2. Pull knot (c2) to remove rope from rope reel. 3. When installing a new starter rope, singe both ends of the rope to prevent fraying. 4. -
Page 12: Installing Rewind Spring
PB-8010, EB810 STARTER SYSTEM 2-3 Installing rewind spring If rewind spring is popped out unexpectedly, follow WARNING DANGER steps 1) to 13) to install it into original position. Wear eye protection and take care when removing rope reel. Rewind spring may un- wind suddenly and cause personal injury. - Page 13 PB-8010, EB810 STARTER SYSTEM 2-3 Installing rewind spring (Continued) 6) Continue to turn rope reel (D) counterclock- wise until the outer hook (m2) of rewind spring is caught on the small bolt or bar (S) as shown. 7) While holding rope reel fi rmly to keep rewind spring winded, bind outside of winded rewind spring with strong string, such as cable tie (T) fi...
-
Page 14: Assembling Starter
PB-8010, EB810 STARTER SYSTEM 2-4 Assembling starter 1. Install rope reel (D) engaging rib (d2) with inner hook (m1) of rewind spring. NOTE: Check for proper engagement of rewind spring and rope reel (D) by turning rope reel (D) clockwise and counterclockwise. 2. -
Page 15: Replacing Starter Pawl
PB-8010, EB810 STARTER SYSTEM 2-5 Replacing starter pawl 1. Remove magneto roter (Refer to “3-10 Inspect- ing and replacing magneto rotor”). 2. Remove E-ring (V) from pawl (N). 3. Inspect spring (W) and pawl (N) for damage. Replace the part(s) as required. 4. -
Page 16: Ignition System
PB-8010, EB810 IGNITION SYSTEM 3 IGNITION SYSTEM (A) Magneto rotor (Flywheel) (F) Spark plug cap coil (B) Woodruff key (G) Spark plug cap (C) Ignition coil (H) Primary wires (D) High tension lead (J) Ground wires (E) Spark plug (K) Ignition switch... -
Page 17: Troubleshooting Guide
PB-8010, EB810 IGNITION SYSTEM 3-1 Troubleshooting guide Start Remedy Inspect S.T. Adjust pole shoe air gaps. Pole (Inspect flywheel magnet shoe air at the same time. Go to gaps Clean / A if OK.) Spark plug Regap / S.T. Replace. Flywheel Replace flywheel. -
Page 18: Testing Spark
PB-8010, EB810 IGNITION SYSTEM 3-2 Testing spark WARNING DANGER *Do not test near spark plug hole without spark plug installed, otherwise there is a chance to ignite fuel mixture inside cylinder. *Do not touch metal parts of spark tester while performing the test to avoid receiving electrical shock. -
Page 19: Replacing Spark Plug Cap And Coil
PB-8010, EB810 IGNITION SYSTEM 3-4 Inspecting and Replacing spark plug cap and coil 1. Pull off spark plug cap (A). 2. Apply some oil in the spark plug cap (A) for easy removal from high tension lead (B). 3. Pull spark plug cap (A) away from high tension lead (B). -
Page 20: Replacing Ignition Switch
PB-8010, EB810 IGNITION SYSTEM 3-6 Replacing ignition switch If ignition switch is damaged, the entire control cable assembly (G) must be replaced. Removing 1. Disconnect primary wire (A) and ground wire (B) Control cable assembly (Refer to 3-5 Inspecting ignition switch). 2. - Page 21 PB-8010, EB810 IGNITION SYSTEM 3-6 Replacing ignition switch (continued) Installing 11 mm (0.4 inch) 1. If replacing bolt (J) and nut (K) stored in the ca- ble connector, insert them into the groove until the nut is fully seated. 2. Install control cable assembly (G) into the groove of the cable connector (H) as shown.
- Page 22 PB-8010, EB810 IGNITION SYSTEM 3-6 Replacing ignition switch (continued) 10. Connect throttle cable to carburetor (Refer to “4-14 Checking and adjusting throttle cable”). 11. Connect primary wire (A) and (P) 12. Connect ground wire (B) and (Q). 13. Bind primary wire terminal (a1), ground wire terminal (b1) and control cable (R) with clip (S).
-
Page 23: Inspecting Ignition Coil Resistance
PB-8010, EB810 IGNITION SYSTEM 3-7 Inspecting ignition coil resistance 1. Connect Ohm-meter or Multimeter to spark plug cap coil (A) and crank case (B). Secondary coil resistance: 785 - 1185 Ω 2. I f t h e m e t e r r e a d i n g i n d i c a t e s i n fi n i t e r es i s ta nc e , remove spark plug cap and spark plug cap coil, and measure resistance between the conduction wire of high tension lead (C) and crank... -
Page 24: Replacing Ignition Coil
PB-8010, EB810 IGNITION SYSTEM 3-8 Replacing ignition coil Removing 1. Remove engine cover and starter assembly. 2. Remove debris guard (A). 3. Disconnect primary wire (B) from ignition coil. 4. Loosen two bolts (C). 5. Remove ignition coil, taking care not to lose col- lars (D). -
Page 25: Inspecting And Replacing Magneto Rotor
PB-8010, EB810 IGNITION SYSTEM 3-10 Inspecting and replacing magneto rotor Inspecting 1. Inspect magnetic force of magneto rotor using fl ux meter, or fl at head screwdriver (A) as shown. 2. If the magnetic force is weak, replace the mag- neto rotor with new one. -
Page 26: Fuel System
PB-8010, EB810 FUEL SYSTEM 4 FUEL SYSTEM ( A ) Air cleaner cover ( S ) Fuel return line ( B ) Pre-air fi lter ( T ) Tank vent line ( C ) Air fi lter ( U ) Tank vent ( D ) Air cleaner case ( V ) Protect tube ( E ) Intake pipe... -
Page 27: Inspecting Air Fi Lter
PB-8010, EB810 FUEL SYSTEM 4-1 Inspecting air fi lter 1. Remove air cleaner cover. 2. Remove pre-air fi lter (A) and air fi lter (B). 3. If pre-air fi lter (A) is dirty, wash the fi lter in a suit- able cleaning solvent. -
Page 28: Inspecting Fuel Tank And Line
PB-8010, EB810 FUEL SYSTEM 4-3 Inspecting fuel tank and fuel line Using Pressure tester 897803-30133 (C) 1. Clean fuel tank inside as requried. 2. Open fuel cap. Then, pull off outer fuel line (a1) from carburetor, pinching clip (B). 3. Connect pressure tester 897803-30133 (C) to outer fuel line (a1) with pipe joint V186-000510 (D). -
Page 29: Replacing Fuel Lines And Grommet
PB-8010, EB810 FUEL SYSTEM 4-4 Replacing fuel lines and grommet Removing 1. Open fuel cap. Then, pull off outer fuel line (a1) and fuel return line (B) from carburetor, pinching clips (F). 2. Remove fuel line grommet (C) from fuel tank, together with outer fuel line (a1), fuel return line (B) and tank vent line (D). -
Page 30: Inspecting Tank Vent
PB-8010, EB810 FUEL SYSTEM 4-5 Inspecting tank vent NOTE: Tank vent prevents a vacuum from forming in fuel tank when fuel in fuel tank is being consumed. When pressure in fuel tank becomes too high, tank vent releases the pressure. Way1: Using Pressure / vacuum tester 91149 (A) 1. -
Page 31: Replacing Carburetor
PB-8010, EB810 FUEL SYSTEM 4-6 Replacing carburetor Removing 1. Remove intake pipe. 2. Remove carburetor cover (A). 3. Disconnect throttle cable from carburetor. 4. Pull off outer fuel line and fuel return line from carburetor. 5. Loosen two bolts (B) and remove air duct and cleaner fi... -
Page 32: Testing Carburetor
PB-8010, EB810 FUEL SYSTEM 4-7 Testing carburetor NOTE: To perform this test, carburetor interior should be wet with fuel. If dry, a little leakage may occur from diaphragms and/or inlet needle seat. Using Pressure tester 897803-30133 (A) 1. Open fuel cap. Then, pull off outer fuel line (B) from carburetor. -
Page 33: Inspecting Crankcase Pulse Passage
PB-8010, EB810 FUEL SYSTEM 4-8 Inspecting crankcase pulse passage 1. Remove carburetor and drop a little oil in pulse hole (a1) on intake insulator (A). 2. Remove spark plug and pull starter grip several times. The oil should spit back from the hole (a1). 3. -
Page 34: Inspecting Inlet Needle Valve
PB-8010, EB810 FUEL SYSTEM 4-10 Inspecting inlet needle valve 1. Loosen screw (A) and remove metering lever (B), metering lever pin (C), metering lever spring (D) and inlet needle valve (E). 2. Inspect inlet needle valve (E) if worn or sticky. Clean or replace as required. -
Page 35: Inspecting Diaphragm And Others
PB-8010, EB810 FUEL SYSTEM 4-11 Inspecting diaphragm and others 1. Remove pump cover (A). 2. Inspect purge bulb (B) for crack or fatigue. Replace as required. 3. Remove air purge body (C). 4. Inspect metering diaphragm (D) for hardening, distortion, or pin hole. Replace as required. 5. -
Page 36: Adjusting Carburetor
PB-8010, EB810 FUEL SYSTEM 4-13 Adjusting carburetor 4-13-1 General adjusting rules A. Before adjustment, check the following items. 1. The correct spark plug must be clean and properly gapped. 2. The air fi lters must be clean and properly installed. 3. -
Page 37: Adjusting Carburetor
PB-8010, EB810 FUEL SYSTEM 4-13 Adjusting carburetor (continued) 4-13-3 Adjusting carburetor 1. Start and run engine for 30 seconds at idling and then run for 180 seconds at WOT. 2. Adjust L mixture needle (A) using Short type small D-shaped tool (E) to reach maximum engine speed just before lean drop off. -
Page 38: Backpack Frame
PB-8010, EB810 BACKPACK FRAME 5 BACKPACK FRAME (A) Backpack harness (B) Harness buckle (C) Clip (D) Clip (E) Back cushion (F) Cold weather insert (G) Backpack frame (H) Compression spring (J) Debris guard... -
Page 39: Removing Backpack Frame Assembly
PB-8010, EB810 BACKPACK FRAME 5-1 Removing backpack frame assembly 1. Remove four precoated bolts (K) and washers. NOTE: When retighten the precoated bolts (K), replace new ones or apply thread locking sealant ThreeBond #1324N. If old thread locking sealant is left in threads, cor- rect torque may not be secured. -
Page 40: Replacing Backpack Harness
PB-8010, EB810 BACKPACK FRAME 5-2 Replacing backpack harness 1. Remove backpack frame assembly (Refer to “5-1 Removing backpack frame assembly”). 2. Remove backpack harness from backpack frame. 3. Insert upper harness buckle (R) into hole of backpack frame. 4. Insert harness strap (S) into hole of backpack frame. -
Page 41: Replacing Backpack Harness
PB-8010, EB810 BACKPACK FRAME 5-3 Replacing backpack frame, debris guard and spring 1. Remove backpack frame assembly (Refer to “5-1 Removing backpack frame assembly”). 2. Detach debris guard (J) from ten tabs on back- pack frame (G). 3. When assembling debris guard (J) and back- pack frame (G), make sure ten tabs on backpack frame (G) are fully engaged with holes on debris guard (J). -
Page 42: Blower System
PB-8010, EB810 BLOWER SYSTEM 6 BLOWER SYSTEM (A) Engine side fan case (B) Guard side fan case (C) Elbow (D) Fan (E) Engine plate (F) Spacer (G) Anti-static lead (H) Spring (J) Spring holder... -
Page 43: Separating Fan Case Assembly
PB-8010, EB810 BLOWER SYSTEM 6-1 Separating fan case assembly 1. Loosen four precoated bolts (A) and washers to remove fuel tank band (B) and fuel tank (C) (Refer to “5-1 Removing backpack frame assembly”). 2. Remove two tapping bolts (D) holding spring (E) and spring holders (F). -
Page 44: Replacing Elbow
PB-8010, EB810 BLOWER SYSTEM 6-2 Replacing elbow 1. Remove engine side fan case from guard side fan case (D) (Refer to “6-1 Separating fan case as- sembly”). 2. Remove end (e1) of anti-static lead. 3. Remove elbow (C) with O-ring (A) from guard side fan case (D). -
Page 45: Disassembling And Assembling Fan
PB-8010, EB810 BLOWER SYSTEM 6-3 Disassembling and assembling fan 1. Install clean rope into spark plug hole (Refer to “3-10 Inspecting and replacing magneto rotor”). 2. Remove fan nut (A) using 14mm socket wrench counterclockwise. 3. Thread Fan remover 91087 (B) on crankshaft end. - Page 46 PB-8010, EB810 BLOWER SYSTEM 6-4 Replacing fan case (continued) Assembling fan case 5. Place engine plate (H) and fan (J) on engine side fan case (A). 6. Hook nails parts of engine side fan case (A) on engine plate (H) as shown. Hook nails parts 7.
-
Page 47: Engine
PB-8010, EB810 ENGINE 7 ENGINE ( A ) Cylinder ( B ) Cylinder gasket ( C ) Piston ring ( D ) Piston ( E ) Snap ring ( F ) Needle bearing ( G ) Piston pin spacer ( H ) Crankcase ( J ) Oil seal ( K ) Dowel pin ( L ) Ball bearing... -
Page 48: Testing Cylinder Compression
PB-8010, EB810 ENGINE 7-1 Testing cylinder compression NOTE: Test cylinder compression when engine is cold. 1. Move ignition switch to STOP position. 2. Open cap cover and remove spark plug (Refer to 3-2 Testing spark). 3. Remove valve core (A) from compression gauge 91037 (B) and insert valve core (A) to adapter P021-051690 (C) with valve core driver (D). -
Page 49: Inspecting Muffl Er And Exhaust Port
PB-8010, EB810 ENGINE 7-2 Cleaning cooling air passages (continued) 2. Remove engine cover if cylinder fins (C) are hard to clean. Clean the clearance of cylinder fi ns using wooden stick, plastic stick or compressed air. NOTE: To prevent debris from entering cylinder, reinstall spark plug, carburetor, and air fi... -
Page 50: Testing Crankcase And Cylinder Sealings
PB-8010, EB810 ENGINE 7-4 Testing crankcase and cylinder sealings 1. Loosen two bolts. 2. To seal intake port and crankcase pulse pas- sage, install pressure rubber plug 91041 (A1) between carburetor and carburetor insulator. 3. Loosen muffl er bolts. And to seal exhaust port, insert pressure rubber plug 91041 (A2) between muffler gasket and exhaust port of muffler as shown. -
Page 51: Replacing Oil Seal
PB-8010, EB810 ENGINE 7-4 Testing crankcase and cylinder sealings (continued) 11. Remove pressure tester (C) and pressure con- nector (B). Remove pressure rubber plug 91041 (A1) and (A2). 7-5 Replacing oil seal 1. Preheat crankcase for easier replacement. WARNING DANGER When using a heat gun, wear gloves. -
Page 52: Inspecting Cylinder
PB-8010, EB810 ENGINE 7-6 Inspecting cylinder 1. Loosen two bolts (A) and remove cylinder cover (B). 2. Loosen four bolts to remove cylinder from en- gine. NOTE: When removing cylinder solely for the pur- pose of inspecting cylinder, leave ignition module, and intake insulator to avoid extra work. -
Page 53: Inspecting Piston And Piston Ring
PB-8010, EB810 ENGINE 7-7 Inspecting piston and piston ring 1. Inspect piston ring (A) and replace it if broken, scored, or exceeded service limits (Refer to “1-5 Service limits”). 2. Inspect piston crown (B). Clean with fi ne sand paper, oil stone, and soft cleaning brush (C) if car- bon is found. -
Page 54: Replacing Ball Bearings
PB-8010, EB810 ENGINE 7-9 Replacing ball bearing 1. Check oil seal(s) and replace if defective. 2. Check ball bearing(s) for smooth rotation. If not, remove ball bearing(s) using bearing wedge (A) 897701-02830 or a suitable bearing puller. 3. Fan side: Install new ball bearing using bear- ing/seal tool 897726-21430 (B) (inner dia. -
Page 55: Assembling Crankshaft And Crankcase
PB-8010, EB810 ENGINE 7-11 Assembling crankshaft and crankcase 1. Clean mating surface of each crankcase half. 2. Heat ball bearing for easier installation. Then insert crankshaft starter end (A) into starter side crankcase half (B) until properly seated. WARNING DANGER When using a heat gun, wear gloves. -
Page 56: Installing Piston Ring And Cylinder
PB-8010, EB810 ENGINE 7-13 Installing piston ring and cylinder 1. Install piston ring on piston ensuring that locat- ing pin (A) is positioned between ring ends. 2. Set new cylinder gasket (B) under cylinder (C). Position it so cylinder gasket pulse slot (b) and Assembled pulse hole (c), lines up with cylinder. -
Page 57: Assembling Engine Assembly And Other Parts
PB-8010, EB810 ENGINE 7-13 Installing piston ring and cylinder (continued) 5. Set cylinder cover (F) on cylinder (C) and tighten two bolts. 7-14 Assembling engine assembly and other parts Assemble engine assembly and other parts, referring to the following instructions. 1. -
Page 58: Maintenance Guide
PB-8010, EB810 MAINTENANCE GUIDE 8 MAINTENANCE GUIDE 8-1 Troubleshooting guide TROUBLE Engine does not crank. Engine does not start. Fuel leaks. Idling is not stable. Acceleration is poor. Engine stalls at high speed. Engine lacks power. Engine overheats. Engine misfires. Engine / others are extremely noisy. - Page 59 PB-8010, EB810 MAINTENANCE GUIDE 8-1 Troubleshooting guide (continued) INSPECTING REFERENCES Inspecting first. Fuel system / Carburetor 13 12 11 10 09 08 07 06 05 04 03 02 01 Air filter Fuel cap / strainer Fuel tank / vent / line 4-3 to 4-5 Carburetor adjustment 4-13...
-
Page 60: Disassembly Chart
PB-8010, EB810 MAINTENANCE GUIDE 8-2 Disassembly chart Air cleaner Starter Back Engine Intake pipe Fuel tank cover assembly cushion cover (4-6) band (4-1) (2-1) (5-1) Pre-air filter, Debris Backpack Air duct Muffler Fuel tank Air filter guard frame (4-6) (7-3) (4-3) (4-1) (5-3) -
Page 61: Service Intervals
PB-8010, EB810 MAINTENANCE GUIDE 8-3 Service intervals Intervals Inspecting point Service Reference Daily 3 months 6 months Before use 100 hours 300 hours Screws and bolts * Retighten / Replace Air fi lter Inspect / Clean Choke system Inspect / Clean Carburetor Inspect / Repair 4-6 to 4-13... - Page 62 Published by YAMABIKO Corp. Tokyo Japan 2009...
Need help?
Do you have a question about the shindaiwa PB-8010 and is the answer not in the manual?
Questions and answers
How do I remove impeller on PB 8010T