Table of Contents
Advertisement
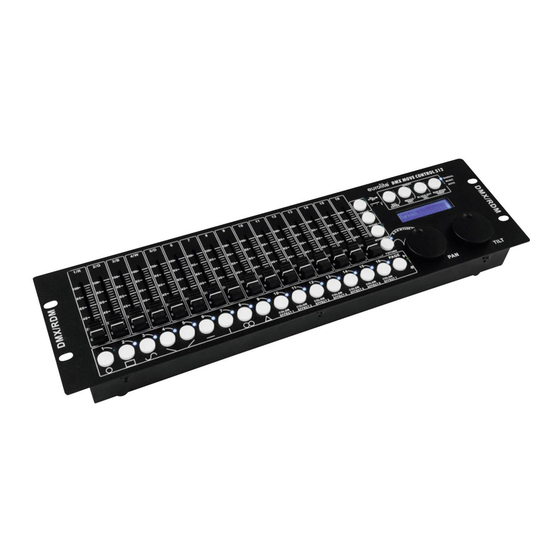
GREAT 512-DMX CONTROLLER
For your own safety, please read this user manual carefully before you initially start-up.
Every person involved with the installation, operation and maintenance of this device has to
- be qualified
- follow the instructions of this manual
- consider this manual to be part of the total product
- keep this manual for the entire service life of the product
- pass this manual on to every further owner or user of the product
- download the latest version of the user manual from the Internet
1. INTRODUCTION
Thank you for having chosen our product. If you follow the instructions given in this manual, we are sure that
you will enjoy this device for a long period of time. Unpack your product.
2. OPERATING DETERMINATIONS
The DMX Move Control DMX controller serves for operation of DMX-controlled light effect devices such as
LED spot lights, moving heads and scanners in discotheques or on stage. The controller provides 512
control channels which can be assigned as desired to the 32 control channels. The built-in effect generator
facilitates programming significantly. 9 movement patterns designed for moving heads and scanners can be
called at the push of a button as well as 7 color effects designed for light effect devices with RGBW LEDs in
particular. 32 memory banks are available for programming illumination scenes. 32 additional memory banks
are available for programming chases (sequences of scenes) with 100 steps each. The chases may be
played manually, sound-controlled or automatically. All settings of your light show can be conveniently stored
and archived on a USB memory device.
The device requires an operating voltage of 9-12 V, 300 mA direct current supplied by the included power
unit. The power unit is allowed to be operated with 100-240 V, 50/60 Hz alternating current. The unit was
designed for indoor use only.
Do not shake the device. Avoid brute force when installing or operating the device. When choosing the
installation spot, please make sure that the device is not exposed to extreme heat, moisture or dust. There
should not be any cables lying around. You endanger your own and the safety of others!
This device must never be operated or stockpiled in surroundings where splash water, rain, moisture or fog
may harm the device. Moisture or very high humidity can reduce the insulation and lead to mortal electrical
shocks. When using smoke machines, make sure that the device is never exposed to the direct smoke jet
and is installed in a distance of 0.5 meters between smoke machine and device. The room must only be
saturated with an amount of smoke that the visibility will always be more than 10 meters.
The ambient temperature must always be between -5° C and +45° C. Keep away from direct insulation
(particularly in cars) and heaters. The relative humidity must not exceed 50 % with an ambient temperature
of 45° C. This device must only be operated in an altitude between -20 and 2000 m over NN. Never use the
device during thunderstorms. Over voltage could destroy the device. Always disconnect the device during
thunderstorms.
Operate the device only after having familiarized with its functions. Do not permit operation by persons not
qualified for operating the device. Most damages are the result of unprofessional operation!
USER MANUAL
CAUTION!
Keep this device away from rain and moisture!
Unplug mains lead before opening the housing!
Advertisement
Table of Contents

Summary of Contents for EMS GREAT 512-DMX CONTROLLER
- Page 1 USER MANUAL GREAT 512-DMX CONTROLLER CAUTION! Keep this device away from rain and moisture! Unplug mains lead before opening the housing! For your own safety, please read this user manual carefully before you initially start-up. Every person involved with the installation, operation and maintenance of this device has to...
-
Page 2: Operating Elements And Connections
Please use the original packaging if the device is to be transported. Never remove the serial barcode from the device as this would make the guarantee void. Please consider that unauthorized modifications on the device are forbidden due to safety reasons! If this device will be operated in any way different to the one described in this manual, the product may suffer damages and the guarantee becomes void. -
Page 3: Power Input
Sliding controls 1 to 16 10 USB port For connecting a USB storage device for • For adjusting the DMX values of the storing and importing data and firmware connected light effect units. The current DMX updates. value is indicated in the display. •... -
Page 4: Installation And Connections
1. INSTALLATION AND CONNECTIONS Switch off the DMX controller prior to connecting any units or to changing any existing connections. Fig. 5.1 Example for connection Installation Install the unit on a plane surface or in your rack. When choosing the installation spot make sure that there is enough space around the unit for ventilation or that heated air from the rack can be passed on to improve heat radiation. -
Page 5: Adjusting The Dmx Starting Addresses Of The Light Effect Units
2. CONFIGURATION address is to be assigned (control LED lights). This menu item allows adjusting further Adjusting the DMX Starting Addresses characteristics. Use the button SWAP to switch between the options. of the Light Effect Units Select the option DMX START ADDR to Adjust the DMX starting address of the connected assign the DMX starting address. -
Page 6: Control Channel
the control elements. The display indicates Select the option FADER REVERSE with the the control element in the upper line, e.g. button SWAP. The display indicates the “Fader CHANL:1/R “ and the DMX channel in control element in the upper line, e.g. the lower line, e.g. -
Page 7: Copying Device Settings
Use the tilt wheel to select the setting [YES] if fade in of the device should be possible or [NO] if not. With the function activated, the controller automatically creates all necessary intermediate values for the fade in. Press the button ENTER to memorize your setting. - Page 8 the lower line and the current output value 100 %. as a DMX value. - MOVEMENT OFFSET: Correction values can be adjusted for fine adjustment of the pan/tilt The 32 light effect units are combined in 2 groups (channel pages) of 16 channels each. movement.
-
Page 9: Memorizing Illumination Scenes
steps 3 and 5, until the desired values are MOVEMENT COLOR:1 assigned to all channels. SPEED:42% Deselect the adjusted devices with the Fig. 7.3 Adjusting parameters corresponding number button 1-16. • Color effects 10-16: The running speed can Repeat the steps 3 to 5 for all further devices be adjusted between 1 and 100 % (indication to be adjusted. - Page 10 Adjusting Fade In for the Color Channels Manual Fade 8.5S Fig. 7.6 Adjusting a fade in time It is possible to adjust a fade in time for illumination scenes affecting the RGBW color channels 1-4 and the dimmer channel. When actuating a sliding control, the corresponding channel is moved slowly and steadily to its target value.
-
Page 11: Programming And Memorizing Chases
Programming and Memorizing Chases Press the button REC to memorize the scene. For programming chases (sequences of scenes), • To confirm the memory procedure, all LEDs 32 memory banks are available. A sequence of up of the controller flash three times. to 100 steps can be programmed on each memory bank. - Page 12 Playing a Chase Auto Wait 1M10S A chase must be programmed before you can call it. Chases can be played manually, time- Fig. 7.14 Chase in automatic mode controlled or sound-controlled. As a basic setting, the manual mode is activated. The LEDs •...
- Page 13 Overwriting Channels Manually Blackout Function During the playback of a chase, it is possible to With the blackout function it is possible to blackout overwrite the programmed DMX values with the and illumination scene or chase completely. sliding controls. This allows for minor adjustments Current fadings and chases are not stopped by during a live performance without the need for the blackout function, they continue “in the dark”...
-
Page 14: System Settings
4. SYSTEM SETTINGS Reset factory [Reset to factory This mode allows you to change important system settings for the controller. settings] Here you can reset the controller to factory setting. Calling the System Settings Call the menu item with the pan wheel and confirm with ENTER. - Page 15 RDM DMX Address setup [RDM DMX Data backup [Data backup] address assignments] All settings of a light show, i.e. DMX settings, illumination scenes and chases can be stored on This menu allows identifying connected RDM a USB memory device and recalled later. 16 devices and changing their DMX address memory banks are available.
-
Page 16: Cleaning And Maintenance
Data load [Data import] Connect a USB memory device to the controller’s USB port. • The files to be imported must be stored in the folder “DMX Move Control 512“located on the root directory of the USB memory device. Call the menu item with the pan wheel and confirm with ENTER. •...
Need help?
Do you have a question about the GREAT 512-DMX CONTROLLER and is the answer not in the manual?
Questions and answers