Table of Contents
Advertisement
Quick Links
CAR MULTIMEDIA DVD/VCD/MP3 PLAYER
AN-3012
User's Manual
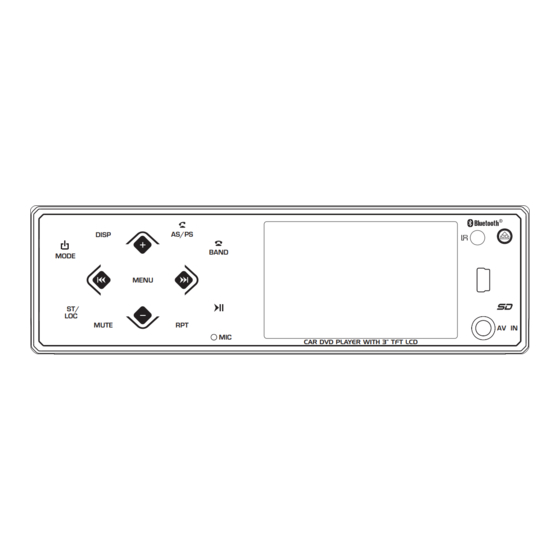
AS/PS
DISP
BAND
MODE
MENU
ST/
LOC
MUTE
RPT
AV IN
MIC
CAR DVD PLAYER WITH 3" TFT LCD
DVD/VCD/CD/CD-R/CD-RW/MP3/MPEG4 Compatible
Anti-Shock Mechanism
AM/FM 2 Band Radio
Front Panel USB Input Port
SD/MMC Memory card slot
Built-in Bluetooth hands-free system
3.0" Widescreen Digital TFT LCD Display
Front Panel AV input Socket
Rear auxiliary AV input RCA Socket
Front/rear AV Output RCA Socket
Sub-woofer Output Socket
Remote Control
Fold Down Detachable Panel
4 x 40 W High Power Output
ISO Connectors for Power Supply and Speaker Outputs
Advertisement
Table of Contents

Related Manuals for Caliber AN-3012


Summary of Contents for Caliber AN-3012
- Page 1 CAR MULTIMEDIA DVD/VCD/MP3 PLAYER AN-3012 User’s Manual AS/PS DISP BAND MODE MENU MUTE AV IN CAR DVD PLAYER WITH 3” TFT LCD DVD/VCD/CD/CD-R/CD-RW/MP3/MPEG4 Compatible Anti-Shock Mechanism AM/FM 2 Band Radio Front Panel USB Input Port SD/MMC Memory card slot Built-in Bluetooth hands-free system 3.0”...
-
Page 2: Table Of Contents
WARNING! Operating a vehicle while watching a video on this car DVD player may violate motor vehicle laws, and can cause serous personal injury, property damage, or death! Page CONTENTS Safety information Installation Using the detachable front panel Wiring diagram Operations Location and function of keys ing the remote control... -
Page 3: Safety Information
Safety information DISC NOTES Be sure to use discs with following marks CAUTION: only for the unit to play: Mobile DVD player is a class 1 laser - DVD VIDEO / DVD AUDIO product. However this mobile DVD player (12 CM disc) uses a visible/invisible laser beam which could cause hazardous radiation - VIDEO CD / AUDIO CD... -
Page 4: Installation
Installation Notes: - Choose the mounting location where the unit will not interfere with the normal driving function of the driver. - Before finally installing the unit, connect the wiring temporarily and make sure it is all connected up properly and the unit and the system work properly. -
Page 5: Using The Detachable Front Panel
1. DIN FRONT-MOUNT (Method A) Installation Opening This unit can be installed in any dashboard having an opening as shown below: 53 mm 182 mm 7. Reconnect the wire harness and the antenna and be careful not to pinch any Installing the unit wires or cables. - Page 6 Removing the unit Using the detachable front panel 1. Make sure the ignition is turned off, REMOVING AND PROTECTING and then disconnect the cable from the DETACHABLE FRONT PANEL vehicle battery's negative (-) terminal. The front panel of the unit may be removed 2.
-
Page 7: Wiring Diagram
Wiring diagram In order to make the unit work best, be sure to strictly follow the below connection! Ensure insulate all the exposed the ends of the unused cable or lead with the electrical covering , avoid short circuit. The idle audio and video plugs make sure to remain the insulation covering to prevent short circuit, or occurs some interfere or burned the unit. -
Page 8: Operations
Video activation wire (Pink/Black) Parking brake indicator Light Parking brake contactor Car Battery Parking Brake switch (Activated by parking brake) To a metal part or chassis of your car Connecting the reversing line to taillight on the car Taillight line To reversing line To taillight To Car Battery... - Page 9 The car radio after removing the front panel: Descriptions of function controls Power on/off ( ), MODE( Source Selector) Button DOWN ( ) Button Tune down, Seek down, previous track, fast reverse DISP Button (System Information Display) Volume increase( ) Button AS/PS (Automatic Search &...
-
Page 10: Using The Remote Control
(23) Fast Forward Button Button Using the remote control (24) Fast Reverse Button, # Button (25) GOTO Button AS/PS (Automatic Search & Preset memory Scan) Button (26) (Stop) Button, DEL (Delete) Button (27) PROG(Programmed play mode), LOC/DX Button (28) RDM (Random) Button, MO/ST Button DISP MODE (29) -
Page 11: General Perations O
Adjusting the volume level 2. Replacing the battery Press the button on the front Replace the battery with the same type panel, or use the VOL+ VOL- button on and the (+) side facing up. the remote control to adjust volume level. Anti-theft LED Indicator Designed as a theft deterrent, the red LED will flash when the unit is turned off... -
Page 12: Radio Perations O
playback, press the MODE button to - Manual search mode: switch to a different mode, when you next Repeatedly press the on the front return to the previous disc, USB, SD/ panel or the or ▲/▼ button on the MMC card playback mode again, the unit remote control to manually search will resume playing from the point that it upward or downward step by step for the... -
Page 13: Av Menu Settings
recall the stored station. AV menu settings Press the button on the remote control can also switch to the AV Menu Overwiew previously stored station. You can adjust various settings of the unit from the AV menu. Auto store / Preset scan The AV menu contains the menu items - Preset scan: and submenus shown in the figure below:... - Page 14 Setup Menu Audio Menu Setup System Clock 10:06 Press button on the front TIME.M panel or press the ◄ ► ▲/▼ BEEP button on the remote control to select a menu item. Hour Minute 2. Press the button on the front Press button on the front panel...
-
Page 15: Disc Operations
Picture Menu Disc operations PICTURE Loading/Removing a Disc 1. Press the OPEN ) button on the DEFAULT front panel to flip down the front panel and then insert a disc into the disc slot with the label side facing upward; and TINT close the front panel, the player will play the disc automatically. - Page 16 For MP3/JPEG/MPEG4: 2. For different kinds of disc, pressing the Use the cursor buttons (▲/▼/◄/►) to button has different effects. select a file or folder, then press the ENTER button to confirm your selection. For CD/VCD/SVCD: If you select a file, it will be played. If you REP 1 REP ALL REP OFF...
-
Page 17: Special Disc Operations
DVD’s menu. Special Disc operations For VCD/SVCD: Disc Menu Operations Some VCD/SVCD discs which have Menu-driven playback is possible while multiple audio channels, you can select the desired audio channel to play by playing a disc with menu-driven features pressing the AUDIO button. - Page 18 In zoom in mode, press the cursor button For VCD/CD/MP3/JPEG: ▲/▼/◄/► ) to move the zoomed-in area. Programmed Play Function Press the PROG button during playback to activate the programing editing 1. Disc type interface as follows: For VCD/SVCD/CD: 2. Playback information TT 1 / 3: Current title/ Total title;...
-
Page 19: Data Disc Operations
- To search for a particular Title, Data disc play operations Chapter, or Track 1. Use the cursor button ( ▲/▼/◄/► ) to highlight 1 (track number), 2 ( chapter When you insert a data disc containing number) or 4 (VCD track number). audio(MP3), movie(MPEG4) or 2. -
Page 20: Usb Operations
USB operations SD/MMC memory card operations Using the USB stick: Using the SD/MMC card: The DVD player features a front panel The DVD player features a SD/MMC USB interface. A USB device can be memory card slot. When you insert a connected to this port. -
Page 21: Bluetooth Hands-Free Function
3. DIAL CALL Bluetooth hands-free function 3.1 Dial with the mobile phone directly. 3.2 Dial with the remote controller. When link up your mobile phone to this 3.2.1 After connecting, press the “ 0~9 , # ” bluetooth hands-free system, you can dial push button on the remote control to enter or receive calls via this blutetooth device telephone number . - Page 22 (Preset phone number) : c) Dialling from the phone number List of saved phone number, you can save 6 memory phone numbers total. When you look around the preset phone (Received phone number): number or received list or dialed list or List of the latest 6 received calls.
-
Page 23: Setup
which will sense the type of monitor Setup attached to the output and select NTSC or PAL as need. If you know the type of In DVD mode, when the disc is playing or monitor, you should choose the type in in stop mode, press the SETUP button to... - Page 24 Playing a video recorded in one aspect ratio on a monitor with a different ratio can result in some mismatches and undesirable display distortion or cutoffs. TV Screen Size Picture Format 16:9 on Disc Pan Scan Letter-box Wide Screen 4) PASSWORD The password system is used in conjunction with the Parental Controls 16:9...
- Page 25 Language Setup 1. AUDIO OUT: Change among SPDIF/OFF, SPDIF/RAW and When you open the language setup page, SPDIF/PCM. you will see the following screen: 2. KEY: Change among b, -4, -2, 0, +2, +4, #. LANGUAGE SETUP OSD LANGUAGE Digital Setup ENGLISH GERMAN AUDIO LANG...
-
Page 26: 4 Attachment
Playing MP3 discs Attachment What is MP3? About Parental Controls MP3 (MPEG-1 Audio Layer 3) is a Commercially-recorded DVD discs have compression standard prescribed by the parental level assignments. The range of ISO, the International Standardization parental controls is from 1 to 8. Organization and MPEG, which is a joint In general, this range corresponds to activity institution of the IEC. - Page 27 “Progressive” (typically used for website Trouble shooting display) or “lossless” (an older format which is rarely used today) JPEG files If it appears that your DVD unit is faulty, cannot be played. So be sure you are please first consult this checklist. It may saving the files in the proper format.
-
Page 28: 6 Specifications
No Sound Specifications ♦ Check the audio connections. GENERAL The Player Does Not Respond to the Power Supply Requirements Remote Control DC 12 Volts, Negative Ground ♦ Aim the remote control directly at the Chassis Dimensions sensor on the front of the player. 178(W)x160(D)x 50(H) mm ♦...
Need help?
Do you have a question about the AN-3012 and is the answer not in the manual?
Questions and answers