
Related Manuals for Costway NP10633WL-BN


Summary of Contents for Costway NP10633WL-BN
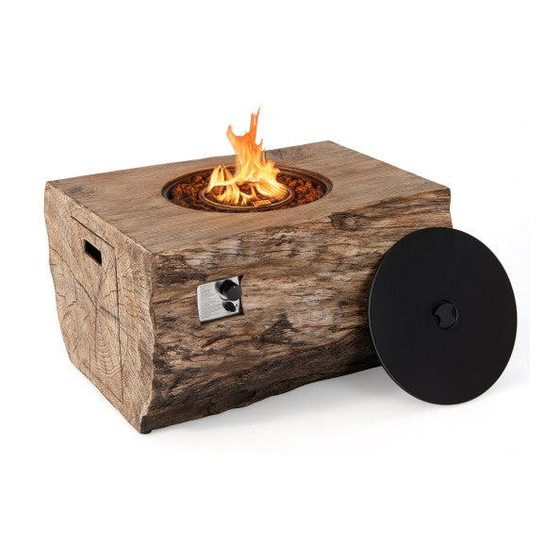
- Page 1 USER’S MANUAL Rectangular Propane Fire Pit NP10633WL-BN THIS INSTRUCTION BOOKLET CONTAINS IMPORTANT SAFETY INFORMATION. PLEASE READ AND KEEP FOR FUTURE REFERENCE.
- Page 2 INSTALLER: Leave this manual with WARNING: the appliance. For Outdoor Use Only. Installation and service CONSUMER: Retain this manual for must be performed by a future reference. qualified installer, service agency, or the gas supplier. DANGER FIRE OR EXPLOSION HAZARD If you smell gas: WARNING ●...
-
Page 3: Important Safety Information
ANS Z21.97 CSA 2.41-2017 Outdoor Decorative Gas Appliances IMPORTANT SAFETY INFORMATION 1. The installation must conform with local codes or, in the absence of local codes, with the National Fuel Gas Code, ANSI Z223.1 NFPA 54; National Fuel Gas Code; Natural Gas and Propane Installation Code, CSA B149.1;... - Page 4 6. Clothing or other flammable materials should not be hung from the appliance or placed on or near the appliance. Any guard or other protective device removed for servicing the appliance shall be replaced prior to operating the appliance. Installation and repair should be done by a qualified service person. The appliance should be inspected before use and at least annually by a qualified service person.
- Page 5 16. Before each use of this gas appliance, inspect the burner. The burner must be replaced prior to the appliance being put into operation if it is evident that the burner is damaged. Use only the replacement burner specified in this manual. 17.
- Page 6 IMPORTANT SAFETY INFORMATION ABOUT PROPANE GAS 1. The propane supply cylinder to be used must be constructed and marked in accordance with the U.S. Department of Transportation (D.O.T.) Specifications for propane cylinders, or the Standard for Cylinders, Spheres and Tubes for Transportation of Dangerous Goods and Commission, CAN/CSA-B339, as applicable.
-
Page 7: Specifications
10. Cylinders must be stored outdoors in a well-ventilated area out of the reach of children. Disconnected cylinders must have threaded valve plugs tightly installed and must not be stored in a building, garage or any other enclosed areas. 11. This appliance is certified by CSA (Canadian Standards Association) to ANS Z21.97 CSA 2.41-2017, Outdoor Decorative Gas Appliances. -
Page 8: Package Contents
PACKAGE CONTENTS PART DESCRIPTION QUANTITY 1 pc 1 pc Fire table 1 pc Door Weather cover 1 pc 1 pack Lava rock Natural gas orifice 1 pc... - Page 9 ASSEMBLY INSTRUCTIONS 1. Carefully unpack all parts from the box and compare parts with the package content listed above, making sure all parts are present before beginning assembly of the product. If any part is missing or damaged, do not attempt to assemble the product. Contact customer service for replacement parts.
- Page 10 (1). On first use, do not stand over or near the fire pit once lit. (2). Light the fire pit and let it run on high for 20 minutes. (3). Once lit, do not go within 12 feet of the fire pit for at least the first 20 minutes on the first use to ensure any residual moisture trapped in the rocks gets released.
- Page 11 3. Open the door. Place the gas cylinder into the gas cylinder support and connect the regulator by turning the black handle clockwise to tighten. To remove the regulator, turn the black handle counter-clockwise. Secure the gas cylinder by tightening clockwise the retention point found on gas cylinder support, so that the gas cylinder cannot move from side to side or fall down.
- Page 12 5. Once the firepit has cooled completely after use, carefully place the lid (A) onto the fire bowl and use the weather cover (D) to protect your fire pit from the elements (See Figure 5). WARNING: Allow 30 minutes after use for fire pit to cool down before placing the lid to prevent scalding.
-
Page 13: Natural Gas Conversion
NATURAL GAS CONVERSION STOP Natural gas conversion must be performed only by natural gas provider or a service company. 1. Disconnect the propane hose from the gas valve (see Figure 6). Caution: The propane tank shall be shut off prior to disconnecting the propane hose, before proceeding with the conversion. - Page 14 3. Replace the propane orifice with the natural gas orifice and screw the natural gas orifice to the bellows tightly. Then connect and tighten the natural gas orifice to the inlet tube (see Figure 8). The Natural gas orifice (4.18 mm diameter size ) is painted with a black mark.
- Page 15 5. Stick and cover the conversion label onto the propane rating plate (see Figure 11). WARNING: This conversion kit shall be installed by a qualified technician in accordance with the manufacturer’s instructions and all applicable codes and requirements of the Authority Having Jurisdiction.
- Page 16 BATTERY Make sure the control knob is in the “OFF” position. Unscrew the push button cap on the ignitor module located on the control panel to access the battery compartment. The ignitor module requires one AAA size battery, (see Figure 12). BATTERY IS NOT INCLUDED.
- Page 17 LEAK TEST To prevent fire or explosion hazard when testing for a leak: 1. Always perform the leak test as described below before lighting this appliance or each time the cylinder is connected for use. 2. Do not smoke or allow other sources of ignition in the area while conducting a leak test.
- Page 18 gas valve / regulator inlet tube / bellows hose connection connection (Figure 16) (Figure 17) To perform a leak test: 1. Make 2~3 oz. of leak solution by mixing one part liquid dishwasher detergent and three parts water. Noted: make sure control knob is “OFF”.
-
Page 19: Lighting Instructions
4. Apply several drops of solution where gas valve attaches to bellows, (see Figure 15), where gas valve attaches to regulator hose, (see Figure 16), and where inlet tube attaches to bellows, (see Figure 17). If NO bubbles appear, the connections are secure. If bubbles appear, the connection has the leak, disconnect, reconnect, perform another leak check. - Page 20 LIGHTING INSTRUCTIONS OFF (AP G. ) gas control knob 1. Push in gas control knob slightly and turn to “OFF”. 2. Turn gas control knob to “ON/MIN”. 3. Push in gas control knob all the wayand hold. Continue to press the ignition button for 15 seconds.
-
Page 21: Care And Maintenance
CARE AND MAINTENANCE To enjoy the outstanding performance from your fire pit, make sure you perform the following activities on a regular basis: 1. Use warm soapy water for cleaning. Never use flammable or corrosive cleaning agents. 2. While cleaning the fire pit, make sure to keep the area around the burner dry at all times. - Page 22 With your inspiring rating, COSTWAY will be more consistent to offer you EASY SHOPPING EXPERIENCE, GOOD PRODUCTS and EFFICIENT SERVICE! Mit Ihrer inspirierenden Bewertung wird COSTWAY konsistenter sein, um Ihnen EIN SCHÖNES EINKAUFSERLEBNIS, GUTE PRODUKTE und EFFIZIENTEN SERVICE zu bieten! Avec votre évaluation inspirante, COSTWAY continuera à...
Need help?
Do you have a question about the NP10633WL-BN and is the answer not in the manual?
Questions and answers