
Subscribe to Our Youtube Channel
Related Manuals for Dell OptiPlex 7040-Small Form Factor


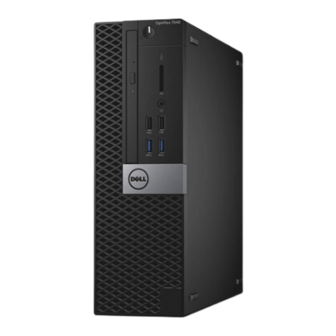
Summary of Contents for Dell OptiPlex 7040-Small Form Factor
- Page 1 OptiPlex 7040 - Small Form Factor Owner's Manual Regulatory Model: D15S Regulatory Type: D15S003 May 2020 Rev. A03...
-
Page 2: Table Of Contents
Contents Chapter 1: Working on your computer................... 5 Before working inside your computer..........................5 Turning off your computer..............................5 After working inside your computer..........................5 Chapter 2: Removing and installing components................6 Recommended tools................................6 Removing the cover................................7 Installing the cover................................7 Removing the front bezel.............................. - Page 3 Accessing System Setup..............................37 System Setup options..............................37 Updating the BIOS ................................44 System and setup password............................44 Assigning a system password and setup password.................... 45 Deleting or changing an existing system and/or setup password..............45 Chapter 5: Specifications......................47 Chapter 6: Contacting Dell......................51 Contents...
- Page 4 A WARNING indicates a potential for property damage, personal injury, or death. © 2018 Dell Inc. or its subsidiaries. All rights reserved. Dell, EMC, and other trademarks are trademarks of Dell Inc. or its subsidiaries. Other trademarks may be trademarks of their respective owners.
-
Page 5: Chapter 1: Working On Your Computer
2. Connect any telephone or network cables to your computer. 3. Connect your computer and all attached devices to their electrical outlets. 4. Turn on your computer. 5. If required, verify that the computer works correctly by running Dell Diagnostics. Working on your computer... -
Page 6: Chapter 2: Removing And Installing Components
Removing and installing components This section provides detailed information on how to remove or install the components from your computer. Topics: • Recommended tools • Removing the cover • Installing the cover • Removing the front bezel • Installing the front bezel •... -
Page 7: Removing The Cover
Removing the cover Steps 1. Follow the procedure in Before Working Inside Your Computer. 2. To remove the cover: a. Slide the blue retention tab to the right to unlock the cover [1]. b. Slide the cover toward the back of the computer [2]. c. -
Page 8: Installing The Front Bezel
Installing the front bezel Steps 1. Insert the tabs on the bezel into the slots on the computer. 2. Press the bezel until the tabs clicks into place. 3. Install the cover. 4. Follow the procedure in After Working Inside Your Computer Removing the fan duct Steps 1. -
Page 9: Installing The Fan Duct
Installing the fan duct Steps 1. Align the slots on the fan duct, with the screws on the heat sink. 2. Insert the fan duct until it clicks into place. 3. Install the cover. 4. Follow the procedure in After Working Inside Your Computer. -
Page 10: Installing The Intrusion Switch
2. Remove the: cover fan duct 3. To remove the intrusion switch: a. Disconnect the intrusion switch cable from the connector on the system board [1][2]. b. Slide the intrusion switch and lift it away from the computer [3]. Installing the intrusion switch Steps 1. -
Page 11: Installing The Expansion Card
Installing the expansion card Steps 1. Insert the expansion card into the connector on the system board. 2. Press the expansion card until it clicks into place. 3. Close the expansion card latch and press it until it clicks into place. 4. -
Page 12: Removing The Hard Drive From The Hard Drive Bracket
4. To remove the hard drive assembly: a. Pull the hard drive release handle forward to release the hard drive bracket from the computer [1]. b. Lift the hard drive assembly away from the computer [2]. Removing the hard drive from the hard drive bracket Steps 1. -
Page 13: Installing The Hard Drive Assembly
bezel cover 3. Follow the procedure in After Working Inside Your Computer. Installing the hard drive assembly Steps 1. Insert the hard drive assembly into the slot on the computer. 2. Connect the power cable to the slot on the hard drive bracket. 3. -
Page 14: Installing The Optical Drive
5. To remove the optical drive from the optical drive cage: a. Press the optical drive release latch [1] and slide the optical drive forward. [2] b. Remove the optical drive from the optical drive cage [3]. Installing the optical drive Steps 1. -
Page 15: Removing The System Fan
Removing the system fan Steps 1. Follow the procedure in Before Working Inside Your Computer. 2. Remove the: cover front bezel hard drive assembly optical drive 3. To remove the system fan: a. Disconnect the system fan cable from the system board [1]. b. -
Page 16: Installing The Heat Sink Assembly
hard drive assembly optical drive 3. To remove the heat sink assembly: a. Disconnect the heat sink cable from the system board. [1] b. Loosen the captive screws that secure the heat sink assembly and lift it away from the computer [2] [3]. Installing the heat sink assembly Steps 1. -
Page 17: Installing The Processor
c. Lift the processor out of the socket [3]. Installing the processor Steps 1. Align the processor with the socket keys. 2. Align the pin-1 indicator of the processor with the triangle on the socket. 3. Place the processor on the socket such that the slots on the processor align with the socket keys. 4. -
Page 18: Installing The Vga Daughter Board
Installing the VGA daughter board Steps 1. Align the VGA daughter board with the screw holder on the system board. 2. Tighten the screw to secure the VGA daughter board to the system board. 3. Insert the VGA connector into the slot at the back of the computer. 4. - Page 19 4. To remove the PSU: a. Disconnect the power cable from the system board [1] [2]. b. Lift the cables away from the computer [3]. c. Remove the screws that secure the PSU to the computer [4]. 5. Press the blue release tab [1], slide the PSU and lift it away from the computer [2]. Removing and installing components...
-
Page 20: Installing The Power Supply Unit (Psu)
Installing the power supply unit (PSU) Steps 1. Insert the PSU in the chassis and slide it toward the back of the computer to secure it. 2. Tighten the screws to secure the PSU to the back of the computer. 3. -
Page 21: Installing The Power Switch
Installing the power switch Steps 1. Slide the power switch module into the slot on the chassis until it clicks into place. 2. Connect the power switch cable to the connector on the system board. 3. Install the: power supply unit optical drive hard drive assembly front bezel... -
Page 22: Installing The Sd Card Reader
Installing the SD card reader Steps 1. Place the SD card reader on the chassis. 2. Tighten the screws that secure the SD card reader to the computer. 3. Route the power supply unit cables into the retention clips. 4. Install the: power supply unit optical drive hard drive assembly... -
Page 23: Removing The Optional Ssd Card
3. Place the rubber on the computer [1] and peel the adhesive tape (pink) from the rubber [2]. 4. To install the SSD card: a. Connect the SSD card to the connector on the system board [1]. b. Tighten the screw to secure the SSD card to the system board [2]. Removing the optional SSD card Steps 1. - Page 24 cover fan duct front bezel memory module hard drive assembly optical drive expansion card optional SSD card SD card reader VGA daughter board heat sink processor 3. To remove the I/O panel: a. Remove the screw that secures the I/O panel to the chassis [1]. b.
-
Page 25: Installing The System Board
Installing the system board Steps 1. Hold the system board by its edges and angle it toward the back of the computer. 2. Lower the system board into the computer until the connectors at the back of the system board align with the slots on the back wall of the computer, and the screw holes on the system board align with the standoffs on the computer. -
Page 26: System Board Layout
System board layout 1. PCIex16 connector 2. PCIex4 connector 3. RJ-45/USB 2.0 connector 4. USB 3.0 connector 5. PS2 keyboard/MS connector 6. Serial port connector 7. DisplayPort connector 8. HDMI connector 9. Line-out connector 10. CPU power connector 11. Intrusion switch connector 12. -
Page 27: Chapter 3: Troubleshooting Your Computer
Troubleshooting your computer You can troubleshoot your computer using indicators like diagnostic lights, beep codes, and error messages during the operation of the computer. Topics: • Diagnostic and Power LED codes • Diagnostic error messages • System error messages Diagnostic and Power LED codes Table 1. - Page 28 Table 1. Power LED states (continued) Power LED light status Possible cause Troubleshooting steps cable are connected to the system board. Steady white The computer is fully If the computer is not functional and in the On state. responding, do the following: ●...
- Page 29 Table 2. Diagnostic power LED codes (continued) State State Name Blinking Amber Problem Description Suggested Pattern Resolution Flash latest BIOS version. If problem persists, replace the motherboard Bad Processor CPU configuration 2 blinks > short pause > activity is in progress 6 blinks >...
- Page 30 Table 2. Diagnostic power LED codes (continued) State State Name Blinking Amber Problem Description Suggested Pattern Resolution If identified the card failed, replace the card. If none of the card failed, replace the motherboard. No Memory detected 3 blinks > short pause > If customer can assist to troubleshoot, narrow 3 blinks >...
- Page 31 Table 2. Diagnostic power LED codes (continued) State State Name Blinking Amber Problem Description Suggested Pattern Resolution If identified the component failed, replace the component. If none of the component failed, replace the motherboard. System board failure 3 blinks > short pause > Fatal system board failure detected.
-
Page 32: Diagnostic Error Messages
If the problem persists, try another drive. Run the Hard Disk Drive tests in Dell Diagnostics. HARD-DISK DRIVE FAILURE The hard drive does not respond to commands from the computer. - Page 33 Then, shut down the computer, reinstall the hard drive, and restart the computer. If the problem persists, try another drive. Run the Hard Disk Drive tests in Dell Diagnostics. INSERT BOOTABLE MEDIA The operating system is trying to boot to non-bootable media, such as an optical drive.
-
Page 34: System Error Messages
The operating system cannot find a specific track on the hard drive. SHUTDOWN FAILURE A chip on the system board may be malfunctioning. Run the System Set tests in Dell Diagnostics. If the message reappears, Contact Dell. TIME-OF-DAY CLOCK LOST POWER System configuration settings are corrupted. - Page 35 NOTICE - Hard Drive SELF MONITORING SYSTEM S.M.A.R.T error, possible hard disk drive failure. has reported that a parameter has exceeded its normal operating range. Dell recommends that you back up your data regularly. A parameter out of range may or may not...
-
Page 36: Chapter 4: System Setup
Boot Sequence allows you to bypass the System Setup‐defined boot device order and boot directly to a specific device (for example: optical drive or hard drive). During the Power-on Self Test (POST), when the Dell logo appears, you can: ● Access System Setup by pressing F2 key ●... -
Page 37: System Setup Overview
If you wait too long and the operating system logo appears, wait until you see the desktop. Then, shut down or restart your computer and try again. NOTE: After the Dell logo appears, you can also press F12 and then select BIOS setup. System Setup options NOTE: Depending on the computer and its installed devices, the items listed in this section may or may not appear. - Page 38 Allows you to connect to display through WiFi. WIDI requires Intel WiFi card, Intel graphics, and WIDI receiver in display (or WIDI compliant display). To install the WIDI application, see the Dell.com/support site to download the WIDI application. NOTE: When installing the WIDI application, connect the display to Intel onboard graphic output.
- Page 39 Table 7. System configuration (continued) Option Description USB PowerShare This option allows you to charge the external devices, such as mobile phones, music player. This option is disabled by default. Audio Allows you to enable or disable the integrated audio controller. ●...
- Page 40 Table 9. Security (continued) Option Description ● Disabled ● Enabled (default) Computrace This field lets you Activate or Disable the BIOS module interface of the optional Computrace Service from Absolute Software. Enables or disables the optional Computrace service designed for asset management. ●...
- Page 41 Table 11. Intel software guard extensions Option Description Intel SGX Enable Allows you to enable or disable the Intel Software Guard Extensions to provide a secured environment for running code/storing sensitive information in the context of the main operating system. ●...
- Page 42 Table 13. Power management (continued) Option Description ● Disabled - Does not allows the system to power on by special LAN signals when it receives a wake-up signal from the LAN or wireless LAN. ● LAN or WLAN - Allows the system to be powered on by special LAN or wireless LAN signals.
- Page 43 Table 16. Maintenance (continued) Option Description Dell Development Configuration Allows you to turn on/off certain features to control the BIOS. This option is disabled by default. BIOS Downgrade Allows you to control flashing of the system firmware to the previous versions. This option is enabled by default.
-
Page 44: Updating The Bios
Steps 1. Restart the computer. 2. Go to Dell.com/support. 3. Enter the Service Tag or Express Service Code and click Submit. NOTE: To locate the Service Tag, click Where is my Service Tag? NOTE: If you cannot find your Service Tag, click Detect My Product. -
Page 45: Assigning A System Password And Setup Password
Assigning a system password and setup password Prerequisites You can assign a new System Password and/or Setup Password or change an existing System Password and/or Setup Password only when Password Status is Unlocked. If the Password Status is Locked, you cannot change the System Password. - Page 46 6. Press Y to save the changes and exit from System Setup. The computer reboots. System Setup...
-
Page 47: Chapter 5: Specifications
Specifications NOTE: Offerings may vary by region. For more information regarding the configuration of your computer in: ● Windows 10, click or tap Start > Settings > System > About. ● Windows 8.1 and Windows 8, click or tap Start >... - Page 48 Table 25. System information Feature Specification System chipset Intel 100 series, Q170 DMA channels Two 8237 DMA controllers with seven independently programmable channels Interrupt levels Integrated I/O APIC capability with 24 interrupts BIOS chip (NVRAM) 16 MB Table 26. Expansion bus Feature Specification Bus type...
- Page 49 Table 29. External connectors (continued) Feature Specification ● PS2 Mouse 6-pin connector Table 30. Internal connectors Feature Specification PCI Express x16 (wired as x4) data width (maximum) 164-pin connector — four PCI Express lanes PCI Express x16 data width (maximum) — 16 PCI 164-pin connector Express lanes Serial ATA...
- Page 50 Table 32. Power NOTE: Heat dissipation is calculated by using the power supply wattage rating. Power Wattage Maximum Heat Voltage Dissipation 180 W 614 BTU/hr 100 V AC to 240 V AC, 50 Hz to 60 Hz, 3A/1.5A Coin cell battery 3 V CR2032 lithium coin cell Table 33.
-
Page 51: Chapter 6: Contacting Dell
About this task Dell provides several online and telephone-based support and service options. Availability varies by country and product, and some services may not be available in your area. To contact Dell for sales, technical support, or customer service issues: Steps 1.
Need help?
Do you have a question about the OptiPlex 7040-Small Form Factor and is the answer not in the manual?
Questions and answers