
Related Manuals for VALKYRIE Dragonfang 240


Summary of Contents for VALKYRIE Dragonfang 240
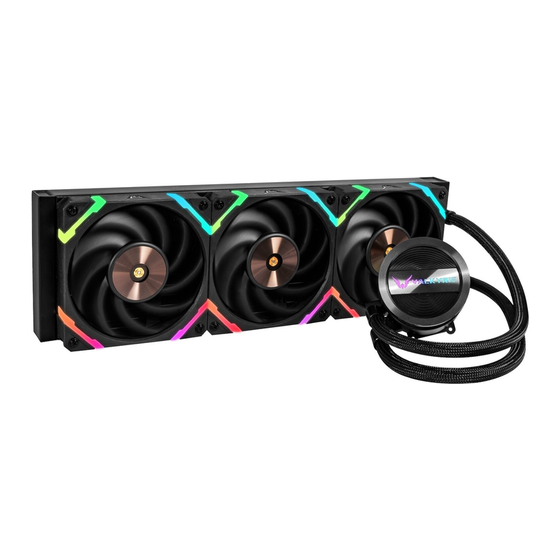
- Page 1 INSTALLATION GUIDE Valkyrie Dragonfang 240/280/360/420/480 DRAGONFANG www.my-valkyrie.com...
- Page 4 AIO Water Cooling Parts 1x AIO water cooling radiator 1x Wire Kit & Hub Set 2 x with Valkyrie Dragonfang 240 3 x with Valkyrie Dragonfang 360 4 x with Valkyrie Dragonfang 480 1 x with Valkyrie Dragonfang 140 2 x with Valkyrie Dragonfang 280...
- Page 5 1x Intel Backplate 4x Intel / AMD Bolts 4x Nuts 4x LGA2011 Bolts 4x Bracket Installation Screws 2x Intel Brackets 2x AMD Brackets 2x AMD fastener Fan screw Fan screw (extended) 120 x 4 / 140 x 4 / 240 x 8 / 280 x 8 120 x 4 / 140 x 4 / 240 x 8 / 280 x 8 360 x 12 / 420 x 12 / 480 x 16 360 x 12 / 420 x 12 / 480 x 16...
-
Page 6: Water Cooling
WATER COOLING... -
Page 7: Radiator Installation
Radiator Installation Step 1: Install fan Use the fan screws to secure the fan to the radiator. *Please use the shorter fan screws. DO NOT use extended screws to secure the cooling fan. Step 2: Install radiator Use the radiator screws to secure the radiator to the case. - Page 8 Intel LGA1200/1700 Installation We have marked the parts required for installing the Intel LGA1200/1700 platform for you. 1x Intel Backplate 4x Intel / AMD Bolts 4x Nuts 4x Bracket Installation Screws 2x Intel Brackets Step 1: Install backplate 1. Align the backplate to the corresponding platform holes. 2.
- Page 9 Step 2: Install screws Install Intel/AMD bolts to the motherboard. *The larger end of the screw faces down. Step 3: Removing protective cover Remove the protective cover from coldplate. * it is critical to the cooling performance.
-
Page 10: Step 4: Install Bracket
Step 4: Install bracket Use bracket bolts to install the bracket to the water block. Step 5: Install water block Put the water block onto the studs and use nuts to fix it. -
Page 11: Step 6: Complete Installation
Step 6: Complete installation Please refer to the “Wiring” for wiring. - Page 12 Intel LGA2011/2066 Installation We have marked the parts required for installing the Intel LGA2011/2066 platform for you. 2x Intel Brackets 4x Nuts 4x LGA2011 bolts 4x Bracket Installation Screws Step 1: Install screws Install Intel LGA2011 bolts to the motherboard.
- Page 13 Step 2: Removing protective cover Remove the protective cover from the coldplate. *It is critical to the cooling performance. Step 3: Install bracket Use bracket bolts to install the bracket to the water block.
- Page 14 Step 4: Install water block Put the water block onto the studs and use nuts to fix it. Step 5: Complete installation Please refer to the “Wiring” for wiring.
- Page 16 AMD AM4/AM5 Installation We have marked the parts required for installing the AMD AM4/AM5 platform for you. 4x Nuts 2x AMD brackets 4x Intel / AMD bolts 2x AMD fastener 4x Bracket Installation Screws Step 1: Prepare the motherboard Screw out the 4 bolts. Remove the original bracket on the motherboard. Keep the original backplate.
-
Page 17: Step 3: Install Brackets
Step 2: Install screws Install Intel/AMD bolts to the motherboard. *The larger end of the screw faces down. Step 3: Install brackets Install AMD brackets onto the screws and tighten them with nuts. - Page 18 Step 4: Removing protective cover Remove the protective cover from the coldplate. *It is critical to the cooling performance. Step 5: Install AMD fastener Use bracket bolts to install the AMD fastener to the water block.
- Page 19 Step 6: Install Water Block Align bracket to the holes and tighten the spring screws on both ends. Step 7: Complete installation Please refer to the “Wiring” for wiring.
- Page 20 WIRING...
- Page 21 2. Plug the water block A-RGB connector into the A-RGB header on the motherboard. * If there is only one A-RGB header on the motherboard, the water block A-RGB connector may be connected to the Valkyrie HUB. ARGB ARGB AIO_PUMP...
- Page 22 Valkyrie HUB Wiring 1. Plug the SATA power supply connector into the Valkyrie HUB POWER port. 2. Plug the 4PIN fan connectors and ARGB connectors into the Valkyrie HUB, respectively.* 3. Connect Valkyrie HUB control cables to MB_FAN and MB_ARGB ports respectively and plug the other ends into the CPU_FAN and AGRB headers on the motherboard.
- Page 23 EXSTENSION CABLE FAN_01 FAN_02 FAN_03 MB-FAN ARGB ARGB ARGB POWER SUPPLY SATA VALKYRIE HUB7 FAN_07 FAN_06 FAN_05 MB-ARGB ARGB ARGB ARGB MOTHERBOARD CPU_FAN CPU_FAN...
- Page 24 TIPS...
- Page 25 Method of replacing water block logo The nameplate can be removed by pulling up the middle section of the magnetic nameplate. *Make sure you start from the middle.
- Page 26 HW Gaming Solution Ltd 28 Oktovriou 261, View point Tower, 3035 Limassol, Cyprus info@my-valkyrie.com www.my-valkyrie.com VD_2.0_15042023...
Need help?
Do you have a question about the Dragonfang 240 and is the answer not in the manual?
Questions and answers