Table of Contents
Advertisement
Advertisement
Table of Contents

Related Manuals for TCL HH132V1


Summary of Contents for TCL HH132V1
- Page 1 USER MANUAL V1.0 | HH132V1/HH132VM...
-
Page 2: Table Of Contents
Contents Chapter 1. Meet your CPE................4 1.1 System requirements ................4 1.2 Overview ....................4 Chapter 2. Get started with your CPE ............6 2.1 Insert a nano SIM card ................6 2.2 Access CPE network ................. 7 2.3 Use the telephone function (optional)............8 Chapter 3. - Page 3 • TCL Communication Ltd. does not assume any liability that may occur due to the use or application of the product described herein. Every effort has been made in the preparation...
-
Page 4: Chapter 1. Meet Your Cpe
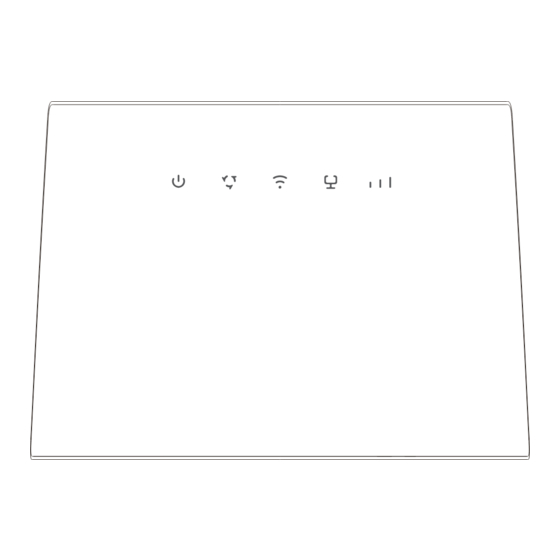
Chapter 1. Meet your CPE The Cat13 LTE CPE is a dual-band WiFi device. It operates at both 2.4 GHz and 5 GHz, and provides wired and wireless access for multiple computers and mobile devices. With various features and functions, the Cat13 LTE CPE is a perfect hub of your home or business network. - Page 5 • 1 bar: weak signal strength. • 2 bars: good signal strength. 5. Signal indicator • 3 bars: excellent signal strength. • Off: no signal. Use a paperclip to press the button for 3 seconds to reset the 6. Reset button device. 7. Nano SIM card Insert a Nano SIM card in the slot.
-
Page 6: Chapter 2. Get Started With Your Cpe
Chapter 2. Get started with your CPE This chapter introduces the basic instructions on how to set up your CPE and make connections. The instructions may vary depending on your CPE model. 2.1 Insert a nano SIM card Prerequisite: Select the right size of SIM card for your CPE. Nano-SIM (4FF) Micro-SIM (3FF) Mini-SIM (2FF) -
Page 7: Access Cpe Network
2.2 Access CPE network You can connect your devices to the CPE network wiredly or wirelessly as illustrated below. Access wired network To establish a wired network connection, connect the wired device to the LAN port of your CPE using an Ethernet cable. Access wireless network To establish a wireless network connection, select the Wi-Fi name (or the SSID) of the CPE on your wireless devices, and enter the Wi-Fi password. -
Page 8: Use The Telephone Function (Optional)
2.3 Use the telephone function (optional) Your CPE supports the telephone function. Connect a telephone to your CPE using a telephone cable as illustrated below. -
Page 9: Chapter 3. Access The Web Ui
Chapter 3. Access the web UI This chapter introduces how to get access to the web UI of your CPE, and gives you a glimpse of the web UI. 3.1 Log in to the web UI To log in to the web UI, follow these steps: 1. - Page 10 Wi-Fi is enabled. Wi-Fi is disabled. Click to log out of the web UI. NOTE • VoLTE function will be disabled if there is no telephone port on your device.
-
Page 11: Chapter 4. Configure Your Cpe
Chapter 4. Configure your CPE In this chapter, we will show you how to get the most out of your CPE using the web UI. In the web UI, you can configure Wi-Fi settings, view connected devices, set up a guest network, and more. -
Page 12: Services
Status You can have a quick check on your device information, such as cellular network, LAN, WAN, Wi-Fi, and diagnostics. Connected devices This tab allows you to edit the connected device name, and manage internet access for connected devices. 4.3 Services Navigate to Services, and click the tab to display the information you want or change SMS settings as desired. -
Page 13: Settings
SMS report. Disable SMS delivery reports Click Call logs (optional, for HH132V1 only) In this tab, you can view call history including incoming calls, outgoing calls, missed calls. Call forwarding (optional, for HH132V1 only) Once this option is enabled, you can choose the approriate call forwarding mode and forward Apply. - Page 14 Setup Network connection In this option, you can configure and manage connection mode, mobile data, and data roaming. Profile management In this option, you can set up a new APN profile, and edit or delete existing profiles. 1. Click New. 2.
- Page 15 Advanced Configure advanced Wi-Fi settings in this option. Max. connected You can decide how many client devices can connect to your CPE devices network at a time. Auto Wi-Fi mode The mode is set to by default. The AP isolation function enables you to create a separate virtual network for each wireless client that is connected to your CPE network.
- Page 16 1. When the SIM PIN feature is enabled, click Disable SIM PIN 2. Enter the current SIM PIN code. 3. Click Apply. Advanced settings Basic Set up the WAN connection mode and modify related parameters under this option. You can set the connection mode to DHCP, PPPoE Static...
- Page 17 Specify which device cannot access the internet by adding the device to the blacklist. MAC filter By default, any device connected to your CPE network is allowed to access the internet. You can specify which device can or cannot access the internet by adding the device to the blacklist or whitelist.
-
Page 18: System
Bridge mode Bridge mode is a networking configuration where two devices are connected. When bridge mode is enabled, the router acts as a switch to extend its port access to other connected devices. 4.5 System In this section, you can quickly view the device information, reboot or reset your device, modify login password, and more. -
Page 19: Important Safety Information
Do not power off the device during the upgrade process. Otherwise, it may be damaged. Important safety information Read all the safety information before using your product. Failure to follow these safety instructions could result in injury, or damage to your product or other property. Important safety instructions • Observe signs and notices that prohibit or restrict the use of wireless devices. - Page 20 Directive 2014/53/EU. You can find the Declaration of Conformity at: https://www.tcl.com/global/en/service-support-mobile/eu-doc.html. Disposal and recycling information At TCL, we continually strive to improve our operations and products, and minimize our impact on the environment. Your product is designed and manufactured with high quality materials and components, which can be recycled and reused.
-
Page 21: Troubleshooting
Troubleshooting If you encounter problems while using the product, use the troubleshooting information to help determine the problem and find possible solutions. General problems Problem Solution Settings Wi-Fi • Log in the web UI, then go to > > Basic, and find the current Wi-Fi password. I forget the Wi-Fi password. - Page 22 10 times, the SIM card will be locked permanently. TCL and the TCL logo are trademarks of TCL Communication Ltd. All other trademarks and trade names are the property of their respective owners. © 2022 TCL Communication Ltd. All rights reserved.
Need help?
Do you have a question about the HH132V1 and is the answer not in the manual?
Questions and answers