
Subscribe to Our Youtube Channel
Related Manuals for STEINEL PB2-BLUETOOTH


Summary of Contents for STEINEL PB2-BLUETOOTH
- Page 1 FUNKTASTER / WIRELESS PUSH BUTTON PB2-BLUETOOTH PB4-BLUETOOTH...
- Page 2 Inhalt Zu diesem Dokument Allgemeine Sicherheitshinweise Gerätebeschreibung Elektrischer Anschluss Montage Funktion Wartung und Pflege Entsorgung Konformitätserklärung Herstellergarantie Technische Daten Störungsbehebung...
-
Page 3: Zu Diesem Dokument
1. Zu diesem Dokument Urheberrechtlich geschützt. Nachdruck, auch auszugsweise, nur mit unserer Genehmigung. Änderungen, die dem technischen Fortschritt dienen, vorbehalten. Warnung vor Gefahren! Warnung vor Gefahren durch Strom! Warnung vor Gefahren durch Wasser! 2. Allgemeine Sicherheitshinweise Failure to observe these operating instructions presents hazards! Diese Anleitung enthält wichtige Informationen für den sicheren Umgang mit dem Gerät. - Page 4 3. Gerätebeschreibung Die PB2/ PB4 Bluetooth sind Bluetooth-Taster, die eine manuelle Funksteuerung von Steinel Bluetooth Mesh Produkten wie Sensoren oder Leuchten ermöglichen. Das PB2/PB4 Bluetooth ist ein Energy Harvesting-Gerät, das keine kabelgebundene Stromversorgung oder Batterie benötigt. Ein Tastendruck erzeugt die Energie, die benötigt wird, um das Bluetooth-Signal an ein angeschlossenes Produkt zu senden.
- Page 5 Produktmaße PB2 - BLUETOOTH 80,5 PB4 - BLUETOOTH 80,5 – 5 – Inhalt...
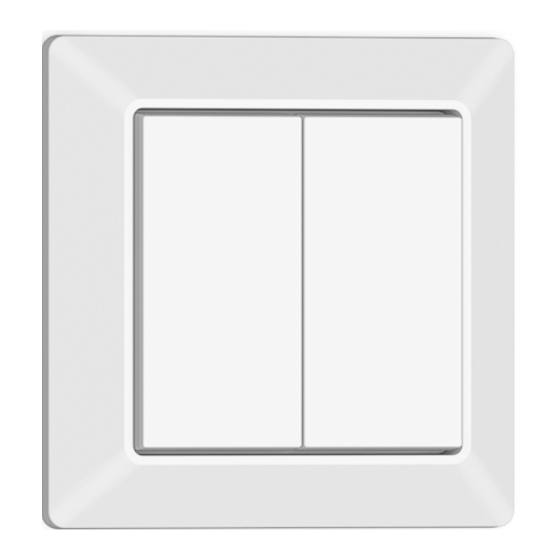
- Page 6 Geräteübersicht PB2 - BLUETOOTH A... Taste 1 B... Taste 2 C... Designrahmen D... Montagerahmen PB4 - BLUETOOTH A... Taste 1 B... Taste 2 C... Taste 3 D... Taste 4 E... Designrahmen F... Montagerahmen – 6 – Inhalt...
-
Page 7: Elektrischer Anschluss
4. Elektrischer Anschluss PB4 - BLUETOOTH ☝ Energy Harvesting Gerät. Für das Gerät ist weder eine kabelgebundene Stromversorgung noch eine Batterie erforderlich. • Stromversorgung - Energy Harvesting (kinetischer Taster) • Kommunikation - per Funk über Bluetooth – 7 – Inhalt... -
Page 8: Montage
5. Montage Gefahr durch elektrischen Strom! Keine Kabel anschließen Montagevorbereitung • Alle Bauteile auf Beschädigung prüfen. Bei Schäden das Produkt nicht in Betrieb nehmen. • Geeigneten Montageort auswählen. – Unter Berücksichtigung der Reichweite. – Nicht in explosionsgefährdeten Bereichen. – Nicht auf leicht entflammbaren Oberflächen. –... - Page 9 Montageschritte A: – Montage mit Schrauben Stellen Sie benötigtes Werkzeug und Material zusammen: – Kreuzschraubendreher 5.1.A • Bauen Sie das Produkt auseinander. 5.2.A • Verwenden Sie die Schrauben für die Befestigung des Montagerahmens. – 9 – Inhalt...
- Page 10 5.3.A Montieren Sie den Designrahmen und die Tasten auf dem festen Montagerahmen. Montageschritte B: – Montage mit Klebeband 5.2.B • Ziehen Sie die Schutzfolie vom doppelseitigen Klebeband ab und legen Sie es auf den Montagerahmen. – 10 – Inhalt...
- Page 11 5.3.B • Entfernen Sie die zweite Schutzfolie vom doppelseitigen Klebeband. • Legen Sie das gesamte Produkt auf eine ebene Fläche. Drücken Sie kurz, um das Klebeband auf der Oberfläche zu befestigen. – 11 – Inhalt...
- Page 12 Sensoren, Leuchten) in Betrieb genommen werden, das mit der Steinel Connect App kompatibel ist – Wählen Sie in der Steinel Connect App das Produkt aus, mit dem Sie den PB2/ PB4 verbinden möchten. – Stellen Sie sicher, dass das mit dem PB2/PB4 zu verbindende Produkt zu einer Gruppe in der Steinel Connect App hinzugefügt wurde.
-
Page 13: Wartung Und Pflege
Elektrogeräte getrennt gesammelt und einer umweltgerechten Wiederverwertung zugeführt werden. 9. Konformitätserklärung Die STEINEL GmbH erklärt hiermit, dass der Funktaster PB2-Bluetooth und der PB4-Bluetooth Funkgerätetyp mit der EU-Richtlinie 2014/53/EU konform sind. Der vollständige Text der EU-Konformitätserklärung ist unter der folgenden Internetadresse verfügbar: www.steinel.de... - Page 14 Die Garantie umfasst die Freiheit von Mängeln, die nachweislich auf einem Material- oder Herstellungsfehler beruhen und uns unverzüglich nach Feststellung und innerhalb der Garantiezeit gemeldet werden. Die Garantie erstreckt sich auf sämtliche STEINEL Professional-Produkte, die in Deutschland gekauft und verwendet werden. Unsere Garantieleistungen für Verbraucher Die nachstehenden Regelungen gelten für Verbraucher.
- Page 15 Produkt bitte vollständig mit dem Original-Kaufbeleg, der die Angabe des Kaufdatums und der Produktbezeichnung enthalten muss, an Ihren Händler oder direkt an STEINEL (UK) Ltd. – 25 Manasty Road, Axis Park, Orton Southgate, GB- Peterborough Cambs PE2 6UP United Kingdom. Wir empfehlen Ihnen daher, Ihren Kaufbeleg bis zum Ablauf der Garantiezeit sorgfältig aufzubewahren.
-
Page 16: Technische Daten
11. Technische Daten – Abmessungen (H x B × T): 80,5 x 80,5 x 15 mm – Abmessungen ohne Rahmen (H x B x T): 55 x 55 x 15 mm – Stromversorgung: selbstversorgend – Protokoll: Bluetooth – Sendefrequenz: 2.4 GHz –... -
Page 17: Störungsbehebung
12. Störungsbehebung Bluetooth-Taster kann nicht mit einem Produkt (z.B. Sensor/Leuchte) verbunden werden – Produkt ist nicht über die App einer Gruppe zugeordnet. • Fügen Sie das Produkt in der App zu einer Gruppe hinzu. – Der Taster befindet sich nicht in Reichweite des Produkts, dem er zugewiesen werden soll. - Page 18 Index About this document General safety precautions System description Electrical connection Installation Function Maintenance and care Disposal Declaration of Conformity Manufacturer’s warranty Technical specifications Troubleshooting...
-
Page 19: About This Document
1. About this document Under copyright. Reproduction either in whole or in part only with our consent. Subject to change in the interest of technical progress. Hazard warning! Warning of hazards from electricity! Warning of hazards from water! 2. General safety precautions Failure to observe these operating instructions presents hazards! These instructions contain important information on the safe use of this... -
Page 20: System Description
3. System description The PB2/ PB4 Bluetooth are Bluetooth push buttons that enable wireless manual override of Steinel Bluetooth Mesh products as sensors or luminaires. The PB2/PB4 Bluetooth is an energy harvesting device that needs no wired power supply or battery. A button push creates the energy that is needed, to sent out the Bluetooth signal to a connected product. - Page 21 Product dimensions PB2 - BLUETOOTH 80,5 PB4 - BLUETOOTH 80,5 – 23 – Index...
- Page 22 Product components PB2 - BLUETOOTH A... Button 1 B... Button 2 C... Design frame D... Mounting frame PB4 - BLUETOOTH A... Button 1 B... Button 2 C... Button 3 D... Button 4 E... Design frame F... Mounting frame – 24 – Index...
-
Page 23: Electrical Connection
4. Electrical connection PB4 - BLUETOOTH ☝ Energy harvesting device. The device doesn’t require a wired power supply or battery. • Power supply - energy harvesting (kinetic push button) • Communication - wireless via Bluetooth – 25 – Index... -
Page 24: Installation
5. Installation Hazard from electrical power. Do not connect any wires! Preparing for installation • Check all components for damage. Do not use the product if it is damaged. • Select an appropriate site to install the product. – Take reach into consideration. –... - Page 25 Mounting procedure A: – Mounting by screws Put together the tools and material needed: – Screwdriver - cross 5.1.A • Disassembly the product. 5.2.A • Use the screws for the mounting frame fixation. – 27 – Index...
- Page 26 5.3.A Mount the design frame and the buttons on the fixed mounting frame. Mounting procedure B: – Mounting by adhesive tape 5.2.B • Remove the protection foil from the double adhesive tape and place it on the mounting frame. – 28 – Index...
- Page 27 5.3.B • Remove the second protection foil from the double adhesive tape. • Place the whole product on a flat surface. Make short press to stick the adhesive tape on the surface. – 29 – Index...
- Page 28 – The app will now guide you through the provisioning process of the wireless pushbutton. Functions that can be set via the Steinel Connect app: – Connecting the Push Button via Bluetooth to other Steinel Bluetooth Mesh products. – Assign functions to each of the rockets for short and long push –...
-
Page 29: Maintenance And Care
9. Declaration of Conformity STEINEL GmbH hereby declares that the Wireless pushbutton PB2- bluetooth and PB4-bluetooth radio equipment type conforms to Directive 2014/53/EU. -
Page 30: Manufacturer's Warranty
10. Manufacturer’s warranty All STEINEL products meet the highest quality standards. For this reason, we, the manufacturer, are pleased to provide you, the customer, with a warranty under the following terms and conditions: The warranty covers the absence of deficiencies which are proven to be the result of a material defect or fault in manufacturing and which are reported to us immediately after detection and within the warranty period. - Page 31 STEINEL (UK) Ltd. – 25 Manasty Road, Axis Park, Orton Southgate, GB- Peterborough Cambs PE2 6UP United Kingdom. For this reason, we recommend that you keep your receipt of purchase in a safe place until the warranty period expires.
-
Page 32: Technical Specifications
11. Technical specifications – Dimensions (H x W × D): 80.5 x 80.5 x 15 mm – Dimensions without frame (H x W x D): 55 x 55 x 15 mm – Power supply: self powered – Protocol: Bluetooth – Transmission Frequency: 2.4 GHz –... -
Page 33: Troubleshooting
12. Troubleshooting Bluetooth push button can’t be connected to a product (e.g. sensor/ luminaire) – Product is not assigned to a group via app. • Add the product to a group in the app. – The push button is not within range of the product to which it is to be assigned. - Page 34 STEINEL GmbH Dieselstraße 80-84 33442 Herzebrock-Clarholz Tel: +49/5245/448-188 www.steinel.de Contact www.steinel.de/contact...
Need help?
Do you have a question about the PB2-BLUETOOTH and is the answer not in the manual?
Questions and answers