Table of Contents
Advertisement
Quick Links
Thank you for purchasing the Model CZ8000 class.
Before using your machine, please read the instruction
manual and understand the contents well.
A f ter reading the instruction manual, please keep it in a lo-
cation where it is easily accessible to the operator.
Instruction Manual
CZ8000 class
SUPER HIGH SPEED OVERLOCK
Advertisement
Table of Contents

Related Manuals for Yamato CZ8000


Summary of Contents for Yamato CZ8000
- Page 1 Instruction Manual SUPER HIGH SPEED OVERLOCK CZ8000 class Thank you for purchasing the Model CZ8000 class. Before using your machine, please read the instruction manual and understand the contents well. A f ter reading the instruction manual, please keep it in a lo-...
-
Page 3: Table Of Contents
CONTENTS Safety instructions ⅰ - iv 1. Name of each part 2. Installation Semi-submerged type 2.1.1 Table cutting diagram 2.1.2 Installation Motor, pulley and belt Hanging belt Belt cover Eye guard and finger guard 3. Sewing speed and rotating direction of pulley 4. - Page 4 CONTENTS 6. Adjustments of sewing machine Needle thread tension for overlock stitch Looper thread tension for overlock stitch Width of overedge seam Upper and lower knives 6.4.1 Height of lower knife 6.4.2 Height of upper knife(flat type) 6.4.3 Sharpness of knives 6.4.4 Sharpening knives Height of feed dogs...
-
Page 5: Safety Instructions Ⅰ
SAFETY INSTRUCTIONS 1. Safety Instruction The sewing machine, automatic machine, and attachments (collectively called “the machine” below) involve sewing operations that require the operator to be near moving parts of the machine. Because of this, there is always a potential danger of unintentional contact with the moving parts. For this reason, the operators who actually use the machine and the maintenance staff who perform maintenance and repair must carefully read “2. - Page 6 As dew condensation may occur when suddenly personal injury or death. Yamato assumes no bringing the machine from a cold environment responsibility for damages or personal injury...
- Page 7 SAFETY INSTRUCTINONS WARNING 2.6 Items for which the power to the machine Disposal of the machine waste has to be turned off The proper disposal of the machine waste is the Be sure to immediately turn the power off if responsibility of the customer, and must be any abnormality or failure is found or in the disposed of in accordance with the locally valid...
- Page 8 Use “Yamato SF oil 28” as specified. while operating. If machine oil gets in your eyes, it may Securely join the table and legs to ensure cause eye inflammation.
- Page 9 3.5 During operation accidents caused by such modification. ○ Be sure to operate the sewing machine using ○ Use genuine Yamato parts when repairing the the safeguards such as belt cover, finger machine and/or replacing the parts. We are guard, and eye guard.
- Page 10 SAFETY INSTRUCTINONS 5. Safety devices and warning label affixing locations Belt cover Finger guard The belt cover prevents entanglement with the The finger guard prevents the operator’s fingers belt. from going under the needle. However, there is some space at the top of the finger guard Do not operate with the cover removed.
-
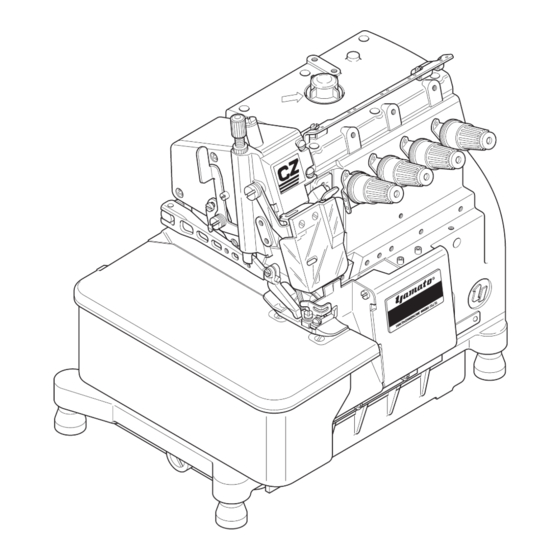
Page 11: Name Of Each Part
Name of each part Oil cap Thread tension spring cap Presser foot release lever SP device (behind Eyeguard) Cloth plate Eye guard Front cover Finger guard Oil reservoir Drain hole screw Presser foot Fig. 1-1 CZ8000... -
Page 12: Installation
Installation 2.1 Semi-submerged type 2.1.1 Table cutting diagram Fig. 2-1 CZ8000... -
Page 13: Installation
⑦ chute Table 1 The number of spacers ① and ② rubber ① Thickness of cushion Number of ① Number of ② tables ② 40 ㎜ 45 ㎜ not necessary Size of spacers : ①=15㎜ ②=5㎜ ④ Fig. 2-3 CZ8000... -
Page 14: Motor, Pulley And Belt
Outside diameter Usual sewing speed × 48.5 + 5 mm 6200 of motor pulley Servomotor speed 6500 6700 7000 7200 Belt 7500 7700 Use a V-belt of M type. 8000 For belt size, refer to Table 2. Table 3 CZ8000... -
Page 15: Hanging Belt
(2) Install the belt cover ⑥ as shown in the figure. ⑥ Fig. 2-6 2.5 Eye guard and finger guard To ensure safe use, ALWAYS install the eye guard ⑦ and the finger guard ⑧ on the prescribed position dur- ing operation. ⑧ ⑦ Fig. 2-7 Fig. 2-8 CZ8000... -
Page 16: Sewing Speed And Rotating Direction Of Pulley
The rotating direction of the motor pulley ① and the ma- chine pulley ② is clockwise as shown in the figure. ① If rotating in reverse direction, oil can not be supplied Fig. 3-1 properly, and the machine can be damaged. CZ8000... -
Page 17: Lubrication
Lubrication 4.1 Lubricating oil Use YAMATO SF OIL No. 28 or Mobil Velocite SM22. NEVER add additives to the oil. If added, it can cause the deterioration of the oil and the damage to the machine. 4.2 Lubricating When using a new machine or a machine which has not been run for a while, supply few drops of oil to the needle bar ①... -
Page 18: Changing Oil
◆ If the oil splashes from the nozzle insufficiently or in- cludes many bubbles even though oil is sufficiently kept, check or replace the oil filter. � ④ Be careful the oil may spill out from the oil filter ②, Fig. 4-6 when loosening the screw ④. CZ8000... -
Page 19: Proper Operation
Proper operation 5.1 Needle system Japanese CZ8000 class : DC×27 (or B27, 1886) standard Metric 60 65 80 85 90 Select proper needles in size according to the thickness standard and the type of the material. Table 4 5.2 Installing needles... -
Page 20: Adjusting Thread Tension
Before threading, ALWAYS turn the motor switch OFF and check that the motor has already stopped. Threading correctly by referring to the threading figure which is attached on the back of the front cover. ATTENTION Improper threading can cause thread breakage, skip stitch, and uneven stitch. CZ8000... -
Page 21: Pressure Of Presser Foot
③. Then, release the lever. Fig. 5-6 Make sure that the presser arm ④ gets into the groove of the presser bar ⑤. If not, it can cause breakage to parts and injury to per- son. CZ8000... -
Page 22: Opening Cover
Differential ratio up to 1:0.6 - 1:2 or 1:1 - 1:3 is available by internal adjusting mechanism respectively. ④ Adjust the graduation, differential ratio, and max. stitch length according to Table 6. Fig. 5-8 Differential Max. stitch Graduation ratio length (㎜) 1:0.7 1:1.6 1:2.3 Table 6 CZ8000... -
Page 23: Adjusting Stitch Length
The adjustable range of the stitch length is 1 - 4 mm. Table 7 shows the number of stitches per 1 inch (25.4 mm) Number of Number of and per 30 mm. Stitch length stitch stitch (㎜) (per 1 inch) (per 30 mm) (25.4 mm) Table 7 CZ8000... -
Page 24: Sp Device And Hr Device
Check the oil amount in SP tank ①. If not enough, supply ④ the oil into the hole ②. Open the oil container plug ④ of HR device and check the oil amount. If not enough, supply the oil. Fig. 5-12 HR device CZ8000... -
Page 25: Cleaning The Machine
◆ stitch length, differential feeding ◆ adjusting knives and thread tension Weekly maintenance: (1) On weekends, clean the machine carefully after remov- ing the presser foot and the stitch plate. (2) Check the tension of V-belt. (3) Check and supply the lubricating oil. CZ8000... -
Page 26: Adjustments Of Sewing Machine
● To loosen the needle thread tension, move the needle thread eyelet and the needle thread pull-off in the direction “L”. Fig. 6-1 ● To tighten the needle thread tension, move them in the direction “T”. L T ⑤ ④ ⑥ ⑦ ④ Fig. 6-2 CZ8000... -
Page 27: Looper Thread Tension For Overlock Stitch
Fig. 6-3 The standard setting of each looper thread eyelet: ● To tighten the thread tension, move each thread eyelet or thread pull-off in the direction “T”. ● To loosen the thread tension, move them in the direction “L”. CZ8000... -
Page 28: Width Of Overedge Seam
3. Dust clogged at the connecting part of the upper knife holder changes the installing angle of the knives. It will make them cut badly. Be sure to clean the parts by loosening the screw ③. CZ8000... -
Page 29: Upper And Lower Knives
Loosen the screw ④ to make the engagement between the upper knife ③ and the lower knife ① to 0.5 - 1.0 mm when the upper knife is at the lowest point. 0.5 - 1.0㎜ ④ ③ ① Fig. 6-7 CZ8000... -
Page 30: Sharpness Of Knives
The upper knife made of super hard alloy is unnecessary 55° to re-sharpen for about one year and normal grinder is not useful for re-sharpening it. Keep another upper knife for spare. If needed, contact us directly or a dealer for re-sharpen- ing. Fig. 6-9 CZ8000... -
Page 31: Height Of Feed Dogs
① 2. For sewing heavy weight knitted fabric or the mate- rial having uneven thickness parts, adjust differential feed dog ① and main feed dog ③ 1.0 ㎜ higher than Fig. 6-11 standard position respectively. CZ8000... -
Page 32: Needles And Loopers
(4) Loosen the screw ④ and adjust the needle bar while moving it up and down. ③ When the needle bar is at the highest point, make the ④ height “N” from the top of the stitch plate to the needle tip in Table 8. Fig. 6-12 CZ8000... -
Page 33: Installing Angle Of Lower Looper
① to the extreme left. Make the distance between ① the lower looper tip and the center of the needle to 3.3 - 3.8 mm. 3.3 - 3.8㎜ Loosen the screw ③ on the lower looper holder to adjust ② 3.3 - 3.8㎜ ③ Fig. 6-15 CZ8000... -
Page 34: Front-And-Rear Position Of Lower Looper
Tighten the screw ③ after checking the height of needle. After adjusting the front-and-rear position of the lower looper, be sure to check the distance between the needle Fig. 6-18 and the lower looper and tighten the screw ② . CZ8000... -
Page 35: Distance Between Needle And Upper Looper
② arm to adjust it. Distance betweren needle Model and upper looper "U" Fig. 6-19 CZ8000 class 4.7 - 6.2 ㎜ CZ8120 class 5.0 - 5.5 ㎜ Table 10 Apply the liquid packing to the mounting part of the frame when installing the looper holder cover. -
Page 36: Timing Relation Between Lower Looper And Upper Looper
Loosen the screw ⑥ to make the clearance between the ⑤ needle guard (front) ⑤ and the needle to 0.02-0.05 ㎜. 0.02 - In case of 2-needle machine, make adjustment basing on 0.05 ㎜ the left needle in the same way as single needle machine. ⑥ Fig. 6-23 CZ8000... -
Page 37: Position Of Presser Foot
To set back and forth position, adjust the clearance be- tween needle drop of the presser foot and that of the stitch plate to 0.2 - 0.3 mm as shown in Fig. 6-24. Loosen the screw ① to make adjustment. Fig. 6-24 CZ8000... -
Page 38: Specifications
Lower Knife : flat type, made of special steel Cutting Upper Knife : flat or angled type, made of super hard alloy Lubricating Oil YAMATO SF OIL No.28 or Mobil Velocite SM22 Capacity of Oil Reservoir 900 ml Lubrication Forcedly by trochoid shaped pump... - Page 40 YAMATO SEWING MACHINE (NINGBO) CO., LTD. No.641, WEST HENGSHAN ROAD, ECONOMIC & TECHNICAL DEVELOPMENT ZONE, BEILUN, NINGBO, P.R.CHINA, P.C. 315800 Tel. +86-574-8680-0888 Fax. +86-574-8680-0555 P/N 6820032 ( I ) No.1 Edited in 2012.9 Printed in China 2012.9 (CZ8000)
Need help?
Do you have a question about the CZ8000 and is the answer not in the manual?
Questions and answers