IPC CT40 Operator's Manual
Hide thumbs
Also See for CT40:
- Operator's manual (414 pages) ,
- Operator's manual (444 pages) ,
- Operator's manual (446 pages)

Related Manuals for IPC CT40


Summary of Contents for IPC CT40
- Page 1 OPERATOR MANUAL CT40 & CT90 Read this manual carefully before carrying out any work on the machine...
-
Page 2: Table Of Contents
CONTENTS CT40 Technical Specifications CT40 Machine Size CT90 Technical Specifications CT90 Machine Size Safety Signs Figures Instructions Page 2... -
Page 3: Ct40 Technical Specifications
CT40 TECHNICAL SPECIFICATIONS CT40 BT50 Cleaned track width Squeegee width Hourly performance m2/h 2250 Number of brushes n° Brush diameter Max brush pressare gr/cm² 11.54 Brush rotation speed g/1¹ Brush motor power Drive control Electronic Drive motor rated power Maximum speed... -
Page 4: Ct40 Machine Size
CT40 MACHINE SIZE CT40 Data X-Y-Z: See table “TECHNICAL SPECIFICATIONS” Page 4... -
Page 5: Ct90 Technical Specifications
CT90 TECHNICAL SPECIFICATIONS CT90 BT70 Cleaned track width Squeegee width Hourly performance m2/h 2848 Number of brushes n° Brush diameter Max brush pressare gr/cm² 23.58 Brush rotation speed g/1¹ Brush motor power Drive control Electronic Drive motor rated power Maximum speed Km/h Suction motor power Solution tank... -
Page 6: Ct90 Machine Size
CT90 MACHINE SIZE CT90 Data X-Y-Z: See table “TECHNICAL SPECIFICATIONS” Page 6... -
Page 7: Safety Signs
SAFETY SIGNS IMPORTANT, CUTTING HAZARD IMPORTANT, CRUSHING HAZARD IMPORTANT, ABRASION HAZARD DISPOSAL SYMBOL, CAREFULLY READ THE SECTION SHOWING THIS SYMBOL MAXIMUM SLOPE READ THE OPERATOR’S MANUAL OPERATOR’S MANUAL, OPERATING INSTRUCTIONS INSULATION CLASS, THIS CLASSIFICATION ONLY APPLIES TO MACHINES POWERED BY BATTERIES DIRECT CURRENT SYMBOL Page 7... -
Page 8: Figures
FIGURES Model : Ser.N : Vac : Date : IP : Kg : Hz : Fig. 1 Fig. 2 Page 8... - Page 9 Fig. 4 Fig. 5 Page 9...
- Page 10 13 17 2 15 2 15 18 11 Fig. 6 Page 10...
- Page 11 Fig. 7 Page 11...
- Page 12 Fig. 8 Fig. 9 Page 12...
- Page 13 Fig. 10 Fig. 11 Page 13...
- Page 14 Fig. 12 Fig. 13 Fig. 14 Fig. 15 Page 14...
- Page 15 Fig. 16 Fig. 17 Page 15...
-
Page 16: Instructions
INSTRUCTIONS Page 16... - Page 17 INDEX INDEX ......................17 GENERAL INFORMATION ................19 2.1..................19 COPE OF THE MANUAL 2.2................20 DENTIFYING THE MACHINE 2.3..........20 OCUMENTATION PROVIDED WITH THE MACHINE TECHNICAL INFORMATION ............... 21 3.1..................21 ENERAL DESCRIPTION 3.2......................21 EGEND 3.3.
- Page 18 PERIODS OF INACTIVITY ................38 BATTERY MAINTENANCE AND CHARGING ..........39 8.1................39 ECHARGING PROCEDURE MAINTENANCE INSTRUCTIONS ..............40 9.1............... 40 AINTENANCE ENERAL RULES 9.2.................. 40 RDINARY MAINTENANCE 9.2.1 Suction motor air filter and float switch: cleaning ....... 40 9.2.2 Basket filter: cleaning .................
- Page 19 GENERAL INFORMATION Read this manual carefully before carrying out any work on the machine 2.1. Scope of the manual This manual has been written by the Manufacturer and is an integral part of the machine. It defines the purpose for which the machine has been designed and constructed and contains all the information required by operators In addition to this manual containing all user information, other publications are available providing specific information for maintenance personnel3.
- Page 20 In line with the company's policy of constant product development and updating, the Manufacturer reserves the right to make modifications without warning. Although your machine may differ appreciably from the illustrations in this document, safety and the information contained in this manual are guaranteed. Identifying 2.2.
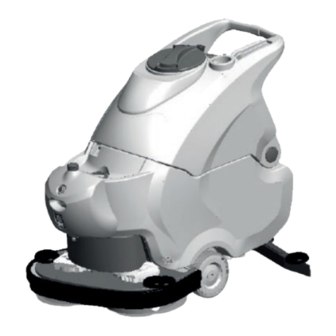
- Page 21 TECHNICAL INFORMATION General 3.1. description This machine is a scrubber drier for sweeping, washing and drying flat, horizontal, smooth or moderately rough, even and obstacle free floors in civil and industrial premises. It is available in both battery and cable versions to meet all running time and weight requirements.
- Page 22 SAFETY INFORMATION 4.1. Safety regulations Read the "User Manual" carefully before start-up and use or before performing maintenance, routine servicing or any other work on the machine. IMPORTANT Rigorously respect all instructions in the Manual (in particular those relating to danger and important information) and on the safety plates fitted to the machine.
- Page 23 The machine must never be left unattended with the motor or engine on. Before leaving it, turn the motor or engine off, make sure it cannot move accidentally and disconnect from the power supply. Always pay attention to other people, children in particular, present in the place where you are working.
- Page 24 The fluids collected during operation contain detergent, disinfectant, water and organic and inorganic material. They must be disposed off in accordance with current legislation. In the case of malfunction and/or faulty operation, turn the machine off immediately (disconnecting it from the mains power supply or batteries) and do not tamper. Contact a service centre authorised by the Manufacturer.
- Page 25 HANDLING AND INSTALLATION 5.1. Lifting and transporting the packaged machine IMPORTANT During all lifting operations, make sure the packaged machine is firmly anchored to avoid it tipping up or being accidentally dropped. Always load/unload lorries in adequately lit areas. The machine, packaged on a wooden pallet by the Manufacturer, must be loaded using suitable equipment onto the transporting vehicle.
- Page 26 The packaging may be kept as it can be reused to protect the machine if it is moved to another site or to a repair workshop. Otherwise it must be disposed off in compliance with current legislation. IMPORTANT Make sure the mains circuit is suitably earthed and that the sockets (and any adaptors used) ensure the continuity of the earth conductors.
- Page 27 5.4.1. Batteries: preparation ! DANGER While installing or performing maintenance on the batteries, the operator must be provided with the necessary personal protection devices (gloves, goggles, overalls, etc) to limit the risk of accident. Keep away from naked flames, avoid short circuiting the battery poles, avoid sparks and do not smoke.
- Page 28 5) Referring to the wiring layout shown in the above diagram, connect the battery cable and bridge terminals to the battery poles. Arrange the cables as shown in the diagram, tighten the terminals on the poles and cover with Vaseline. 6) Lower the dirty water drum into its work position and fasten it to the detergent tank;...
- Page 29 5.5. Battery charger (battery models) IMPORTANT Never allow the batteries to become excessively flat as this could damage them irreparably. 5.5.1. Choosing the battery charger Make sure the battery charger is compatible with the batteries to be charged: − tubular lead batteries: a 24V - 20 A automatic charger is recommended. Consult the battery charger manufacturer and manual to confirm the choice.
- Page 30 CT40: as well as enabling brush operation, pressing this button automatically attaches the brushes. o CT40 BT50 model, holding this button down for at least 5 seconds also selects the type of machine operation, "MICROFIBRE" with microfibre disk or "BRUSH- PAD"...
- Page 31 • Pressure control light (fig. 6, ref. 17 - CT40 BT50 model): consists of 3 green LEDs and 1 red LED indicating the pressure of the brush/microfibre on the work surface. There may be: 1 green LED on: minimum pressure;...
- Page 32 6.2. Mounting and adjusting the squeegee The squeegee (fig. 2, ref. 6) is responsible for the first phase of drying. To mount the squeegee on the machine, proceed as follows: 1) check that the squeegee mount (fig. 7, ref. 2) is raised, otherwise lift it by means of the squeegee lever (fig.
- Page 33 6.4. Mounting and changing the brush/drive disks IMPORTANT Never work without the brushes, rollers and drive disks perfectly installed. Fitting the brush (one-brush models): Rest the brush on the floor in front of the machine and centre it with the guard. Lower the head and repeatedly action the brush/drive control lever (fig.
- Page 34 • check that the tap lever (fig. 6, ref. 6) is in the "CLOSED" position; • via the opening at the front, fill the detergent tank (fig. 2, ref. 7) with a suitable concentration of clean water and low-foam detergent. Leave at least 5 cm between the surface of the liquid and the opening of the tank;...
- Page 35 PRESSURE OF THE BRUSH/MICROFIBRE ON THE SURFACE TO BE CLEANED: • during work make sure the pressure of the microfibre/brush on the work surface is within the permitted operating range - 1 green LED on, minimum pressure; 2 green LEDs on, medium pressure;...
- Page 36 The flow of water must be adjusted in proportion to the desired advance speed. The slower the machine moves forwards, the less water is needed. Persist when washing particularly dirty points to give the detergent time to perform its mechanical action detaching and suspending the dirt and the brushes time to exert an effective mechanical action.
- Page 37 Use suitable personal protection devices. Drain the water with the machine disconnected from the power supply. To empty the tank: • move the machine near a drain; • remove the cap (fig. 9, ref. 1); • when the detergent tank is completely empty, replace the cap (fig. 9, ref. 1). i INFORMATION The water and detergent solution can also be used to wash the dirty water drum.
- Page 38 PERIODS OF INACTIVITY If the machine is not used for some time, remove the squeegee and brushes (or drive disks), wash them and put them away in a dry place (preferably in a bag or wrapped in plastic film) away from dust. Park the machine with the head lowered. Make sure the tanks are completely empty and perfectly clean.
- Page 39 BATTERY MAINTENANCE AND CHARGING ! DANGER Do not check the battery by sparking. The batteries give off flammable fumes. Put out all fires and hot embers before checking or topping up the batteries. Perform the operations described above in a ventilated room. To avoid permanent damage to the batteries, do not run them down completely.
- Page 40 MAINTENANCE INSTRUCTIONS ! DANGER Never perform any maintenance operations without first disconnecting the batteries. Maintenance on the electrical circuit and all other operations not explicitly described in this manual must be performed by specialised personnel only, in compliance with current safety legislation and as described in the maintenance manual. 9.1.
- Page 41 9.2.3 Detergent filter: cleaning • Unscrew the screw located below the bottom tank (fig. 11, ref. 1); • unscrew the detergent filter (fig. 11, ref. 2); • clean the filter with running water or the detergent solution used on the machine; •...
- Page 42 IMPORTANT Never use a fuse with a higher amperage than specified. If a fuse continues to blow, the fault in the wiring, boards (if present) or motors must be identified and repaired. Have the machine checked by qualified personnel. 9.3.
- Page 43 10. TROUBLESHOOTING Possible problems affecting the whole machine: PROBLEM CAUSE REMEDY The brushes you have not used the brush switch press the brush switch do not turn the power supply or motor thermal cutout reconnect the power supply or motor connectors are disconnected thermal cutout connectors the brush motor fuse has blown...
- Page 44 the edge of the rubber blades in contact replace the rubber blade squeegee with the floor is worn does not the squeegee or hose is blocked or unblock and repair the damage clean or damaged suction is ineffective the float switch has tripped (dirty water empty the dirty water drum or reset the drum), is clogged by dirt or broken float switch...
- Page 45 the battery poles and charging clean and grease the poles and The batteries do not provide the terminals are dirty and oxidised terminals, recharge the batteries normal work the electrolyte level is low top up all the elements with distilled time (battery water as described in the instructions models only)
- Page 46 the battery has not been connect the battery charger to the At the end of charging with the electronic connected to the battery charger battery connector (for example, because the low battery charger, the voltage connector of the battery battery does not charger has been erroneously provide the correct connected to the machine...
- Page 47 11. ALARMS ON THE DISPLAY Acc / Man : Accelerator / Man The traction lever has been pushed during machine turning ON by the key. Traction can be engaged only by release and pull again the handle lever. POT : POTentiometer The traction potentiometer is broken or badly connected.
- Page 48 bLt : traction blocked The battery voltage is too low: the traction and all other functions are blocked. Charge the batteries. AcS : Brush command problem The brush remote control switch is not engaged properly: Push the brush switch and if the error is still on the display, check the remote control connections.
- Page 49 12. Board Alarms Board alarms CLEANTIME 90 If drive is interrupted, the error code should be identified by means of the status LED (fig. 6. ref. 16). In the absence of malfunctions, the status LED is steadily on while the machine is in operation.
- Page 50 Eastern Creek NSW 2766 T: 1800 226 843 (FREE CALL) T: +61 2 9839 9700 E: contactanz@ipcworldwide.com W: www.ipcworldwide.com IPC New Zealand Unit 5, 103 Cryers Road East Tamaki, Auckland 2013 T: +64 9 253 9013 F: +64 9 253 9015 PLDC02007_9 Rev.
Need help?
Do you have a question about the CT40 and is the answer not in the manual?
Questions and answers