Table of Contents
Advertisement
Quick Links
Advertisement
Table of Contents

Subscribe to Our Youtube Channel
Related Manuals for BMW Motorrad S 1000R


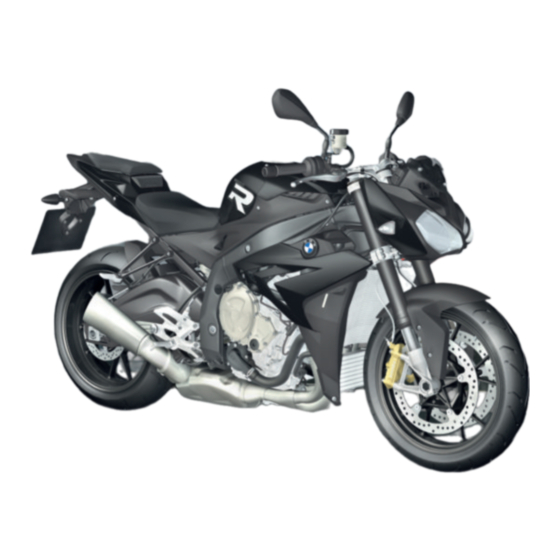
Summary of Contents for BMW Motorrad S 1000R
- Page 1 BMW Motorrad The Ultimate Riding Machine Rider's Manual (US Model) S 1000 R...
- Page 2 Motorcycle/Retailer Data Motorcycle Data Retailer Data Model Contact in Service Ms./Mr. Vehicle identification number Phone number Color number Initial registration Retailer's address/phone number (com- License plate pany stamp)
- Page 3 Suggestions and complaints If you have any questions con- Congratulations on choosing a cerning your motorcycle, your au- motorcycle from BMW Motorrad thorized BMW Motorrad retailer and welcome to the community is always happy to provide advice of BMW motorcycle owners and and assistance.
-
Page 4: Table Of Contents
Table of Contents BMW Motorrad ASC ..52 3 Displays ....21 Warning and indicator Dynamic Traction Control. - Page 5 Fuses ..... 154 Wheels and tires ..173 BMW Motorrad ASC ..112 Jump-starting ... . . 155 Electrical system .
- Page 6 Reporting safety defects ....180 BMW Motorrad Service . . . 181 BMW Motorrad Mobility Services ....181 Maintenance proce- dures .
-
Page 7: General Instructions
General instructions Overview ......6 Abbreviations and symbols ..6 Equipment . -
Page 8: Overview
Overview WARNING Hazard with Result of an activity. moderate risk. Failure to Chapter 2 of this Rider's Man- Reference to a page with avoid this hazard can result in ual will provide you with an ini- more detailed informa- death or serious injury. tial overview of your motorcy- tion. -
Page 9: Equipment
Rider's Manual. In addition, If your motorcycle comes with motorcycle production. BMW Motorrad cannot guarantee equipment not described here, the total absence of errors. We you can find the descriptions in a Optional accessory. hope you will appreciate that no separate manual. -
Page 11: Overviews
Overviews General view, left side ....11 General view of left side with DDC ....... . 13 General view, right side . -
Page 13: General View, Left Side
General view, left side Adjusting front compres- sion damping (red scale value display) ( Adjuster for spring preload, rear ( Seat lock ( Tire inflation pressure table Payload table Chain adjustment values Engine oil level indicator 125) OA plug for navigation... -
Page 15: Ddc
General view of left side with DDC with Dynamic Damping Control (DDC) Adjusting spring preload on front wheel ( Seat lock ( Tire inflation pressure table Payload table Chain adjustment values Adjuster for spring preload, rear ( Engine oil level indicator 125) OA plug for navigation... -
Page 17: General View, Right Side
General view, right side Brake-fluid reservoir, rear 130) Vehicle identification num- ber (VIN) and type plate (on steering-head bearing) Brake-fluid reservoir, front 129) Adjustment of front rebound-stage damping (yellow scale value display) Steering damper Coolant level indicator 131) OA plug Oil fill location ( 126) Adjustment of rear... -
Page 18: Underneath Seat
Underneath seat Battery ( 156) Helmet holder ( Luggage loops ( Onboard tool kit ( 122) with anti-theft alarm sys- tem (DWA) Anti-theft alarm system Fuse box ( 154) Rider's Manual (US Model) with Pro riding modes -Coding plug (... -
Page 19: Multifunction Switch, Left
Multifunction switch, left High-beam headlight and headlight flasher ( Lap timer ( with cruise control Cruise control ( Hazard warning flashers BMW Motorrad Race ABS ASC ( with Dynamic Traction Control (DTC) DTC ( with Dynamic Damping Control (DDC) DDC (... -
Page 20: Right
Multifunction switch, right with heated handlebar grips Heated handlebar grips Riding mode ( Emergency on/off switch (kill switch) ( Starting the engine... -
Page 21: Instrument Cluster
Instrument cluster Indicator and warning lamps ( Tachometer Shiftpoint lamp ( Ambient light sensor (for brightness adjustment of instrument lighting) with anti-theft alarm sys- tem (DWA) DWA indicator lamp Multifunction display... -
Page 23: Displays
Displays Warning and indicator lights..22 Multifunction display ....24 Warning lights ..... . 25 Fuel down to reserve . -
Page 24: Warning And Indicator Lights
Warning and indicator lights ASC indicator and warning light ( with Dynamic Traction Control (DTC) DTC warning light ( ABS indicator and warning light ( Turn indicator, left Universal warning lamp (appears together with warnings in display panel) Turn indicator, right Fuel reserve ( Idle High-beam headlight... - Page 25 11 Light for fastest lap...
-
Page 26: Multifunction Display
Multifunction display Speedometer Gear indicator, shows "N" in neutral (idling) with heated handlebar grips Operating heated grips Coolant temperature General information Clock ( Fuel level Riding mode ( NOTICE Refer to Chapter 5 for informa- tion regarding the display modes available for track use. -
Page 27: Warning Lights
Warning lights If several warnings are active, all corresponding warning lamps and Display warning symbol are displayed; Warnings are displayed with the warnings appear alternately. corresponding warning lamps. The possible warnings are listed on the following pages. Warnings for which no individual warning lamp is present are sig- naled by the universal warning lamp 1 which lights up in combi-... - Page 28 Overview of warning indicators Warning and indicator Warning symbols in the Meaning lamps display panel EWS! lights up yellow is indicated EWS active ( flashes red Coolant tempera- Coolant temperature too high ( ture display flashes lights up Engine in emergency-operation mode LAMPR! lights up yellow is indi-...
- Page 29 Warning and indicator Warning symbols in the Meaning lamps display panel VDS! is indicated Fall sensor defective ( flashes ABS self-diagnosis not completed lights up ABS switched off ( lights up ABS error ( flashes rapidly ASC intervention ( flashes slowly ASC self-diagnosis not completed lights up ASC switched off (...
- Page 30 Warning and indicator Warning symbols in the Meaning lamps display panel flashes rapidly DTC intervention ( flashes slowly DTC self-diagnosis not completed lights up DTC switched off ( lights up DTC error ( DDC! lights up yellow is indicated DDC error ( DWALO! is indi- DWA battery charge level low (...
- Page 31 Warning and indicator Warning symbols in the Meaning lamps display panel NO CODING lights up yellow Encoding missing ( indicated...
- Page 32 Have the defective key re- Avoid rapid acceleration and Check the coolant level. placed, preferably by an autho- passing maneuvers. rized BMW Motorrad retailer. Should the coolant temperature Possible cause: frequently be too high, have Coolant temperature too The engine control unit has di-...
- Page 33 General warning lamp as soon as possible at an au- fails. lights up yellow (only if both thorized workshop, preferably lamps for the parking lights fail). an authorized BMW Motorrad WARNING LAMPF! is indicated. retailer. Overlooking the motorcy- WARNING...
- Page 34 Safety risk facility, preferably an authorized message will appear in the Replace defective bulbs as BMW Motorrad retailer. display. This warning message soon as possible; it is best is suppressed by activating the always to carry a complete...
- Page 35 Have the malfunction corrected ABS switched off as soon as possible at an au- ABS indicator light lights thorized workshop, preferably an authorized BMW Motorrad retailer. Possible cause: The ABS system has been deac- ASC intervention tivated by the rider.
- Page 36 DTC self-diagnosis not as soon as possible at an au- diagnosis has been completed. completed thorized workshop, preferably an authorized BMW Motorrad with Dynamic Traction Control ASC switched off retailer. (DTC) ASC indicator and warning light lights up.
- Page 37 Possible cause: Possible cause: an authorized BMW Motorrad retailer. The DTC system has been deac- DTC self-diagnosis not tivated by the rider. completed DDC error Switching the DTC function on General warning lamp 53). The DTC function is not shows yellow.
- Page 38 This fault message is only shown facility, preferably an authorized lowing the Pre-Ride-Check. for a short time immediately fol- BMW Motorrad retailer. Possible cause: lowing the Pre-Ride-Check. Encoding missing The DWA battery no longer has...
-
Page 39: Fuel Down To Reserve
NOTICE The determined range is WARNING an approximate reading. BMW Motorrad therefore Rough engine running or recommends that you do not switching off of the engine due to a fuel shortage. try to use the full range before refueling. - Page 40 Consult a certified workshop, display means "October, 2013." lights up yellow and preferably an authorized SERVICE! is continually BMW Motorrad retailer, for displayed. setting of the date. When a service date elapses without service, the general warning lamp lights up in yellow,...
-
Page 41: Operation
BMW Motorrad Race ABS ..50 BMW Motorrad ASC ....52 Dynamic Traction Control. DTC ..53... -
Page 42: Steering And Ignition Lock
Ignition Steering and ignition lock Switch on ignition Keys You are provided with 2 ignition keys. Should you lose your keys, re- fer to the information regarding the electronic immobilizer (EWS) 41). Turn key to position 1 while moving handlebars slightly. Single-key locking Ignition, lights and all electrical Insert key into the steering and... -
Page 43: Ews Electronic Immobilizer
If you lose a vehicle key, you can (DTC) have it disabled by your autho- immobilizer DTC self-diagnosis is per- rized BMW Motorrad retailer. The motorcycle's electronic formed ( When having a key disabled you circuitry monitors the data stored... -
Page 44: Multifunction Display
Multifunction display RACE INFO: The stored in- LAPTI- formation from the Select display mode can be displayed here. This display mode can only be activated with the motorcycle stopped. SETUP MENU: The behav- ior of the instrument cluster can be adjusted to the driver's preferences here. - Page 45 Overview of display modes — Solid line: briefly press button. ‑ ‑ Dotted line: press and hold button. Onboard computer dis- plays ( Start time recording Start RACE INFO ( Start SETUP menu...
- Page 46 Selecting displays in Reset average data ROAD mode Switch on ignition. Switch on ignition. Press button 2 repeatedly until SETUP MENU ENTER displayed. Press and hold button 2. Repeatedly press button 1 Press button 2 repeatedly until briefly until average value to Press button 1 repeatedly until SETUP EQUIPMENT EN- be reset appears in display.
- Page 47 Press button 2 to decrease minutes. If minutes were displayed as desired, press and hold but- ton 2 until hours 3 flash. Press button 1 to increase hours. Press button 2 to decrease hours. When hours have been set as desired, press button 2 until hours no longer flash.
-
Page 48: Alarm System (Dwa)
Emergency on/off switch (kill turn indicators flash. The alarm switch) in normal operating po- Alarm tone type can be adjusted by sition. an authorized BMW Motorrad The alarm can be set off by: Switch on ignition. retailer. Turn indicators light up once. - Page 49 Confirmation tone sounds once (if programmed). DWA is now switched off. DWA Adjusting Switch on ignition ( 40). Repeatedly press but- Press button 1 briefly to ton 1 briefly, until 2 respectively select the SETUP EQUIPMENT EN- SETUP EQIP DWA menu is shown in display line.
-
Page 50: Headlight
Adjusting headlight for adjustment checked by a spe- High-beam headlight and cialized workshop, preferably by RHD/LHD traffic headlight flasher an authorized BMW Motorrad This motorcycle's headlight fea- retailer. Start engine. tures a symmetrical low beam. No special adjustments or proce-... -
Page 51: Turn Indicators
The defined rid- Switch on hazard warning ing time and distance can be set flashers by an authorized BMW Motorrad Switch on ignition. retailer. Immediately after switching off the ignition push button 1 to... -
Page 52: Emergency On/Off Switch
(kill switch) Engine switched off button 1 again to switch off Operating position hazard warning flashers. WARNING BMW Motorrad Race Operation of the emergency ON/OFF switch when riding. Switching the ABS Danger of falling due to blocking function off of rear wheel. - Page 53 Switching the ABS NOTICE function on The ABS function can also be deactivated while driving. Press and hold the 1 button until first the DTC warning light 2 and then the ABS indi- Press and hold the 1 button cator light 3 changes its display until the ABS -indicator and behavior.
-
Page 54: Bmw Motorrad Asc
3 mph (min 5 km/h) ASC indicator and warning warning light 2 changes its light starts to light up. display behavior. BMW Motorrad ASC Release button 1 within two ASC indicator and warning seconds. Switching the ASC light goes out, and starts... -
Page 55: Dynamic Traction Control. Dtc
The ASC function is switched The DTC function is switched NOTICE off. If the coding plug is not in- The DTC function can also be Switching the DTC stalled, the ignition can also be deactivated while driving. function on switched off and then on again as an alternative. -
Page 56: Riding Mode
"Technology in Detail". Switch on ignition ( 40). min 3 mph (min 5 km/h) Riding mode Use of the riding modes BMW Motorrad has developed 4 riding scenarios for your motor- cycle from which you can select the one matching your situation:... - Page 57 DYNAMIC PRO : For sporty riding (with coding plug in- stalled only). When the vehicle is stationary, the selected riding mode is ac- tivated after approx. 2 seconds. The new riding mode is acti- vated during operation under the following conditions: The throttle grip is in the neu- The selection menu 1 with four Press button 1 repeatedly un-...
-
Page 58: Cruise Control
Switching on cruise control To do so, press in locking de- ATTENTION vice 1 and pull off cap. Insert the coding plug. Penetration of dirt and mois- Push switch 1 to right. Switch on ignition. ture in the open connector. Button 2 is unlocked. - Page 59 Decreasing speed Adjustment range for Increase speed cruise control 19...112 mph (30...180 km/h) Speed is increased each time button is pressed. Indicator lamp for cruise- control system lights up. 1 mph (1 km/h) Press button 1 forward and The motorcycle maintains your hold.
-
Page 60: Brakes
Deactivate cruise control Switching off cruise NOTICE control Actuate brakes or clutch or throttle grip (take back throttle Opening the throttle does not beyond back position) to deac- deactivate the cruise-control sys- tivate cruise-control system. tem. If you release the throttle Cruise control indicator lamp grip, the motorcycle will decel- goes out. -
Page 61: Tires
the clutch lever forward at the WARNING WARNING same time. Adjusting the brake lever Valve inserts open of their Adjustment options: while driving. own accord at high speeds. Position 1: largest distance Accident hazard between handlebar grip and Sudden loss of tire inflation pres- sure. -
Page 62: Heated Handlebar Grips
Once they are warm you should If tire pressure is too low: switch back to the first stage. Correct tire pressure. Second step: 100 % heat- Heated handlebar grips ing capacity with heated handlebar grips First step: 50 % heating capacity Operating heated grips Start engine. -
Page 63: Rider And Passenger Seats
Rider and passenger Install the passenger seat Lock seat lock with ignition key. seats Removing rider`s seat Removing passenger seat Make sure ground is level and firm and park motorcycle. Mount passenger seat in mounts 1 on left and right. Press cover of driver's seat above screws 1 forward some- what and hold in place. -
Page 64: Helmet Holder
Installing driver`s seat Press cover of driver's seat ATTENTION over screw sockets toward Mount driver`s seat in front somewhat and hold in mount 1, then position over Incorrect positioning of the place. screw sockets 2. When doing helmet lock. Install screws 1. so, make sure that the paneling Fairing scratched. -
Page 65: Luggage Straps
Luggage straps Securing luggage on motorcycle Removing passenger seat 61). Turn over passenger seat. Use loops 1 e.g. in conjunction with passenger footrests, to lash luggage onto passenger seat. When doing so, make sure that the rear trim is not damaged. -
Page 67: On The Racetrack
On the racetrack LAPTIMER ......66 RACE INFO ......70 SETUP MENU . -
Page 68: Laptimer
LAPTIMER Marking displayed value LAST BEST: Required time of the previous lap is shown The following times can be Display in the third line and the best shown in the third line: lap time of the stored values is LASTLAP: Time of the previ- shown in the fourth line. - Page 69 Display overview — Solid line: briefly press button. ‑ ‑ Dotted line: press and hold button. Interrupt time entry 69). Start time recording 68). Display times ( 68).
- Page 70 Displaying times Start time recording recording continues to run. However, in the other display modes the recording of a new lap can only be started via an external signal. Infrared receiver with infrared receiver The lap timer can be conve- niently operated with an infrared To display desired time, press Operate switch 1 to start...
- Page 71 mode does counting begin at lap time can be specified. Signals Mileage for the interme- received before this time expires 1 again. diate elapsed time are then ignored. Fastest lap expected 328.1 ft (100 m) Interrupting time entry This function must be activated SETUP RACETRACK in the If the current intermediate...
-
Page 72: Race Info
RACE INFO All other stored laps The total sum of all stored lap Select stored lap TOTAL times Delete the stored data DELETE LAPS Delete the stored best lap time BEST-EVER DELETE RACE INFO EXIT display mode. Press button 1 or button 2 to display stored laps consecu- tively. - Page 73 Display overview — Solid line: briefly press button. ‑ ‑ Dotted line: press and hold button. Select stored lap ( 70). Delete lap times ( 73). Exit INFO MENU ( 72). Delete recordings ( 73).
- Page 74 Information on race lap Driving mode used most for driving; is continually displayed. Exiting INFO MENU Press and hold button 2 to exit RACE INFO display mode. Alternately: Top speed The recorded values are (max), Average speed (Ø) stored. and lowest speed (min) of As an alternative: press and displayed race lap.
- Page 75 Deleting recordings are deleted. As a result, a new Delete lap times race can be recorded at other times and compared with the best lap from previous races. The all-time best lap can also be deleted. If the all-time best lap is from a stored recording, the correspond- ing lap number is also displayed.
- Page 76 been the second to last lap is taken over as the new last lap. a random stored lap, it is deleted. The numbering of the remaining laps is maintained. The deleted lap time is sub- tracted from the overall time. To delete all-time best lap BEST-EVER BEST-...
-
Page 77: Setup Menu
LAST BEST SETUP MENU , best lap time SETUP EQUIPMENT the total of all stored lap times Adjusting DWA alarm Select parameter TOTAL DWA AUTO ON/OFF and the all-time best BEStEV lap time Setting the time display CLOCK TIME Display duration for last HOLD stopped time Set brightness... - Page 78 Overview SETUP MENU — Solid line: briefly press button. ‑ ‑ Dotted line: press and hold button. Display settings Racetrack settings...
- Page 79 Set parameter Exit settings SETUP MENU Press and hold button 2 until To exit , press and hold button 1. displayed parameter begins to flash. A value which is still flashing Press button 1 or button 2 re- will not be saved. peatedly until desired value is As an alternative, press but- displayed.
-
Page 80: Spring Preload
Spring preload Make sure there is no load on the motorcycle, removing any Adjustment on front wheel cargo or luggage. with Dynamic Damping Control (DDC) The spring preload on the front wheel must be adapted to the weight of the rider. Higher weight requires a higher spring preload, lower weight requires a Hold motorcycle in vertical po-... - Page 81 To increase the spring deflec- Make sure ground is level and Adjustment of spring tion (reduce spring preload), firm and park motorcycle. preload dependent on use the tool from the onboard Start engine. loading tool kit to turn the adjustment NOTICE ring 2 in direction B.
- Page 82 Measure distance D between Make sure ground is level and lower edge 1 of license-plate firm and park motorcycle. carrier and screw 2 of chain Start engine. guard. NOTICE Load motorcycle with driver. With the assistance of a helper, Before setting the spring preload, measure distance D between completely unload the motorcy- points 1 and 2 again and cal-...
-
Page 83: Damping
Damping Measure distance D between lower edge 1 of immersion Correct damping setting tube and front axle 2. The damping must be adjusted Load motorcycle with driver. to the road conditions and the With the assistance of a spring preload. second person, measure A rough road surface requires distance D between points 1... - Page 84 Adjusting compression Compression stage, ba- damping on front wheel sic setting, front Position 3 (standard setting with rider 187 lbs (85 kg)) Position 7 (sport-oriented set- ting with rider 187 lbs (85 kg)) Rebound-stage damping To increase damping: turn ad- on front wheel justing screw with tool from onboard tool kit so that mark-...
- Page 85 Rebound stage, basic setting, front Position 3 (standard setting with rider 187 lbs (85 kg)) Position 7 (sport-oriented set- ting with rider 187 lbs (85 kg)) Adjusting rebound-stage To increase damping: turn ad- To increase damping: turn ad- damping at rear wheel justing screw with tool from justing screw with tool from Make sure ground is level and...
- Page 86 Rebound stage, basic Factory settings for re- setting, rear bound at rear Position 4 (standard setting Position 4 with rider 187 lbs (85 kg)) Displaying damping with Position 7 (sport-oriented set- ting with rider 187 lbs (85 kg)) with Dynamic Damping Control Factory settings at front (DDC) Damping is displayed in the mul-...
-
Page 87: Mirror Removal And Installation
HARD Mirror removal and : Sporty, performance- oriented damping installation To set motorcycle load: Removing mirror Press and hold button 1 re- peatedly until desired setting is displayed. NOTICE The load setting cannot be ad- Press button 1 briefly to justed while the motorcycle is display current adjustment. -
Page 88: Tion 2
Removing and installing Install mirrors NOTICE license-plate carrier If the license plate carrier is Removing license-plate removed for racetrack use, the carrier vehicle's electronic monitoring Make sure ground is level and system will interpret this as firm and park motorcycle. a defective lamp or bulb and Removing passenger seat the corresponding warning... - Page 89 with anti-theft alarm system Take off license-plate car- (DWA) rier 2 and thread out wiring harness 1. Install the passenger seat 61). Installing license-plate carrier Make sure ground is level and firm and park motorcycle. Disconnect connector 1 for Removing passenger seat license-plate carrier.
-
Page 90: Removing And Installing Front Turn
Install screws 4 with wash- Connect connector 1, position ers 3. and fasten cable tie arrow. Number-plate carrier to NOTICE rear frame If the lamp defect warning 4 lb/ft (5 Nm) message for racetrack use is suppressed in the display, with anti-theft alarm system this must be activated in the SETUP MENU... - Page 91 panel also apply logically for the left side. Remove right cover ( 134). Position turn indicator and in- stall screw 1. Install right cover ( 135). Remove screw 1 and take off turn indicator. Guide cable through fairing side panel. Protect connector on motorcy- cle against contamination.
-
Page 93: Riding
Riding Safety instructions ....92 Observe checklist ....94 Starting . -
Page 94: Safety Instructions
Speed of the year. Your authorized If you ride at high speed, always Payload of tank rucksack BMW Motorrad retailer will be bear in mind that various bound- happy to advise you and has ary conditions can adversely af- the correct clothing for every ≤11 lbs (≤5 kg) - Page 95 Risk of poisoning Catalytic converter Danger of overheating Exhaust fumes contain carbon If misfiring causes unburned fuel ATTENTION monoxide, which is colorless and to enter the catalytic converter, odorless but highly toxic. there is a danger of overheating Engine idling for a lengthy and damage.
-
Page 96: Observe Checklist
Observe checklist Starting Adjusting rebound-stage damping at rear wheel Use the following checklist to Starting the engine 83). check your motorcycle at regu- Switch on ignition. lar intervals. with Dynamic Damping Control Pre-Ride-Check is carried out. (DDC) Before every journey: Adjust spring preload at rear ABS self-diagnosis is Function of the brake system... - Page 97 Phase 1 In the case of cold start or un- Engine starts. der cold temperatures: Pull Consult the troubleshooting back clutch lever. chart if the engine refuses to start. ( 166) Pre-Ride-Check In the "Pre-Ride-Check", the instrument-cluster module exe- cutes a test routine to check the status of the warning lamps and the tachometer.
- Page 98 It must be noted as soon as possible at an au- that the availability of the ABS thorized workshop, preferably function is restricted or it is not an authorized BMW Motorrad ABS self-diagnosis available at all. retailer. completed...
- Page 99 The self-diagnosis routine with Dynamic Traction Control is determining whether (DTC) ASC self-diagnosis rou- BMW Motorrad ASC is ready for tine not completed The self-diagnosis routine operation. The self-diagnosis is determining whether routine runs automatically when...
-
Page 100: Breaking In
Have the malfunction corrected Engine run-in speed completed as soon as possible at an au- thorized workshop, preferably The DTC symbol is no longer an authorized BMW Motorrad displayed. <9000 min (Odometer retailer. reading 186...621 miles Watch all warning and indicator (300...1000 km)) -
Page 101: Shifting Gears
Tires Shifting gears Mileage until running-in New tires have a smooth sur- check Shiftpoint lamp face. This must be roughened by riding in a restrained manner at 311...746 miles various lean angles until the tires (500...1200 km) are run in. This running in proce- Speed monitoring dure is essential if the tires are to function until running-in... - Page 102 , indicates the speed at which the in virtually all load and engine BMW Motorrad recommends rider should shift into the next- speed ranges. During accelera- only upshifting with clutch highest gear.
-
Page 103: Brakes
Adjust gearshift lever Gearshift lever is adjusted To achieve the shortest possi- downward. ble braking distance, the front brake must be applied quickly Align shift lever 2 on selec- and with increasing force. This tor shaft 3 so that selector procedure provides ideal exploita- shaft 3 protrudes somewhat tion of the extra weight transfer... -
Page 104: Parking Your Motorcycle
Descending mountain When driving in the rain and ATTENTION through puddles. passes After washing the vehicle. Poor ground conditions in WARNING When driving on roads spread area of stand. with salt. Component damage caused by Braking only with the rear- After working on the brakes tipping over. -
Page 105: Refueling
On a grade, the motorcycle Do not refuel with E85, i.e. WARNING should always face uphill; se- fuel with an ethanol content lect 1st gear. of 85 %, or with Flex Fuel. Escaping of fuel due to ex- pansion under exposure to Fuels with a maximum ethanol Refueling heat with overfilled fuel tank. -
Page 106: Secure Motorcycle For Trans
Open protective cap. Fuel reserve NOTICE When refueling after running on Approx. 1.1 gal (Approx. 4 l) fuel reserve, the resulting total fuel quantity must be greater Press fuel tank cap down firmly than the fuel reserve, so that the to close. - Page 107 Fasten rear straps on both ATTENTION ATTENTION sides to the passenger foot- pegs and then tighten them. Motorcycle tips to the side Pinching of components. Tension all straps evenly; the when raising. Component damage motorcycle should be pulled Component damage cause by Do not pinch components, down against its springs with tipping over.
-
Page 109: Technology In De
Race ABS ......110 Engine management with BMW Motorrad ASC ....112 Engine Management with Dynamic Traction Control . -
Page 110: Riding Mode
Riding mode selection tion on public roads. by BMW Motorrad. Different riding modes can be se- NAMIC PRO driving mode lected in order to adapt the mo- No mode-selection options are... -
Page 111: Switchover
the rear wheel from spinning if with Dynamic Traction Control up. The lift-off detection for the possible. (DTC) rear wheel is also deactivated. The DTC system intervenes with Dynamic Traction Control ROAD even later so that dynamic ac- (DTC) In the ROAD mode the full en- celeration is also possible. -
Page 112: Brake System With Bmw Motorrad
Brake system with How does the ABS work? Motorcycle must be stopped with the ignition switched on BMW Motorrad Race The maximum braking force that can be transferred to the road surface is partially dependent on Throttle grip must be turned... - Page 113 At this point in not always be relied on to pre- first actuated after this, the brake time, the BMW Motorrad Integral vent the rear wheel from lifting pressure already built up can be ABS must assume extremely low off the ground.
-
Page 114: Engine Management With Bmw Motorrad Asc
Apart from problems on the momentum take over and even BMW Motorrad Race ABS, WARNING BMW Motorrad Race ABS is un- unusual riding conditions can Failure to have maintenance able to counteract their effects. also cause a fault message to be performed on the brake sys- generated. - Page 115 ASC reduces for the rear wheel to spin or lose BMW Motorrad ASC can be de- traction. If the system registers the engine torque until the front activated for these cases.
-
Page 116: Engine Management With Dynamic Traction Con
DTC error is displayed. A style. This case cannot be controlled self-diagnosis routine must be Do not reduce the system's ex- by BMW Motorrad ASC. completed before the error will tra safety margin with careless be displayed. riding or unnecessary risks. -
Page 117: Dynamic Damping Adjustment
BMW Motorrad well, however the spring travel is Heating up on an auxiliary stand at idle speed or with gear DTC. not measured. engaged. Dynamic Damping If the front wheel loses contact Adjustment with the ground under extreme... -
Page 119: Accessories
Accessories General instructions ....118 Luggage ......118... -
Page 120: General Instructions
Observe maximum payload of ditions experienced by BMW accessories and other products. tank rucksack. motorcycles and, consequently, You will find all BMW Motorrad they are not sufficient in some optional accessories on Payload of tank rucksack circumstances. our website: "www.bmw- Use only parts and accessories motorrad.com". - Page 121 with rear bag Observe the maximum load capacity of the rear bag and the maximum speed at which the motorcycle may travel with a rear bag fitted. Payload of rear bag max 11 lbs (max 5 kg) Speed limit for driving with rear bag max 137 mph (max 220 km/h)
-
Page 123: Maintenance
Maintenance General instructions ....122 Onboard tool kit ....122 Rear-wheel stand . -
Page 124: General Instructions
If you are in Miniature fuses, 4 A, 7.5 A 152). doubt, consult an authorized and 10 A Open-ended wrench workshop, preferably your au- Puller for removing fuses Wrench size: 17 mm thorized BMW Motorrad retailer. -
Page 125: Rear-Wheel Stand
The basic stand stands and its accessories are avail- 15 lb/ft (20 Nm) able through your authorized ATTENTION BMW Motorrad retailer. Motorcycle tips to the side when raising. Component damage cause by tipping over. Secure the motorcycle against... -
Page 126: Front Wheel Stand
Front wheel stand inserted into the rear wheel Raise motorcycle, preferably swing arm. Mounting front wheel with a BMW Motorrad rear- Adjust height of rear wheel stand wheel stand. stand so that rear wheel is Mount rear-wheel stands lifted slightly off ground. -
Page 127: Engine Oil
. The basic stand and right in front suspension. and its accessories are avail- able through your authorized BMW Motorrad retailer. Attach the front wheel stand to the front suspension and press it on the ground evenly. Engine oil... - Page 128 BMW Motorrad retailer. NOTICE Topping up engine oil To reduce the environmental Park the motorcycle, ensuring impact, BMW Motorrad recom- that the support surface is firm mends checking the engine oil and level. after every journey of at least Wipe area around oil filler 50 km.
-
Page 129: Brake System
Add engine oil up to specified From rear looking at brake Have the brakes checked at an level. pads 1. authorized workshop, preferably Check engine oil level ( 125). an authorized BMW Motorrad Install cap of oil fill location 1. retailer. - Page 130 Use of unsuitable brake BMW Motorrad retailer. pads. Failure of the brake system due If genuine BMW Motorrad to loss of the brake pads. brake pads are not installed, Only use brake pads with a be sure to check thickness of...
- Page 131 Have the brake pads replaced at an authorized service facil- ity, preferably an authorized BMW Motorrad retailer. Checking front brake fluid level Conduct a visual inspection of Rear brake-pad wear the brake pad thickness. Direc-...
- Page 132 Check brake fluid level regularly. Have the defect corrected as soon as possible by an autho- rized workshop, preferably an authorized BMW Motorrad re- Read off brake fluid level at tailer. Front brake fluid level brake-fluid reservoir 1. Checking rear brake fluid...
-
Page 133: Coolant
Check brake fluid level regularly. Have the defect corrected as soon as possible by an autho- rized workshop, preferably an authorized BMW Motorrad re- Check level of brake fluid in tailer. Rear brake fluid level rear brake-fluid reservoir 1. Coolant... -
Page 134: Fairings And Panels
Read off coolant level on ex- Open cap 1 of expansion tank. Coolant, specified level pansion tank 1. Direction of Add coolant up to specified view: from front looking at out- level. side of right-hand side panel. Check coolant level ( 131). - Page 135 Installing right fairing side panel also apply logically for the left side. panel Switch off ignition ( 41). with engine spoiler Remove screws 1. Detach fairing side panel 2 on right from grommets 3 while First insert fairing side panel 1 making sure that rear area is at front in driving direction, detached first, then remove in...
- Page 136 with engine spoiler Remove screws 1 and take off Remove screw 1. windshield 2. Pull cover on right 2 to side Install engine spoiler 1 while and detach from both hold- making sure that retaining ers 3. hook 2 is fastened. Remove cable tie arrow.
- Page 137 Remove screws 1 and lamp Lay on cover on left 1 from Lay on cover on right 1 at top. mask 2. above. Connect connector 2 for turn Connect connector 2 for turn indicators and install cable. Installing lamp mask indicators and install cable.
-
Page 138: Clutch
BMW Motorrad If clutch pedal free play is outside retailer. tolerance: Adjusting clutch lever play Checking clutch lever play 136). Adjusting clutch lever play Install windshield 1 and screws 2. Windshield on bracket for instrument cluster Operate clutch lever 1 until resistance is felt. -
Page 139: Chain
To extend and maximize Chain the chain's service life BMW Motorrad recommends Lubricating chain using BMW Motorrad chain lubricant or: ATTENTION Lubricant Insufficient cleaning and lu- Using a screwdriver, push the brication of the drive chain. chain 1 in the middle between Increased wear. - Page 140 Rotate rear wheel toward front justing screws 2 on left and facility, preferably an authorized of vehicle until the chain is ten- right. BMW Motorrad retailer. sioned. Checking chain tension Determine chain length below 137). the rear wheel swinging arm Ensure that the figures 4 indi- with 10 rivets.
-
Page 141: Wheels
Check wheel rims For every size of tire, The wheel sizes play a major role BMW Motorrad has tested and Make sure ground is level and in the ABS and ASC/DTC han- approved certain makes as firm and park motorcycle. - Page 142 Make sure ground is level and firm and park motorcycle. Measure tire tread depth in main tread grooves with wear indicating marks. NOTICE Tread wear marks are integrated into the main grooves on every Remove screw 1 and take tire. If the tire tread has worn ATTENTION wheel speed sensor out of down to the level of the marks,...
- Page 143 Incorrectly aligned threaded ventions by ABS and ASC/DTC. Raise motorcycle, preferably support sleeve in the front Please see the information on with a BMW Motorrad rear- suspension. the effect of wheel sizes on wheel stand. Damage to the wheel speed sen-...
- Page 144 Always have the tightening torques checked by a spe- Lift front wheel and install cialized workshop, preferably Clamping screw in axle quick-release axle 1 with an authorized BMW Motorrad adapter retailer. torque. Tightening sequence: Tighten Quick-release axle in ATTENTION...
- Page 145 Removing rear wheel and position cable guide 2. bore and fasten with screw 1. Install screws 3 with specified Raise motorcycle, preferably torque. with a BMW Motorrad rear- wheel stand. Radial brake calipers on Mount rear-wheel stands the axle adapter 123).
- Page 146 Loosen lock nuts 2 on left and right. Loosen adjusting screws 3 on left and right. Remove adjusting plate 4 and slide axle as far as possible to- ward inside. Press brake caliper 1 against Roll rear wheel as far forward brake disk 2.
- Page 147 Make sure that the wheel cialized workshop, preferably speed sensor 1 is not an authorized BMW Motorrad Install rear wheel damaged when rolling out the retailer. rear wheel. Roll rear wheel on support into...
- Page 148 Mount brake caliper carrier 1 in Roll rear wheel further into Roll rear wheel as far forward guide 2. swing arm while simultaneously as possible and lay chain 1 on pushing brake caliper carrier 1 sprocket. toward the front. Make sure that wheel speed sensor 1 is not damaged when Insert shim on right 1 in swing- rolling in rear wheel.
-
Page 149: Light Sources
Raise the rear wheel and in- Remove right cover ( 134). stall the quick-release axle 3 through the shim in the brake- caliper support and the rear wheel. Ensure that quick-release axle seats securely against travel stop on adjustment plate. Fasten brake line in holder 2 and install screw 1. - Page 150 Replace defective bulb. NOTICE Light sources featuring spec- ification ratings for higher lev- els of illumination are commer- cially available as special acces- sories. These light sources have a shorter service life than con- Disconnect plug connection 1. ventional light sources and also Install bulb 1.
- Page 151 Install the cover. NOTICE Install right cover ( 135). Light sources featuring spec- Replacing bulb for high- ification ratings for higher lev- beam headlight els of illumination are commer- Switch off ignition ( 41). cially available as special acces- Remove left cover ( 134).
- Page 152 Detach connector from Remove bulb 1 from the Insert bulb 1 in bulb socket. holder arrow (with a socket. screwdriver if necessary) and Replace defective bulb. disconnect from connector 1. Turn socket 2 counter clock- Bulb for parking light wise and pull out of carrier. W3W / 12 V / 3 W To prevent contaminants from being deposited on the glass...
- Page 153 Replacing right parking Replace defective bulb. light bulb Bulb for parking light Make sure ground is level and firm and park motorcycle. W3W / 12 V / 3 W Switch off ignition. Remove right cover ( 134). To prevent contaminants from being deposited on the glass surface, always use a clean, dry cloth to hold the bulb.
- Page 154 Replacing bulb for front and rear turn indicator Switch off ignition ( 41). Insert socket 1 in headlight Remove bulb 1 from housing until locking device light housing by turning it engages. counterclockwise. Remove screw 1. Replace defective bulb. Bulbs for flashing turn indicators, front RY10W / 12 V / 10 W with LED turn indicators...
- Page 155 Replacing bulbs for Bulbs for flashing turn license plate light indicators, rear Switch off ignition ( 41). with LED turn indicators To prevent contaminants from being deposited on the glass surface, always use a clean, dry cloth to hold the bulb. Insert inside end of lens into light housing and close.
-
Page 156: Fuses
Contact an authorized service To prevent contaminants from facility, preferably an authorized being deposited on the glass BMW Motorrad retailer. surface, always use a clean, dry cloth to hold the bulb. Maximum number of de- Press license-plate lamp 1 into fective LEDS in the tail- light housing. -
Page 157: Jump-Starting
Make sure ground is level and shop, preferably an authorized Locking device audibly en- firm and park motorcycle. BMW Motorrad retailer. gages. Removing passenger seat Install the passenger seat Replacing fuse 61). 61). Jump-starting CAUTION Touching live parts of the ig- nition system when the en- gine is running. -
Page 158: Battery
Allow engine on support mo- Disconnect jumper cable from ATTENTION torcycle to run while jump- negative terminals first, then starting. disconnect second cable from Contact between crocodile positive terminals. Begin by clamping one end of clips of jump leads and mo- the red jumper cable to the Installing driver`s seat ( 62). - Page 159 During riding breaks of more than 4 weeks, connect a trickle-charger to the battery. NOTICE BMW Motorrad has developed a trickle-charger specially designed for compatibility with the elec- tronics of your motorcycle. Using First install positive battery ca-...
- Page 160 Always fully recharge Consult a certified service fa- the battery before returning it to cility, preferably an authorized use. BMW Motorrad retailer, for set- Connect battery to vehicle ting of the date. 157).
-
Page 161: Care
Care Care products ..... 160 Washing your motorcycle ..160 Cleaning sensitive motorcycle parts . -
Page 162: Care Products
Washing your Care products torcycle, after riding through water or in the rain. motorcycle BMW Motorrad recommends Poorer braking action. that you use cleaning and BMW Motorrad recommends Brake early until the brake ro- care products available at your that you use BMW insect re- tors and brake pads are dry. -
Page 163: Cleaning Sensitive Motorcycle
Chrome Exercise caution when using Do not use insect sponges or high-pressure or steam-jet sponges with a hard surface. Especially in the case of road devices. salt, carefully clean chrome parts NOTICE with plenty of water and BMW NOTICE auto shampoo. Use chrome pol- When used as intended, sooner ish for additional treatment. -
Page 164: Paint Care
To preserve the finish of your fects of substances that damage vehicle, BMW Motorrad recom- the paint, especially if your ve- Store motorcycle mends using BMW Car Wax or hicle is ridden in areas with high agents that contain carnauba or Clean motorcycle. -
Page 165: Return Motorcycle To Use
Return motorcycle to Remove the protective wax coating. Clean motorcycle. Install battery ( 158). Observe checklist ( 94). -
Page 167: Technical Data
Technical Data Troubleshooting chart ... . . 166 Performance data ....177 Threaded fasteners ....167 Engine . -
Page 168: Troubleshooting Chart
Troubleshooting chart Engine does not start at all or is very difficult to start. Possible cause Remedy Side stand extended and gear engaged Retract side stand. Gear engaged and clutch not disengaged Place transmission in neutral or disengage clutch. No fuel in tank Refueling procedure ( 103). -
Page 169: Threaded Fasteners
Threaded fasteners Front wheel Value Valid Quick-release axle in threaded bush M24 x 1.5 37 lb/ft (50 Nm) Clamping screw in axle adapter M8 x 35 Tighten the screws 6 times, alternating between one and the other each time 14 lb/ft (19 Nm) Radial brake calipers on the axle adapter M10 x 65... - Page 170 Rear wheel Value Valid Swinging-arm adapter on rear wheel swinging arm M8 x 30 15 lb/ft (20 Nm) Spring strut on main frame M10 x 65 41 lb/ft (56 Nm) Mirrors Value Valid Locknut (mirror) on clamping piece M14 x 1 15 lb/ft (20 Nm) Multi-Wax Spray...
-
Page 171: Engine
Engine Engine design Water/oil-cooled 4-cylinder four-cycle in-line en- gine with four valves per cylinders and two over- head cams Displacement 999 cc (999 cm Cylinder bore 3.1 in (80 mm) Piston stroke 2 in (49.7 mm) Compression ratio 12:1 Rated output 160 hp (118 kW), at engine speed: 11000 min Torque 83 lb/ft (112 Nm), at engine speed: 9250 min... -
Page 172: Fuel
SAE 5W-40, API SL/JASO MA2, Additives (for in- stance, molybdenum-based substances) are pro- hibited, because they would attack the coatings on engine components, BMW Motorrad recom- mends BMW Motorrad ADVANTEC Ultimate Oil Engine oil, quantity for topping up max 0.8 quarts (max 0.8 l), Difference between... -
Page 173: Clutch
Clutch Clutch design Multi-disk oil-bath clutch, slipper clutch Transmission Transmission design Claw-shifted 6-speed transmission integrated in engine housing Transmission gear ratios 1.652 (76:46 teeth), Primary gear ratio 2.647 (45:17 teeth), 1st gear 2.091 (46:22 teeth), 2nd gear 1.727 (38:22 teeth), 3rd gear 1.500 (36:24 teeth), 4th gear 1.360 (34:25 teeth), 5th gear 1.261 (29:23 teeth), 6th gear... -
Page 174: Rear-Wheel Drive
Rear-wheel drive Type of rear suspension Aluminum swinging arm Number of teeth of rear-wheel drive (Pinion/ 17/45 sprocket) Secondary gear ratio 2.647 Suspension Front wheel Type of front suspension Upside-down telescopic forks Spring travel, front 4.7 in (120 mm), on wheel Rear wheel Type of rear suspension Aluminum swinging arm... -
Page 175: Brakes
Wheels and tires Recommended tire combinations An overview of the current tire approvals is avail- able from your authorized BMW Motorrad retailer or on the Internet at bmw-motorrad.com. Speed category of front/rear tires W, minimum requirement: 168 mph (270 km/h) -
Page 176: Electrical System
Rear wheel Rear wheel design Aluminum cast wheel Rear-wheel rim size 6.0" x 17" Rear tire designation 190/55 ZR 17 Load index for rear tire At least 63 Permissible rear-wheel imbalance max 1.6 oz (max 45 g) Tire inflation pressure Tire pressure, front 36.3 psi (2.5 bar), With tire cold Tire pressure, rear... - Page 177 Fuse 6 7.5 A, Optional accessory connector, number- plate light Fuse 7 4 A, Ignition switch Fuse 8 4 A, Rotation rate sensor, multifunction switch, left Main fuse 40 A Battery Battery design AGM (Absorptive Glass Mat) battery. Battery voltage 12 V Battery capacity 9 Ah...
-
Page 178: Frame
with LED turn indicators Bulbs for flashing turn indicators, rear RY10W / 12 V / 10 W with LED turn indicators Bulb for license-plate light W5W / 12 V / 5 W Frame Frame design Aluminum composite bridge frame, load-sharing engine Location of type plate Right steering head... -
Page 179: Weights
Weights Unladen weight 456 lbs (207 kg), DIN unladen weight, ready for road, 90 % full tank of gas, without OE Permissible gross weight 897 lbs (407 kg) Maximum payload 441 lbs (200 kg) Performance data Top speed >124 mph (>200 km/h) -
Page 181: Service
Service Reporting safety defects ... 180 BMW Motorrad Service ... . 181 BMW Motorrad Mobility Services ......181 Maintenance procedures . -
Page 182: Defects
Reporting safety defects If you believe that your vehicle has a defect which could cause a crash or could cause injury or death, you should immediately inform the National Highway Traffic Safety Ad- ministration (NHTSA) in addition to notifying BMW of North America, LLC. If NHTSA receives similar complaints, it may open an investigation, and if it finds that a safety defect exists in a group of vehicles, it may order a recall and remedy campaign. -
Page 183: Bmw Motorrad Service
BMW Motorrad retailer. Services With its worldwide dealer net- work, BMW Motorrad can attend The BMW Motorrad Mobility Ser- To ensure that your BMW con- to you and your motorcycle in vices furnish you and your new... - Page 184 621 miles (1000 km) pendent on the vehicle owner and the mileage driven. Your The specified service intervals BMW Motorrad retailer confirms apply to street operation. For that the service has been per- racing operation, adjust the inter- formed and enters the date for vals in accordance with loading.
-
Page 187: Maintenance Schedule
Maintenance schedule BMW running-in check Standard BMW Service 186) Engine oil change with fil- Check valve clearance Checking the engine tim- Replace all spark plugs Replacing air filter Telescopic fork oil change Change the brake fluid in the entire system annually or every 6000 miles (whichever comes first) -
Page 188: Standard Bmw Service
Lubricating the side stand. Performing the brief test using Checking the lighting and sig- the BMW Motorrad diagnosis nal system. system. Checking that the engine start- Visual inspection of brake lines, ing suppression works. -
Page 189: Confirmation Of Mainte
Confirmation of maintenance work BMW Pre-Delivery BMW Running-in Check Check Conducted Conducted Odometer reading Next service at the latest or, if reached sooner, Odometer reading Stamp, Signature Stamp, Signature... - Page 190 BMW Service BMW Service BMW Service Conducted Conducted Conducted Odometer reading Odometer reading Odometer reading Next service Next service Next service at the latest at the latest at the latest or, if reached sooner, or, if reached sooner, or, if reached sooner, Odometer reading Odometer reading Odometer reading...
- Page 191 BMW Service BMW Service BMW Service Conducted Conducted Conducted Odometer reading Odometer reading Odometer reading Next service Next service Next service at the latest at the latest at the latest or, if reached sooner, or, if reached sooner, or, if reached sooner, Odometer reading Odometer reading Odometer reading...
- Page 192 BMW Service BMW Service BMW Service Conducted Conducted Conducted Odometer reading Odometer reading Odometer reading Next service Next service Next service at the latest at the latest at the latest or, if reached sooner, or, if reached sooner, or, if reached sooner, Odometer reading Odometer reading Odometer reading...
- Page 193 BMW Service BMW Service BMW Service Conducted Conducted Conducted Odometer reading Odometer reading Odometer reading Next service Next service Next service at the latest at the latest at the latest or, if reached sooner, or, if reached sooner, or, if reached sooner, Odometer reading Odometer reading Odometer reading...
-
Page 194: Confirmation Of Service
Confirmation of service The table is intended as proof of maintenance and repair work, the installed optional accessories and any special campaign (recall) work carried out. Work carried out Odometer Date reading... - Page 195 Work carried out Odometer Date reading...
-
Page 197: Appendix
Appendix Certificate for Electronic Immobi- lizer ....... . 196... -
Page 198: Immobilizer
FCC Approval This device complies with Any changes or modifi- Part 15 of the FCC rules. cations not expressly Ring aerial in the Operation is subject to the approved by the party ignition switch following two conditions: responsible for compliance (1) This device may not could void the user’s cause harmful inter-... - Page 199 Approbation de informations avec la clé de Toute modification contact via l'antenne qui n'aurait pas été la FCC annulaire. approuvée expressément Antenne annulaire Le présent dispositif est par l'organisme responsa- conforme à la partie 15 ble de l'homologation peut présente dans le des règles de la FCC.
-
Page 200: Index
Maintenance instructions, 156 Replace license plate light, 153 Abbreviations and symbols, 6 Position on vehicle, 16 Replace low-beam headlight, 147 Removing, 158 Control, 17 Replace parking light bulb, 151 Technical data, 175 Operating, 50 Brake fluid Replace tail light, 154 Self-diagnosis, 96 Check fluid level at rear, 130 Replace turn indicator, 152... - Page 201 Coolant Fairing Indicator lamp, 19 Check fill level, 131 Installing, 135 Warning lamps, 36 Fluid level indicator, 15 Removing, 134 Overheating warning Fall sensor indicator, 30 Electrical system Warning lamps, 32 Topping up, 132 Technical Data, 174 Frame Cruise-control system Emergency on/off switch (kill Technical Data, 176 Control, 17...
- Page 202 Headlight Mirrors Keys, 40 Adjusting, 60 Adjusting for RHD/LHD Removing/installing, 85 traffic, 48 Mobility Services, 181 Headlamp range, 48 License-plate carrier Motorcycle Heated handlebar grips Removing/installing, 86 Care, 159 Control, 18 Lights Cleaning, 159 Operating, 60 Control, 17 Parking, 102 Helmet holder Low-beam headlight, 48 Position on vehicle, 16...
- Page 203 Rear-wheel stand Spark plugs Onboard computer Mounting, 123 Technical data, 175 Control, 17 Refueling, 103 Speedometer, 24 Onboard tool kit Rider's Manual (US Model) Spring preload Contents, 122 Position on vehicle, 16 Adjusting, 78 Position on vehicle, 16 Riding mode Front adjustment element, 11, Overview of warning Adjusting, 54...
- Page 204 Electrical system, 174 Transmission Immobilizer, 30 Technical Data, 171 Engine, 169 Overheating, 30 Troubleshooting chart, 166 Overview, 22 Engine oil, 170 Turn indicators Weights Frame, 176 Control, 17 Payload table, 11, 13 Fuel, 170 Operating, 49 Technical Data, 177 Fuses, 174 Removing/installing, 88 Wheels Light sources, 175...
- Page 206 Errors and omissions excepted. © 2015 Bayerische Motoren Werke Aktiengesellschaft 80788 Munich, Germany Reprints and duplication of this work, in whole or part, are pro- hibited without the express writ- ten approval of BMW Motorrad, Aftersales.
- Page 207 Important data for refueling: Fuel Recommended fuel quality Super unleaded (max. 10 % ethanol, E10) 89 AKI (95 ROZ/RON) 89 AKI Usable fuel quantity Approx. 4.6 gal (Approx. 17.5 l) Fuel reserve Approx. 1.1 gal (Approx. 4 l) Tire inflation pressure Tire pressure, front 36.3 psi (2.5 bar), With tire cold Tire pressure, rear...
Need help?
Do you have a question about the S 1000R and is the answer not in the manual?
Questions and answers