
Related Manuals for Juniper JOT Desk BSW


Summary of Contents for Juniper JOT Desk BSW
- Page 1 JOT Desk Fixed-Height Workstation Includes Add-Ons: A1 | A2 | A3 | A4 Watch Entire General Installation Guide Install Video...
- Page 3 Edition Code :: Workstation ..................1 Add-ons :: Surface-Mount Cable Management Tray ......7 :: Modesty Panel ................. 11 :: Laminate Inset End Panels ............. 15 :: Steel Inset End Panels .............. 23...
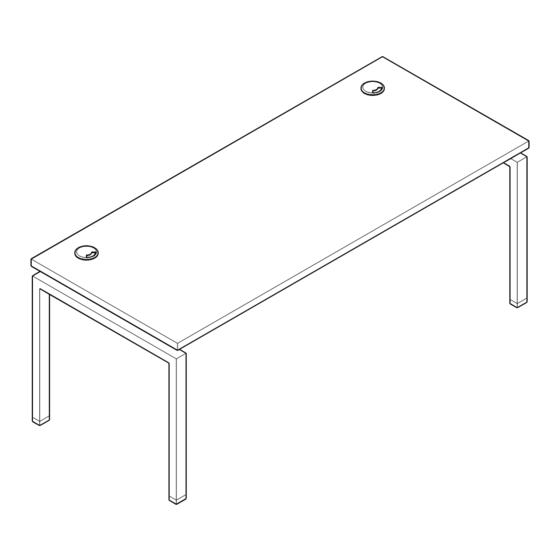
- Page 4 Workstation Overview JOT Fixed-Height Workstation All parts listed are for a single workstation; additional Scan to parts will be needed for additional workstations. Watch Section...
- Page 5 Parts List Code Qty. Description GB3072 Surface Extra Long Beam Lock Plate Cap Screw Locking Screw and Lever 30” End Leg BL30 Wood Screws 42” Support Bar* BASB72 Wood Screws *Part will be added to surfaces 72” and longer...
- Page 6 1 | Join End Legs with Beam Insert beam tabs into leg brackets. Guide beam tabs into bracket holes, ensuring that there is not a gap between the beam and legs. Scan to Watch Step Using a rubber mallet, hammer the beam to lock in place. 2 | Bolt Down Beam-to-Leg Lock Plate Note: The beam lock plates will not fit if there is a gap between the beam and the leg.
- Page 7 3 | Measure and Adjust Beam Width Measure from end leg to end leg until you find the approximate width of the work surface. Insert the screw through the overlapping beam slots and Scan to Watch Step into the locking screw and lever. Slightly tighten the screw. DO NOT fully tighten.
- Page 8 5 | Secure Beam Tighten beam locks. Scan to Watch Step Optional | Install Support Bar If working with a surface 72” or longer, use 10 wood screws to install support bar under the surface. Scan to Watch Step...
- Page 10 A1: Surface-Mount Cable Management Tray Overview JOT Fixed-Height Workstation Scan to If workstations have power, refer to BL-8 JOT power guide. Watch Section...
- Page 11 Parts List Code Qty. Description Surface-Mount Cable Management Tray BHCT Wood Screws...
- Page 12 1 | Extend Cable Tray to Desired Length Extension range: 25"–45". Scan to Watch Step...
- Page 13 2 | Attach Cable Tray to Surface Attach cable tray using wood screws. Scan to Watch Step...
- Page 14 A2: Modesty Panel Overview JOT Fixed-Height Workstation All parts listed are for a single modesty panel; additional parts will be needed for additional modesty Scan to panels. Watch Section...
- Page 15 Parts List Code Qty. Description Laminate Modesty Panel* GLMP## Machine Screws L-Brackets BMPBFB Wood Screws *For Steel Modesty Panel: components may vary, but process is similar.
- Page 16 1 | Secure Brackets to Modesty Panel Connect the bracket to the modesty panel using screws. Secure tightly. Scan to Watch Step...
- Page 17 2 | Attach Modesty Panel to Surface Attach modesty panel to surface using wood screws provided with brackets. Panel will be center aligned and flushed with back of surface. Scan to Watch Step...
- Page 18 A3: Laminate Inset End Panels Overview JOT Fixed-Height Workstation All parts listed are for a single panel; additional parts Scan to will be needed for additional panels. Watch Section...
- Page 19 Parts List Code Qty. Description GBEP## Laminate Inset End Panel End Panel T-Bracket LEPBL1 Self-Tapping Screws Wood Screws...
- Page 20 1 | Secure Bracket to End Legs Attach 4 brackets to end legs using the self-tapping screws. 1. Inset–The back of the bracket will align flush with edge of leg. Scan to Watch Step 2. Flush–Back of bracket will be 9/16” from edge back edge of leg. Inset Bottom View Align Flush ”...
- Page 21 2 | Attach End Panel Slide end panels into place and adjust until flush with bracket. Use 2 wood screws to secure panel to each bracket. Scan to Watch Step...
- Page 22 A4: Steel Inset End Panels Overview JOT Fixed-Height Workstation All parts listed are for a steel inset end panel; additional parts will be needed for additional Scan to steel inset end panels. Watch Section...
- Page 23 Parts List Code Qty. Description Steel Inset End Panel BEP## Self-Tapping Screws...
- Page 24 1 | Slide Panels into End Legs Slide the end panel into place and adjust until either flush with outside of leg or slightly recessed. Scan to Watch Step Align Flush Slightly Recessed...
- Page 25 2 | Attach End Panels Use 4-6 self-tapping screws to secure panel to each leg. Scan to Watch Step...
- Page 26 1-866-999-0955 | hello@juniperoffice.com | juniperoffice.com © 2023 Juniper Office | Version 23.1.3...
Need help?
Do you have a question about the JOT Desk BSW and is the answer not in the manual?
Questions and answers