Advertisement
Quick Links
Advertisement

Related Manuals for Juniper Kit-BLBC72


Summary of Contents for Juniper Kit-BLBC72
- Page 1 Kit-BLBC72 Laminate Bookcase Includes Add-Ons: General Installation Guide...
- Page 3 Edition Code :: Laminate Bookcase ..........1 KIT-BLBC72 Add-ons :: Locking Doors..................9...
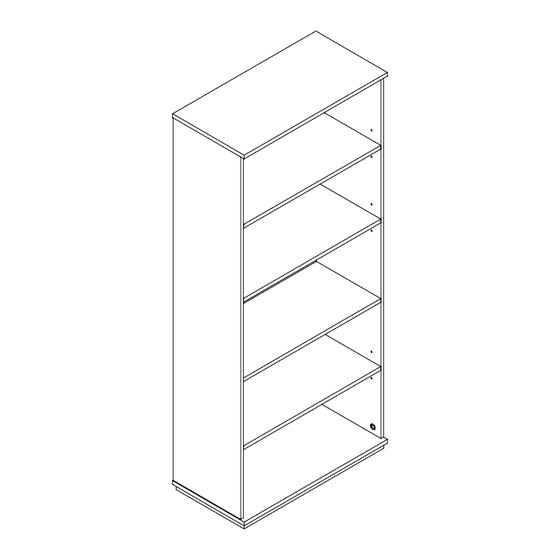
- Page 4 Bookcase Overview Laminate Bookcase All parts listed are for a laminate bookcase; additional parts will be needed for additional bookcases.
- Page 5 Parts List Code Qty. Description Top Panel Bottom Panel Side Panels KIT-BLBC72 Back Panel Fixed Shelf Adjustable Shelves NOTE: Bookcase comes in 2 boxes.
- Page 6 1 | Insert Hardware into Top Panel Insert hardware into pre-drilled holes as shown below. Requires 6 cam pins. Cam Pin 2 | Insert Hardware into Bottom Panel Insert hardware into pre-drilled holes as show below. Requires 6 cam pins. Cam Pin...
- Page 7 3 | Insert Hardware into Both Side Panels Insert hardware into pre-drilled holes as shown below. Requires 5 cam pines, 6 shelf pins, 4 wooden dowels, and 4 cam locks. NOTE: Repeat steps for both panels. Shelf Pin Cam Lock Cam Pin Wooden Dowel...
- Page 8 4 | Insert Hardware into Back Panel Insert hardware into pre-drilled holes as shown below. Requires 2 cam pins, 8 wooden dowels, and 12 cam locks. Wooden Dowel Cam Lock Cam Pin 5 | Insert Hardware into Fixed Shelf Insert hardware into pre-drilled holes as shown below. Requires 4 wooden dowels and 6 cam locks.
- Page 9 6 | Secure Fixed Shelf to Back Panel Align cam pins on back panel with open cam locks on fixed shelf panel. Turn cam locks with screwdriver to lock cam pins in place. Tighten Cam Locks 7 | Secure 2 Side Panels Align 12 cam pins on side panels with 12 open cam locks on assembled back panel and shelf.
- Page 10 8 | Secure Top and Bottom Panels Align 6 cam pins on top panel with 6 open cam locks on side and back panels. Turn cam locks with screwdriver to lock cam pins in place. NOTE: Repeat steps for bottom panel. Tighten Cam Locks 9 | Insert Shelves Place and secure remaining 3 shelves onto shelf pins.
- Page 11 10 | Place Cam Lock Covers Lock Covers...
- Page 12 A1: Locking Doors Overview Laminate Bookcase All parts listed are for a laminate bookcase; additional parts will be needed for additional bookcases.
- Page 13 Parts List Code Qty. Description BLBCD Locking Doors (Set of 2)
- Page 14 1 | Place First Door Choose door placement then insert 4 wood screws through each door hinge and into bookcase side panel. NOTE: Repeat steps for second door. 2 | Secure Door Handle Using 2 wood screws, drive screws through door panel and into back of handle. NOTE: Repeat steps for second door.
- Page 15 3 | Double Check All Hardware is Tightened...
- Page 16 1-866-999-0955 | hello@juniperoffice.com | juniperoffice.com © 2023 Juniper Office | Version 23.0.0...
Need help?
Do you have a question about the Kit-BLBC72 and is the answer not in the manual?
Questions and answers