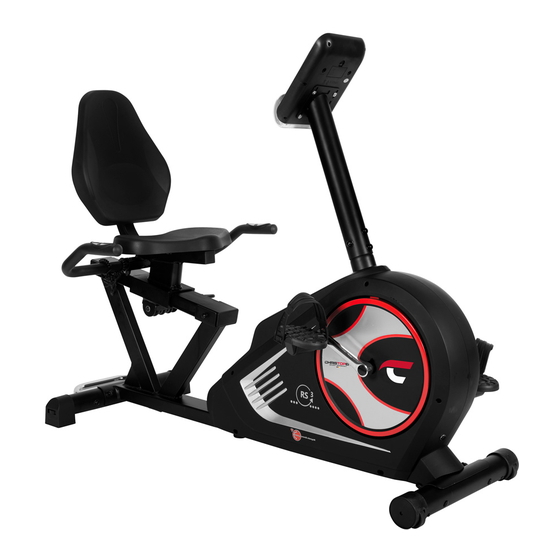
Christopeit Sport RS 3 Assembly And Exercise Instructions
Hide thumbs
Also See for RS 3:
- Assembly and exercise instructions (68 pages) ,
- Assembly and operating instructions manual (68 pages)
Advertisement
Available languages
Available languages
Quick Links
Heimsport-Trainingsgerät
Montage- und Bedienungsanleitung
u r Bestell-Nr. 1826
Notice de montage et d'utilisation du
No. de commande 1826
Инструкция по монтажу и эксплуатации
Ergometer
RS 3
D
GB
Assembly and exercise instructions
or Order No. 1826
F
NL
Montage- en bedieningshandleiding voor
Bestellnummer 1826
RU
№ заказа 1826
1
Advertisement

Related Manuals for Christopeit Sport RS 3


Summary of Contents for Christopeit Sport RS 3
- Page 1 Heimsport-Trainingsgerät Ergometer RS 3 Montage- und Bedienungsanleitung Assembly and exercise instructions u r Bestell-Nr. 1826 or Order No. 1826 Montage- en bedieningshandleiding voor Notice de montage et d’utilisation du Bestellnummer 1826 No. de commande 1826 Инструкция по монтажу и эксплуатации...
- Page 2 Inhaltsu bersicht Contents Page 1. Wichtige Empehlungen und Sicherheitshinweise Seite 2. Einzelteileu bersicht Seite 3. Stu ckliste-Ersatzteilliste-Techn. Daten Seite Sommaire Page 4. Montageanleitung mit Explosionsdarstellungen Seite - 10 Benutzung des Gera tes 5. Computeranleitung-Sto rungsbeseitigung Seite 12 - 15 Reinigung, Wartung und Lagerung...
- Page 3 Montageu bersicht: Assembly overview: Aperçu de l‘Assemble e: Montage overzicht: Обзор Ассамблея:...
- Page 5 Stu ckliste - Ersatzteilliste Wenn ein Bauteil nicht in Ordnung ist oder ehlt, oder wenn Sie in Zukunt ein Ersatzteil beno tigen, wenden Sie sich bitte an: RS 3 Best.-Nr. 1826 Internet Service- und Ersatzteilportal: Technische Daten: Stand: 01. 06. 2018 www.christopeit-service.de...
- Page 6 Abb- Bezeichnung Abmessung Menge Montiert an ET-Nummer Stu ck Abb. Nr. Vierkantstopen 38x38 36-9211-23-BT Rechteckstopen 80x40 36-1826-13-BT Kunststogleiter 36-1826-12-BT Exzenterhalterung 36-1826-14-BT Sitz 36-1213-03-BT Ru ckenpolster 36-1826-05-BT Kabelschutz 36-9821-13-BT Rundstopen 36-9211-21-BT Pedalarm links 33-9211-14-SI Pedalarm rechts 33-9211-15-SI Pulskabel 1 3+42 36-1826-15-BT Pulsverbindungskabel 2...
- Page 7 Abb- Bezeichnung Abmessung Menge Montiert an ET-Nummer Stu ck Abb. Nr. Schwungmasse 33-1826-11-SI Schwungradachse 33-9211-13-SI Riemenrad 85+86 36-9211-38-BT Mutter M10x1.0 39-9820 Netzanschlussbuchse 36-1721-07-BT Stopen 36-1826-20-BT Werkzeug Set 36-9211-34-BT Montage- und Bedienungsanleitung 36-1826-19-BT...
- Page 8 Unebenheiten des Untergrundes ausgleichen. Das Gera t wird damit so ausgerichtet, dass ungewollte Eigenbewegungen des Gera tes wa hrend des Trainings ausgeschlossen werden. Um den RS 3 an einen anderen Austellort zu verbringen ko nnen Sie das Gera t am Transportgri...
- Page 9 Schritt 3: Montage der Computeraunahme (5) am Grundrahmen (1). 1. Fu hren Sie die Computeraunahme (5) mit dem unteren Ende zur Aunahme am Grundrahmen (1) und verbinden Sie die die Pulsverbindungskabel 3 (45) mit den Pulsverbindungskabeln 2 (42) und das Verbindungskabel (30) dem Stellmotorkabel (43).
- Page 10 Schritt 6: Montage des Pulsgries (3) am Sitzrahmen (2). 1. Den Pulsgri (3) zum Sitzrahmen (2) u hren und in die passende Au- nahme von unten einlegen, sodass die Bohrungen u bereinander liegen. Die Schrauben M8x45 (10) von unten durch die Bohrungen stecken und den Handgri...
- Page 11 U/min und Wattleistung von Stue 1 bis Stue 24 u r RS 3 Art.-Nr. 1826 Stufe 20RPM 30RPM 40RPM 50RPM 60RPM 70RPM 80RPM 90RPM 100RPM WATT WATT WATT WATT WATT WATT WATT WATT WATT Anmerkung: 1. Die Leistungsanzeige in Watt wurde anhand der Umdrehungszahl der Tretachse pro Minute (UPM) und des Bremsmomentes (Nm) kalibriert.
- Page 12 COMPUTER ANLEITUNG „+“ und „-“ : Mit den +/- Tasten a ndern Sie die Werte - nur blinkende Angaben ko nnen im Wert gea ndert werden. „Test“ : Mit dieser Taste ko nnen Sie nach dem Training Ihre Fitness-Note ermitteln.
- Page 13 Tretwiderstand : Mittels der + / - Taste ko nnen Sie jederzeit - in allen Pro- Programmabla ue werden im Display grasch dargestellt. Der Ablau der grammen - den Tretwiderstand anpassen außer im Wattprogramm P16. Die einzelnen Programme erolgt gema ß Darstellung des Balkendiagramms im Vera ...
- Page 14 Programm Manual: Computer Ihres ERGOMETER ist mit einem Empa nger (ohne Sender) u r dieses Programm entspricht den Funktionen eines normalen Heimtrainers. vorhandene Cardio- Pulsmessgera te ausgestattet. Sollten Sie im Besitz So werden hier die Zeit, die Geschwindigkeit, die U/min, die Enternung, eines solchen Gera ...
- Page 15 Trainingsfa che in mm Freifa che in mm (u r Gera t und Benutzer) (Trainingsfa che und Sicherheitsfa che (umlauend 60cm)) Reinigung, Wartung und Lagerung des Ergometers: Sto rungsbeseitigung: Wenn Sie die Funktionssto rung nicht anhand der augeu hrten 1.
- Page 16 Trainingsanleitung Um spu rbare ko rperliche und gesundheitliche Verbesserungen zu erreichen, Weitere Inormationen zum Thema Auwa rmu bungen, Dehnungsu bungen mu ssen u r die Bestimmung des erorderlichen Trainingsauwandes die oder allgemeine Gymnastiku bungen fnden Sie in unserem Downloadbereich olgenden Faktoren beachtet werden: unter www.christopeit-sport.com 1. Intensita t: 4. Motivation Die Stue der ko rperlichen Belastung beim Training muß den Punkt der Der Schlu ...
- Page 17 Contents 1. Summary o Parts Page 3 - 4 2. Important Recommendations and Saety Inormation Page 17 3. Parts List-List o spare parts-tec. Data Page 18 - 20 4. Assembly Instructions With Exploded Diagrams Page 21 - 23 Mount, use and dismount 5.
- Page 18 Parts List – Spare Parts List Please contact us i any components are deective or missing, or i you need any spare parts or replacements in uture: RS 3 Order No. 1826 Technical data: Issue: 01. 06. 2018 Internet service- and spare parts data base: Ergometer o...
- Page 19 Illus Designation Dimensions Quantity Attached to ET number illustration No. Bushing 36-1826-12-BT Bracket 36-1826-14-BT Seat 36-1213-03-BT Backrest 36-1826-05-BT Cable sae 36-9821-13-BT Round end cap 36-9211-21-BT Crank let 33-9211-14-SI Crank right 33-9211-15-SI Pulse wire 1 3+42 36-1826-15-BT Pulse connection cable 2 41+45 36-1826-17-BT Motor cable...
- Page 20 Illus Designation Dimensions Quantity Attached to ET number illustration No. Small belt wheel 85+86 36-9211-38-BT M10x1.0 39-9820 DC connection cable 36-1721-07-BT End cap 36-1826-20-BT Tool set 36-9211-34-BT Assembly and exercise Instruction 36-1826-19-BT...
- Page 21 Assembly Instructions Remove all the separate parts rom the packaging, lay them on the foor and check roughly that all are there on the base o the assembly steps. Please note that a number o parts are connected directly to the main rame preassembled.
- Page 22 Step 4: Installation o the computer (44) at computer holder (5). 1. Put the plug o pulse connection cable 3 (45) and connection cable (30) into the cable sockets rom monitor (44). 2. Attach the monitor (44) to computer holder (5) and tighten with screws M4x10(24) and washers 4//8 (52).
- Page 23 Step 6: Installation o the pulse grip (3) at the seat rame (2). 1. Place the pulse grip (3) rom bottom side to the holder at seat rame (2) and adjust the holes in the tubes so that they are aligned. Push the bolts M8x45 (10) rom bottom side through the holes and tighten the pulse grip (3) at seat rame (9) with washers 8//16 (15) and cap nuts (11) rmly.
- Page 24 RPM and Power in Watt o Level 1 - Level 24 or RS 3 Art.-Nr. 1826 Level 20RPM 30RPM 40RPM 50RPM 60RPM 70RPM 80RPM 90RPM 100RPM WATT WATT WATT WATT WATT WATT WATT WATT WATT Remarks: 1. The power consumptions (Watt) are calibrated by measuring the driving speed (min-1) o axle and the braking torque (Nm).
- Page 25 Computer Instructions LEVEL: Indicates the level o loading selected rom LEVEL 1 to LEVEL 24. TIME/ WATT : Indicates Time or Watt alternately. The time shows minutes and seconds. I preset, time counts downwards. Minimum preset 5Min. Range 5-99Min. The actually power display show in Watt. Preset range 30-350Watt only in Watt program P16.v Or permanently by pressing the F-key.
- Page 26 Programm 6 Interval Programm 7 Cardio Programm 8 Endurance Programm 9 Slope Programm 10 Rally User Setting Program 11 (U1) User Setting Program 12 (U2) User Setting Program 13 (U3) User Setting Program 14 (U4) User Setting Program 15 (U5) Programm 16 Watt Control Program Programm 17 HRCP Programm 18 HRCP...
- Page 27 Max Heart Rate in Program 18, and 95% Max Heart Rate in Program 19. nished by pressing „TEST“ key and then stop exercising. Ater the key is Ater pressing „START/STOP“ key to exercise, please also apply the heart pressed, please also apply the heart rate detector appropriately. The test rate detector appropriately.
- Page 28 Training instructions You fnd urther inormation on the subject warm-up exercises, stretch exer- cises or general gymnastics exercises in our download area under www. christopeit-sport.com You must consider the ollowing actors in determining the amount o training eort required in order to attain tangible physical and health benefts: 4. Motivation The key to a successul program is regular training. You should set a fxed 1. Intensity: time and place or each day o training and prepare yoursel mentally or the The level o physical exertion in training must exceed the level o normal training. Only train when you are in the mood or it and always have your goal exertion without reaching the point o breathlessness and / or exhaustion. in view. With continuous training you will be able to see how you are progres- A suitable guideline or eective training can be taken rom the pulse rate. sing day by day and are approaching your personal training goal bit by bit. During training this should rise to the region o between 70% to 85% o the maximum pulse rate (see the table and ormular or determination and calculation o this). During the frst weeks, the pulse rate should remain at the lower end o this region, at around 70% o the maximum pulse rate. In the course o the ollo- wing weeks and months, the pulse rate should be slowly raised to the upper limit o 85% o the maximum pulse rate. The better the physical condition o the person doing the exercise, the more the level o training should be encreased to remain in the region o between 70% to 85% o the maximum pulse rate. This should be done by lengthening the time or the training and / or encreasing the level o difculty.
- Page 29 Sommaire Che re cliente, cher client, 1. Aperçu des pie ces Page 2. Recommandations importantes et re gles Nous vous e ´ licitons pour l’achat de ce cycle d’entra nement inte ´ rieur et de se ´ curite ´ Page nous vous souhaitons beaucoup de plaisir avec.
- Page 30 Si une pie ce n’est pas correcte, s’il manque une pie ce ou si vous avez besoin d’une pie ce de rechange a l’avenir, veuillez vous RS 3 N° de commande 1826 adresser a : Caracte ...
- Page 31 Sche ma De signation Dimensions Quantite Monte sur Nume ro ET n° en mm Unite s sche ma n° Bouchon carre 38x38 36-9211-23-BT Bouchon rectangle 80x40 36-1826-13-BT Insert en plastique 36-1826-12-BT Support excentrique 36-1826-14-BT Siege 36-1213-03-BT...
- Page 32 Sche ma De signation Dimensions Quantite Monte sur Nume ro ET n° en mm Unite s sche ma n° Volant cine tique 33-1826-11-SI Axe de volant cine tique 33-9211-13-SI Poulie 85+86 36-9211-38-BT Ecrou M10x1.0...
- Page 33 Sortez toutes les pie ` ces de l’emballage, posez-les sur le sol et contro lez de ´ placer le RS 3 a un endroit die ´ rent, soulevez l‘appareil par la poigne ´ e si rien ne manque en vous basant grossie ` rement sur la e tapes de de transport (49) jusqu‘a ...
- Page 34 Etape n° 4: Montage de l’ordinateur (44) sur logement d’ordinateur (5). 1. Prenez ensuite l’ordinateur (44) et xez son ca ble de connexion (30) a l’arrie re de l’ordinateur (44). Fixez le ca ble de connexion de pulsation 3 (45) a ...
- Page 35 Etape n° 6: Montage de poigne e de pouls (3) sur le logement de sie ` ge (2). 1. Placer la poigne ´ e de pouls (3) sur le logement de sie ge (9) et en veillant a ce que les trous de orage des tubes soient situe ´ s les uns au-dessus des autres.
- Page 36 RPM and Power in Watt o Level 1 - Level 24 or RS 3 Art.-Nr. 1826 Level 20RPM 30RPM 40RPM 50RPM 60RPM 70RPM 80RPM 90RPM 100RPM WATT WATT WATT WATT WATT WATT WATT WATT WATT Remarques : 1. La puissance consomme ´ e (en Watt) est calibre ´ e mesurant la vitesse (min-1) d’essieu et de couple (en Nm).
- Page 37 Guide d’utilisation de l’ordinateur Programme 16: programme en watts programme 17–20: programmes des pulsations.) DEGRE (Level): Achage de la re ´ sistance a l’eort, de 1 a 24. Plus le chire est e ´ leve ´ , plus la re ´...
- Page 38 Re sistance a ` la marche : Vous pouvez adapter a tout moment – dans tous l’e ´ cran Display. Le de ´ roulement de chaque programme suit la repre ´ sentation les programmes – le niveau de re ´ sistance a la marche avec les touches + du diagramme des leviers dans la zone d’achage, par exemple, le pro- / - .Vous pouvez vous rendre compte des modications a ...
- Page 39 PROGRAMME 1 : Manuel re ´ quence prise une minute apre s la n de l’entra nement (pulsations nales). Ce programme correspond aux onctions d’un home-trainer normal. Ainsi, N’utilisez cette onction qu’apre s vous e tre entra ne ´ pendant de ´ ja un certain la dure ´...
- Page 40 Centre d‘entra nement en mm Surace libre en mm (Pour appareil et l‘utilisateur) (Zone de la ormation et de la zone de se ´ curite ´ (60cm rotation)) Nettoyage, Entretien et stockage de ergome ` tre: Corrections: Si vous ne pouvez pas re ´ soudre en utilisant les inormations 1.
- Page 41 Recommandations pour l’entra nement aux exercices de distension ou les exercices de gymnastique ge ´ ne ´ raux dans notre domaine de te ´ le ´ chargement sous le www.christopeit-sport.com Les acteurs ci-apre s doivent e tre pris en compte pour la de ´ termination de 4.
- Page 42 Inhoudsopgave Geachte klant 1. Overzicht van de losse delen pagina 3 - 4 2. Belangrijke aanbevelingen en veiligheidsinstructies pagina 42 Wij willen u van harte gelukwensen met de aanscha van uw hometrainer en hopen dat u hier veel plezier aan zult beleven. Neem a.u.b. de instructies 3.
- Page 43 Stuklijst - reserveonderdelenlijst Wanneer een bepaald onderdeel niet in orde is o ontbreekt, o wanneer u in de toekomst een reserveronderdeel nodig heet, kunt RS 3 best.nr. 1826 u zich wenden tot: Technische specicatie: Stand: 01. 06. 2018 Ergometer klasse HA met een precieze weergave van de gegevens Internet service- en onderdelen data base: •...
- Page 44 Ab. Beschrijving Ametingen Aantal Gemonteerd aan ET-nummer stuks abeeldingsnr. Kunststoglijders 36-1826-12-BT Excentriek houder 36-1826-14-BT 36-1213-03-BT Rugpolstering 36-1826-05-BT Kabel dop 36-9821-13-BT Ronde dop 36-9211-21-BT Pedaalkruk links 33-9211-14-SI Pedaalkruk rechts 33-9211-15-SI Polskabel 1 3+42 36-1826-15-BT Verbindingskabel voor pols 2 41+45 36-1826-17-BT Stelmotorkabel 36-9212-04-BT Computer 36-1507203-BT...
- Page 45 Ab. Beschrijving Ametingen Aantal Gemonteerd aan ET-nummer stuks abeeldingsnr. Frijloop 85+86 36-9211-38-BT Moer M10x1.0 39-9820 Nettoestel spanningsverzorging 36-1721-07-BT Ronde dop 36-1826-20-BT Gereedschapsset 36-9211-34-BT Montage-en bedieningshandleiding 36-1826-19-BT...
- Page 46 Het apparaat moet zo worden opgesteld, dat het tijdens de en bruto controleer aan de hand van de montageen staps o alle training niet uit zichzel beweegt. Om de RS 3 naar een andere locatie onderdelen aanwezig zijn. Hierbij moet er op worden gelet dat een...
- Page 47 Stap 4: Montage van de computer (44) aan de computerhouder (5). 1. Neemt u de computer (44) en steekt u de verbindingskabel (30) in de stekker van de computer (44) en steekt vervolgens de polsslag verbindingskabel 3 (45) in de vanzelsprekende stekkers van de computer (44).
- Page 48 Stap 6: Montage van de polsgreep (3) aan de zit opname (2). 1. De polsgreep (3) van lager positie aan de houder van de zit opname (2) steken en de openingen in de buizen zo uitlijenen dat ze boven elkaar liggen.
- Page 49 RPM and Power in Watt o Level 1 - Level 24 or RS 3 Art.-Nr. 1826 Level 20RPM 30RPM 40RPM 50RPM 60RPM 70RPM 80RPM 90RPM 100RPM WATT WATT WATT WATT WATT WATT WATT WATT WATT Opmerkingen: 1. De energieconsumptie (Watt) wordt gemeten door de trapsnelheid te meten (min-1) van de as en de torsie (Nm).
- Page 50 • Displays Computerhandleiding PROGRAMMA : Weergave van het ingestelde programma 1-20 (manueles program- ma; 1 – 10 = itnessprogramma’s; programma 11-15 = individuele gebruikersprogramma’s; programma 16 = wattprogramma; programma 17-20 = polsslagprogramma’s) NIVEAU: Weergave van de gekozen trapweerstand van niveau 1 – 24. Hoe groter het getal, hoe groter de weerstand.
- Page 51 Trapweerstand: programma’s gebeurt in overeenstemming met de weergave van het balk- Door middel van de + / - toets kunt u steeds - in alle programma’s – de diagram in het displayveld, bijvoorbeeld programma 3 = berg + dal enz. trapweerstand aanpassen.
- Page 52 Programma manual: handmatig agelezen worden. Dit unctioneert met al de niet-gecodeerde borstgordels, Dit programma komt overeen met de uncties van een normale hometrainer. waarvan de zendrequentie tussen 5,0 en 5,5 KHz ligt. Zo worden hier de tijd, de snelheid/t/min, de astand, de watt/Kjoule, de De reikwijdte van de zendtoestellen bedraagt al naargelang het model 1 actuele polsslag en de waarschuwingspolsslag permanent in het displayveld tot 2 m.
- Page 53 Oeenterrein in mm Oeenterrein in mm (Voor de apparaat-en (Voor de apparaat-en gebruikers) gebruikers) Reiniging, onderhoud en opslag van de Ergometer: Fixes: Als u niet kunt oplossen met behulp van de genoemde storing 1. Reiniging inormatie, kunt u contact opnemen met uw dealer o Fabrikant. Gebruik alleen een vochtige doek voor het reinigen.
- Page 54 Trainingshandleiding 4. Motivatie De sleutel tot een succesvol programma is een regelmatige training. U kunt het beste een vaste tijd en plaats per trainingsdag vaststellen en u ook De onderstaande actoren moeten in acht worden genomen bij het bepalen geestelijk op de training voorbereiden. Train alleen met een goed humeur van de benodigde training voor het bereiken van een merkbare verbetering en houd uw doel voor ogen.
- Page 55 Обзор содержания Уважаемые покупательницы и покупатели! Важные рекомендации и указания Поздравляем Вас с покупкой тренировочного снаряда для домашних по безопасности ctp. занятий спортом и желаем Вам самых приятных впечатлений. 2. Обзор отдельных деталей стр. Следуйте, пожалуйста, указаниям и инструкциям нашего руководства 3.
- Page 56 Спецификация - Список запасных частей Вес продукта: 32кг Г абаритные размеры: прибл. Д 136x Ш 64 x В 107 см RS 3 № заказа 1826 Обучение площадь: не менее 2,5 м Технические характеристики По состоянию на 01.06.2018 Эргометр класса HA с высокой точностью индикации...
- Page 57 Рис. Наименование Размеры Кол-во Монтируется на ЕТ-№ № в мм № штук Пластиковая вставка 36-1826-12-BT Эксцентриковый кронштейн 36-1826-14-BT Седло 36-1213-03-BT Мягкая спинка 36-1826-05-BT Защиты кабеля 36-9821-13-BT Заглушка 36-9211-21-BT Рычаг педали слева 33-9211-14-SI Рычаг педали справа 33-9211-15-SI Датчик пульса 1 3+42 36-1826-15-BT Соединительный...
- Page 58 Рис. Наименование Размеры Кол-во Монтируется на ЕТ-№ № в мм № штук Гнездо для блока питания 36-1721-07-BT Заглушки 36-1826-20-BT Гаечный ключ с открытым зевом 36-9211-34-BT Инструкция по монтажу 36-1826-19-BT...
- Page 59 Руководство по монтажу 4. Вкрутите pезиновый колпачок для ножки (28) в основную раму (1) и зафиксируйте положение гайкой (23). (После того, как Вы смонтировали весь тренажер, правильно Пожалуйста, выньте все отдельные части из коробки и проверьте их выставите компенсаторы (26+28) неровности пола. Этим Вы на...
- Page 60 Шаг 4: Монтаж компьютера (44) на Крепление компьютера (5). 1. Возьмите компьютер (44) и вставьте соединительный кабель (30) с обратной стороны компьютера (44). Вставьте соединительный кабель пульса 3 (45) в соответствующее гнездо на компьютере (44), приложите компьютер (44) на крепление компьютера, находящееся сверху...
- Page 61 Шаг 6: Монтаж поручень (3) на салазки седла (2). 1. Вставьте поручень (3) на салазки седла (2) таким образом, чтобы отверстия располагались друг над другом. Вставьте болты M8x45 (10) в отверстия и крепко прикрутите рукоятки (3) на салазки седла (2) с лодкладная шайба 8//16 (15) и колпачковая гайка (11). 2.
- Page 62 Обороты/минута и показатель в ваттах отступени 1 до ступени 32 для RS 3 № заказа 1826 Level 20RPM 30RPM 40RPM 50RPM 60RPM 70RPM 80RPM 90RPM 100RPM WATT WATT WATT WATT WATT WATT WATT WATT WATT Замечание: 1. Показатель мощьности в ваттах расчитывается из количества оборотов оси кривошипа в минуту (UPM) и тормозного момента (Nm).
- Page 63 Иструкция к компьютеру ИНДИКАЦИЯ PROGRAMM/ПРОГРАММА : Индикация встроенных программы от 1-20 (программы 1–10 - фитнес- программы, программы 11-15 – программы задаваемые пользователем; программа 16 – программа ватт; программы 17-20 – пульсозависимые программы). LEVEL/СТЕПЕНЬ НАГРУЗКИ: Индикация выбранной степени нагрузки от 1–24. Чем выше степень нагрузки, тем...
- Page 64 LEVEL/НАГРУЗКА : действующую и последующие позиции времени. Высота колонок При помощи клавиш + / - возможно установление оптимальной указывает величину нагрузки, но не профиль дороги. Прохождение нагрузки во всех программах. Изменение видно по высоте балок и программы показываются на дисплее графически. Каждая программа по...
- Page 65 Программа Manuell/Ручная : в комплекте нет передающего устройства. Имея стандартный грудной Эта программа соответствует функциям нормального велотренажера. передатчик вы можете посылаемые им импульсы видеть на вашем Показатели времени, скорости/об/мин, дистанции, ватт/килоджоули компьютерном дисплее. и текущего показателя пульса непрерывно показываются в Это...
- Page 66 Чистка, техническое обслуживание и хранение Исправление неполадок: Если проблема не может быть решена с помощью нижестоящих тренажера указаний, пожалуйста, обратитесь в центр, где вы купили тренажер. 1. Чистка Для чистки используйте чистую влажную салфетку. Внима- Проблема Возможная Решение ние: Никогда не используйте для чистки бензин, разбавитель причина...
- Page 67 Область обучения в мм Бесплатный поверхность в мм (Для устройства и пользователя) (Площадь Обучение и зоны безопасности (вращающиеся 60см)) Упражнения для разминки перед тренировкой Начните разминку с ходьбы на месте в течение 3 минут. После этого выполните следующие упражнения, которые помогут вам оптимально подготовиться...
- Page 68 ИНСТРУКЦИЯ ПО ТРЕНИРОВКЕ Вы должны учитывать следующие факторы, чтобы определить Мотивация верные параметры тренировок для достижения ощутимых физических Ключевым моментом успеха программы являются регулярные результатов и пользы для здоровья. тренировки. Вам следует установить конкретное время и место на каждый день для тренировок и внутренне подготовить себя к ним. Интенсивность...
Need help?
Do you have a question about the RS 3 and is the answer not in the manual?
Questions and answers