Chapters
Table of Contents

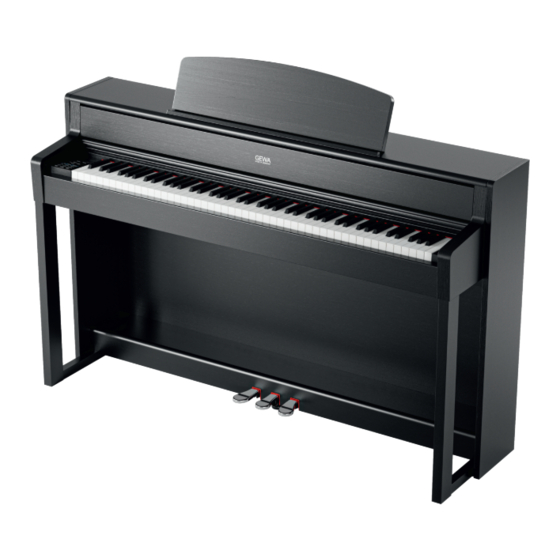
Related Manuals for Gewa UP395


Summary of Contents for Gewa UP395
- Page 1 QUICK START GUIDE GEWA UP395 Die vollständige Bedienungsanleitung für ihr Modell finden sie unter: Please follow the download link to the complete user’s manual: gewakeys.com/service/downloads...
- Page 2 Manufacturer: GEWA music GmbH Oelsnitzer Str. 58 08626 Adorf GERMANY gewamusic.com Version 1.0 Stand 13.09.2023...
-
Page 5: Table Of Contents
CE-Zeichen ..............................9 Entsorgung ..............................9 LIEFERUMFANG ..............................10 MONTAGEANLEITUNG UP395 ......................... 11 ERSTE SCHRITTE UP395 ..........................13 Die Bedienelemente Ihres Digitalpianos ....................13 Bedientasten und Pedale ........................... 14 Spieltisch / Anschlüsse / Unterseite ......................16 Bluetooth Audio / MIDI ..........................18 GEWA PIANO REMOTE APP .......................... -
Page 6: Sicherheitsinformationen
SICHERHEITSINFORMATIONEN ZEICHENERKLÄRUNG Sehr geehrter Kunde, vielen Dank, dass Sie sich für ein Digital Piano von GEWA music entschieden haben! Sie haben ein hochwertiges Digitalpiano ausgewählt, das Ihnen ein beeindruckendes Klangerlebnis und viel Freude bereiten wird. Zusätzliche Funktionen erweitern die Möglichkeiten Ihres Digitalpianos weit über das Klavierspiel hinaus. -
Page 7: Bestimmungsgemäss Verwenden
SICHERHEITSINFORMATIONEN BESTIMMUNGSGEMÄSS VERWENDEN BESTIMMUNGSGEMÄSS VERWENDEN Das Digitalpiano ist zur Verwendung in trockenen Räumen vorgesehen. • Es können Geräte zur Audiowiedergabe (als Eingang oder Ausgang) oder Datenkommunikation angeschlossen werden. jeweiligen technischen Spezifikationen müssen aber eingehalten werden (siehe dazu den Abschnitt „Technische Daten“). -
Page 8: Vorsichtsmassnahmen
• Schalten Sie das Digitalpiano aus oder ziehen Sie den Netzstecker, wenn: - es während der Verwendung des Digitalpianos zu einem plötzlichen Tonausfall kommt, - das Digitalpiano einen ungewöhnlichen Geruch oder Rauch erzeugt. • Lassen Sie das Digitalpiano dann unbedingt von Ihrem GEWA-Kundendienst überprüfen. WARNUNG Brandschutz •... -
Page 9: Ce-Zeichen
Die Konformität mit den o. a. Richtlinien wird durch das CE-Zeichen auf dem Gerät bestätigt. Die Konformitätserklärung kann unter folgender Adresse eingesehen werden: GEWA music GmbH, Oelsnitzer Str. 58, 08626 Adorf, GERMANY ENTSORGUNG Zum Entsorgen bringen Sie das Altgerät bitte zur Sammelstelle Ihres kommunalen Entsorgungsträgers (z. -
Page 10: Lieferumfang
LIEFERUMFANG UP395 LIEFERUMFANG UP395 Kontrollieren Sie den Verpackungsinhalt auf Vollständigkeit, bevor Sie mit der Montage beginnen. Pos. Bezeichnung Menge Spieltisch mit Klaviatur Notenablage Tastaturabdeckung Rückwand Pedalboard Seitenteil links Seitenteil rechts Anschlusskabel Stromversorgung Kreuzschlitzschraube M6 x 16 Kreuzschlitzschraube M6 x 30 Kreuzschlitz-Holzschraube 3,5 x 30 Kopfhörerbügel... -
Page 11: Montageanleitung Up395
MONTAGEANLEITUNG UP395 MONTAGEANLEITUNG UP395 In diesem Abschnitt erfahren Sie, wie Sie Ihr Digitalpiano richtig aufstellen. Sie benötigen für die Montage: • Einen Kreuzschlitzschraubendreher Größe 2 • Eine weitere Person Ziehen Sie die Kreuzschlitzschrauben erst fest an, wenn alle Teile Ihres Digitalpianos HINWEIS vormontiert und ausgerichtet sind. - Page 12 MONTAGEANLEITUNG UP395 8. Stecken Sie das Pedalkabel seitenrichtig (ohne Verwendung von großer Kraft) in die Pedalkabelbuchse an der Unterseite des Spieltischs (1) und stecken Sie das Stromkabel (6) an der Unterseite des Pianos an die Buchse Power (ohne Bild). Pedalkabelbuchse Pedalkabel 9.
-
Page 13: Erste Schritte Up395
Öffnen Sie die Klaviaturabdeckung wie auf der Skizze gezeigt. Gehen Sie zum Schließen in umgekehrter Reihenfolge vor. ERSTE SCHRITTE UP395 In diesem Abschnitt machen wir Sie mit den Bedienelementen Ihres Digitalpianos vertraut. DIE BEDIENELEMENTE IHRES DIGITALPIANOS Ihr GEWA Digitalpiano verfügt über folgende Bedienelemente: Lautsprecher Bedienpanel Indikator LED Klaviatur... -
Page 14: Bedientasten Und Pedale
ERSTE SCHRITTE BEDIENTASTEN UND PEDALE BEDIENTASTEN UND PEDALE Ansicht A 1. Display Zeigt Ihnen Informationen zu den getätigten Einstellungen. 2. Softbuttons Damit können Sie im Display zugewiesene Funktionen aufrufen. 3. Cursortasten Hier navigieren Sie in den jeweiligen Funktionen und können Einstellungen vornehmen. Menü-Auswahl 4. - Page 15 Töne frei schwingen, sodass deren Resonanzfrequenzen angeregt werden. Dies führt zu einem volleren Klang. Mit dem Pedal des Gewa Pianos ist auch ein Halbpedal- spiel möglich. Dabei werden die simulierten Dämpfer nur leicht angehoben und die gespielten Töne klingen schneller ab, als bei ganz durchgedrücktem Pedal.
-
Page 16: Spieltisch / Anschlüsse / Unterseite
ERSTE SCHRITTE SPIELTISCH / ANSCHLÜSSE / UNTERSEITE SPIELTISCH / ANSCHLÜSSE / UNTERSEITE Übersicht Laut- Laut- sprecher sprecher Ansicht A Ansicht B A1 USB IN/OUT Schließen Sie hier bei Bedarf einen USB-Stick oder ein anderes USB-Gerät an. A2 Kopfhörerausgänge Sie können hier bis zu zwei Kopfhörer anschließen. B Pedalkabelbuchse Hier wird das Pedalkabel angeschlossen. - Page 17 BEDIENEN SPIELTISCH / ANSCHLÜSSE / UNTERSEITE Ansicht C An diese 6,3 mm Klinkenbuchse können Sie ein handelsübliches SUSTAIN Sustain Pedal anschließen, wenn Sie Ihr Digitalpiano ohne den mitgelieferten Fuß nutzen möchten. Dieser Anschluss ist in die Stereokanäle L(inks) und R(echts) LINE OUT L/R unterteilt.
-
Page 18: Bluetooth Audio / Midi
Ihr Digitalpiano verfügt über Bluetooth MIDI Funktionalitäten. Bluetooth MIDI Über die Bluetooth MIDI Funktion können Sie Ihr GEWA Digitalpiano mit verschiedenen Lern-Apps oder DAWs (Digital Audio Workstations, z.B. Logic Pro oder Studio One) verbinden. Die Bluetooth MIDI Schnittstelle ist ständig aktiv und Sie können sich jederzeit mit Ihrem Digitalpiano verbinden. -
Page 19: Technical Data Up395
Anschlagdynamik 6 Einstellungen (Soft 1, Soft 2, Medium, Hard 1, Hard 2 und Constant) Pedale Dämpfer-, Sostenuto- und Piano-Pedal Soundquelle GEWA music Samples mit 4-Fach Stereo Layer Polyphonie Anzahl integrierter Klänge 2x 30 Watt Verstärker Nennleistung RMS 2x 30 Watt... - Page 21 Preauctions ..............................24 CE-Mark ..............................25 Disposal ..............................25 DELIVERY UP395 ............................... 26 ASSEMBLY INSTRUCTIONS UP395 ......................... 27 GETTING STARTED UP395 ..........................29 The controls of your digital piano ....................... 29 Control buttons and pedals ........................30 Keyboard / Connections / Bottom side ...................... 32 Bluetooth Audio / MIDI ..........................
-
Page 22: Safety Information
SAFETY INFORMATION Dear Customer, Thank you for choosing a digital piano from GEWA music! You have chosen a high-quality digital piano that will give you an impressive sound experience and lots of fun. Additional functions extend the capabilities of your digital piano far beyond piano playing. -
Page 23: Intended Use
SAFETY INSTRUCTIONS INTENDED USE INTENDED USE The digital piano is intended for use in dry rooms. • Devices for audio playback (as input or output) or for data communication can be connected. However, the respective technical specifications must be complied with (see the section „Technical data“). -
Page 24: Preauctions
- There is a sudden loss of sound while using the digital piano - The digital piano generates an unusual smell or smoke • Be sure to have the digital piano checked by your GEWA service representative WARNING Protection against fire •... -
Page 25: Ce-Mark
The conformity with the regulations listed above is confirmed by the CE sign on the device. The declaration of conformity can be viewed at the following address: GEWA music GmbH, Oelsnitzer Str. 58, 08626 Adorf, GERMANY DISPOSAL To dispose of the old device, please take it to your local waste management authority (e.g.disposal company or recycling centre). -
Page 26: Delivery Up395
DELIVERY UP395 DELIVERY UP395 Check the content of the package for completeness before starting with the assembly. Pos. Description Pcs. Keyboard Music desk Rollable keyboard lid Rear panel Pedal board Left side panel Right side panel Power cable Phillips screw M6 x 16 Phillips screw M6 x 30 Phillips wood screw 3.5 x 30... -
Page 27: Assembly Instructions Up395
Do not firmly tighten the recessed head screws until all parts of your digital piano are NOTE aligned. Make sure you assemble your digital piano on level ground. Now lets start assembling your GEWA digital piano. 1. Unfold the pedal cable (not shown) and screw the adjustment screw (10) into the pedal board (3). - Page 28 ASSEMBLY INSTRUCTIONS UP395 8. Insert the pedal cable true to side into the pedal cable socket on the underside of the keyboard (1). It should slide easily into the socket. Then plug the power cable (6) into the power socket which is also located on the underside (not shown).
-
Page 29: Getting Started Up395
To open the lid please follow below drawing. In the opposite way the lid can then be closed again. GETTING STARTED UP395 Now let‘s have a look on to the controls of your GEWA digital piano. THE CONTROLS OF YOUR DIGITAL PIANO Your GEWA digital piano features the following controls:... -
Page 30: Control Buttons And Pedals
GETTING STARTED CONTROL BUTTONS AND PEDALS CONTROL BUTTONS AND PEDALS Diagram A 1. Display Shows information about the chosen settings. 2. Softbuttons This allows you to call up functions assigned in the display. 3. Cursor keys Navigate through the functions here and adjust settings. Menu - Selection 4. - Page 31 Furthermore, all the other strings can freely resonate, so their frequencies contribute to a richer sound. All this is simulated by the pedal of your Gewa piano. It is also possible to play with half pedal, which means the simulated dampers are only lifted slightly, so that the sustaining notes are decaying faster than with the pedal fully depressed.
-
Page 32: Keyboard / Connections / Bottom Side
GETTING STARTED KEYBOARD / CONNECTIONS / BOTTOM SIDE KEYBOARD / CONNECTIONS / BOTTOM SIDE Overview SPEAKER SPEAKER Diagram A Diagram B A1 USB IN/OUT Connect a USB stick or another USB device here. A2 Headphone sockets Connect one or two sets of headphones here. B Pedal cable socket Connect the pedal cable here. - Page 33 GETTING STARTED KEYBOARD / CONNECTIONS / BOTTOM SIDE Ansicht C You can connect a standard sustain pedal to this 6.3mm jack socket, SUSTAIN if you want to use our digital piano with an external stand. This connection is split into the stereo channels L(eft) and R(ight) LINE OUT L/R Using the 6.3mm jack cables, you can connect these outputs to a receiver, e.g.
-
Page 34: Bluetooth Audio / Midi
Bluetooth MIDI interface is always active, and you can connect to your digital piano anytime. In the search of your mobile device the MIDI interface is displayed as: GEWA Mid. Follow the instructions of your MIDI software to connect the piano. -
Page 35: Technical Data Up395
Touch sensitivity 6 levels (Soft 1, Soft 2, Medium, Hard1, Hard2 and Constant) Pedals Damper-, Sostenuto- and Piano Pedal Sound source GEWA music samples with 4 stereo layers Polyphony Amount of internal sounds 2x 30 Watts Amplifier output RMS 2x 30 Watts... - Page 37 I controlli di questo piano digitale ......................45 Pulsanti e pedali di controllo ........................46 Tastiera / Connessioni / Pannello inferiore ....................48 Audio Bluetooth / MIDI ..........................50 APP GEWA PIANO REMOTE ..........................50 DATI TECNICI MODELLO UP355 ........................51...
-
Page 38: Informazioni Di Sicurezza
INFORMAZIONI DI SICUREZZA SIMBOLI Gentile Cliente, Grazie per aver scelto un pianoforte digitale GEWA music! Hai scelto un pianoforte digitale di alta qualità che ti darà una memorabile esperienza di suono e tanto divertimento. Funzioni aggiuntive portano le possibilità del tuo pianoforte digitale ben oltre quella di suonarlo. -
Page 39: Utilizzo Corretto
• Utilizzo all’aperto o in caso di pioggia. Utilizzo in ambienti umidi • Utilizzare alimentatori non GEWA, o collegare l’alimentazione a prese con un voltaggio errato o montate male • Suonare il piano in prossimità di apparecchiature elettriche o elettroniche come stereo, televisori, radio o telefoni cellulari. -
Page 40: Precauzioni
• Spegnere e scollegare immediatamente il piano se: - Si verifica un improvviso abbassamento di volume durante l’utilizzo . - Il piano emette fumo o odore di bruciato. • In questi casi è necessario rivolgersi ad un rivenditore o centro autorizzato GEWA. ATTENZIONE Prevenzione incendio •... -
Page 41: Marcatura Ce
• I temporali posso produrre scariche elettriche che possono danneggiare il piano. • Durante i temporali, o nei periodi di inutilizzo prolungato, suggeriamo di scollegare il piano dall’impianto elettrico. MARCHIO CE ll piano GEWA è conforme alle direttive CE: Direttiva 2014/53/EU EN55020:2007+A11:2011 EN55024:2010 EN55032:2012... -
Page 42: Componenti Fornite Modello Up355
PARTI FORNITE CON IL PIANOFORTE UP395 PARTI FORNITE CON IL PIANOFORTE UP395 Controllate che il contenuto dell’imballaggio sia completo prima di iniziare il montaggio. Pos. Description Pcs. Console Leggio Copritastiera Pannello posteriore Supporto pedaliera Pannello laterale sinistro Pannello laterale destro... -
Page 43: Istruzioni Di Montaggio Modello Up355
ISTRUZIONI PER IL MONTAGGIO UP395 ISTRUZIONI PER IL MONTAGGIO UP395 In questa sezione vi mostreremo come è facile montare un Pianoforte GEWA. Per il montaggio è necessario: • Cacciavite a stella PH2 • Persona di aiuto Non stringere completamente le viti finchè tutte le parti del pianoforte non saranno allineate. - Page 44 ISTRUZIONI PER IL MONTAGGIO UP395 8. Inserire il cavo della pedaliera in modo corretto (deve entrare delicatamente senza forzature) nella presa posizionata sulla parte inferiore della console (1) e inserite l’alimentatore (6) nella presa per l’alimentazione nella parte posteriore del Piano (senza immagine).
-
Page 45: Per Iniziare
Per aprirlo seguire le indicazioni del disegno di seguito. In senso inverso il copritastiera può venir chiuso di nuovo. PER INIZIARE CON L‘UP395 Ora diamo un‘occhiata ai comandi del pianoforte digitale GEWA. I COMANDI DEL PIANOFORTE DIGITALE Il pianoforte digitale GEWA dispone dei seguenti comandi:... -
Page 46: Pulsanti E Pedali Di Controllo
PER INIZIARE PULSANTI E PEDALI DI CONTROLLO TASTI DI CONTROLLO E PEDALI Diagramma A 1. Display Mostra le informazioni sulle funzioni selezionate. 2. Pulsanti morbidi Permettono di richiamare le funzioni assegnate nel Display. 3. Tasti cursore Per navigare tra le funzioni e regolare i parametri. Menu - Selezione 4. - Page 47 Questo effetto viene simulato dal pedale del pianoforte Gewa. È possibile anche suonare con mezzo pedale, il che significa che gli smorzatori simulati risultano sollevati solo leggermente, in modo che le note mantenute decadano più...
-
Page 48: Tastiera / Connessioni / Pannello Inferiore
PER INIZIARE TASTIERA / CONNESSIONI / PANNELLO INFERIORE TASTIERA / CONNESSIONI / PANNELLO INFERIORE Panoramica SPEAKER SPEAKER Diagramma A Diagramma B A1 USB IN/OUT Per connettere una chiavetta USB o un altro dispositivo USB. A2 Presa cuffie Per connettere uno o due cuffie. B Presa cavo pedaliera Per connettere il cavo della pedaliera. - Page 49 PER INIZIARE TASTIERA / CONNESSIONI / PANNELLO INFERIORE Diagramma C È possibile collegare un pedale Sustain standard a questa presa jack SUSTAIN da 6,3 mm. Questa connessione è suddivisa nei canali stereo L(eft) e R(ight). LINE OUT L/R Utilizzando i cavi jack da 6,3 mm, è possibile collegare queste uscite a un ricevitore, ad es.
-
Page 50: Audio Bluetooth / Midi
Il pianoforte digitale dispone di funzionalità Bluetooth Audio e MIDI. Bluetooth Midi Tramite la funzione Bluetooth MIDI, puoi collegare il pianoforte digitale GEWA con varie app di apprendimento o DAW (Digital Audio Workstation, ad esempio Logic Pro o Studio One). L‘interfaccia Bluetooth MIDI è sempre attiva e permette di connettersi al pianoforte digitale in qualsiasi momento. -
Page 51: Dati Tecnici Modello Up355
Anschlagdynamik 6 Einstellungen (Soft 1, Soft 2, Medium, Hard 1, Hard 2 und Constant) Pedale Dämpfer-, Sostenuto- und Piano-Pedal Soundquelle GEWA music Samples mit 4-Fach Stereo Layer Polyphonie Anzahl integrierter Klänge 2x 30 Watt Verstärker Nennleistung RMS 2x 30 Watt... - Page 53 Eléments de commande de votre piano numérique .................. 61 Touches de commande et pédalier ......................62 Connectiques (côté arrière de la console) ....................64 Bluetooth Audio / MIDI ..........................66 APPLICATION GEWA PIANO REMOTE ......................66 CARACTERISTIQUES TECHNIQUES UP355 ....................67...
-
Page 54: Informations De Sécurité
EXPLICATIONS DES SYMBOLES Cher client, Merci d’avoir choisi notre piano numérique GEWA ! Vous avez opté pour un piano numérique de haute qualité, qui vous procurera un son et une expérience de jeu très impressionnants. Les fonctions supplémentaires élargissent le champ des possibilités de votre piano numérique, bien au-delà... -
Page 55: Utilisation Conforme Aux Consignes
INFORMATIONS DE SÉCURITÉ UTILISATION CONFORME AUX CONSIGNES UTILISATION DE VOTRE PIANO NUMÉRIQUE CONFORME AUX CONSIGNES • Garder votre piano numérique dans un environnement sec. Il peut être raccordé pour une lecture audio (en tant qu’entrée ou sortie) ou pour la communication de données. Il faut respecter les spécifications techniques correspondantes (voir la section «... -
Page 56: Mesures De Sécurité
• En cas de contact accidentel avec un liquide, débrancher immédiatement votre piano numérique. Faire rapidement examiner votre piano numérique par le service clients de GEWA. AVERTISSEMENt En cas d’événements inhabituels • Eteindre ou débrancher le piano numérique dans les cas suivants: - le piano numérique a une panne subite de son durant l’utilisation,... -
Page 57: Signes Ce
• Vérifier l‘alimentation électrique régulièrement et retirer toute poussière ou salissure sur l‘appareil. ATTENTION Dommages au piano numérique GEWA causés par des orages • Les orages peuvent provoquer des surtensions électriques susceptibles d’endommager les appareils électriques. • Retirer la prise mâle de la prise femelle en cas d’orage ou d’absence prolongée d’utilisation. -
Page 58: Eléments Fournis
RÉCEPTION DE VOTRE UP395 RÉCEPTION DE VOTRE UP395 Vérifiez que le contenu de l‘emballage est complet avant de débuter l‘assemblage. Pos. Description Quantité Console Porte-partition Couvercle de clavier enroulable Panneau arrière Pédalier Panneau gauche Panneau droit câble d’alimentation Vis Philips M6 x 16 Vis Philips M6 x 30 Vis à... - Page 59 Ne serrez pas complètement les vis tant que toutes les parties de votre piano numérique ne REMARQUE sont pas ajustées. Assemblez votre piano numérique sur un sol plat. A présent, commençons l’assemblage du piano numérique GEWA. 1. Déroulez le câble pédale (non illustré) et vissez la vis de support (10) dans le pédalier (3).
-
Page 60: Instructions De Montage Up355
INSTRUCTIONS DE MONTAGE UP395 8. Branchez, sans forcer, le câble du pédalier dans la prise correspondante située dans la partie inférieure de la console (1). Puis branchez le câble d’alimentation (6) dans la prise de courant, qui se trouve également dans la partie inférieure (non illustré). -
Page 61: Démarrage Up355
Ouvrir le couvre clavier comme indiqué sur le dessin. Procéder à l‘inverse pour le fermer. DÉMARRAGE UP395 Dans cette section, nous vous familiarisons avec les commandes de votre piano numérique. COMMANDES DE VOTRE PIANO NUMERIQUE Votre piano numérique GEWA dispose des éléments suivants : Haut-parleurs Tableau de Voyant LED Clavier commande Vue A Pédalier... -
Page 62: Touches De Commande Et Pédalier
DÉMARRAGE TOUCHES DE COMMANDE ET PÉDALIER TOUCHES DE COMMANDE ET PEDALIER Vue A 1. Affichage Indique les informations sur les paramètres. 2. Boutons soft Accéder à des fonctions définies sur l‘écran. 3. Touches de déplacement Parcourir les fonctions et régler les paramètres. Sélection de menu 4. - Page 63 (résonance par sympathie). Cela conduit à un son plus complet. Avec la pédale des pianos Gewa, un jeu à demi-pédale est également possible. Les étouffoirs simulés ne sont que légèrement relevés et la résonance des notes jouées s’éteint plus rapidement qu’avec une pédale complètement...
-
Page 64: Connectiques (Côté Arrière De La Console)
DÉMARRAGE CONNECTIQUES (CÔTÉ ARRIÈRE DE LA CONSOLE) CONNECTIQUE (COTE ARRIERE DE LA CONSOLE) Vue générale Haut- Haut- parleur parleur Vue A Vue B A1 USB IN/OUT Connecter une clé USB ou un autre périphérique USB si nécessaire. A2 Sortie casque Connecter jusqu’à... - Page 65 DÉMARRAGE CONNECTIQUES (CÔTÉ ARRIÈRE DE LA CONSOLE) Vue C Prise jack 6,3 mm pour connecter n’importe quelle pédale de sustain SUSTAIN standard, si vous souhaitez utiliser votre piano numérique avec un autre support. Ce connecteur est divisé en deux canaux stéréo L (gauche) et R LINE OUT L/R (droit).
-
Page 66: Bluetooth Audio / Midi
Logic Pro ou Studio One). L‘interface Bluetooth MIDI est toujours activée et vous pouvez à tout moment connecter votre piano numérique. Lorsque vous recherchez l‘interface MIDI sur votre appareil portable, elle s‘affiche sous GEWA Mid. Suivez les instructions de votre logiciel MIDI pour connecter le piano. -
Page 67: Caracteristiques Techniques Up355
Sensibilité des touches 6 niveaux (Soft 1, Soft 2, Medium, Hard1, Hard2 and Constant) Pédalier Forte, Sostenuto et douce Source audio Echantillons GEWA music 4 couches stéréo Polyphonie Quantité de sons internes 2x 30 Watt Sortie amplificateur RMS 2x 30 Watt 2x 15 Watt Système haut-parleurs 3 voies... - Page 69 PRVNÍ KROKY UP355 ............................77 Ovládací prvky Vašeho D-piana ........................ 77 Ovládací tlačítka a pedály .......................... 78 Hrací deska / Vstupy / Dolní straná nástroje ....................80 Bluetooth Audio / MIDI ..........................82 GEWA PIANO REMOTE APP ..........................82 TECHNICKÁ DATA UP355 ..........................83...
-
Page 70: Informace
INFORMACE VYSVĚTLENÍ SYMBOLŮ Vážený zákazníku, velice Vám děkujeme, že jste se rozhodl pro koupi GEWA digitálního piána společnosti GEWA music GmbH! Zvolil jste vysoce kvalitní nástroj, který Vám jistě přinese spoustu skvělých zážitků a příjemného hraní. Vaše bezpečnost je pro nás důležitá. -
Page 71: Užívání Dle Určení
INFORMACE BESTIMMUNGSGEMÄSS VERWENDEN POUŽITÍ NÁSTROJE Použití digitálního piana je zásadně určeno pro hru v suchém prostředí. • Lze zapojit další zařízení (vstup / výstup), která dokáží komunikovat s D-pianem. Technické specifikace musí být zachovány dle návodu (podívej v příručce „Technická data“). •... -
Page 72: Opatření
• Adaptér nikdy nezasouvejte/nevytahujte mokrou rukou a nikdy jej netahejte ze sítě za kabel • V případě, že se nedopatřením do digitálního piana dostane voda, okamžitě přístroj odpojte z el. zásuvky a nechte piano následně překontrolovat Vašim prodejcem GEWA music GmbH VAROVÁNÍ... -
Page 73: Ce-Značení
EN300328:V2.1.1 Soulad se směrnicí zobrazen/potvrzen pomocí CE-značení na přístroji. Prohlášení o souladu naleznete na následující adrese: GEWA music GmbH, Werkstraße 1, 08626 Adorf, GERMANY LIKVIDACE Vysloužilé digitální piano odvezte na místo sběrného odpadu (např.sběr elektroodpadu). Vedle vyznačené označení znamená, že se tento přístroj nesmí likvidovat s běžným domácím odpadem. -
Page 74: Obsah Balení
OBSAH BALENÍ UP395 OBSAH BALENÍ UP355 Než začnete se samotnou montáží, důkladně dle přiloženého návodu zkontrolujte, zda balení obsahuje veškeré tyto součásti. Pos. Bezeichnung Menge Spieltisch mit Klaviatur Notenablage Tastaturabdeckung Rückwand Pedalboard Seitenteil links Seitenteil rechts Anschlusskabel Stromversorgung Kreuzschlitzschraube M6 x 16... -
Page 75: Návod Na Montáž Up355
NÁVOD NA MONTÁŽ UP395 MONTAGEANLEITUNG UP395 In diesem Abschnitt erfahren Sie, wie Sie Ihr Digitalpiano richtig aufstellen. Sie benötigen für die Montage: • Einen Kreuzschlitzschraubendreher Größe 2 • Eine weitere Person Ziehen Sie die Kreuzschlitzschrauben erst fest an, wenn alle Teile Ihres Digitalpianos HINWEIS vormontiert und ausgerichtet sind. - Page 76 MONTAGEANLEITUNG UP395 8. Stecken Sie das Pedalkabel seitenrichtig (ohne Verwendung von großer Kraft) in die Pedalkabelbuchse an der Unterseite des Spieltischs (1) und stecken Sie das Stromkabel (6) an der Unterseite des Pianos an die Buchse Power (ohne Bild). Pedalkabelbuchse Pedalkabel 9.
-
Page 77: První Kroky Up355
Para abrir la tapa, siga el siguiente dibujo. A la inversa, la tapa puede volver a cerrarse PUESTA EN MARCHA UP395 Echemos ahora un vistazo a los controles de su piano digital GEWA LOS CONTROLES DE SU PIANO DIGITAL Su piano digital GEWA dispone de los siguientes controles:... - Page 78 PRVNÍ KROKY HRACÍ DESKA / VSTUPY / DOLNÍ STRANÁ NÁSTROJE TECLADO / CONEXIONES / PARTE INFERIOR Diagrama A 1. Mostrar Muestra información sobre los ajustes elegidos. 2. Botones de función Permite llamar las funciones asignadas en el pantalla. 3. Teclas de cursor Navegue aquí...
-
Page 79: Ovládací Tlačítka A Pedály
Pedal de piano (lado izquierdo) Al accionar el pedal de piano o de una cuerda, el GEWA Piano simula un ligero desplazamiento del teclado hacia la derecha. La alteración de la línea de golpeo de los martillos del piano imaginario da como resultado un tono de color diferente y un volumen ligeramente más suave. -
Page 80: Hrací Deska / Vstupy / Dolní Straná Nástroje
PRVNÍ KROKY HRACÍ DESKA / VSTUPY / DOLNÍ STRANÁ NÁSTROJE TECLADO / CONEXIONES / PARTE INFERIOR Visión general ALTAVOZ ALTAVOZ Diagrama A Diagrama B A1 ENTRADA/SALIDA USB Conecta aquí una memoria USB u otro dispositivo USB. A2 Tomas de auriculares Conecta aquí... - Page 81 PRVNÍ KROKY HRACÍ DESKA / VSTUPY / DOLNÍ STRANÁ NÁSTROJE Diagrama C Puede conectar un pedal de sustain estándar a esta toma jack de SUSTAIN 6,3 mm, si desea utilizar el piano digital con un soporte externo. Esta conexión se divide en los canales estéreo L(eft) y R(ight). LINE OUT L/R Utilizando los cables jack de 6,3 mm, puede conectar estas salidas a un receptor, por ejemplo, un amplificador o una grabadora.
-
Page 82: Bluetooth Audio / Midi
Su piano digital dispone de funcionalidad Bluetooth MIDI y Audio. Bluetooth MIDI A través de la función Bluetooth MIDI, puede conectar su piano digital GEWA con varias aplicaciones de aprendizaje o DAWs (Digital Audio Workstations, por ejemplo Logic Pro o Studio One). La interfaz MIDI Bluetooth está siempre activa, y puede conectarse a su piano digital en cualquier momento. -
Page 83: Technická Data Up355
Ivory Touch, Let-Off Citlivos 6 levels (Soft 1, Soft 2, Medium, Hard1, Hard2 and Constant) Pedály Mute, Sostenuto, Piano pedál Zdroj zvuku GEWA music samples with 4 stereo layers Polyfonie Interní předvolby 2x 30 Watts Výstup RMS 2x 30 Watts... - Page 85 PUESTA EN MARCHA UP355 .......................... 93 Los mandos del piano digital ........................93 Botones de control y pedales ........................94 Teclado / Conexiones / Parte inferior ......................96 Bluetooth Audio / MIDI ..........................98 APLICACIÓN GEWA PIANO REMOTE ......................98 DATOS TÉCNICOS UP355 ..........................99...
-
Page 86: Información De Seguridad
INFORMACIÓN DE SEGURIDAD CLAVE Estimado cliente, Le agradecemos que se haya decidido por un piano digital de GEWA music. Ha elegido un piano digital de alta calidad que le proporcionará un sonido impresionante y mucha diversión. Las funciones adicionales amplían las posibilidades de su de su piano digital. -
Page 87: Uso Previsto
INFORMACIÓN DE SEGURIDAD USO PREVISTO USO PREVISTO El piano digital está diseñado para su uso en espacios secos. • Se pueden conectar dispositivos para la reproducción de audio (como entrada o salida) o para la comunicación de datos. No obstante, deben cumplirse las especificaciones técnicas correspondientes (véase el apartado „Datos técnicos“). -
Page 88: Precauciones
Nunca tire del cable; puede dañarlo. • Si accidentalmente entra líquido en el piano digital, desenchúfelo inmediatamente. • A continuación, haga revisar el piano digital por el servicio técnico de GEWA. ADVERTENCIA Circunstancias inusuales • Apague el piano digital o desenchufe el cable de alimentación si: •... -
Page 89: Marca Ce
La conformidad con las normativas enumeradas anteriormente se confirma mediante el símbolo CE en el dispositivo. La declaración de conformidad puede consultarse en la siguiente dirección: GEWA music GmbH, Oelsnitzer Str. 58, 08626 Adorf, ALEMANIA DESECHO Para deshacerse del aparato antiguo, llévelo a su autoridad local de gestión de residuos (por ejemplo, una empresa de eliminación de residuos o un centro de reciclaje). -
Page 90: Entrega Up355
ENTREGA UP395 ENTREGA UP395 Compruebe que el contenido del paquete está completo antes de iniciar el montaje. Description Quantity Spieltisch mit Klaviatur Notenablage Tastaturabdeckung Rückwand Pedalboard Seitenteil links Seitenteil rechts Anschlusskabel Stromversorgung Kreuzschlitzschraube M6 x 16 Kreuzschlitzschraube M6 x 30 Kreuzschlitz-Holzschraube 3,5 x 30 Kopfhörerbügel... -
Page 91: Instrucciones De Montaje Up355
INSTRUCCIONES DE MONTAJE UP395 MONTAGEANLEITUNG UP395 In diesem Abschnitt erfahren Sie, wie Sie Ihr Digitalpiano richtig aufstellen. Sie benötigen für die Montage: • Einen Kreuzschlitzschraubendreher Größe 2 • Eine weitere Person Ziehen Sie die Kreuzschlitzschrauben erst fest an, wenn alle Teile Ihres Digitalpianos HINWEIS vormontiert und ausgerichtet sind. - Page 92 INSTRUCCIONES DE MONTAJE UP395 8. Stecken Sie das Pedalkabel seitenrichtig (ohne Verwendung von großer Kraft) in die Pedalkabelbuchse an der Unterseite des Spieltischs (1) und stecken Sie das Stromkabel (6) an der Unterseite des Pianos an die Buchse Power (ohne Bild).
-
Page 93: Puesta En Marcha Up355
Para abrir la tapa, siga el siguiente dibujo. A la inversa, la tapa puede volver a cerrarse. PUESTA EN MARCHA UP355 Echemos ahora un vistazo a los controles de su piano digital GEWA LOS CONTROLES DE SU PIANO DIGITAL Su piano digital GEWA dispone de los siguientes controles:... -
Page 94: Botones De Control Y Pedales
PUESTA EN MARCHA BOTONES DE CONTROL Y PEDALES BOTONES DE CONTROL Y PEDALES Diagrama A 1. Mostrar Muestra información sobre los ajustes elegidos. 2. Botones de función Permite llamar las funciones asignadas en el pantalla. 3. Teclas de cursor Navegue aquí por las funciones y ajuste la configuración. Menú... - Page 95 Pedal de piano (lado izquierdo) Al accionar el pedal de piano o de una cuerda, el GEWA Piano simula un ligero desplazamiento del teclado hacia la derecha. La alteración de la línea de golpeo de los martillos del piano imaginario da como resultado un tono de color diferente y un volumen ligeramente más suave.
-
Page 96: Teclado / Conexiones / Parte Inferior
PUESTA EN MARCHA TECLADO / CONEXIONES / PARTE INFERIOR TECLADO / CONEXIONES / PARTE INFERIOR Visión general ALTAVOZ ALTAVOZ Diagrama A Diagrama B A1 ENTRADA/SALIDA USB Conecta aquí una memoria USB u otro dispositivo USB. A2 Tomas de auriculares Conecta aquí uno o dos juegos de auriculares. B Toma del cable del pedal Conecte aquí... - Page 97 PUESTA EN MARCHA TECLADO / CONEXIONES / PARTE INFERIOR Diagrama C Puede conectar un pedal de sustain estándar a esta toma jack de SUSTAIN 6,3 mm, si desea utilizar el piano digital con un soporte externo. Esta conexión se divide en los canales estéreo L(eft) y R(ight). LINE OUT L/R Utilizando los cables jack de 6,3 mm, puede conectar estas salidas a un receptor, por ejemplo, un amplificador o una grabadora.
-
Page 98: Bluetooth Audio / Midi
Su piano digital dispone de funcionalidad Bluetooth MIDI y Audio. Bluetooth MIDI A través de la función Bluetooth MIDI, puede conectar su piano digital GEWA con varias aplicaciones de aprendizaje o DAWs (Digital Audio Workstations, por ejemplo Logic Pro o Studio One). La interfaz MIDI Bluetooth está siempre activa, y puede conectarse a su piano digital en cualquier momento. -
Page 99: Datos Técnicos Up355
Anschlagdynamik 6 Einstellungen (Soft 1, Soft 2, Medium, Hard 1, Hard 2 und Constant) Pedale Dämpfer-, Sostenuto- und Piano-Pedal Soundquelle GEWA music Samples mit 4-Fach Stereo Layer Polyphonie Anzahl integrierter Klänge 2x 30 Watt Verstärker Nennleistung RMS 2x 30 Watt... - Page 100 Manufacturer: GEWA music GmbH Oelsnitzer Str. 58 08626 Adorf GERMANY gewamusic.com Version 1.0 Stand 13.09.2023 changes and errors excepted...
Need help?
Do you have a question about the UP395 and is the answer not in the manual?
Questions and answers