Table of Contents
Advertisement
Quick Links
Advertisement
Table of Contents

Related Manuals for Gewa UP400


Summary of Contents for Gewa UP400
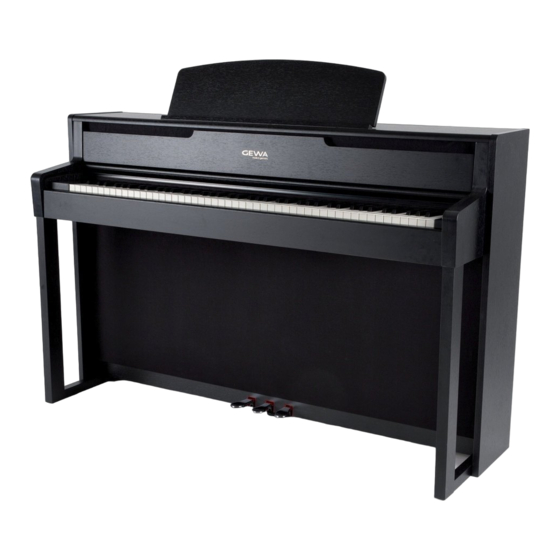
- Page 1 USER MANUAL GEWA Digital Piano UP400 Bedienungsanleitung | Owners manual | Mode d’emploi | Manual de instrucciones www.gewakeys.com Read these operating instructions before use and observe the safety information! Keep the instruction manual for future reference.
- Page 2 Manufacturer: GEWA music GmbH Werkstraße 1 08626 Adorf GERMANY www.gewamusic.com Version 1.0 Last update: 21.07.2020...
-
Page 3: Table Of Contents
CONTENTS SAFETY INFORMATION ......................... 4 Key ............................4 Intended use .......................... 5 Improper use ......................... 5 Precautions ..........................6 CE mark ..........................7 Disposal ..........................7 PARTS SUPPLIED WITH THE PIANO .................... 8 ASSEMBLY INSTRUCTIONS ......................9 GETTING STARTED ........................13 The controls of your digital piano .................. -
Page 4: Safety Information
SAFETY INFORMATION Dear Customer, Thank you for choosing a digital piano from GEWA music! You have chosen a high-quality digital piano that will give you an impressive sound experience and lots of fun. Additional functions extend the capabilities of your digital piano far beyond piano playing. -
Page 5: Intended Use
SAFETY INFORMATION INTENDED USE INTENDED USE The digital piano is intended for use in dry rooms. • Devices for audio playback (as input or output) or for data communication can be connected. However, the respective technical specifications must be complied with (see the section “Technical data“). • The electrical connection may only be made to correctly installed power supplies, fulfilling the respective regulations. The mains voltage on the identification plate must correspond to the mains voltage of the country of use. -
Page 6: Precautions
• Turn off the digital piano or unplug the power cable if: - There is a sudden loss of sound while using the digital piano - The digital piano generates an unusual smell or smoke • Be sure to have the digital piano checked by your GEWA service representative WARNING Protection against fire • Open flames such as candles or tealights can tip over and cause a fire... -
Page 7: Ce Mark
EN300328:V2.1.1 The conformity with the regulations listed above is confirmed by the CE sign on the device. The declaration of conformity can be viewed at the following address: GEWA music GmbH, Werkstraße 1, 08626 Adorf, GERMANY DISPOSAL To dispose of the old device, please take it to your local waste management authority (e.g. disposal company or recycling centre). -
Page 8: Parts Supplied With The Piano
ITEMS SUPPLIED PARTS SUPPLIED WITH THE PIANO Check the content of the package for completeness before starting with the assembly. -
Page 9: Assembly Instructions
Quick Start Guide not shown Cable clips ASSEMBLY INSTRUCTIONS In this section we will show you how to easily set up your GEWA digital piano. For the assembly you need: • size 2 Phillips screws • second assisting person Do not firmly tighten the recessed head screws until all parts of your digital piano are NOTE aligned. - Page 10 ASSEMBLY INSTRUCTIONS 3. Then attach the rear panel with phillips screws (9A and 9B) at the angle brackets of the side panels and the pedalboard/subwoofer housing. 4. Now place the keyboard (1) onto the base from above. The metal guides of the side panels have to slide into the respective groove and the counterpart.
- Page 11 ASSEMBLY INSTRUCTIONS 7. Attach the subwoofer cover (6). Guide it past the front strips (4 and 5). There are no screws provided for the cover. It is magnetic. 8. Now screw the headphone hanger onto the left underside of the keyboard by using a phillips screw (13).
- Page 12 ASSEMBLY INSTRUCTIONS OPENING THE KEYBOARD LID CAUTION Please make sure to always use both hands to open or close the lid. To open the lid please follow below drawing. In the opposite way the lid can then be closed again...
-
Page 13: Getting Started
GETTING STARTED FUNCTION KEYS GETTING STARTED Now let‘s have a look on to the controls of your GEWA digital piano THE CONTROLS OF YOUR DIGITAL PIANO Your GEWA digital piano features the following controls: Music desk Touch Panel Pedals View A... -
Page 14: Function Keys / Touch Display
GETTING STARTED FUNCTION KEYS FUNCTION KEYS / TOUCH DISPLAY View A Touch Display The touch display shows you information about the settings and is used to control the piano. Favorite sounds After switching on the piano there are 4 favorite sounds available on the home screen. -
Page 15: Pedals
Furthermore, all the other strings can freely resonate, so their frequencies contribute to a richer sound. All this is simulated by the pedal of your Gewa piano. It is also possible to play with half pedal, which means the simulated dampers are only lifted slightly, so that the sustaining notes are decaying faster than with the pedal fully depressed. - Page 16 GETTING STARTED KEYBOARD CONNECTIONS View A Connect a USB stick or another USB device USB IN/OUT here. Connect one or two sets of headphones here. Headphone sockets This port external sound source playback LINE IN (e.g. MP3 players) through the speaker system via a 3.5mm jack socket.
-
Page 17: Operating Use
OPERATING USE TOOLBAR OPERATING USE TOOLBAR At the bottom of the display in most menus you can see the toolbar, which gives you instant access to all important functions of the piano. Just tap the icon to enter the menu. The selected icon is highlighted in blue to indicate which page you are currently on. -
Page 18: Sounds / Sound Selection
OPERATING USE SOUNDS SOUNDS On the ”sounds“ operating page you have access to all sounds of the digital piano as well as effect settings and the combinations mode. The sounds are organized in different categories such as ”Piano“, ”E-Piano“, ”Strings“ and so on. SOUND SELECTION To select a sound, first select a category in the upper section using the arrow keys. In the bottom section you can see the corresponding sounds. -
Page 19: Effects
OPERATING USE EFFECTS EFFECTS The UP400 features two independent, programmable effect blocks with reverb and modulation effects, as well as global equalization (EQ). At the top of the sound selection page, there are three buttons that show the active effect settings. -
Page 20: Reverb
OPERATING USE EFFECTS REVERB 5.4.2 The reverb effect simulates the room sound in different environments. Use the ”Type“ parameter to select the type of the simulated room. sounds like a furnished room Room 1 Room 2 simulates a slightly larger room sounds like a stage Stage sounds like a small concert hall... -
Page 21: Sound Adjustment (Eq)
OPERATING USE SOUND ADJUSTMENT (EQ) SOUND ADJUSTMENT (EQ) The ”EQ“ block is intended for the tonal adjument of the speaker system. It is always active regardless of the current selected sound. There are different fixed presets available, as well as freely adjustable user settings: The sound control is set to neutral here, the sound is exactly as it was Linear recorded. -
Page 22: Combinations
OPERATING USE SOUND ADJUSTMENT (EQ) COMBINATIONS 5.5.1 In combinations mode you can combine up to three different sounds. For example, to play a double bass with the left hand and a piano with layered string sound with the right hand. To create a combination, click on the sound icon in the toolbar to get to the sound selection screen. - Page 23 OPERATING USE SOUND ADJUSTMENT (EQ) If you tap on the name of the combination in the upper part of the screen, a dialog for naming the combination appears. If necessary, enter a new name here and confirm with “OK“ or discard with “CANCEL“. By default, the selected sounds (layers) of a combination sound simultaneously and over the full tonal and dynamic range of the keyboard.
-
Page 24: Music
If you have inserted a USB stick with music tracks into the piano, you select and play them here. The UP400 plays tracks in *.wav, *.mp3, and *.mid formats. In the area below, the title of the current song is displayed. -
Page 25: Lessons
MUSIC LESSONS 5.6.2 The UP400 contains a selection of pieces and exercises in a special format that allows you to play the left and right hands separately so that you are able to practice one hand at a time. Furthermore, the speed of the composition can be changed to adjust the degree of difficutly to the level of practice. - Page 26 OPERATING USE MUSIC 2 - Loop Function The Loop function is used for automatically repeating a certain part of the piece during practice. You can play the piece by using the player control buttons. Tap “start“ as soon as you reach the start of your deisred loop.
-
Page 27: Demos
DEMOS 5.6.3 In the “Demos“ mode, pieces of music are stored to demontrate the essential sounds of the UP400. The functions are identical to those of the USB mode, see page 24. RECORDINGS 5.6.4 Recordings mode is used to play back recordings previously made and saved in recorder mode. -
Page 28: Recorder
OPERATING USE MUSIC RECORDER 5.6.5 The recorder is used to record and play back your performance. 1 – Player/Recorder Used to switch between player and recorder function, as described in chapter 5.6 2 – Title Here you can select one of four internal memory locations for your recording. Tap on the generic name in the middle to open an input field for assigning your own name for your Recording. -
Page 29: Metronome / Rhythms
OPERATING USE METRONOME / RHYTHMS METRONOME / RHYTHMS The metronome helps you when practicing. The UP400 also has a rhythm function to play along with pieces of different styles. 1 – Metronome / Rhythm Used to switch between metronome and rhythm functions. -
Page 30: Settings
OPERATING USE SETTINGS SETTINGS Tap the settings icon in the toolbar to access the UP400 settings menu. In the “Virtual Piano Technician“ area, you will find all settings concerning the piano sound, including tuning etc. In the “vSettings“ area, you will find all basic device settings. Language Defines the language for the entire user Language interface. Brightness Controls the brightness of the display. Display... - Page 31 OPERATING USE SETTINGS Automatic Switch off After the time set here, the piano will turn off Powersettings / Reset completely. To deactivate the function, press the left arrow button until “off“ appears. Start-Up Settings Controls how the piano starts up: “Factory Default“...
- Page 32 OPERATING USE SETTINGS Audio Input Volume Controls the playback volume of external Volume Settings devices that are connected via the line input or bluetooth Audio Input Reverb The signal of external devices can be combined with a reverb effect. This parameter controls the reverb level.
- Page 33 On an acoustic piano, the strings of some Piano Noises notes resonate indirectly when a note is played. This characteristic is simulated by your GEWA digital piano and can be changed in its intensity. Damper Resonance Due to the effect descibed above, especially when playing with the pedal held down, many resonances occur.
-
Page 34: Connecting External Devices
CONNECTING EXTERNAL DEVICES CONNECTING EXTERNAL DEVICES Here you can learn more about the connection possibilities of your digital piano. CONNECTING HEADPHONES Connect your headphones to one the two 6.3mm jack connectors below the keyboard. If headphones are connected to one or both jacks, the speakers of your digital piano will NOTE be automatically deactivated. -
Page 35: Bluetooth Audio
3. Push the upper right arrow until you are in the menu called “Bluetooth“. 4. Press the “Connect“ button. Now your GEWA Piano is visible as a bluetooth device. It should now be listed within the NOTE device list of your mobile device You can now connect to your GEWA piano. -
Page 36: Useful Information
USEFUL INFORMATION INDEX USEFUL INFORMATION At this point, we would like to provide definitions for a few terms that are used in this manual. We also explain the special features of your digital piano here. INDEX Term Definition MIDI Musical Instrument Digital Interface is a data transmission protocol. That means that musical control information is transmitted between electronic instruments such as digital pianos, keyboards, synthesizers, drum computers and also PCs and laptops. -
Page 37: Warranty
USEFUL INFORMATION TROUBLESHOOTING AND REPAIR WARRANTY The dealer from whom the device was purchased warrants the material and manufacture of the device for a period of 2 years from the date of purchase. In the case of a defect product, the buyer is initially only entitled to a subsequent performance. This includes either the repair or the delivery of a replacement product. -
Page 38: Technical Data
88 keys, Concert Pianist, Graded Hammer Wooden Keys Touch sensitivity 6 levels (Soft1, Soft2, Medium, Hard1, Hard2 and Constant) Pedals Damper-, Sostenuto- and Piano Pedal Sound source GEWA music samples with 4 stereo layers Polyphony Amount of internal sounds 2x 30 Watt Amplifier output RMS... - Page 40 Manufacturer: GEWA music GmbH Werkstraße 1 08626 Adorf GERMANY www.gewamusic.com Version 1.0 Errors and omissions excepted!
Need help?
Do you have a question about the UP400 and is the answer not in the manual?
Questions and answers