Table of Contents
Advertisement
Quick Links
Advertisement
Table of Contents

Summary of Contents for Botex SDC-16
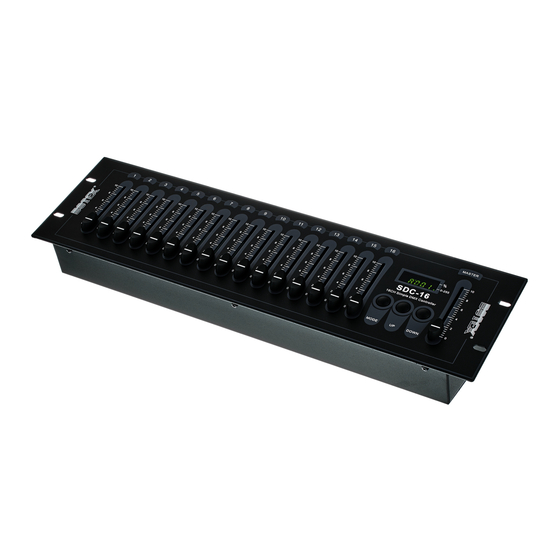
- Page 1 DMX Controller SDC-16 DMX Controller...
- Page 2 Thomann GmbH Hans-Thomann-Straße 1 96138 Burgebrach Germany Telephone: +49 (0) 9546 9223-0 Internet: www.thomann.de 18.01.2024, ID: 224882 (V2)
-
Page 3: Table Of Contents
General information..........................5 1.1 Symbols and signal words....................... 5 Safety instructions............................. 7 Features................................9 Starting up..............................10 Connections and controls........................12 Operating..............................15 Technical specifications........................17 Plug and pin assignments........................18 Protecting the environment......................19 DMX Controller SDC-16 DMX Controller... - Page 4 DMX Controller SDC-16 DMX Controller...
-
Page 5: General Information
NOTICE! This combination of symbol and signal word indicates a pos‐ sible dangerous situation that can result in material and environmental damage if it is not avoided. DMX Controller SDC-16 DMX Controller... - Page 6 General information Warning signs Type of danger Warning – danger zone. DMX Controller SDC-16 DMX Controller...
-
Page 7: Safety Instructions
Never cover the device or the vents. Do not install the device in the immediate vicinity of other heat sources. Never operate the device in the immediate vicinity of naked flames. DMX Controller SDC-16 DMX Controller... - Page 8 The plasticiser contained in the rubber feet of this product may react with the coating of the floor and cause permanent dark stains after some time. If necessary, use a suitable mat or felt slide to prevent direct contact between the device’s rubber feet and the floor. DMX Controller SDC-16 DMX Controller...
-
Page 9: Features
Features Features Special features of this DMX controller: 16 channel faders 1 master fader Compact design Simple operation Power supply via the supplied 9 V external power adapter DMX Controller SDC-16 DMX Controller... -
Page 10: Starting Up
If the DMX connections are wired incorrectly, this can cause errors during the data transfer. Do not connect the DMX input and output to audio devices, e.g. mixers or ampli‐ fiers. Use special DMX cables for the wiring instead of normal microphone cables. DMX Controller SDC-16 DMX Controller... - Page 11 When all cable connections are made, turn on the device with the main switch on the back. The device is immediately ready for operation, the display shows the current DMX start address, for example ‘A001’ . DMX Controller SDC-16 DMX Controller...
-
Page 12: Connections And Controls
Connections and controls Connections and controls Front panel ö DMX Controller SDC-16 DMX Controller... - Page 13 3 [MASTER] | Master fader. The master fader serves as a controller for all 512 channels of the DMX universe. 4 Control buttons: [MODE] | Toggles the display mode. [UP], [DOWN] | Increases or decreases the displayed value. DMX Controller SDC-16 DMX Controller...
- Page 14 Connections and controls Rear panel & 5 [DC INPUT] | Connection socket for the power supply. 6 [POWER] | Main switch. Turns the device on and off. 7 [DMX OUT] | DMX output DMX Controller SDC-16 DMX Controller...
-
Page 15: Operating
0 to 255 appears in the display for approximately 10 seconds. To switch the display to percentage (0 to 100), press [MODE]. ð The LED [%] lights. To switch the display to DMX values (0 to 255), press again [MODE]. ð The [0-255] LED lights. DMX Controller SDC-16 DMX Controller... - Page 16 10 seconds. To switch the display to percentage (0 to 100), press [MODE]. ð The LED [%] lights. To switch the display to DMX values (0 to 255), press again [MODE]. ð The [0-255] LED lights. DMX Controller SDC-16 DMX Controller...
-
Page 17: Technical Specifications
9 V , 300 mA, centre positive Dimensions (W × H × D) 482 mm × 80 mm × 132 mm Weight 2.3 kg Ambient conditions Temperature range 0 °C…40 °C Relative humidity 20%…80% (non-condensing) DMX Controller SDC-16 DMX Controller... -
Page 18: Plug And Pin Assignments
‘just’ a not working light show! DMX connection A 3-pin XLR socket is used as DMX output. The following diagram and table show the pin assignment of the XLR socket. Ground DMX data (–) DMX data (+) DMX Controller SDC-16 DMX Controller... -
Page 19: Protecting The Environment
Use the available collection sites. Before disposing of your old device, remove the batteries if this is possible without destroying Dispose of the batteries or rechargeable batteries at suitable collection points or through your local waste facility. DMX Controller SDC-16 DMX Controller... - Page 20 Repairing a device or passing it on to another user is an ecologically valuable alternative to disposal. You can return your old device to Thomann GmbH at no charge. Check the current conditions on www.thomann.de. If your old device contains personal data, delete those data before disposing of it. DMX Controller SDC-16 DMX Controller...
- Page 21 Notes DMX Controller SDC-16 DMX Controller...
- Page 22 Notes DMX Controller SDC-16 DMX Controller...
- Page 24 Musikhaus Thomann · Hans-Thomann-Straße 1 · 96138 Burgebrach · Germany · www.thomann.de...


Need help?
Do you have a question about the SDC-16 and is the answer not in the manual?
Questions and answers