Table of Contents
Advertisement
Advertisement
Table of Contents

Subscribe to Our Youtube Channel
Related Manuals for Botex DC-2448


Summary of Contents for Botex DC-2448
- Page 1 Manual Controller DMX DC-2448...
-
Page 2: Table Of Contents
Table of Contents Safety instructions ........................... 4 1.1. FOR SAFE AND EFFICIENT OPERATION ................4 Overview ............................6 3.1. Front view ..........................6 3.2. Rear view ..........................9 Operation guide ..........................10 4.1. Begin Programming ....................... 10 4.1.1. Record enable ....................... 10 4.1.2. - Page 3 5.1.6. Implementation ......................22 5.2. DMX ............................24 5.2.1. DMX channel setup ....................... 24 5.2.2. Clear of DMX channel setup ..................24 5.2.3. Call 12 pre-set programs ....................25 Brief of main functions ........................26 6.1. Reverse the direction of the scene ..................26 6.2.
-
Page 4: Safety Instructions
1. Safety instructions • Read the safety instructions and also this manual carefully. • Keep the manual. • Observe all red flags. • Observe the manual. • To prevent fire or electric shocks, protect the device against rain and humidity •... - Page 5 Safety Do not remove the grounding. It is for your safety. If you remove the grounding it can cause electric shocks. Accessory Please use only the accessory which is set by the manufacturer. Important Damages caused by the disregard of this user manual are not subject to warranty. The dealer will not accept liability for any resulting defects or problems.
-
Page 6: Overview
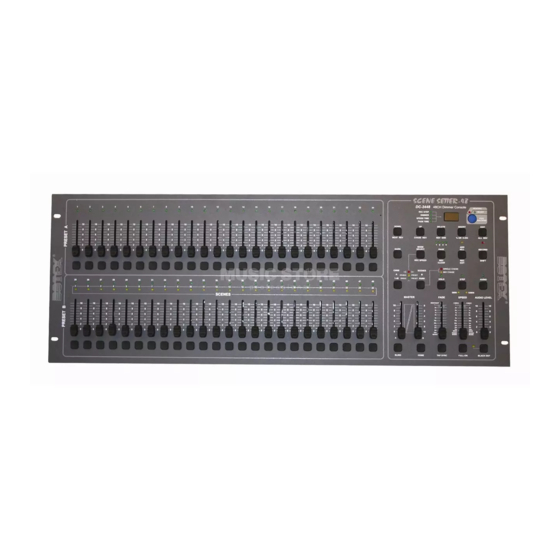
3. Overview 3.1. Front view 1. PRESET A LEDs Show the current intensity of the relevant channel numbered from 1 to 24. 2. Channel Fader 1-24 These 12 faders are used to control and/or program the intensities of channels 1-24. 3. - Page 7 11. UP/CHASE REV “Up” is used to modify a scene in “Edit” mode. “Chase Rev” is to reverse the chasing direction of a scene under speed fader control. 12. PAGE button Tap to select pages of scenes from Page 1-4. 13.
- Page 8 27. HOME button This button is used to deactivate the „Blind“. 28. TAP SYNC button Repeatedly tapping this button establishes the chase speed. 29. FULL ON button This function brings overall output to full intensity. 30. BLACK OUT button This button is used to kill all output with exception for t5hat resulting from “Flash” and “Full on”. 31.
-
Page 9: Rear View
3.2. Rear view 1. POWER Switch 2. DC Input DC 12-20V, 500 mA Min 3. MIDI THRU/OUT/IN „MIDI ports are for connection to a sequencer or MIDI device. 4. DMX Out 5. Non-existent 6. AUDIO Input This jack accepts a line level audio input signal ranged from 100mV to 1 Vpp. 7. -
Page 10: Operation Guide
4. Operation guide 4.1. Begin Programming 4.1.1. Record enable 1. Press and hold „Record” button. 2. While holding down the „Record” button, tap the „Flash” buttons 1, 6, 6 and 8 in sequence. 3. Release the „Record” button, the „Record” LED lights up, now you can begin programming your chase patterns. -
Page 11: Program Scenes
4.1.3. Program Scenes 1. Record Enable. 2. Select the „1-48 Single“mode by tapping the „Mode Select“button. This will give you control of all 24 channels as you program. Be sure that “Master A&B” are both set at maximum. (Master A is at its maximum in the fully up position, while Master B is as its maximum in the fully down position.) 3. - Page 12 8. You can continue programming or exit. To exit “Program” mode, tap “Exit” button while holding down the “Record” button, the “Record” LED should go out. Example: Program a 32 steps chase with channels 1-32 at full in sequence into “Flash” button, the “Record”...
-
Page 13: Editing
4.2. Editing 4.2.1. Edit programs 1. Record enable. 2. Use the „Page“button to select the page the program you wish to edit is on. 3. Tap the „Mode Select“button to select „CHNS <> SCENES“. 4. Press and hold down the „Edit“button. 5. -
Page 14: Erase A Program
4.2.2. Erase a Program 1. Record enable. 2. Use the “Page” button to select the page the page the program you wish to erase is on. 3. While holding down the „Edit“button, tap the „Flash“button (25-48) twice. 4. Release the two buttons, all LEDs flash, indicating the program is erased. -
Page 15: Delete A Step Or Steps
4.2.5. Delete a step or steps 1. Enter „Edit“mode. 2. Tap the „Step” button to scroll to the step you wish to delete. 3. Tap the „Delete“button when you reach to the step you wish to delete, all LEDs will flash briefly indicating the deletion of the step. 4. -
Page 16: Insert A Step Or Steps
4.2.6. Insert a step or steps. 1. Record a scene or scenes you wish to insert. 2. be sure you are in „CHNS<>SCENE” mode and enter the „Edit“mode. 3. Tap the „step“button to scroll to the step which you wish to insert before. -
Page 17: Running
3. Press and hold the „Up” button if you want to raise the intensity. If you want to lower the intensity, press and hold down the “Down” button. 4. While holding down the „Up“ or „Down“ button, tap the „Flash“ button corresponding to the DMX channel of the scene you wish to modify until you reach the desired intensity value read from the display. -
Page 18: Running A Program To Audio
4. Move the desired channel fader (25-48) to its maximum position to trigger the program, and the program will fade in depending upon current fade time. You may press and hold down the relevant “Flash” button (25-48) to trigger the program. 5. -
Page 19: Running A Program With A Standard Beat
4. Now you may move the speed fader to select your desired speed. Note: The step 3 is not necessary if the selected program is not recorded with the standard beat. 4.3.4. Running a program with a standard beat 1. be sure the „Audio“is disengaged. Tap the “mode Select” button to select „CHNS<>SCENE”... - Page 20 2. Tap the „Flash” button 5 or 10 three times while holding down the „Record” button. 3. The „5MIN“ or „10MIN“ LED should light up indicating the speed fader is set to run in the „5“ or „10 minute mode. 20 / 30...
-
Page 21: Midi Operation & Dmx Channel Setup
5. MIDI operation & DMX channel setup 5.1. MIDI 5.1.1. Setting MIDI IN 1. Tap the „Flash” button 1 three times while holding down the „Record” button, the display reads „CHI” indicating MIDI IN channel setup is available. 2. Tap the “Flash” button numbered from 1-16 to assign MIDI IN channel 1-16, the relevant channel LED lights indicating MIDI IN channel is set. -
Page 22: Exit Midi Setting
5.1.3. Exit MIDI setting Press and hold down the „Record“ button. While holding down the „Record“ button tap the „Rec Exit“ button to exit MIDI setting. 5.1.4. Receiving a MIDI file dump Tap the „Flash“ button 3 three times while holding down the „Record“ button, the display reads „IN“... - Page 23 4. There are two types of file dump mode described as below. 5. The controller will send and receive NOTE ON and NOTE Off data via the „Flash” buttons. . Note No. Velocity Functions 22-69 Program master Turn on or off program 1-48 70-93 Channel intensity Activate channel 1-48...
-
Page 24: Dmx
5.2. DMX 5.2.1. DMX channel setup 1. Be sure that this unit has been in “Record” mode. Press and hold down „Record” button. 2. Tapping „Flash” button 8 three times while holding down the „Record” button allows you to access DMX channel setup. The display reads the current DMX channel. -
Page 25: Call 12 Pre-Set Programs
5.2.3. Call 12 pre-set programs 1. be sure that this unit has been in „Record“mode. Press and hold down „Record” button. 2Tapping „Flash“ buttons 6, 6, 8 and 8 in sequence while holding down the „Record“ button allows you to call 12 factory default programs of page 1. -
Page 26: Brief Of Main Functions
6. Brief of main functions 6.1. Reverse the direction of the scene 1. Reverse the direction of all scenes: Press the „ALL REV” button, all the scenes should change their directions. 2. Reverse the chasing direction of all programs with speed control. Press the “Chase Rev”... -
Page 27: Single"Mode
6.5. „Single“mode 1. All programs will run in sequential order starting in the order of program number. 2. The display will read the running program number. 3. All programs will be controlled by the same speed fader. 4. Press the „Mode Select“button and select „CHNS<>SCENES“. 5. -
Page 28: Add"And „Kill
6.10. „Add“and „Kill“ The „ADD/KILL“button changes the mode of the „Flash“buttons. Normally the „flash“ buttons are in „add“ mode., whereas pressing any flash button will not kill other scenes, allowing multiple scenes to be on at a time. The “Kill” mode is activated by pressing “ADD/KILL” button and illuminating the LED above it. Pressing any “Flash”... -
Page 29: Technical Data
7. Technical Data Power input DC 12-20V; 500 mA min. DMX Output 3 pin female XLR MIDI Signal 5 pin Standard Interface Audio Input 100 mV, 1 Vpp Fuse (internal) F 0,5A 250V 5x20mm Dimensions 711x264x85mm Weight 7,2kg 29 / 30... - Page 30 Importer: B & K Braun GmbH Industriestraße 1 D-76307 Karlsbad www.bkbraun.com info@bkbraun.com 30 / 30...
Need help?
Do you have a question about the DC-2448 and is the answer not in the manual?
Questions and answers