Philips 107B30 Service Manual
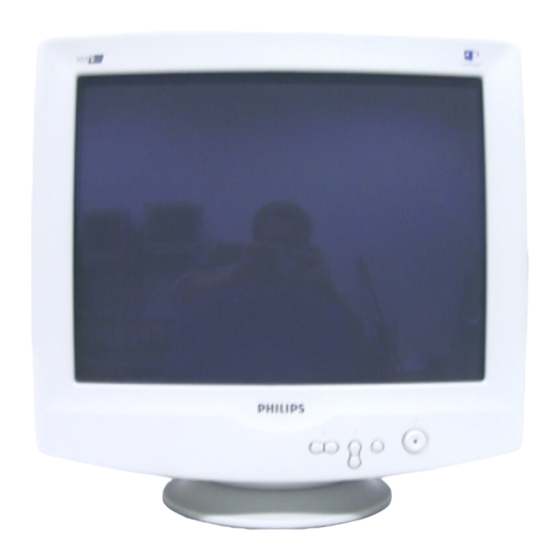
17" auto scan colour monitor
Hide thumbs
Also See for 107B30:
- Specification sheet (2 pages) ,
- User manual (151 pages) ,
- Technical specifications (2 pages)
Table of Contents
Advertisement
Quick Links
17" Auto scan Colour Monitor
DDC/Power saving/MPR II/TCO
Description
Important Safety Notice ------------------------------- 2
Technical Data ------------------------------------------ 3
Front control & OSD------------------------------------ 4
OSD menu tree------------------------------------------ 5
OSD Adjustments-----------------------------------6~12
Troubleshooting----------------------------------------12
Lock/Unlock, Factory mode & Service mode-----13
Warning and Notes ------------------------------------ 14
Mechanical Instructions ------------------------- 15~17
Wiring Diagram-----------------------------------------18
Hex Data of DDC2B--------------------------------19 ~21
DDC Instructions -----------------------------------22~26
Electrical Adjustments --------------------------- 27~ 29
Block Diagram ------------------------------------------31
ANY PERSON ATTEMPTING TO SERVICE THIS CHASSIS MUST FAMILIARIZE HIMSELF WITH THE CHASSIS
AND BE AWARE OF THE NECESSARY SAFETY PRECAUTIONS TO BE USED WHEN SERVICING ELECTRONIC
EQUIPMENT CONTAINING HIGH VOLTAGES.
CAUTION: USE A SEPARATE ISOLATION TRANSFORMER FOR THIS UNIT WHEN SERVICING.
REFER TO BACK COVER FOR IMPORTANT SAFETY GUIDELINES
Published by BCU Monitors
Printed in Taiwan
TABLE OF CONTENTS
Description
Page
Video Panel (A) Schematic Diagram ---------------32
Video Panel C.B.A.(A) --------------------------------33
Main Panel-Deflection (B) Schematic Diagram --34
Main Panel C.B.A.(B,C)-------------------------------35
Power Supply (C) Schematic Diagram-------------36
Key Control Panel (D) Schematic Diagram -------37
Key ControlPanel C.B.A. (D) ------------------------38
Repair Tips ----------------------------------------------39
Exploded View------------------------------------------40
Recommended parts list------------------------------41
Spare parts list------------------------------------- 42~44
Repair flow chart----------------------------------- 45~52
LightFrame for Windows--------------------------53~56
General Product Specification-------------------57~81
General Troubleshooting Guide----------------82~104
SAFETY NOTICE
©
Copyright reserved
Subject to modification
Chassis : M36
M36 107B3 GS_3
107B30/40C
Horizontal frequencies
30 - 86 kHz
Aug 15 2001
Page
3138 106 10155
Advertisement
Chapters
Table of Contents

Related Manuals for Philips 107B30


Summary of Contents for Philips 107B30
-
Page 1: Table Of Contents
17" Auto scan Colour Monitor Chassis : M36 M36 107B3 GS_3 DDC/Power saving/MPR II/TCO 107B30/40C Horizontal frequencies 30 - 86 kHz TABLE OF CONTENTS Description Page Description Page Video Panel (A) Schematic Diagram ---------------32 Important Safety Notice ------------------------------- 2 Video Panel C.B.A.(A) --------------------------------33... - Page 2 Wiring Diagram M36 107B3 GS_3 Go to cover page 1802 1802 1113 1113 Forward Back...
-
Page 3: Safety Test Requirements (Hipot & Ground)
Safety test requirements M36 107B3 GS_3 Go to cover page All units that are returned for service or repair must pass the 3. Equipments and Connection original manufactures safety tests. Safety testing requires both Hipot and Ground Continuity testing. 3.1. Equipments For example : HI-POT TEST INSTRUCTION - ChenHwa 9032 PROGRAMMABLE AUTO SAFETY... -
Page 4: Block Diagram
M36 107B3 GS_3 Block diagram Go to cover page FUNCTION BLOCK OF COCA+ M36 107B3 GS_3 VIDEO VIDEO LIGHT & OUTPUT AMPLIFIER RESTOR. FRAME DEFLECTION UNIT STAGE TDA4886 BF422 x 6 TDA4822 LM2439 ROTATION LM358N OSD IC MYSON MTV030-19 Self- test S-CAP H-OUTPUT/ LOT... -
Page 5: Video Panel (A) Schematic Diagram
Video Panel Schematic diagram M36 107B3 GS_3 Go to cover page 7302-2 7301-19 1713-4 1 V/div AC 1 V/div AC 2 V/div AC 5 mS/div 5 mS/div 5 uS/div 7301-16 7302-4 1 V/div AC 1 V/div AC 5 mS/div 5 mS/div 7701-1 7302-6 20 V/div AC... - Page 6 Deflection - Main Panel Schematic diagram M36 107B3 GS_3 Go to cover page B1 7503-C B8 7501-6 7610-D B22 7685-C B29 7801-18 50 V/div AC 5 V/div AC 50 V/div AC 100 V/div AC 0.5 V/div AC 5 mS/div 10 uS/div 10 uS/div 5 mS/div 10 uS/div...
-
Page 7: Key Control Panel (D) Schematic Diagram
Key Control Schematic diagram M36 107B3 GS_3 Go to cover page Forward Back... -
Page 8: Key Controlpanel C.b.a
Key Control Panel C.B.A.(D) M36 107B3 GS_3 Go to cover page 1891 A2 1892 A2 1893 A2 1894 A3 1895 A4 3891 A2 3892 A3 3893 A2 3894 A3 3895 A3 6891 A1 8891 A4 53022cus 53022hmc Forward Back... -
Page 9: Repair Tips
Repair Tips M36 107B3 GS_3 Go to cover page preferably be equipped with a thermal control (soldering 0. Warning temperature: 225 to 250 C). - The chip, once removed, must never be reused. All ICs and many other semi-conductors are susceptible to electrostatic discharges (ESD). -
Page 10: Exploded View
Exploded view M36 107B3 GS_3 Go to cover page 3138 127 52031 BACK COVER ASSY 3138 188 71111 I/F CABLE 3138 178 56211 VIDEO PCB ASSY (M30 for CPT CRT) 3138 178 56201 MAIN PCB ASSY 3138 107 98401 3138 168 78011 PEDESTAL ASSY DEGAUSSING COIL 9322 165 37682... -
Page 11: Recommended Parts List
Recommended Parts List M36 107B3 GS_3 Go to cover page Recommended parts list of 107B30/40C 0001 313812752211 FRONT CAINET ASSY 0002 313812752031 BACK COVER ASSY 0003 313810798401 PEDESTAL ASSY 0044 313810448612 BASE(CHEIL HR-1360) 0047 313810454231 BUTTON-POWER 0049 313810454211 BUTTON-FUNCTION 0053 313810448602 SWIVEL(CHEIL HR-1360) - Page 12 OSD Adjustments M36 107B3 GS_3 Go to cover page The OSD Controls LANGUAGE The ON SCREEN DISPLAY shows its settings in one of five languages. The default is English, but you can select French, Spanish, German, or Italian. BRIGHTNESS To adjust your screen's brightness, follow the steps below. Brightness is 1) Press the button on the monitor.
- Page 13 OSD Adjustments (Continued) M36 107B3 GS_3 Go to cover page ZOOM 3) Press the button. The ADJUST HORIZONTAL window appears. ADJUST POSITION should be highlighted. ZOOM increases or decreases the size of the images on your screen. To adjust the ZOOM follow the steps below. 1) Press the button on the monitor.
- Page 14 OSD Adjustments (Continued) M36 107B3 GS_3 Go to cover page 2) Press the button until ADJUST SHAPE is highlighted. 2) Press the button until ADJUST VERTICAL is highlighted. 3) Press the button. The ADJUST SHAPE window appears. 3) Press the button.
- Page 15 OSD Adjustments (Continued) M36 107B3 GS_3 Go to cover page Smart Help After returning to MAIN CONTROLS . . . 7) When the trapezoid is adjusted, press the button to highlight ...to continue to ADJUST SIDE ANGLES, start with step 5 under PARALLELOGRAM or press the button to return to the ADJUST ADJUST SIDE ANGLES and follow the directions.
- Page 16 OSD Adjustments (Continued) M36 107B3 GS_3 Go to cover page 4) Press the button to highlight 9300K for GENERAL USE, 5) Press the button. The ROTATE IMAGE window appears. ROTATE 6500K for GAMES, or USER PRESET. should be highlighted. 5) Once you have highlighted GENERAL USE or GAMES, press the button to confirm you selection and return to the MAIN CONTROLS window.
- Page 17 OSD Adjustments (Continued) M36 107B3 GS_3 Go to cover page 4) Press the button to select YES or NO. NO is the default. 4) Press the button. The ADJUST MOIRE window appears. YES returns all settings to their original factory adjustments. HORIZONTAL will be highlighted.
- Page 18 OSD Adjustments (Continued), Troubleshooting M36 107B3 GS_3 Go to cover page DEGAUSS Monitor Specific Troubleshooting EXTRA CONTROLS is a set of three features, including DEGAUSS. Self-Test Feature Check (STFC) Degaussing removes electromagnetic build up that may distort the color Your monitor provides a self-test feature that allows you to check on your screen.
- Page 19 Mechanical Instructions M36 107B3 GS_3 Go to cover page 0. General To be able to perform measurements and repairs on the "circuit boards", these unit should placed in the service position first. 1.Remove the rear cover lids (screw cover) -Remove right and left lib (screw cover) on the back cover as shown in Fig.
- Page 20 Mechanical Instructions M36 107B3 GS_3 Go to cover page 4. Main panel with Bottom Tray - Disconnect the degaussing coil (1113)from Main panel as shown in Fig. 6. - Remove the video panel from CRT neck. - Remove the "screw" of I/F cable from Main panel, grounding screw , wire as shown in Fig.
- Page 21 Mechanical Instructions M36 107B3 GS_3 Go to cover page 5. How to remove Main Panel (Chassis) After remove "Main panel with bottom tray": Fig. 18 - Remove a screw from back of bottom tray as shown in Fig. 15. - Remove Interface cable from bottom tray as shown in Fig. 16. - Remove a screw from Main panel as shown in Fig.
- Page 22 : TY 123456 Blue Y coordinate : 0.065 Monitor Descriptor #3 White X coordinate : 0.283 Monitor Name : PHILIPS 107B3 White Y coordinate : 0.297 Monitor Descriptor #4 Established Timings Established Timings I : 720 x 400 @70Hz (IBM,VGA)
- Page 23 Hex Data of DDC2B M36 107B3 GS_3 Go to cover page Standard Timing Identification #6 ********************************************************************** Horizontal active pixels : 1600 EDID log file for Philips Tube Aspect Ratio : 4:3 ********************************************************************** Refresh Rate : 60 Vendor/Product Identification ID Manufacturer Name...
- Page 24 : TY 123456 Red Y coordinate : 0.345 Monitor Descriptor #3 Green X coordinate : 0.29 Monitor Name : PHILIPS 107B3 Green Y coordinate : 0.61 Monitor Descriptor #4 Blue X coordinate : 0.155 Monitor Range Limits Blue Y coordinate : 0.065...
- Page 25 DDC Instructions M36 107B3 GS_3 Go to cover page 1. General 3. Pin assignment DDC Data Re-programming A. 15-pin D-Sub Connector In case the main EEPROM with Software DDC which store all factory settings were replaced because a defect,repaired monitor the serial numbers have to be re-programmed.
- Page 26 DDC Instructions (Continued) M36 107B3 GS_3 Go to cover page 4. Configuration and procedure 3. At the submenu, type the letter of your computer's floppy disk drive followed by :EDID301 (for example, A:\EDID301, as shown in Fig. 5). There is no Hardware DDC (DDC IC) anymore. Main EEPROM stores all factory settings and DDC data (EDID code) which is so called Software DDC.
- Page 27 DDC Instructions (Continued) M36 107B3 GS_3 Go to cover page Re-programming EEPROM (Software DDC) 4. Click icon (Read EDID function) to read DDC EDID data from monitor. The EDID codes will display on screen as shown in Fig. 13. Step 1: After initialize alignment box, connecting all cables and box as shown in Fig.
- Page 28 DDC Instructions (Continued) M36 107B3 GS_3 Go to cover page Step 5: **Configuration Setup & Enter Factory Mode ** Step 6: Write DDC data for "write EDID data" Click (Write EDID) icon from the tool bar to write DDC data. Bring up "Writing 0%~100%, ready"...
- Page 29 DDC Instructions (Continued) M36 107B3 GS_3 Go to cover page Step 9: Load DDC data Note 2 : In Factory Mode: Read/Write DDC data Before Read/Write EDID code, please confirm that the Click from the tool bar. Software DDC only was enabled as shown in Fig. 23. Select the file you want to open as shown in Fig.
- Page 30 Electrical Adjustments M36 107B3 GS_3 Go to cover page 5. To access factory mode 0. General 5.1 Turn off monitor (don't turn off PC) 5.2 Press " " and " " simultaneously on the front control When carry-out the electrical settings in many cases a video signal panel,then press "...
- Page 31 Gain. LF (BRIGH SHARP) (for ref. 230) 48K SUB EXIT OSD R/G/B cut-off and R/G/B gain can be accessed (for Philips CRT), with initial data: Fig. 2.2 9300 K R cutoff = 62%, R gain = 71% (I C) (for example: 152 is value of "BIAS R")
- Page 32 Electrical Adjustments (Continued) M36 107B3 GS_3 Go to cover page 8. Focus adjustment Apply a signal of " @ " character. at 64 kHz/60 Hz mode set the brightness to mid-position , contrast to max - position and adjust the focus for optimal sharpness in the area within 2/3 from the screen center.
-
Page 33: Spare Parts List
Go to cover page Parts List 2527 203803456228 ELCAP VX 50V S 2U2 PM20 CTV : 107B30/40C 2528 202055290821 CER2 DC B 50V S 10N PM10 2600 203803192003 ELCAP VT 250V S 33U PM20 3101 232224213684 METGLAZ RST A VR37 680K PM5... - Page 34 Spare Parts List (Continued) M36 107B3 GS_3 Go to cover page 6502 933414680133 DIO REG BZX79-C2V4 A (PHSE) 3501 213810113333 RST CRB CR12 A 33K PM5 A 6503 319801010010 DIO SIG 1N4148 (COL) 3826 213810113101 RST CRB CFR-12 A 100R PM5 3538 213810113152 RST CRB CFR-12 A 1K5 PM5 6504 319801010010 DIO SIG 1N4148 (COL)
- Page 35 Spare Parts List (Continued) M36 107B3 GS_3 Go to cover page 3347 319802151010 RST SM 0805 100R PM5 COL 1157 Video Panel 3348 319802151010 RST SM 0805 100R PM5 COL 3349 213810113101 RST CRB CFR-12 A 100R PM5 3350 319802154790 RST SM 0805 47R PM5 COL 3351 213810113101 RST CRB CFR-12 A 100R PM5 7301 935266857112 IC TDA4886/V2...
-
Page 36: Repair Flow Chart
Repair Flow Chart M36 107B3 GS_3 Go to cover page A. Power Supply Failure 1. Sympton : check 7102 pin1 check 7102 check 7102 check 7102 no startup sound 100V<pin1<380V pin14 > 2V pin 8=2.4V pin4 output ? LED light off check check check... - Page 37 Repair Flow Chart (Continued) M36 107B3 GS_3 Go to cover page rough check for R,G, B B.Video 1. video input= 0.7V check blanking Repair Flow 2. 7301video output =2.5V 7501 pin16 3. 7701 video output > 35Vpp check 1.Sympton : R,G,B output (with wite pattern) check heater...
- Page 38 Repair Flow Chart (Continued) M36 107B3 GS_3 Go to cover page C. Horizontal deflection output repair flow : 1. Sympton : check Hsync check Hsync check Hsync without 7606 base 7605 base 7501 pin8 H-deflection. check check Hsync check Hsync replace 5612 180V 7603 drain...
- Page 39 Repair Flow Chart (Continued) M36 107B3 GS_3 Go to cover page basic check D. Vertical Deflection Failure +12/-12V/+80V Sympton : check check one horizontal line 3401,3402 6405,6402 V_size is abnormal 3407,3408 good? too large/small good check check 7401 7401 check 7501 check pin12,pin13 ramp 3412,3413...
- Page 40 Repair Flow Chart (Continued) M36 107B3 GS_3 Go to cover page check cpu pin6/ pin32= 5V E. CPU Basic Check pin9/pin8=12MhZ check list pin7=gnd H size compensation for 86K S-CAPACITOR SWITCH TABLE 31. H-EHT the load variance Hor. Freq.(KHz) < 27.50 27.5 ~ 33.24 33.24 ~ 36.51 36.51 ~ 40.00...
- Page 41 Repair Flow Chart (Continued) M36 107B3 GS_3 Go to cover page check 38. Rotation output from 0V to 5V check 3. ABL-CON output from 0V to 5V check key check 3836, 2821 23. Keypad Enter,Up,Down,Left,Right keys 3871~3875 check pin34 1.no H/V sync & IF cable pin5 floating - show msg.
- Page 42 Repair Flow Chart (Continued) M36 107B3 GS_3 Go to cover page Basic check F. TDA4841 Vcc=pin9=pin10=12V Vcc > 9V Check List gnd =pin7=pin25=0v during startup 1. HFLB pin16 if no exist (from H.defl) CLBL=hi pin17 = Hunlock = floating pin30 = Hpll2 = 0V pin6 = HDRV = floating 2.
- Page 43 Repair Flow Chart (Continued) M36 107B3 GS_3 Go to cover page Hunlock pin is floating while pll1(pin26) is 17. Hunlock unlock in searching mode 18. IIC scl = hi the initial sequence of IIC IC 19 IIC sda = hi 7501,7301,7304 compensate for the V_size 21 EHT_compen.
-
Page 44: Lightframe For Windows
Earlier Philips monitors or other manufacturers’ monitors will not work with this special software. It is recommended that you install this software only on a Philips monitor designed to use it. These monitors can be identified by the LightFrame™ logo on the front of the monitor. - Page 45 LightFrame for Windows (Continued) ™ M36 107B3 GS_3 Go to cover page 5. Click Yes, bring up Fig.5 Fig 9 Fig 5 9. Click Finish, bring up Fig. 10 & Fig 11 on the desktop. 6. Click Next, bring up Fig.6 Fig 10 Fig 6 7.
- Page 46 LightFrame for Windows (Continued) ™ M36 107B3 GS_3 Go to cover page Operating LightFrame™ 3b) If you want to highlight only an area of a window, click on the left mouse button and drag the cursor over the area to be highlighted while After installation, LightFrame™...
- Page 47 Philips’ LightFrame™ can detect the monitor’s LightFrame™ capabilities and store the setup information about the new monitor. If the monitor is not LightFrame™...
- Page 48 . FLAT SQUARE CRT - POWER SAVING MANAGEMENT SYSTEM - MAXIMIZED CONTAINER LOADING - VESA DDC2B - LOW EMISSION TCO99 17" M36 107B3 86K CMTR TYPE : 107B30/40C 8639 000 11438 BRAND : PHILIPS (86K) 2001-06-18 WR.Huang 2001-06-18 Forward Back...
-
Page 49: General Product Specification
Focus check 4.10 Luminance uniformity 4.11 White color adjustment 4.12 Color tracking on full white pattern 4.13 Purity 4.14 Moire 4.15 Blemish 17" M36 107B3 86K CMTR TYPE : 107B30/40C 8639 000 11438 BRAND : PHILIPS(86K) 2001-06-18 WR.Huang 2001-06-18 Forward Back... - Page 50 Certifications Safety Fulfil approbation requirements Reliability Mean time between failures 10.0 Quality assurance requirements 10.1 Acceptance test 11.0 Service ability 17" M36 107B3 86K CMTR TYPE : 107B30/40C 8639 000 11438 BRAND : PHILIPS (86K) 2001-06-18 WR.Huang 2001-06-18 Forward Back...
- Page 51 (between 0 and 0.6 V to be considered as low level ,between 2.3 and 5.0 V as high level) C. Impedance Video : Terminated with 75 ohms Sync : Terminated with 4.7K ohms pull down resistors. 17" M36 107B3 86K CMTR TYPE : 107B30/40C 8639 000 11438 BRAND : PHILIPS(86K) 2001-06-18 WR.Huang 2001-06-18 Forward...
- Page 52 68.7 KHz 85Hz (VESA) 7. 1280 x 1024 80.0 KHz 75Hz (VESA) 8. 640 x 480 43.3 KHz 85Hz (VESA) 17" M36 107B3 86K CMTR TYPE : 107B30/40C 8639 000 11438 BRAND : PHILIPS (86K) 2001-06-18 WR.Huang 2001-06-18 Forward Back...
- Page 53 The AUTOSCAN color monitor must be capable of displaying standard resolutions within the vertical(refresh) frequency range of 50 to 160 Hz and horizontal scan range of 30 - 86KHz. 17" M36 107B3 86K CMTR TYPE : 107B30/40C 8639 000 11438 BRAND : PHILIPS(86K) 2001-06-18 WR.Huang...
- Page 54 = 3.232 us Rear porch 0.448 ms Sync width = 1.616 us Sync width 0.064 ms Sync.polarity = Sync.polarity = 17" M36 107B3 86K CMTR TYPE : 107B30/40C 8639 000 11438 BRAND : PHILIPS (86K) 2001-06-18 WR.Huang 2001-06-18 Forward Back...
- Page 55 Rear porch = 1.837 us Rear porch 0.475 ms Sync width = 1.067 us Sync width 0.037 ms Sync.polarity = Sync.polarity 17" M36 107B3 86K CMTR TYPE : 107B30/40C 8639 000 11438 BRAND : PHILIPS(86K) 2001-06-18 WR.Huang 2001-06-18 Forward Back...
- Page 56 Inactive Inactive Blanked Mandatory <=3w(TCO) Normal Remark: Transition time from ON to any power saving mode will have 5 seconds delay. 17" M36 107B3 86K CMTR TYPE : 107B30/40C 8639 000 11438 BRAND : PHILIPS (86K) 2001-06-18 WR.Huang 2001-06-18 Forward Back...
- Page 57 Due to aging (25 C, 300 hrs) : 1.0 % Due to mains voltage variation ( 10% ) : 1.0 % 17" M36 107B3 86K CMTR TYPE : 107B30/40C 8639 000 11438 BRAND : PHILIPS(86K) 2001-06-18 WR.Huang 2001-06-18 Forward Back...
- Page 58 (preset modes only, refer to fig. 1) Width : 306 +/- 3 mm Height : 230 +/- 3 mm 17" M36 107B3 86K CMTR TYPE : 107B30/40C 8639 000 11438 BRAND : PHILIPS (86K) 2001-06-18 WR.Huang 2001-06-18 Forward Back...
- Page 59 The maximum convergence error to be measured on a white spot or white display line to represents the maximum distance between the energy centers of any two primary colors. (See Fig. 6) 17" M36 107B3 86K CMTR TYPE : 107B30/40C 8639 000 11438 BRAND : PHILIPS(86K) 2001-06-18 WR.Huang 2001-06-18...
- Page 60 After warming-up time of 30 min. , no color stains may occur in above four patterns. 17" M36 107B3 86K CMTR TYPE : 107B30/40C 8639 000 11438 BRAND : PHILIPS (86K) 2001-06-18 WR.Huang 2001-06-18 Forward Back...
- Page 61 D-shell socket Tilt and swivel base Tilt angle : 5 forward and 15 backward Swivel rotation : 90 leftward or rightward 17" M36 107B3 86K CMTR TYPE : 107B30/40C 8639 000 11438 BRAND : PHILIPS(86K) 2001-06-18 WR.Huang 2001-06-18 Forward Back...
- Page 62 B-1 Container loading (separated pedestal) Container size Q'ty W/ palette W/ palette Layers Sets per layer Sets per block Blocks per container Total sets 17" M36 107B3 86K CMTR TYPE : 107B30/40C 8639 000 11438 BRAND : PHILIPS (86K) 2001-06-18 WR.Huang 2001-06-18 Forward Back...
- Page 63 : 6.3.1 Radiation Completely fulfilled International Commission of Radio logical Protection (ICRP) requirement 0.5 mR/Hr. 17" M36 107B3 86K CMTR TYPE : 107B30/40C 8639 000 11438 BRAND : PHILIPS(86K) 2001-06-18 WR.Huang 2001-06-18 Forward...
- Page 64 Norway NEMKO ---- Denmark DEMKO ---- Finland FIMKO ---- Spain HOMOLOGATION BEAB U.S.A. UL , DHHS Canada Japan ---- VCCI 17" M36 107B3 86K CMTR TYPE : 107B30/40C 8639 000 11438 BRAND : PHILIPS (86K) 2001-06-18 WR.Huang 2001-06-18 Forward Back...
- Page 65 The service ability of this monitor should fulfil the requirements which are prescribed in UAW-0346 and must be checked with the check list UAT - 0361 17" M36 107B3 86K CMTR TYPE : 107B30/40C 8639 000 11438 BRAND : PHILIPS(86K) 2001-06-18 WR.Huang...
- Page 66 M36 107B3 GS_3 GENERAL PRODUCT SPECIFICATION Go to cover page 303 mm 306 mm 309 mm FIG-1 IM AGE D IMEN SION 17" M36 107B3 86K CMTR TYPE : 107B30/40C 8639 000 11438 BRAND : PHILIPS (86K) 2001-06-18 WR.Huang 2001-06-18 Forward Back...
- Page 67 M36 107B3 GS_3 GENERAL PRODUCT SPECIFICATION Go to cover page 306 mm |A-B| AND |C-D| < 5 mm FIG-2 IMAGE CENTERING 17" M36 107B3 86K CMTR TYPE : 107B30/40C 8639 000 11438 BRAND : PHILIPS(86K) 2001-06-18 WR.Huang 2001-06-18 Forward Back...
- Page 68 M36 107B3 GS_3 GENERAL PRODUCT SPECIFICATION Go to cover page 306 mm < 2 mm FIG-3 IMAGE ROTATION 17" M36 107B3 86K CMTR TYPE : 107B30/40C 8639 000 11438 BRAND : PHILIPS (86K) 2001-06-18 WR.Huang 2001-06-18 Forward Back...
- Page 69 M36 107B3 GS_3 GENERAL PRODUCT SPECIFICATION Go to cover page 306 mm A=B=C=D < 2.0 mm FIG-4 IMAGE GEOMETRY 17" M36 107B3 86K CMTR TYPE : 107B30/40C 8639 000 11438 BRAND : PHILIPS(86K) 2001-06-18 WR.Huang 2001-06-18 Forward Back...
- Page 70 GENERAL PRODUCT SPECIFICATION Go to cover page 80 mm ZONE B ZONE A 306 mm FIG-5 CONTRAST AND BRIGHTNESS MEASUREMENT AREA 17" M36 107B3 86K CMTR TYPE : 107B30/40C 8639 000 11438 BRAND : PHILIPS (86K) 2001-06-18 WR.Huang 2001-06-18 Forward Back...
- Page 71 M36 107B3 GS_3 GENERAL PRODUCT SPECIFICATION Go to cover page ZONE B ZONE A ZONE C 306 mm FIG-6 MISCONVERGENCE 17" M36 107B3 86K CMTR TYPE : 107B30/40C 8639 000 11438 BRAND : PHILIPS(86K) 2001-06-18 WR.Huang 2001-06-18 Forward Back...
- Page 72 Go to cover page 1 BYTE = 8BITS LINE HEX.DATA 0 0 0 0 Fig 7 CHARACTER FORMAT FOR FOCUS CHECK 17" M36 107B3 86K CMTR TYPE : 107B30/40C 8639 000 11438 BRAND : PHILIPS (86K) 2001-06-18 WR.Huang 2001-06-18 Forward Back...
- Page 73 General Troubleshooting Guide M36 107B3 GS_3 Go to cover page General Troubleshooting Guide No Display, Unstable Picture/ but LED is ON Picture Flickers or LED is amber (yellow) H/V Rolling, Monitor drivers H/V Sync. (inf file) Picture too bright Focus Picture too dim Degaussing Picture distortion...
- Page 74 General Troubleshooting Guide M36 107B3 GS_3 Go to cover page NO DISPLAY, but LED is ON or LED is amber(yellow) Checkpoint: 1. No Macintosh adaptor attached to the plug of signal cable if using the IBM PC 2. A symptom of no color on models equipped with the Plug & Plug feature (DDC) may be seen when these monitors are connected to a NON-DDC Host or Computer.
- Page 75 General Troubleshooting Guide M36 107B3 GS_3 Go to cover page Continued Green Amber Amber? or Green? Make sure the correct signal is input. Make sure of the state of the computer (Turn on). Press the Is the ATTENTION keyboard or operate the mouse. picture displayed? For example: Is picture displayed...
- Page 76 Philips' monitors build in VESA DDC2B feature to support Plug & Play requirement for Windows 95/98/2000/Me . You can install the information file ( .inf) in order to select your Philips monitor from "Monitor" dialog box in Windows 95/98/2000/Me to activate Plug & Play application. The installation procedure based on...
- Page 77 During normal viewing conditions of a monitor, Focus at center of the screen should be sharper than the edges of the screen. However, focus on the edges should still display legibly at the Philips recommended resolution and refresh rate for all Philips monitor sizes. Does it cause by...
- Page 78 This is what stops the degauser, and this devices resistance will decrease as it cools back off enabling the degause to operate again. This is an intentional design and is a industry standard, not just Philips. A nearby magnetic field may magnetize the CRT.
-
Page 79: General Troubleshooting Guide
General Troubleshooting Guide M36 107B3 GS_3 Go to cover page Tip : ***** The best way to understand "Image control features (by "On Screen Display" or "Front Control Knob") is to minimize and maxmize each control feature while viewing a full image on the screen. By Picture distortion performing this, the customer will immediately understand: (Geometry) -
Page 80: Unstable Picture/Picture Flickers
General Troubleshooting Guide M36 107B3 GS_3 Go to cover page Unstable Picture/ Picture Flickers A low refresh rate or electrical interference typically causes flickering in the picture and is not normally a defective monitor: =>Try the monitor in another physical location before suspecting the monitor itself and adjust the refresh rate to 75hz or higher. -
Page 81: H/V Rolling, H/V Sync
General Troubleshooting Guide M36 107B3 GS_3 Go to cover page H/V Rolling, H/V Sync. 1. Turn off monitor. 2. Disconnect signal cable. 3. Turn on monitor. Does rolling occur in the self test ? (warning signal..) Check video cable for bent pins, reseat to It is need to check and system video and... -
Page 82: Picture Too Bright
General Troubleshooting Guide M36 107B3 GS_3 Go to cover page Picture too bright Adjust Brightness and/or contrast via the Monitor "On-Screen Display" or "Front Control Knob". Is picture displayed normally? * Reset the monitor via OSD manipulation. (Select "Reset to Factory settings".) *(or =>... -
Page 83: Picture Too Dim
General Troubleshooting Guide M36 107B3 GS_3 Go to cover page Note : 1. Sun light passing through a window is much brighter than monitor luminance (Luminance is the measurable quantity which most closely Picture too dim corresponds to brightness), therefore the two worst places for a monitor is directly facing the window or directly behind the window. -
Page 84: No Power / Led Is Off
General Troubleshooting Guide M36 107B3 GS_3 Go to cover page NO POWER / LED is off Is cabinet of monitor damaged being dropped? 1. Is the correct AC power cord connected? The monitor may have 2. Is AC power outlet active? become faulty due to 3. - Page 85 : Moir is a natural effect or phenomenon of CRT that has the appearance of a wavy pattern é which is repetitive and superimposed on the screen as ripple images. , not just Philips monitor had. These are a few suggestions to help for reducing or minimizing the effect.
- Page 86 General Troubleshooting Guide M36 107B3 GS_3 Go to cover page OSD MAIN MENU LOCKED Press and hold the OSD menu key for about 10 seconds , until picture displays "OSD MAIN MENU UNLOCKED" Please contact your dealer/reseller for more information. Forward Back...
- Page 87 General Troubleshooting Guide M30 105B2 GS_3 Go to cover page Shimmering/ Jitter/Video Noise Turn on monitor with a display or image for 30 minutes (due to drift). Jitter or Noise still present ? Try moving the monitor to another location to see if problem goes away. Jitter or Noise disappear.
- Page 88 General Troubleshooting Guide M36 106B3 GS_3 Go to cover page Missing Color There are 2 easy ways to determine the Missing color problem. 1. View an image that is supposed to be "White". If one of the colors (RGB) is not functioning. White can not be produced.
- Page 89 General Troubleshooting Guide M36 107B3 GS_3 Go to cover page Color Purity Turn on monitor with a full image for 30 minutes (due to drift). Color Purity or Blotchy or Streaky Press Degauss button (or via the OSD manipulation) or Turn unit "OFF" then "ON" to degauss. Does degaussing resolve ? Note the location of "problem area"...
-
Page 90: Power Management Function Is Not Active
General Troubleshooting Guide M36 107B3 GS_3 Go to cover page Power management function is not active Verify the PC is compliant with VESA. In case all of the video signals of PC are not off, power management function is not active normally. [Repeat to power on and off (power management).] There are accelerator boards not complied with VESA. -
Page 91: A Buzzing Sound When Powering On
General Troubleshooting Guide M36 107B3 GS_3 Go to cover page A buzzing sound when powering on This sound is caused when the auto degaussing circuit is active. This buzzing sound is normal when the monitor is first turned on. This sound may be louder during the winter months and during initial power on. -
Page 92: Customax
M36 107B3 GS_3 Go to cover page CustoMax CustoMax is proprietary Philips software that allows user to control parameter (e.g. Size , Color , Geometry ) in place of the buttons on the front of the monitor. To install and run the CustoMax., you must have a USB compatible system and have a USB connection on the rear of your monitor. -
Page 93: Colorific
WYSIWYG (what you see is what you get ) . The Colorific software is the property of Sonnetech ,Ltd. Only certain Philips monitor Models are equiped with the software. If you have special interesting , please hit the web site "http:\www.colorific.com". -
Page 94: Usb
PC OEMs. USB 2.0 : Drafted by Compaq, Hewlett Packard, Intel, Lucent, Microsoft, NEC and Philips, USB Specification version 2.0 will increase device data throughout up to 480Mbps, 40 times faster than USB 1.1 devices. -
Page 95: Picture Too Large Or Small
General Troubleshooting Guide M36 107B3 GS_3 Go to cover page Picture too Large or Small : Reset monitor via OSD menu maniputlation : Adjust the Horz(width) and.or Vert size (height) in the On Screen Display. : Change monitor timing to work at the recommended resolution. Please contact your dealer/reseller for more information. - Page 96 4. When the HV circuitry is operating properly there is no possibility of an x- tube must be the same type as the original, including suffix letter, or a Philips radiation problem. High voltage should always be kept at the manufacturer's approved type.
- Page 97 Power Supply - Main Panel Schematic diagram M36 107B3 GS_3 Go to cover page 5113-1 5113-12 78.3 100 V/div AC 10 V/div AC 5 uS/div 5 uS/div 7102-7 5113-2 141.7 50 V/div AC 5 V/div AC 5 uS/div 5 uS/div 5113-4 7102-13 5 V/div AC...
- Page 98 OSD menu tree M36 107B3 GS_3 Go to cover page The OSD Tree Below is an overall view of the structure of the On- Screen Display. You can use this as reference when you want to later on work your way around the different adjustments.
- Page 99 REPLACEMENT PARTS, WHICH ARE LISTED WITH THEIR evaluation. Accordingly, a servicer who uses a service PART NUMBERS IN THE PARTS LIST SECTION OF THIS procedure or tool which is not recommended by PHILIPS SERVICE MANUAL. must first satisfy himself thoroughly that neither his safety nor the safe operation of the equipment will be jeopardized by the service method selected.
- Page 100 This monitor has 8 factory-preset modes as indicated in the ® This monitor is ENERGY STAR compliant. following table : ® As an ENERGY STAR Partner, PHILIPS has determined that Frequen Sync polarity this product meets the ENERGY STAR guidelines for energy ®...
- Page 101 Description of the On Screen Display What is the On-Screen Display? This is a feature in all Philips monitors which allows an end-user to adjust screen performance of monitors directly though an on-screen instruction window. The user interface provides user-friendliness and ease-of-use when operating the monitor.
- Page 102 Lock/Unlock, Factory Mode, Burn In, Service Mode M36 107B3 GS_3 Go to cover page To access factory mode Front Control 1. Turn off monitor (don't turn off PC) 2. Press " " and " " simultaneously on the front control panel,then press "...
- Page 103 Warning and Notes M36 107B3 GS_3 Go to cover page Warnings Notes 1. Safety regulations require that the unit should be returned 1. The direct voltages and waveforms are average voltages. in its original condition and that components identical to They have been measured using the Service test software the original components are used.
Need help?
Do you have a question about the 107B30 and is the answer not in the manual?
Questions and answers