
Related Manuals for SMC Networks LECYU Series


Summary of Contents for SMC Networks LECYU Series
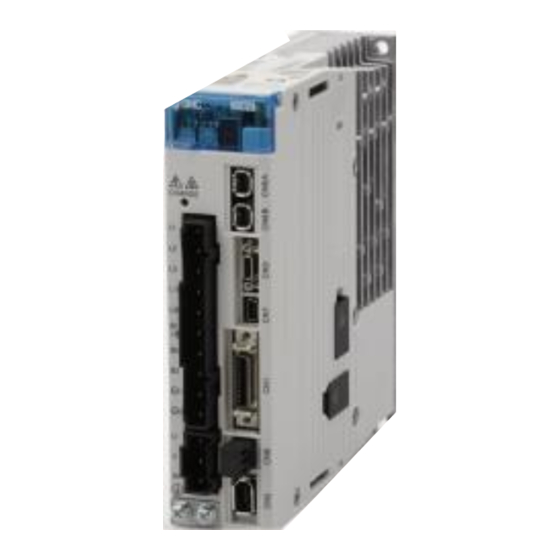
- Page 1 Doc No. JXC※-OMT0070-A NN24448401 (Simplified edition) PRODUCT NAME AC Servo Motor Driver (MECHATROLINK-III type) MODEL / Series / Product Number LECYU Series...
-
Page 2: Table Of Contents
Contents Introduction ....................6 1. Procedure before operation ..............7 1.1 Flow chart ......................7 2. Wiring ....................... 8 2.1 System configuration ..................8 2.2 Wiring for power supply ................. 9 2.3 I/O signal connection example (Sink I/O interfaces) ........11 2.3.1 I/O Signal (CN1) Names and Functions .............. - Page 3 LECYU Series / Driver Safety Instructions These safety instructions are intended to prevent hazardous situations and/or equipment damage. These instructions indicate the level of potential hazard with the labels of “Caution,” “Warning” or “Danger.” They are all important notes for safety and must be followed in addition to International Standards (ISO/IEC), and other safety regulations.
- Page 4 a mechanical protective function, and periodical checks to confirm proper operation. Note that the CAUTION level may lead to a serious consequence according to conditions. Please follow the instructions of both levels because they are important to personnel safety. - 4 -...
- Page 5 LECYU Series / Driver Safety Instructions Caution The product is provided for use in manufacturing industries. The product herein described is basically provided for peaceful use in manufacturing industries. If considering using the product in other industries, consult SMC beforehand and exchange specifications or a contract if necessary.
-
Page 6: Introduction
Introduction It is recommended that the operator read the operation manual for LECYU prior to use. For the handling and details of other equipment, please refer to the operation manual for used equipment. Select ΣV as an object series when you use SigmaWin+. Refer to the table for the following type when you select the model (parameter edit at offline etc.). -
Page 7: Procedure Before Operation
1. Procedure before operation 1.1 Flow chart Confirm that the cables to the driver and the actuator are - - - Wiring check connected correctly. Refer to [2. Wiring]. Check the surrounding environment (cable routing and Surrounding - - - impurity such as wire off cuts or metallic dust) of the driver environment check and the servo motor. -
Page 8: Wiring
2. Wiring 2.1 System configuration The system configuration chart is shown below. Refer to the next paragraph for details of the wiring for each cable. Refer to 2.6 Refer to 2.5 Refer to 2.3 Refer to 2.4 - 8 -... -
Page 9: Wiring For Power Supply
2.2 Wiring for power supply Connect the actuator and driver power supply. (1) Power supply is AC200V three phase Driver Motor cable Actuator Encoder cable ∗ For the LECYU2-V5, V7, V8, terminals B2 and B3 are not short-circuited. Do not short-circuit these terminals. [1] Main circuit power input terminals, L1, L2, L3 and Control power input terminals, L1, L2: Connect the 200VAC external power supply to the power supply. - Page 10 (2) Power supply is AC200V single phase Driver ∗ For the LECYU2-V5, V7, V8, terminals B2 and B3 are not short-circuited. Do not short-circuit these terminals. [1] Main circuit power input terminals, L1, L2 and Control power input terminals, L1, L2: Connect the 200VAC external power supply to the power supply.
-
Page 11: I/O Signal Connection Example (Sink I/O Interfaces)
2.3 I/O signal connection example (Sink I/O interfaces) The following diagram shows a typical connection example. DRIVER Lock (Lock released when ON) DRIVER ∗1. represents twisted-pair wires. ∗3. The 24-VDC power supply is not included. Use a 24-VDC power supply with double insulation or reinforced insulation. -
Page 12: I/O Signal (Cn1) Names And Functions
2.3.1 I/O Signal (CN1) Names and Functions The following table shows the names and functions of I/O signals (CN1). (1) Input Signals Signal Pin No. Name Function Forward run P-OT (/SI1) prohibited, With overtravel prevention: Stops servomotor when movable part travels beyond the allowable range of Reverse run N-OT (/SI2) prohibited... - Page 13 (2) Output Signals Signal Pin No. Name Function ALM+ Servo alarm output signal Turns OFF when an error is detected. ALM- /BK+ Controls the lock. The lock is released (/SO1+) when the signal turns ON. Lock interlock signal /BK- Allocation can be changed to general-purpose output signals (/SO1+, (/SO1- /SO1-).
-
Page 14: Sequence Input Circuit
2.3.2 Sequence Input Circuit (1) Photocoupler Input Circuit CN1 connector terminals 6 to 13 are explained below. The sequence input circuit interface is connected through a relay or open-collector transistor circuit. When connecting through a relay, use a low-current relay. If a low-current relay is not used, a faulty contact may result. -
Page 15: Sequence Input Circuit
2.3.3 Sequence Input Circuit Incorrect wiring or incorrect voltage application to the output circuit may cause short-cir- cuit. If a short-circuit occurs as a result of any of these causes, the holding lock will not work. This could damage the machine or cause an accident resulting in death or injury. (1) Photocoupler Output Circuit Photocoupler output circuits are used for servo alarm (ALM), servo ready (/S-RDY), and other sequence out- put signal circuits. - Page 16 (2) Line Driver Output Circuit CN1 connector terminals, 17-18 (phase-A signal), 19-20 (phase-B signal), and 21-22 (phase-Z signal) are explained below. These terminals output the following signals via the line-driver output circuits. • Output signals for which encoder serial data is converted as two phases pulses (PAO, /PAO, PBO, /PBO) •...
-
Page 17: Wiring For Safety Cable
2.4 Wiring for Safety cable (1) Connection Example for input signals The input signals must be redundant. DRIVER For safety function signal connections, the input signal is the 0 V common and the output signal is the source output. When using the safety function, a safety function device must be connected and the wiring that is necessary to activate the safety function must be done to turn ON the servomotor power. -
Page 18: Wiring For External Regenerative Resistor
2.5 Wiring for external regenerative resistor Please prepare it in your company when the external regenerative resistor is necessary. Refer to the catalog of each actuator for the selection of the external regenerative resistor. (1) DRIVERs: Model LECYU2-V5, V7, V8 Connect an external Regenerative resistor between the B1/ and B2 terminals on the DRIVER. -
Page 19: Mechatrolink Cable Wiring
2.6 MECHATROLINK cable wiring The following diagram shows an example of connections between a PC or PLC...etc and a DRIVER using MECHATROLINK-III communications cables (CN6A, CN6B). PC or PLC...etc. Note 1 Note 1 Note 1. The length of the cable between stations (L1, L2 ... Ln) must be 75 m maximum. For removing the MECHATROLINK-III communications cable connectors from the DRIVER, refer to the following procedure. -
Page 20: Communications Setting
3. Communications Setting The DIP switch S3 is used to make the settings for MECHATROLINK-III communications. The station address is set using the rotary switches S1 and S2. (1) Settings of the Rotary Switches S1 and S2 Set the station address using the rotary switches S1 and S2. Station Address 00H to 02H: Disabled 0 to 2... - Page 21 Ex) When you connect three station PC or PLC...etc. No.1 No.2 No.3 Setting the Station Address Station Address No.1 - 21 -...
-
Page 22: Parameter Setting (Driver Side)
4. Parameter setting (Driver side) The setting is a necessary parameter. Please optionally set it. Please refer to "LECYU manual" for a detailed parameter. Setup software (SigmaWin+) is necessary for the setting of the parameter. ※1 Please download setup software via our website. ※2 Prepare LEC-JZ-CVUSB USB cable (... -
Page 23: Rotation Direction
4.3 Rotation Direction The servomotor rotation direction can be reversed with parameter Pn000.0 without changing the polarity of the speed/position reference. This causes the rotation direction of the servomotor to change, but the polarity of the signal, such as encoder output pulses, output from the DRIVER does not change. -
Page 24: Recommended Parameter Values For Each Actuator
4.4 Recommended parameter values for each actuator For recommended parameter values for each actuator, refer to the "LECYU Operation Manual, Appendix". 4.4.1 Electronic Gear It is necessary to set it on the PLC side according to the kind of PLC. The electronic gear enables the workpiece travel distance per reference unit input from the host PC or PLC.etc. -
Page 25: Positioning Completed Width
4.5 Positioning Completed Width This signal indicates that servomotor movement has been completed during position control. When the difference between the number of references output by the host PC or PLC...etc and the travel distance of the servomotor (position error) drops below the set value in the parameter, the positioning completion signal will be output. -
Page 26: Trial Operation (Sigmawin+)
• When the external Regenerative resistors for power are used at the rated load ratio, the resistor temperature increases to between 200 °C and 300 °C. The resistors must be used at or below the rated values. Check with the manufacturer for the resistor’s load characteristics. - Page 27 <When Online is selected> Enter the necessary settings for communication setup. 1. Click Search. 2. Select DRIVER series and make the settings required. Click Search. After the DRIVERs have been successfully connected to SigmaWin+, a list of the connected DRIVERs will appear on the screen.
-
Page 28: Jog Operation
DRIVER Selection Box 3. Select the DRIVER to be connected and then click Connect, or just double-click the DRIVER to be connected. The SigmaWin+ main window will appear. Click Cancel to close the dialog box. 5.2 JOG Operation This function turns the motor at the set JOG speed. The rotational direction and the speed setting can be verified without connecting a PC or PLC etc. - Page 29 <When the Write Prohibited Setting is ON> If the write prohibited setting is ON, the following message will appear. Click OK, and set the write prohibited setting to OFF. Refer to “LECYU Operation Manual”, Section 6.12 for details. 2. Click OK, and the JOG Operation box appears. If the servo is on, an error message will appear. Make sure that the servo is off.
-
Page 30: Program Jog Operation
5.3 Program JOG Operation This function allows automatic operation determined by the preset pattern of operation. WARNING Using the program JOG operation function while the motor is running is dangerous. Be sure to check the user’s manual before using this function. Pay particular attention to the following items. •... - Page 31 3. Set the running conditions and click Apply. The graph for the operation pattern is displayed. 4. Click Run and the Program JOG Operation box appears. - 31 -...
- Page 32 5. Click Servo ON and Execute. The program JOG operation starts. - 32 -...
-
Page 33: Troubleshooting
6. Troubleshooting When a fault occurs during operation, the corresponding alarm or warning is displayed. If an alarm or warning occurrs, refer to“LECYM Operation Manual”,section 9.1.2 or “ LECYM Operation Manual”,section 9.2.2 and take the appropriate action. When an alarm occurs, ALM turns off. After removing the cause of the alarm or warning, the alarm or warning can be deactivated in any of the methods marked in the alarm / warning deactivation column. - Page 34 (cont’d) Alarm reset SigmaWin+ SigmaWin+ Servo motor Power [Alarm] [Setup] Alarm Alarm warning Stop ping | | Alarm Name Number clear command Method ↓ [Display Alarm] [Software Reset] [ALM-CLR] | | Reset button Execute button ○ ○ ○ ○ A.8A0 External Encoder Error of Module Gr.1 ○...
- Page 35 (cont’d) Alarm reset SigmaWin+ SigmaWin+ Servo motor Power [Alarm] [Setup] Alarm Alarm warning Stop ping | | Alarm Name Number clear command Method ↓ [Display Alarm] [Software Reset] [ALM-CLR] | | Reset button Execute button ○ FL-1 System Alarm ○ FL-2 ○...
-
Page 36: Warningalarms List
6.2 WarningAlarms List This section provides list of warnings. After its cause has been removed, the warning can be deactivated in any of the methods marked in the warning reset column. (1) Commands for the MECHATROLINK-III standard servo profile Warning reset SigmaWin+ SigmaWin+ Power... - Page 37 (2) Commands for the MECHATROLINK-II-compatible profile Warning reset SigmaWin+ SigmaWin+ Power [Alarm] [Setup] Warning Alarm warning Warning Name | | Number clear command ↓ [Display Alarm] [Software Reset] [ALM-CLR] | | Reset button Execute button ○ ○ ○ ○ A.900 Position Error Overflow ○...
- Page 38 Revision history No.LEC-OM07501 Feb./2014 1st printing No.LEC-OM07502 Jul./2014 2nd printing No.LEC-OM07503 Apr./2015 3rd printing No.LEC-OM07304 (No.JXC※-OMT0070) Nov./2017 4th printing No.JXC※-OMT0070-A Oct./2023 Deletion of Recommended parameter value 4-14-1, Sotokanda, Chiyoda-ku, Tokyo 101-0021 JAPAN Tel: + 81 3 5207 8249 Fax: +81 3 5298 5362 https://www.smcworld.com Note: Specifications are subject to change without prior notice and any obligation on the part of the manufacturer.
Need help?
Do you have a question about the LECYU Series and is the answer not in the manual?
Questions and answers