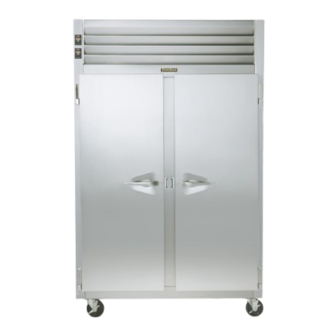
Traulsen R Series Quick Start Manual

Traulsen R Series Quick Start Manual

Quality refrigeration
Hide thumbs Also See for R Series:

Advertisement

Quick Links

Quality Refrigeration
Quick Start Guide
1. RECEIPT & SUPPORT INSTALLATION
You should carefully inspect your Traulsen unit for damage during delivery. If damage is detected, you should save
all the crating materials and make note on the carrier's Bill Of Lading describing this. A freight claim should be filed
within 5 days.
Confirm that the correct power supply is available to the cabinet per the manufactures requirements as listed on
the cabinet data tag before cabinet installation. The area in which your cabinet is to be installed should be chosen
carefully to insure the best performance. The installation surface should be level and provide good area circulation.
After the cabinet is set in place, and leveled, an NSF approved sealant(Dow Corning Silastic RTX #732 for example)
should be used around the perimeter of the base to secure the unit to the floor and prevent the ingress of vermin and
water under the unit. After properly sealing the unit to the floor, the enclosed ramp should then be installed using the
instructions included in this guide.
Some models may use R-290 (Propane) as a refrigerant. If flammable refrigerant is present, follow instructions as
labeled on the unit. Proper care must be taken to avoid any damage to refrigeration system including refrigerant
tubing, condenser and evaporator coils during handling, moving, installation and cleaning as it may cause risk of fire
or explosion. If damaged, unit must be moved to well ventilated area away from any sources of ignition.
Further service and repair must be performed by qualified refrigeration technicians familiar with applicable safety
standards for flammable refrigerants. Technicians must use appropriate personal protective equipment and follow
applicable safety pre cautions to avoid risk of fire or explosion.
All models should be installed to allow at least 12" of clear space above the unit. In all cases the louvers must be free
of any obstruction which could prevent proper air-flow.
Most units are supplied with a cord and plug, which can simply be plugged into a dedicated appropriately sized outlet.
For those requiring hard-wiring directly to the power supply, this should be done by a qualified electrician only.
Instructions for the installation,
use and care of:
R & A Series Roll-In
Refrigerators
R & A Series Roll-In
Hot Food Cabinets
TR36218 P/N 375-60366-00 (Rev. B 07/23)
-1-

Advertisement

Table of Contents
loading

Summary of Contents for Traulsen R Series

  • Page 1 1. RECEIPT & SUPPORT INSTALLATION You should carefully inspect your Traulsen unit for damage during delivery. If damage is detected, you should save all the crating materials and make note on the carrier’s Bill Of Lading describing this. A freight claim should be filed within 5 days.
  • Page 2: Ramp Installation

    2. RAMP INSTALLATION 2. a - STEP ONE To install the ramp you will need to first loosen and remove screws (351-60001-07) from both the left and right sides of the breaker strip. 2. b - STEP TWO Center the ramp to the door opening placing it 1-2 inches above the bottom of the unit. Move the ramp close to the unit (see Figure A) until the ramp end is placed between screw heads and foam tape by visual inspection.
  • Page 3 2. RAMP INSTALLATION (continued) 2. c - STEP THREE Install screws (351-60001-07) on the left and right sides but do not tighten (see Figure C). Push the ramp into the unit until it is fully inserted, then tighten the screws on the left and right sides (see Figure D). Figure C Figure D 2.
  • Page 4 2. RAMP INSTALLATION (continued) 2. e - STEP FIVE Adjust the door sweep’s height to close the gap between the wiper’s bottom and the ramp’s surface, then tighten the screw closest to the door hinge. Next, tighten the screw on the opposite end (closest to the door handle), then tighten the remaining two screws in the middle.
  • Page 5: Control Basics

    Make sure the lock bolt catches the lockkeeper so the door can be locked. All Traulsen equipment is configured for optimum performance. However, you may make minor adjustments to your Traulsen unit to suit your needs.
  • Page 6: General Care

    5. GENERAL CARE Disconnect electrical power supply before cleaning any parts of the unit. All Traulsen equipment should be cleaned only with warm water, mild soap and a soft cloth. Apply with a dampened cloth and wipe in the direction of the metal grain.
  • Page 7: Cleaning The Condenser

    6. CLEANING THE CONDENSER Disconnect electrical power supply before cleaning any parts of the unit. This is the single most important thing you can do to promote long, efficient equipment life. For upright cabinets, remove the two bottom screws securing the louver panel, then pivot this upwards allowing full access to the front facing condenser.
  • Page 8: Troubleshooting

    Factory recommends to use exact make and models to assure the consistent performance and to minimize the risk of possible ignition due to incorrect parts. In case of uncertainty or parts unavailability, contact Traulsen technical assistance at 800-825-8220.
  • Page 9: Service And Warranty Information

    8. SERVICE & WARRANTY INFORMATION 8. a - SERVICE SUPPORT To speak to service support for Traulsen units please contact our Fort Worth, TX facility by phone at 800-825-8220 or by fax to 817-740-6748 (parts) or 817-740-6757 (service). Note: When calling for service support, please make sure you have model and serial number of unit available.
  • Page 10: Hours Of Operation

    HOURS OF OPERATION: Monday thru Friday 7:30 AM - 4:30 PM CST Traulsen 4401 Blue Mound Road Fort Worth, TX 76106 Phone (800) 825-8220 Service Fax (817) 740 6757 www.traulsen.com Quality Refrigeration -10- TR36218 P/N 375-60366-00 (Rev. B 07/23)

This manual is also suitable for:

A seriesRdt232wut-fhsT25364a14

Table of Contents