Fanvil LINKVIL CA400 User Manual
Hide thumbs
Also See for LINKVIL CA400:
- Quick installation manual (23 pages) ,
- User manual (14 pages) ,
- Faq & troubleshooting (13 pages)
Table of Contents
Advertisement
Quick Links
Advertisement
Table of Contents

Related Manuals for Fanvil LINKVIL CA400

Summary of Contents for Fanvil LINKVIL CA400
- Page 1 User Manual CA400 User Manual CA400 Release Date:2023/11/27...
-
Page 2: Table Of Contents
User Manual CA400 Directory Introduction ............................3 Packing ..............................4 Instructions ............................5 CM70 Camera ..........................5 3.1.1 Camera Overview ............................. 5 3.1.2 Keys &LED Indicator ..........................6 3.1.3 Privacy Cover ............................6 3.1.4 Connection ............................... 7 MS10 Speakerphone ........................7 3.2.1 LED Indicator ............................ -
Page 3: Introduction
User Manual CA400 Introduction This is a wireless video conferencing solution designed specifically for small and medium- sized conference rooms. It mainly consists of an omnidirectional microphone MS10 that supports wireless screen projection, a receiver RC10, and a USB camera CM70, aiming to simplify your meetings. -
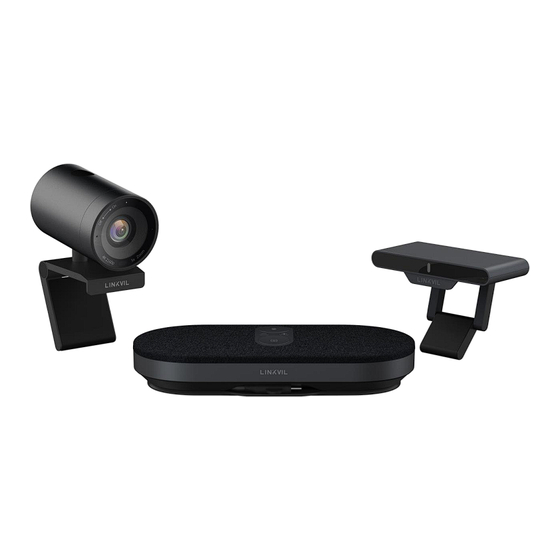
Page 4: Packing
User Manual CA400 Packing RC10 CM70 MS10... -
Page 5: Instructions
User Manual CA400 Instructions 3.1 CM70 Camera Camera Overview 3.1.1 LED Indicator Dual Microphone IR Receiver Switch Button USB Type-c port Clip Mount Front Side Back Clip Mount Tripod Mount Swivel & Tilt Tripod Screw hole Easily mount onto any displays Tripod screw hole is located at Manually adjust the webcam such as laptop monitor television... -
Page 6: Keys &Led Indicator
User Manual CA400 Keys &LED Indicator 3.1.2 Event Camera response LED Status Red light & orange Plug-in power light flashing Camera is in use Green light Camera is not in Red light Switch to 1x→2x→3x→4x→5x Single press the Red light blink →auto framing by each press switch button Long press(>2s) -
Page 7: Connection
User Manual CA400 Connection 3.1.4 (1) Connect the type C end of the bundled USB 3.0 cable to the Type C port at the back of the USB Camera. (2) Connect the Type A end of the same cable to a laptop or workstation. Connect with the USB 2.0 port of PC, the maximum resolution is 1080P, USB 3.0, the maximum resolution is 4K. -
Page 8: Screen Casting Led Indicator
User Manual CA400 Screen casting LED Indicator 3.2.2 Flashing Green Connecting in progress. Static Green Connection succeeds, ready for screencasting Static Yellow No DP signal from the laptop port. Three troubleshooting methods connection failure: 1. Re-plug the Speakerphone 2. Receiver is not powered, please re-plug and Static Red ensure the Receiver indicator light shows static white... -
Page 9: Receiver Led Indicator
User Manual CA400 Receiver LED Indicator 3.3.1 Flashing Green Connecting in progress. Static Green Connection succeeds, ready for screencasting. Static White Working. 3.4 Remote control Remote control Overview 3.4.1 Camera off Mic off Arrow keys & OK Auto framing/Manual- Menu Return Zoom in Zoom out... -
Page 10: Led Indication
User Manual CA400 LED indication 3.4.2 Event Camera response LED Status Use remote and Mic is mute, mute icon pop up Orange light blink turn off mic Use remote and Camera is off, pop up a black Red light blink turn off camera image with camera off icon Use remote and... -
Page 11: Installation Guidelines
User Manual CA400 Installation Guidelines Plug the 5V/2A power supply into the receiver and connect it to the HDMl cable of the display. To connect the USB camera, plug the camera's USB cable into the USB-A port on the receiver. Camera IN Power HDMI Out... - Page 12 User Manual CA400 Connect the MS10 Speakerphone to a full-featured Type-C port on your laptop. Wait until the screencasting button light turns green, then press the button to start casting your screen. Press the button again to end screen casting. Press to start /end screen casting TIPS:...
- Page 13 User Manual CA400 To use the speakerphone and access the camera wirelessly, in your video conference software, select "MS10 XXX "as your microphone, speaker, and camera. MS10 XXX "MS10 Wireless Camera" option is only available in the camera Integrated Camera device list when a camera is connected to the receiver.
-
Page 14: Faq
User Manual CA400 Q: What does it mean when the screencasting Button On the MS10 Speakerphone lights up yellow? Make sure whether the computer connected supports DisplayPort (DP output), Otherwise, there will be no signal output. Q: What does it mean when the screencasting Button On the MS10 Speakerphone lights up Red? Power off and on the Speakerphone. - Page 15 User Manual CA400 3. Check the computer casting mode, part of the computer to expand the screen can only be 4K cast screen. Q: Why does the sound not come out from SpeakerPhone? 1. Check the MS10 Speakerphone is set to output device by default in computer audio setting. 2.
- Page 16 User Manual CA400 The CA400 is designed to support laptops under Windows and MAC OS. Compatibility is not guaranteed with PC or Android under Linux or mobile phones and PADs under MAC OS. Q: What wireless technology is used to connect the CM70 camera to the MS10, and how far can it be? The remote control and camera are controlled through infrared.
-
Page 17: Safe Usuage Guidelines For Products
User Manual CA400 Safe Usuage Guidelines for Products ⚫ Do not open modify the product expect for internal parts removal and replacement. ⚫ Do not disassemble or attempt to service the product. ⚫ This Product is safe under normal and reasonably foreseeable misuse operating conditions.
Need help?
Do you have a question about the LINKVIL CA400 and is the answer not in the manual?
Questions and answers