Table of Contents
Advertisement
Quick Links
Advertisement
Table of Contents

Subscribe to Our Youtube Channel
Summary of Contents for Draper 65084
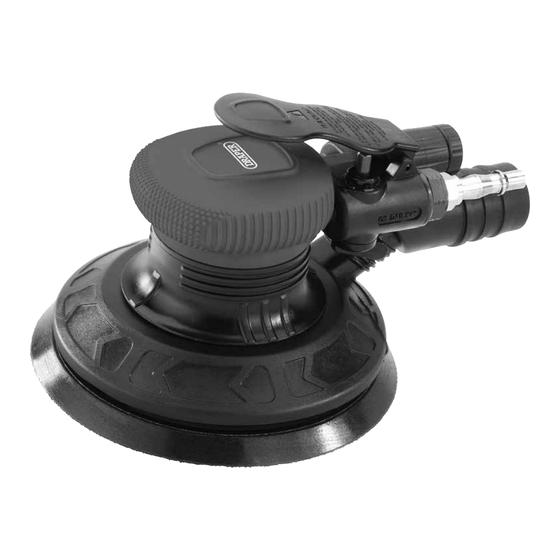
- Page 1 Original Instructions Version 3 DUAL ACTION AIR COMPOSITE SANDER 65084...
-
Page 2: Copyright © Notice
All photographs and drawings within this manual are document is part of the product; retain it for the life supplied by Draper Tools to help illustrate correct of the product, passing it on to subsequent holders. operation of the product. -
Page 3: Table Of Contents
2. Contents 1. Preface 1.1 Product Reference 1.2 Revisions 1.3 Understanding the Safety Content of This Manual 1.4 Copyright © Notice 2. Contents 3. Product Introduction 3.1 Intended Use 3.2 Specification 4. Health and Safety Information 4.1 Health and Safety Instructions for this Air Sander 4.2 ... -
Page 4: Product Introduction
Any other application beyond the conditions established for use will be considered misuse. Read this manual in full before attempting to assemble, Draper Tools accepts no responsibility for improper use operate or maintain the product and retain it for later use. of this product. -
Page 5: Health And Safety Information
− DO NOT use the sander if the backing pad is − Contact Draper Tools if the safety markings need broken or cracked or the tool has been dropped. to be replaced and DO NOT use the tool. - Page 6 • ONLY use accessory types and sizes recommended by dust or fumes. Draper Tools. • Use appropriate respiratory protection in accordance • DO NOT attach grinding wheels or cutting-off with local occupational health and safety regulations.
-
Page 7: Additional Safety Instructions For Pneumatic Tools
Use of these substances may cause the product to explode. • Draper Tools recommends the use of a whip hose between the tool and the air supply to reduce vibration. -
Page 8: Identification And Unpacking
5. Identification and Unpacking 5.1 Product Overview Air line inlet Retaining clip Backing plate Shroud Dust outlet Speed control lever Exhaust Trigger lever Inlet bung – 8 –... -
Page 9: What's In The Box
If any part is occurred during shipment. damaged or missing, do not attempt to use the product. Please contact the Draper Helpline; contact details can be found at the back of this manual. 1 x Air sander (not shown) -
Page 10: Preparation Instructions
When using an air tool with a hose over 25ft long, Important: Always check the machine operating pressure Draper Tools recommends increasing the bore of the hose before use. to the next largest available size (i.e. increase 3/8" to 1/2"). -
Page 11: Connection To The Air Supply
6. Preparation Instructions 6.3 Connection to the Air Supply Important: Draper Tools recommends using a 1/4" BSP male-threaded thread whip hose (Stock No. 54438, not supplied) to connect the spray gun to an air line in order to reduce vibration. -
Page 12: Operating Instructions
7. Operating Instructions Important: ALWAYS ensure that the product is correctly 5. Adjust the position of the speed control lever (8) to prepared and lubricated before operation. Read all the alter the airflow into the tool and set the sanding safety and preparation instructions in this manual speed as appropriate. -
Page 13: Maintenance And Storage
8. Maintenance and Storage 8.2 Replacing the Backing Plate Important: ALWAYS ensure that the air supply is disconnected from the tool before performing any The backing plate should be replaced if it becomes maintenance or storing the product. damaged, can no longer be sufficiently fastened, or no 8.1 General Maintenance longer grips the sanding pads securely. -
Page 14: Troubleshooting
The tool will not switch off. The o-rings at the throttle valve are Replace the o-ring seal or contact broken or dislodged. Draper Tools for support. If the issue cannot be resolved, contact Draper Tools for support. – 14 –... -
Page 15: Spares, Returns And Disposal
Store these materials in suitable containers and dispose of them in accordance with local regulations. Draper Tools and its agents cannot be responsible for the disposal of these substances. At the end of its working life, dispose of the product responsibly and in line with local regulations. -
Page 16: Warranty
This warranty period covers parts and labour for 6 months from the date of purchase. Your Draper Tools guarantee is not effective until you can Where tools have been hired out, the warranty period produce, upon request, a dated receipt or invoice to covers 90 days from the date of purchase. -
Page 17: Explanation Of Symbols
11. Explanation of Symbols Max. air pressure Read the instruction manual Warning! Average air consumption L/min Average air consumption Do not abandon in the environment Wear suitable eye protection and a 0.88 Product weight (bare) dust mask Wear protective gloves UK Conformity Assessed Wear ear defenders European Conformity... - Page 18 Notes – 18 –...
- Page 19 Notes – 19 –...
- Page 20 Telephone Sales Desk: +44 (0) 23 8049 4333 General Enquiries: +44 (0) 23 8026 6355 General Fax: +44 (0) 23 8026 0784 Please contact the Draper Tools Product Helpline for repair and servicing enquiries. © Published by Draper Tools Limited © Published by Draper Tools Limited...


Need help?
Do you have a question about the 65084 and is the answer not in the manual?
Questions and answers