Commercial copying, redistribution, hiring or lending is prohibited. No part of this publication may be stored in a retrieval system or transmitted in any other form or means without written permission from Draper Tools Limited. In all cases this copyright notice must remain intact.
This warranty applies in lieu of any other warranty expressed or implied and variations of its terms are not authorised. Your Draper warranty is not effective unless you can produce upon request a dated receipt or invoice to verify your proof of purchase within the warranty period.
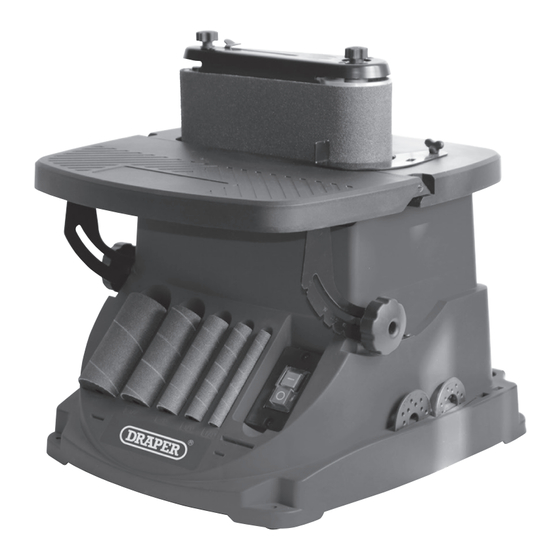
SCOPE This oscillating spindle sander is a versatile machine allowing various finishing tasks to be undertaken. SPECIFICATION Stock No........................... 98425 Part No..........................OSBS450D Motor: Rated voltage ........................ 230V~ Rated frequency ......................50Hz Rated input ........................450W Revolutions per minute ......................2000rpm Oscillations per minute ........................
HEALTH AND SAFETY INFORMATION GENERAL SAFETY INSTRUCTIONS FOR POWER TOOL USE WARNING: Read all safety warnings, instructions, illustrations and specifications provided with this power tool. Failure to follow all instructions listed below may result in electric shock, fire and/or serious injury. Save all warnings and instructions for future reference.
HEALTH AND SAFETY INFORMATION tool safety principles. A careless action can cause severe injury within a fraction of a second. Power tool use and care Do not force the power tool. Use the correct power tool for your application. The correct power tool will do the job better and safer at the rate for which it was designed.
HEALTH AND SAFETY INFORMATION Always keep your hands out of the path of the sander and away from the sanding sleeves or belt. Avoid hand positions where a sudden slip could cause your hand to contact the sleeve or belt. Do not reach underneath the workpiece or around the sanding sleeve or belt while the spindle is rotating.
HEALTH AND SAFETY INFORMATION When sanding a large piece of material, provide additional support at table height. Never leave when the machine is on, wait until the machine has come to a complete stop. Do not perform assembly or adjustment work on the table while the sander is operating. Turn sander “OFF”...
Lay the contents out and check them against the parts shown below. If any part is damaged or missing, please contact the Draper Help Line (the telephone number appears on the Title page) and do not attempt to use the product.
PREPARING THE SANDER Note: Remove the plug from the socket before carrying out adjustment, servicing or maintenance. TOOL HOLDERS The sander comes equipped with two sets of holders, one for the sanding sleeve and rubber drums when not in use, the other for the table inserts.
OPERATING THE SANDER Important: Make sure that the mains voltage matches the voltage stated on the machines rating plate. Important: If the sander is to be used in a permanent position, it is recommended that it is secured to a hard work surface.
OPERATING THE SANDER If no sanding belt is fitted, move the belt release lever (2) towards the spindle knob to allow the belt to be fitted. Ensure movement is controlled due to the tensioned spring loaded mechanism avoided potential damage or injury. FIG.8. Fit the sanding belt and check that it is lined up level at the correct height on the main roller of the belt sanding unit.
OPERATING THE SANDER Important: Make sure that the mains voltage matches the voltage stated on the machines rating plate. SPINDLE SANDER MODE - FIGS. 11 - 12 (33) Remove the belt sander (17) by unscrewing and removing the spindle knob (33). Lift the belt sander unit from the fixed table and store in the rear storage compartment.
10. MAINTENANCE AND TROUBLESHOOTING 10.1 MAINTENANCE Regular inspection and cleaning reduces the necessity for maintenance operations and will keep your tool in good working condition. The motor must be correctly ventilated during tool operation. For this reason avoid blocking the air inlets.
10. MAINTENANCE AND TROUBLESHOOTING 10.4 TROUBLESHOOTING GUIDE Warning! For you own safety always turn the main switch on the machine “OFF” and remove the plug from the power supply before carrying out any maintenance or troubleshooting. Problem Possible Cause Remedy Motor does not start.
11. EXPLANATION OF SYMBOLS 11.1 EXPLANATION OF SYMBOLS Read the instruction manual. Wear face mask and safety glasses. Disable the machine before attempting to maintain it. WEEE – Waste Electrical & Electronic Equipment. Do not dispose of Waste Electrical & Electronic Equipment in with domestic rubbish.
12. DISPOSAL 12.1 DISPOSAL – At the end of the machine’s working life, or when it can no longer be repaired, ensure that it is disposed of according to national regulations. – Contact your local authority for details of collection schemes in your area. In all circumstances: •...
Need help?
Do you have a question about the OSBS450D and is the answer not in the manual?
Questions and answers