
Related Manuals for Omcan CD-IT-110


Summary of Contents for Omcan CD-IT-110
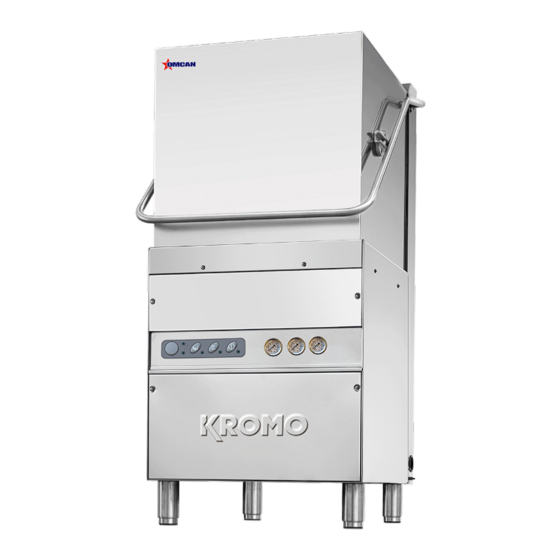
- Page 1 Dishwasher Model CD-IT-110 Item 49127 Instruction Manual Revised - 11/08/2023 Toll Free: 1-800-465-0234 Fax: 905-607-0234 Email: service@omcan.com www.omcan.com...
-
Page 2: Table Of Contents
Table of Contents Model CD-IT-110 Section Page General Information --------------------------------------------------------------------------- 3 - 4 Safety and Warranty --------------------------------------------------------------------------- 4 - 6 Technical Specifications -------------------------------------------------------------------------- 7 Installation and Operation ------------------------------------------------------------------ 8 - 14 Maintenance --------------------------------------------------------------------------------- 14 - 16 Troubleshooting ----------------------------------------------------------------------------- 16 - 18... -
Page 3: General Information
If the package has suffered rough handling, bumps or damage (visible or concealed), please note it on the bill of lading before accepting the delivery and contact Omcan within 24 hours, so we may initiate a claim with the carrier. A detailed report on the extent of the damage caused to the machine must be filled out within three days, from the delivery date shown in the shipping documents. -
Page 4: Safety And Warranty
Si el paquete ha sufrido un manejo de poco cuidado, golpes o daños (visible o oculto) por favor anote en la factura antes de aceptar la entrega y contacte Omcan dentro de las 24 horas, de modo que podamos iniciar una reclamación con la compañia. - Page 5 Safety and Warranty WARNINGS This instructions booklet must be kept with the machine for future consultations. If the machine is sold or transferred to other users, make sure the booklet always goes with the unit so that the new owner can have all the necessary information on operations and all relevant instructions.
- Page 6 1 YEAR PARTS AND LABOUR WARRANTY Within the warranty period, contact Omcan Inc. at 1-800-465-0234 to schedule an Omcan authorized service technician to repair the equipment locally. Unauthorized maintenance will void the warranty. Warranty covers electrical and part failures, not improper use.
-
Page 7: Technical Specifications
Technical Specifications Model CD-IT-110 Plates: 16.3” / 413mm dia. Crockery Dimensions Tray Max: Gastronorm 1/1 (20.9” x 12.8” / 530 x 324mm) Rack Dimensions 20” x 20” / 508 x 508mm 2 - Plastic Plates Basket Rack Equipment 1 - Large Mesh Glass Basket... -
Page 8: Installation And Operation
Installation and Operation RECEIVING THE MACHINE Pay special attention in choosing the lifting points and the machine bar and centre during the loading and unloading operations. Before accepting the machine, verify that all the data on the data-plate corresponds to the required ones and to the ones of the available electrical supply. - Page 9 Installation and Operation WATER SUPPLY CHARACTERISTICS The machine water supply must be potable. The inlet water must also meet the parameters given in the below table. Water parameters table Chlorine 2mg/l Water hardness 8°F Iron 0.2 mg/l Manganese 0.05 mg/l Out of range values might lead to corrosion and jeopardize the life of the machine.
- Page 10 Installation and Operation This switch shall be installed in the immediate vicinity of the machine. Only this switch must be used, always and strictly, to de-energize the machine at the end of the work session. Make sure the appliance is linked to an efficient ground connection. WARNING: check very carefully if the “ground connection”...
- Page 11 Installation and Operation ADJUSTMENT With each rinse cycle, the dispenser draws an amount of rinse aid, adjustable from 0 to 2 cubic inches (from 0 to 4 cc), equivalent to a length of 0 to 11” (from 0 to 30 cm) drawn into the suction tube. In order to regulate the dispenser to the minimum amount, turn the adjustment screw D (completely clockwise.
- Page 12 Installation and Operation • Open the water valve. • Turn on the main wall switch and start the machine by pressing switch 1 (it is not a total disconnecting switch). • Insert the special green rinse aid dispenser tube in the liquid rinse aid container and check that the quantity is sufficient for the daily requirement.
- Page 13 Installation and Operation heat resistant. CROCKERY AND CUTLERY NOT SUITABLE FOR DISHWASHER • Wooden crockery and cutlery or with wooden parts; water at high temperature causes deformation to wood. Also the adhesives used are not suitable for treatment in the dishwasher; a consequence could be the handles detachment.
-
Page 14: Maintenance
Installation and Operation filling or rinse phase. RINSE AID USE The machine is equipped with a rinse aid dispenser. The machine automatically draws the product. The rinse- aid chemical, shall be suitable for professional glass and dishwashers. It is advisable to rely on specialized retailers in the sector. - Page 15 Maintenance To ensure the best performance of the machine a proper and systematic cleaning is required. The following shall be carried out, at least once/day: • Turn off the ON/OFF switch to 0. • Turn off the water valve. • Drain the water removing the overflow pipe.
-
Page 16: Troubleshooting
Maintenance ECOLOGICAL ASPECTS RECOMMENDATIONS FOR OPTIMAL USE OF ENERGY, WATER AND ADDITIVES Use the machine fully loaded when possible This shall prevent detergent, rinse aid, water and energy waste. Detergent and rinse-aid Use detergent and rinse-aid chemicals with high biodegradability, to respect the environment best. Verify the proper dosage in relation to water hardness at least once a year. - Page 17 Troubleshooting The machine does not load water. Water valve shut. Open the water valve. The spray arm nozzles or the solenoid filter are clogged and/or caked with lime deposits. Clean the rinsing arm nozzles, the pipes and the filter. Check that the water hardness is <10°F. Equip the machine with an external water softener.
- Page 18 Troubleshooting During wash cycle the machine Water from the previous day has not been replaced. Empty the tank and stops and draws water. refill it. Faulty pressure switch. Have the technical assistance service check the thermostat and the pressure switch. The overflow tube is incorrectly positioned.
- Page 19 Figure Drawings...
-
Page 20: Parts Breakdown
Parts Breakdown Model CD-IT-110 General Body 49127... - Page 21 Parts Breakdown Model CD-IT-110 Hood 49127...
- Page 22 Parts Breakdown Model CD-IT-110 Electric Control Components 49127...
- Page 23 Parts Breakdown Model CD-IT-110 Solenoid Valve Group 49127...
- Page 24 Parts Breakdown Model CD-IT-110 DVGW Valve 49127...
- Page 25 Parts Breakdown Model CD-IT-110 Rinse Aid Dispenser Group 49127...
- Page 26 Parts Breakdown Model CD-IT-110 Boiler Group 49127...
- Page 27 Parts Breakdown Model CD-IT-110 3 Ways Connection 49127...
- Page 28 Parts Breakdown Model CD-IT-110 Wash Pump Group 49127...
- Page 29 Parts Breakdown Model CD-IT-110 Drain Pump Group 49127...
- Page 30 Parts Breakdown Model CD-IT-110 Pressure Switch Group 49127...
- Page 31 Parts Breakdown Model CD-IT-110 Wash Arm Group 49127...
- Page 32 Parts Breakdown Model CD-IT-110 Baskets 49127...
- Page 33 Parts Breakdown Model CD-IT-110 Control Panel and Switches 49127...
- Page 34 Parts Breakdown Model CD-IT-110 General Body 49127 Item No. Description Position Item No. Description Position Item No. Description Position AO694 Right/Left Handle Pilot Bush for 49127 AO702 Right Standard for 49127 AO707 Door Spring for 49127 Stainless Steel Basket Support 12S...
- Page 35 Parts Breakdown Model CD-IT-110 Solenoid Valve Group 49127 Item No. Description Position Item No. Description Position Item No. Description Position Single Solenoid Valve H20 230V for Gasket 3/4 Load H20 DIS.LS061 for AO533 AO535 AO537 11,5x19 EPDM Rubber Hose for 49127...
- Page 36 Parts Breakdown Model CD-IT-110 3 Ways Connection 49127 Item No. Description Position Item No. Description Position Item No. Description Position AO736 Plastic Y-Piece D.12-12-10 for 49127 AO738 Pipe-Pass O-Ring for 49127 AO741 Hexagonal Nut 3/8" D.10 for 49127 Stainless Steel Rinse Pipe Fitting D.10...
- Page 37 Parts Breakdown Model CD-IT-110 Wash Arm Group 49127 Item No. Description Position Item No. Description Position Item No. Description Position AO740 O-Ring 112 NBR for 49127 AO756 Hub for Rotor 11S 09/98 for 49127 AO758 Lower Pipe Coupling L172 for 49127 Stainless Steel Rinse Pipe Fitting D.10...
-
Page 38: Electrical Schematics
Electrical Schematics Model CD-IT-110 49127... -
Page 39: Warranty Registration
Warranty Registration Thank you for purchasing an Omcan product. To register your warranty for this product, complete the information below, tear off the card at the perforation and then send to the address specified below. You can also register online by visiting: Merci d’avoir acheté... - Page 40 Since 1951 Omcan has grown to become a leading distributor of equipment and supplies to the North American food service industry. Our success over these many years can be attributed to our commitment to strengthen and develop new and existing relationships with our valued customers and manufacturers.
Need help?
Do you have a question about the CD-IT-110 and is the answer not in the manual?
Questions and answers