
Related Manuals for Omcan CD-GR-0500


Summary of Contents for Omcan CD-GR-0500
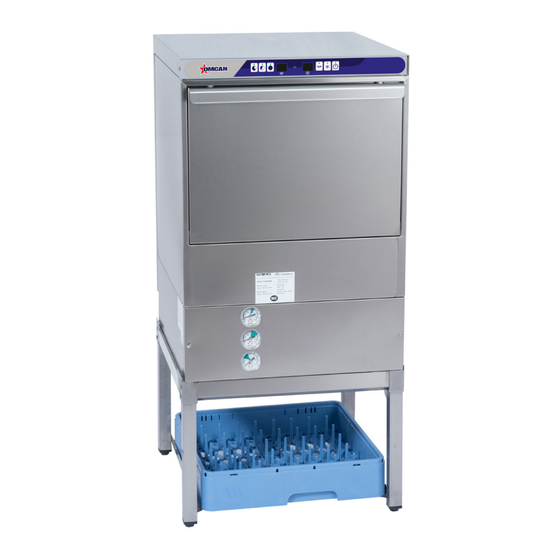
- Page 1 High Temp Dishwasher Model CD-GR-0500 Item 46320 Instruction Manual Revised - 03/19/2021 Toll Free: 1-800-465-0234 Fax: 905-607-0234 Email: service@omcan.com www.omcan.com *Platform not included.
-
Page 2: Table Of Contents
Table of Contents Model CD-GR-0500 Section Page General Information --------------------------------------------------------------------------- 3 - 4 Technical Specifications ---------------------------------------------------------------------- 5 - 7 Safety and Warranty --------------------------------------------------------------------------- 8 - 9 Installation ------------------------------------------------------------------------------------ 10 - 17 Operation ------------------------------------------------------------------------------------- 17 - 19 Maintenance --------------------------------------------------------------------------------- 20 - 21... -
Page 3: General Information
If the package has suffered rough handling, bumps or damage (visible or concealed), please note it on the bill of lading before accepting the delivery and contact Omcan within 24 hours, so we may initiate a claim with the carrier. A detailed report on the extent of the damage caused to the machine must be filled out within three days, from the delivery date shown in the shipping documents. - Page 4 Si el paquete ha sufrido un manejo de poco cuidado, golpes o daños (visible o oculto) por favor anote en la factura antes de aceptar la entrega y contacte Omcan dentro de las 24 horas, de modo que podamos iniciar una reclamación con la compañia.
-
Page 5: Technical Specifications
Technical Specifications Model CD-GR-0500 Voltage 208-240V 60Hz Max Power 3800 W Max Amperes 16 A Boiler Heating Element 3100 W Tank Heating Element 2900 W Boiler Capacity Tank Capacity 35 L Washing Pump Power 0.75 HP Overall Dimensions 22.4” x 23.6” x 32.7” / 570 x 600 x 830mm Basket Dimensions 19.7”... - Page 6 Technical Specifications...
- Page 7 Technical Specifications PRODUCT SERIAL NUMBER...
-
Page 8: Safety And Warranty
Safety and Warranty THE FOLLOWING SYMBOLS INDICATE IMPORTANT INFORMATION THROUGHOUT THIS MANUAL. Caution symbols indicate action or condition that can result in damage to the machine. Not approved symbols indicate action or condition that will diminish the optimum operation of the machine. - Page 9 • 1 Extended warranty brochure. 1 YEAR PARTS AND LABOUR WARRANTY Within the warranty period, contact Omcan Inc. at 1-800-465-0234 to schedule an Omcan authorized service technician to repair the equipment locally. Unauthorized maintenance will void the warranty. Warranty covers electrical and part failures, not improper use.
-
Page 10: Installation
Installation CHECK THAT ALL THE FOLLOWING ACCESSORIES ARE INSIDE THE MACHINE: • 1 Glass basket. • 1 Dish basket. • 1 Cutlery basket. • 1 Water inlet hose. • 1 Pressure reducer valve (PRV). • 4 leveling feet. • 4 thread covers for leveling feet. •... - Page 11 Installation LEVEL THE MACHINE INSTALLATION SUGGESTIONS • Place the dishwasher in the desired location. • The appliance should leveled. Adjustable feet are provided for this adjustment. Note The leveling feet should not have any exposed threads. Please use the provided bushes in order to cover the exposed threads.
- Page 12 Installation WATER SUPPLY CONNECTION ATTENTION: Connection with the water supply should be made according to all applicable codes. Machine must be connected to hot water source. Minimum income water temperature should be 40º. A Pressure Regulator Valve must be inserted between the machine water inlet and the water source. Water pressure during flow (not static), must be regulated to 20 PSI.
- Page 13 Do not add extension to the drain hose otherwise warranty is void. Outflow is accomplished by the use of a drain pump in the CD-GR-0500. The outlet hose must not be higher than 650mm from the floor. An open drain connection or one to a vented drain pipe is recommended.
- Page 14 Installation ATTENTION: • Make sure that no residuals remain to the water supply line before connecting it to the machine. • Plumbing connections must be made in such way that will allow the machine to be moved for service and cleaning.
- Page 15 Installation CONTROL PANEL This machine is equipped with peristaltic detergent and rinse aid pumps that are controlled through the PCB board. For that reason in order to adjust the dosing of each one you have to enter the User’s Menu by following the below steps, please bear in mind that for each second the corresponding pump captures the following liquid quantities: •...
- Page 16 Installation • Hold the buttons SW1, 3, 5 together. RINSE AID PUMP PRIMING: • Dishwasher on standby (OFF). • Door closed. • Hold the buttons SW1, 3, 4 together. Caution: Before you perform these adjustments, turn off the power supply. The dozer is adjusted from the manufacturer’s premises at its maximum value for easy initial priming and must be adjusted accordingly (depending on water hardness, how dirty the dishes are, and the detergent used).
-
Page 17: Operation
Installation Operation DAILY OPERATION • Check the chemical containers to be sufficient full. • Reposition the overflow pipe and the surface screeners. • Turn on the dishwasher by pressing button SW6 for 3 sec. The LED L6 will flash and the buzzer will sound. •... - Page 18 Operation • Load the basket in a proper way and place it inside the machine. All the residuals on the dishes and glasses must be removed • Close the door. • Start a washing cycle by pressing the preferable washing cycle time button. Program Wash time Rinse time...
- Page 19 Operation Pay attention on removing the basket after the washing cycle as it may be HOT. • For best results avoid allowing food residues to dry. • Remove bulk food residues, olive pips, lemon peels, toothpicks, etc., before placing the dishes in the basket.
-
Page 20: Maintenance
Maintenance Proper operation and safe use may be ensured only through the correct use of the appliance, as well as the compliance with the operation instructions, the corresponding specifications and the care and cleaning indications. Depending on local water hardness, the nozzles on the upper wash piping and rinse arms should be cleaned. Caution must be exercised to not damage the nozzles. -
Page 21: Troubleshooting
Maintenance After defining the value, press Button SW5 once in order to register the value in the memory. In the matrix that is presented below you can find a short description of the functions that can be adjusted by the user, as well as their default values. In order to exit the User’s Menu, press-hold Button SW6 for 3 sec. - Page 22 Troubleshooting ALARM PROBLEM DESCRIPTION Alarm 1 Filling time in excess. Alarm 2 The water level during draining is not reduced. Alarm 3 Excess time of boiler heating. Alarm 4 Excess time of tank heating. Alarm 5 Water temperature in the boiler is above limits. Alarm 6 Water temperature in the wash tank is above limits.
- Page 23 Troubleshooting Boiler heating operates, but LED Faulty LED. Change LED. does not turn on. Dispenser heating does not Switch N1 of the appliance or Activate the corresponding switch operate. main switch or fuse has not been or fuse. activated. Boiler heating is open. Wait.
-
Page 24: Parts Breakdown
Parts Breakdown Model CD-GR-0500 46320... - Page 25 Parts Breakdown Model CD-GR-0500 46320...
- Page 26 Parts Breakdown Model CD-GR-0500 46320...
- Page 27 Parts Breakdown Model CD-GR-0500 46320...
- Page 28 Parts Breakdown Model CD-GR-0500 46320...
- Page 29 Parts Breakdown Model CD-GR-0500 46320...
- Page 30 Parts Breakdown Model CD-GR-0500 46320...
- Page 31 Parts Breakdown Model CD-GR-0500 46320...
- Page 32 Parts Breakdown Model CD-GR-0500 46320...
- Page 33 Parts Breakdown Model CD-GR-0500 46320...
- Page 34 Parts Breakdown Model CD-GR-0500 46320...
- Page 35 Parts Breakdown Model CD-GR-0500 46320...
- Page 36 Parts Breakdown Model CD-GR-0500 46320...
- Page 37 Parts Breakdown Model CD-GR-0500 46320...
- Page 38 Parts Breakdown Model CD-GR-0500 46320...
- Page 39 Parts Breakdown Model CD-GR-0500 46320...
- Page 40 Parts Breakdown Model CD-GR-0500 46320 Item No. Description Position Item No. Description Position Item No. Description Position 41141 Small Leveling Feet Black for 46320 AD890 Filter for Mod.50 Right Complete for 46320 41106 Wash Pump Inlet Hose for 46320 001.00.00016 001.50.00102...
- Page 41 Parts Breakdown Model CD-GR-0500 46320 Item No. Description Position Item No. Description Position Item No. Description Position 73796 Flow Control Disk for Base for 46320 AD921 Steel Electrical Door Switch Plate for 46320 73762 Cable Plastic Clamp for 46320 002.50.00016 003.00.00077...
-
Page 42: Electrical Schematics
Electrical Schematics Model CD-GR-0500 46320 Booster Heating Electromagnetic Rinse Aid Pump Thermo Probe Tank Element Filter Motor Capacitor Hot Rinse Valve Thermofuse Booster UI User Interface Washing Pump Cold Rinse Valve Microrelay Thermofuse Tank Motor Tank Heating Drain Pump Motor... -
Page 43: Notes
Notes ________________________________________________________________________________________ ________________________________________________________________________________________ ________________________________________________________________________________________ ________________________________________________________________________________________ ________________________________________________________________________________________ ________________________________________________________________________________________ ________________________________________________________________________________________ ________________________________________________________________________________________ ________________________________________________________________________________________ ________________________________________________________________________________________ ________________________________________________________________________________________ ________________________________________________________________________________________ ________________________________________________________________________________________ ________________________________________________________________________________________ ________________________________________________________________________________________ ________________________________________________________________________________________ ________________________________________________________________________________________ ________________________________________________________________________________________ ________________________________________________________________________________________ ________________________________________________________________________________________ ________________________________________________________________________________________ ________________________________________________________________________________________ ________________________________________________________________________________________ ________________________________________________________________________________________... - Page 44 Notes ________________________________________________________________________________________ ________________________________________________________________________________________ ________________________________________________________________________________________ ________________________________________________________________________________________ ________________________________________________________________________________________ ________________________________________________________________________________________ ________________________________________________________________________________________ ________________________________________________________________________________________ ________________________________________________________________________________________ ________________________________________________________________________________________ ________________________________________________________________________________________ ________________________________________________________________________________________ ________________________________________________________________________________________ ________________________________________________________________________________________ ________________________________________________________________________________________ ________________________________________________________________________________________ ________________________________________________________________________________________ ________________________________________________________________________________________ ________________________________________________________________________________________ ________________________________________________________________________________________ ________________________________________________________________________________________ ________________________________________________________________________________________ ________________________________________________________________________________________ ________________________________________________________________________________________...
- Page 45 Notes ________________________________________________________________________________________ ________________________________________________________________________________________ ________________________________________________________________________________________ ________________________________________________________________________________________ ________________________________________________________________________________________ ________________________________________________________________________________________ ________________________________________________________________________________________ ________________________________________________________________________________________ ________________________________________________________________________________________ ________________________________________________________________________________________ ________________________________________________________________________________________ ________________________________________________________________________________________ ________________________________________________________________________________________ ________________________________________________________________________________________ ________________________________________________________________________________________ ________________________________________________________________________________________ ________________________________________________________________________________________ ________________________________________________________________________________________ ________________________________________________________________________________________ ________________________________________________________________________________________ ________________________________________________________________________________________ ________________________________________________________________________________________ ________________________________________________________________________________________ ________________________________________________________________________________________...
-
Page 46: Installation Requirements And Checklist
INSTALLATION REQUIREMENTS AND CHECKLIST The Dishwasher must be installed by a certified plumber. Failing to follow the instructions below will void the warranty. *This checklist must be returned with warranty card.* Installer Signature Below: 1. Check water hardness. If water hardness exceeds 7 grains per gallon, a water softener must be installed. 2. -
Page 47: Warranty Registration
Warranty Registration Thank you for purchasing an Omcan product. To register your warranty for this product, complete the information below, tear off the card at the perforation and then send to the address specified below. You can also register online by visiting: Merci d’avoir acheté... - Page 48 Since 1951 Omcan has grown to become a leading distributor of equipment and supplies to the North American food service industry. Our success over these many years can be attributed to our commitment to strengthen and develop new and existing relationships with our valued customers and manufacturers.
Need help?
Do you have a question about the CD-GR-0500 and is the answer not in the manual?
Questions and answers