
Related Manuals for Omcan CD-GR-0500


Summary of Contents for Omcan CD-GR-0500
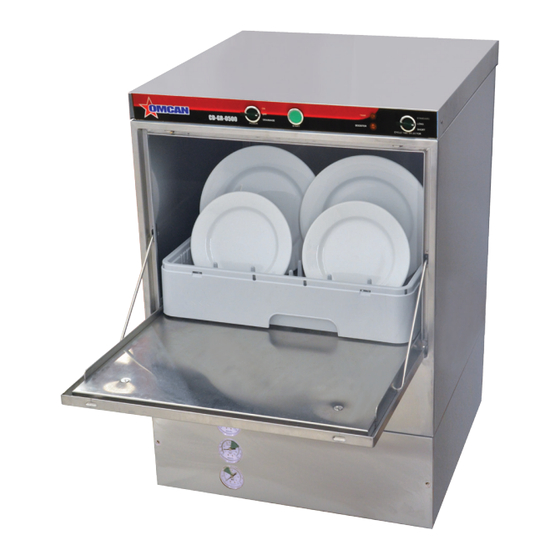
- Page 1 High Temp Dishwasher Model CD-GR-0500 Item 45219 Instruction Manual Revised - 04/20/2018 Toll Free: 1-800-465-0234 Fax: 905-607-0234 Email: service@omcan.com www.omcan.com...
-
Page 2: Table Of Contents
Table of Contents Model CD-GR-0500 Section Page General Information --------------------------------------------------------------------------- 3 - 4 Technical Specifications ---------------------------------------------------------------------- 5 - 7 Safety and Warranty --------------------------------------------------------------------------- 8 - 9 Installation ------------------------------------------------------------------------------------ 10 - 17 Operation ------------------------------------------------------------------------------------- 17 - 19 Maintenance --------------------------------------------------------------------------------- 20 - 21... -
Page 3: General Information
If the package has suffered rough handling, bumps or damage (visible or concealed), please note it on the bill of lading before accepting the delivery and contact Omcan within 24 hours, so we may initiate a claim with the carrier. A detailed report on the extent of the damage caused to the machine must be filled out within three days, from the delivery date shown in the shipping documents. - Page 4 Si el paquete ha sufrido un manejo de poco cuidado, golpes o daños (visible o oculto) por favor anote en la factura antes de aceptar la entrega y contacte Omcan dentro de las 24 horas, de modo que podamos iniciar una reclamación con la compañia.
-
Page 5: Technical Specifications
Technical Specifications Model CD-GR-0500 Voltage 220-240V 60Hz Max Power 3.8 Kw Max Amperes 16 A Minimum Income Water Temperature 40°C / 104°F Rinse Flow Pressure 20 psi ± 5 Boiler Heating Element 3.1 kW Tank Heating Element 2.9 kW Boiler Capacity... - Page 6 Technical Specifications...
- Page 7 Technical Specifications PRODUCT SERIAL NUMBER...
-
Page 8: Safety And Warranty
Safety and Warranty THE FOLLOWING SYMBOLS INDICATE IMPORTANT INFORMATION THROUGHOUT THIS MANUAL. Caution symbols indicate action or condition that can result in damage to the machine. Not approved symbols indicate action or condition that will diminish the optimum operation of the machine. - Page 9 • 1 Extended warranty brochure. 1 YEAR PARTS AND LABOUR WARRANTY Within the warranty period, contact Omcan Inc. at 1-800-465-0234 to schedule an Omcan authorized service technician to repair the equipment locally. Unauthorized maintenance will void the warranty. Warranty covers electrical and part failures, not improper use.
-
Page 10: Installation
Installation PLACEMENT LEVEL THE MACHINE INSTALLATION SUGGESTIONS • Place the dishwasher in the desired location. • The appliance should leveled. Adjustable feet are provided for this adjustment. - Page 11 Installation Note The leveling feet should not have any exposed threads. Please use the provided bushes in order to cover the exposed threads. PLACEMENT - CHEMICAL CONTAINERS Chemical supply containers must be placed as close as possible to the machine and must not be elevated.
- Page 12 Installation ATTENTION: Connection with the water supply should be made according to all applicable codes. Machine must be connected to hot water source. Minimum income water temperature should be 40º. A Pressure Regulator Valve must be inserted between the machine water inlet and the water source. Water pressure during flow (not static), must be regulated to 20 PSI.
-
Page 13: Drainage Connection
Do not add extension to the drain hose otherwise warranty is void. Outflow is accomplished by the use of a drain pump in the CD-GR-0500. The outlet hose should be connected either directly to a floor drain or drain which must not be higher than the level of the outlet at the rear of the machine. - Page 14 Installation ELECTRICAL CONNECTION Attention: Before make any electrical connection or service, disconnect the main electrical supply and lock it out in order to clearly indicate that there is work in progress. Open the lower front cover (2 bolts). Open the top cover of electrical circuit. III.
- Page 15 Installation DETERGENT AND RINSE AID REGULATION. Open the lower front cover (2 bolts). Take out the feeders. III. Adjust the quantity by regulating the dosing (xxxxxx ml / rotation). Replace the feeders. Make sure that the chemical feeders’ hoses are not out of the right position. Replace the front lower cover.
- Page 16 Installation AUTOMATIC FILLING OF DETERGENT This model has an automatic detergent pump for use with a container of non foaming liquid detergent. The detergent pump is a peristaltic regulated (looks exactly like the rinse-aid pump) and can be regulated by a screw above and on the right of the glass cover.
-
Page 17: Operation
Installation Operation DAILY OPERATION 1. Check the chemical containers to be sufficient full. 2. Replace the overflow pipe and the surface screeners into correct position. 3. Turn on the dishwasher by putting the switch No 1 into on position. 4. Wait 20 minutes in order both the tank and booster to be fully heated. Attention: the full heating process is finished when both warming lights are off. - Page 18 Operation 5. Load the basket in a proper way and place it in the machine. Attention: All the residuals on the dishes and glasses must be removed. 6. Select the preferable washing cycle time by the selector switch No 2. Program Wash time Rinse time...
- Page 19 Operation • Check that the pump inlet filter has been placed in the correct position if it was removed for cleaning. • Check that the overflow stand pipe is inserted correctly in its outlet. • Close door. • Turn power switch to “PROGRAM” (switches should now illuminate). •...
-
Page 20: Maintenance
Maintenance SHUTTING DOWN AND DRAINING 1. Turn the power switch into draining position. 2. Remove the overflow pipe. Attention: Do not remove the surface screeners and internal filters if the tank is not empty. 3. Press the start button to start a draining cycle. If a second draining is needed start a new cycle by pressing the start button. - Page 21 Spare parts and components are usually available at the authorized local service agency, or directly from Omcan, In case of warranty claims or complaints, you must supply the model and serial number of the appliance found on the specification label of the appliance.
-
Page 22: Troubleshooting
Control switch S1 not activated. Turn switch S1 on. Switch S1 is faulty. Refer to the authorized service agency, local dealer, or Omcan. Water supply not turned on. Turn the supply on. Door is not closed. Close the door. - Page 23 The door is not closed. Close the door. Main relay is faulty. Refer to the authorized service agency, local dealer, or Omcan. Pump motor is faulty. Refer to the authorized service agency, local dealer, or Omcan. Program timer is faulty.
-
Page 24: Parts Breakdown
Parts Breakdown Model CD-GR-0500 45219... - Page 25 Parts Breakdown Model CD-GR-0500 45219...
- Page 26 Parts Breakdown Model CD-GR-0500 45219...
- Page 27 Parts Breakdown Model CD-GR-0500 45219...
- Page 28 Parts Breakdown Model CD-GR-0500 45219...
- Page 29 Parts Breakdown Model CD-GR-0500 45219...
- Page 30 Parts Breakdown Model CD-GR-0500 45219...
- Page 31 Parts Breakdown Model CD-GR-0500 45219...
- Page 32 Parts Breakdown Model CD-GR-0500 45219...
- Page 33 Parts Breakdown Model CD-GR-0500 45219...
- Page 34 Parts Breakdown Model CD-GR-0500 45219...
- Page 35 Parts Breakdown Model CD-GR-0500 45219...
- Page 36 Parts Breakdown Model CD-GR-0500 45219...
- Page 37 Parts Breakdown Model CD-GR-0500 45219...
- Page 38 Parts Breakdown Model CD-GR-0500 45219...
- Page 39 Parts Breakdown Model CD-GR-0500 45219...
- Page 40 Parts Breakdown Model CD-GR-0500 45219 Item No. Description Position Item No. Description Position Item No. Description Position Cycle Selection Switch 0-1-2 LED for 60951 INOX Screw M4x15 for V500 41104 73884 Washer Steel 6x18 for V500 V500 60952 INOX Nut M4 for V500...
- Page 41 Parts Breakdown Model CD-GR-0500 45219 Item No. Description Position Item No. Description Position Item No. Description Position Washing Base Down V-K Complete 41119 Relay Magnetic Contactor for V500 60996 Nut M10 for V500 61005 for V500 73837 Micro Relay 11 Pins with Faston for V500 41140 O-Ring 10.5x3 for V500...
-
Page 42: Electrical Schematics
Electrical Schematics Model CD-GR-0500 45219 Booster’s Heating Detergent Pump Main Switch Thermostat Element Motor Program Selector Tank’s Heating Drainage Pump Start Switch Switch Element Motor Doors Cut Off Electronic Timer Indicator Lamp Microrelay Switch Pressure Switch Capacitor Water Inlet Valve... -
Page 43: Warranty Registration
Warranty Registration Thank you for purchasing an Omcan product. To register your warranty for this product, complete the information below, tear off the card at the perforation and then send to the address specified below. You can also register online by visiting: Merci d’avoir acheté... - Page 44 Since 1951 Omcan has grown to become a leading distributor of equipment and supplies to the North American food service industry. Our success over these many years can be attributed to our commitment to strengthen and develop new and existing relationships with our valued customers and manufacturers.
Need help?
Do you have a question about the CD-GR-0500 and is the answer not in the manual?
Questions and answers
Not off after regular season aworking