Advertisement
Quick Links
Advertisement

Subscribe to Our Youtube Channel
Related Manuals for Wisenet PNB-A9091RLPH


Summary of Contents for Wisenet PNB-A9091RLPH
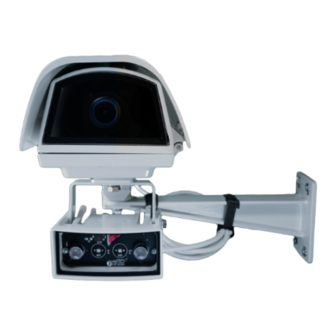
- Page 1 PNB-A9091RLPH Quick Guide Wisenet Road AI LPR Box Camera Kit...
- Page 2 Wisenet Road AI LPR Box Camera Kit Quick Guide Copyright ©2022 Co., Ltd. All rights reserved. Hanwha Techwin Trademark Each of trademarks herein is registered. The name of this product and other trademarks mentioned in this manual are the registered trademark of their respective company.
-
Page 3: Installation And Connection
overview CONTENTS OVERVIEW What’s Included INSTALLATION & CONNECTION Installation 3_ Contents... -
Page 4: What's Included
overview WHAT’S INCLUDED Please check if your camera and accessories are all included in the product package. Each item may be package in its' own box. Appearance Item Name Quantity HOV32K2A700 OUTDOOR HOUSING WBJA WALL BRACKET WITH BALL JOING IRH30L IR ILLUMINATOR OSUPPIR BRACKET FOR IR ILLUMINATOR... - Page 5 Quick Installation of housing, wall mount, and illuminator: Fasten the plate (1) between the bottom of the housing (2) and the bracket (3) using the supplied screws (4). Fasten the top bracket (1) to the illuminator using the screws and washers (2) supplied. Fasten the illuminator and bracket using the nut and the washer.
- Page 6 Opening the housing Loosen the 2 screws on the side of the housing, allowing the cover and the upper half of the body to pivot open on the hinge. Slide removal To remove the slide it is necessary to partially unscrew the fixing screws as shown in the figure.
- Page 7 Position the camera lens close to the glass to avoid visual interference or optical reflections. Connect the camera to the J2 connector (3) (PoE+ OUT) Refit the slide in its housing and fix the previously loosened screws. Connection of the illuminator Connect the illuminator to the J6 terminal as described in the diagram below.
- Page 8 PoE+ cable connection Connect the PoE+ cable from the Power Injector to the J1 connector. Before powering the device, you must set the maximum power consumption of the housing operating on dip switch SW1, below. Configuration POWER CONSUMPTION CONFIGURATION Before powering the device, you must set the Maximum power maximum power consumption of the housing to ON for PoE+ class 4 (25.5W maximum output) operating on dip...
- Page 9 IP addressing. The Wisenet Road AI application has been pre-installed and licensed on the camera. Please consult the Wisenet Road AI Quick Start Guide for more information on getting started with using the LPR application.
- Page 10 Hanwha Techwin America 500 Frank W. Burr Blvd. Suite 43 Teaneck, NJ 07666 Toll Free +1.877.213.1222 Direct +1.201.325.6920 Fax +1.201.373.0124 www.hanwhasecurity.com...
Need help?
Do you have a question about the PNB-A9091RLPH and is the answer not in the manual?
Questions and answers