
Related Manuals for HydroMassage L-440


Summary of Contents for HydroMassage L-440
- Page 1 L-440/450 Lounge Quick Start Manual Bluetooth Models Class I, Type B, IPXO, Equipment Revised June 6, 2018...
-
Page 2: Table Of Contents
Contents PAGE Introduction to HydroMassage® ....................1 HydroMassage® Limited Warranty ..................... 2 Disclaimers ..........................3 HydroMassage® Precautions and Contraindications ..............4 HydroMassage® Safety Considerations ..................5 HydroMassage® Lounge Specifications..................6 Installation Preparation Instructions .................... 7 Pre-Installation Checklist......................8 Delivery Unpacking Instructions ....................9 Delivery Moving Unit to Desired Location .................. -
Page 3: Introduction To Hydromassage
HydroMassage® is a registered trademark of JTL Enterprises, Inc. Notice of Copyright HydroMassage® Owner's Manual@ October 2017 JTL Enterprises, Inc. All rights reserved. Disclaimer While every precaution has been taken to ensure the accuracy of the contents of this manual, JTL Enterprises, Inc. -
Page 4: Hydromassage® Limited Warranty
Specific legal rights: This limited Warranty gives you specific legal rights which may vary from state to state. L-400 Lounge Quick Start Manual V2.0 20180312 JTL Enterprises, Inc 1-727-536-5566 • www.HydroMassage.com Page 2 of 38... -
Page 5: Disclaimers
This writing constitutes the final expression of the parties' agreement and is the complete and final statement of the terms of the agreement. L-400 Lounge Quick Start Manual V2.0 20180312 JTL Enterprises, Inc 1-727-536-5566 • www.HydroMassage.com Page 3 of 38... -
Page 6: Hydromassage® Precautions And Contraindications
IMPORTANT: Any person with a specific medical condition upon which heat or massage might have an adverse effect should consult a physician prior to use. have an adverse effect should consult a physician prior to use. L-400 Lounge Quick Start Manual V2.0 20180312 JTL Enterprises, Inc 1-727-536-5566 • www.HydroMassage.com Page 4 of 38... -
Page 7: Hydromassage® Safety Considerations
If the External Cooling System is to be installed anywhere other than on the ground, check to • ensure it is securely mounted. L-400 Lounge Quick Start Manual V2.0 20180312 JTL Enterprises, Inc 1-727-536-5566 • www.HydroMassage.com Page 5 of 38... -
Page 8: Hydromassage® Lounge Specifications
15.6” Display Type Wide Screen all in Touchscreen 1920 x 1080 pixels, 60Hz Resolution Temperature Operating: 41°F-95°F/5°C- Parameters 35°C Weight 3.95 lbs./179 kg L-400 Lounge Quick Start Manual V2.0 20180312 JTL Enterprises, Inc 1-727-536-5566 • www.HydroMassage.com Page 6 of 38... -
Page 9: Installation Preparation Instructions
Weight: 285Ibs. /129 kg without water, 405Ibs/184kg with 20 gal/76 liters distilled water. Requires a doorway larger than 34 in./87 cm to install room. L-400 Lounge Quick Start Manual V2.0 20180312 JTL Enterprises, Inc 1-727-536-5566 • www.HydroMassage.com Page 7 of 38... -
Page 10: Pre-Installation Checklist
Position Lounge with electrical box (mounted on frame) facing towards center of room for ease of access during service, when possible. b. If external cooling system is being installed on the HydroMassage® room floor, ensure the following: o Sufficient space is available for cooling unit o Allow for a minimum of 12”... -
Page 11: Delivery Unpacking Instructions
Adjustable Phillips Screw Tin-Snips Small Scissors Crescent Driver Wrench Follow the steps below when unpacking HydroMassage® Lounge Shipping Crates. Step 3: Remove Box (sleeve) Step 2: Remove Lid Step 1: Using Tin-Snip, snip by lifting up packing bands packing bands... - Page 12 3 below. IMPORTANT: Do not carry unit or move by using plywood shipping platform. Touchscreen Arm Touchscreen Computer Figure 3. L-400 Lounge Quick Start Manual V2.0 20180312 JTL Enterprises, Inc 1-727-536-5566 • www.HydroMassage.com Page 10 of 38...
- Page 13 NOTE: You can then lower the lounge down onto the 4 casters on the bottom of the frame as shown below In figure(s) 8 and 9. Figure 8. Figure 9. L-400 Lounge Quick Start Manual V2.0 20180312 JTL Enterprises, Inc 1-727-536-5566 • www.HydroMassage.com Page 11 of 38...
-
Page 14: Delivery Moving Unit To Desired Location
HydroMassage® Delivery/Moving Lounge to Desired Location Follow the steps below when moving HydroMassage® Lounge Step 1: Move lounge to desired location. NOTE: Ensure metal control box is facing toward the center of the room for easy access. NOTE: If you must stand the lounge on its end: Mount the extra casters that are included in the supply box to the frame at the head end of the •... - Page 15 HydroMassage® Delivery/Moving Lounge to Desired Location Continued Follow the steps below when moving HydroMassage® Lounge Step 2: Put side and end panels on unit. NOTE: Use black thumb screws from Parts Supply Box to secure end panels. PRIOR TO CLOSING OUT DELIVERY/UNPACKING PROCEDURES, ENSURE THAT ALL COMPONENTS ARE SECURE FOR THE NEXT STEPS.
-
Page 16: Touchscreen Installation Components
Power cord wiring to Touchscreen touchscreen mounting Allen Wrench to tighten touchscreen pole if necessary. Found in bag attached to frame. L-400 Lounge Quick Start Manual V2.0 20180312 JTL Enterprises, Inc 1-727-536-5566 • www.HydroMassage.com Page 14 of 38... -
Page 17: Hydromassage® Touchscreen Installation
1. Remove touchscreen from the box and unwrap the touchscreen pole and open supply boxes. 2. Identify all HydroMassage® Pre-Installation Components on previous page. 3. Attach the touchscreen mounting pole into lounge frame. Touchscreen is typically installed on the side of the lounge adjacent to a wall. - Page 18 7. Users may plug headphones into headphone jack on back of touchscreen 8. If installing T-Max or other remote usage controls, make connection at this point. NOTE: Call HydroMassage® technical support at 727-536-5566 with question. L-400 Lounge Quick Start Manual V2.0 20180312 JTL Enterprises, Inc 1-727-536-5566 •...
-
Page 19: Hydromassage Leg Setup
HydroMassage Leg Setup Swing out the front legs. The front legs of the HydroMassage Lounge ship with one of the mounting bolts removed from the leg and the legs hinged into the base of the lounge. The legs are affixed to the frame by standard black tri-knobs attached to bolts. -
Page 20: Hydromassage® Initial Start-Up
Black knobs 6. Plug the 220V power cord into the 220V wall outlet IMPORTANT: The touchscreen will power up as the 220V power cord is plugged in. The HydroMassage® software will take 30-45 seconds to appear on the screen. L-400 Lounge Quick Start Manual V2.0 20180312 JTL Enterprises, Inc 1-727-536-5566 •... -
Page 21: Bluetooth Setup
**Important** HydroMassage® Touchscreen must be paired to Bluetooth Module Press and HOLD the HydroMassage® Logo icon on the top left corner of the touchscreen start window. RESULTS: Secondary window will appear requesting six digit access number as shown below in Step 2.. - Page 22 3. Select the "Bluetooth Manager" option on the left bottom side of screen as shown below. 4. The Bluethooth Manager Window option will appear like the picture below. L-400 Lounge Quick Start Manual V2.0 20180312 JTL Enterprises, Inc 1-727-536-5566 • www.HydroMassage.com Page 20 of 38...
- Page 23 Do not hit any buttons or do anything on this window as the Bluetooth chip will automatically connect itself to the tablet and this window will disappear. L-400 Lounge Quick Start Manual V2.0 20180312 JTL Enterprises, Inc 1-727-536-5566 • www.HydroMassage.com Page 21 of 38...
- Page 24 • Once all water is added remove the fill tube and reinstall the breather tube. 7. Press green START button on touchscreen to turn on HydroMassage® for the first time. • Check under unit for any visible signs of leaks.
-
Page 25: Testing
HydroMassage® Testing 1) Test touchscreen controls • Confirm the HydroMassage® is working properly by testing the pressure bars, change the massage speed, and launch the entertainment options at least 1X each. Massage Massage Area Pressure Limits Massage Travel Speed Entertainment 2) Test the cooling system (either external and internal) (For 440, 450 Models, Admin screen to view temperature settings). -
Page 26: Hydromassage® Final Assembly
HydroMassage® Final Assembly 1. Position HydroMassage® unit in final location (centered on wall) For all models, allow for a minimum of 3' of excess electrical and cooling system wiring to • enable movement of HydroMassage® unit during servicing or maintenance. - Page 27 Comfort pad snaps 6. Contact HydroMassage® Technical Support Department at 727-536-5566 to install HydroMassage® Desktop Software and Remote Access Software (if applicable). L-400 Lounge Quick Start Manual V2.0 20180312 JTL Enterprises, Inc 1-727-536-5566 • www.HydroMassage.com Page 25 of 38...
-
Page 28: Hydromassage® Post Installation
HydroMassage® Post Installation 1) HydroMassage® Usage • Ensure all staff/ customers are familiar with basic HydroMassage® operation and functionality. The pillow should be positioned at the top of the user's shoulders to reduce noise. • pillow may be removed to massage head and neck. -
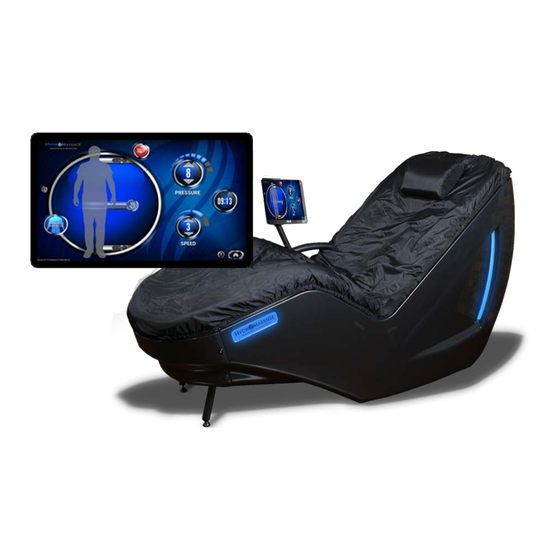
Page 29: Hydromassage® Touchscreen Overview
HydroMassage® Touchscreen Overview The HydroMassage® touchscreen is a feature that was designed to increase the functionality, ease of use, and overall level of enjoyment of a HydroMassage® Dry Hydrotherapy system. In addition to allowing the user to adjust the pressure, speed,... - Page 30 Time before beginning the massage, press either the Up or Down arrows directly to the right of the clock. To change the default time, see "Adjusting Defaults" under Advanced Features. L-400 Lounge Quick Start Manual V2.0 20180312 JTL Enterprises, Inc 1-727-536-5566 • www.HydroMassage.com Page 28 of 38...
- Page 31 To access this menu, press and hold the HydroMassage® Logo on the main screen for 5 seconds then enter the HydroMassage® Administrator Code (120700). The Administrator Default windows will open.
- Page 32 Click on the LED Color box to open the LED Color Picker Select desired color and close Default Blue is Green Blue Use the slide bar to adjust, then click close L-400 Lounge Quick Start Manual V2.0 20180312 JTL Enterprises, Inc 1-727-536-5566 • www.HydroMassage.com Page 30 of 38...
-
Page 33: External Timer Connection Diagram
HydroMassage External Timer Connection Diagram ® L-400 Lounge Quick Start Manual V2.0 20180312 JTL Enterprises, Inc 1-727-536-5566 • www.HydroMassage.com Page 31 of 38... -
Page 34: External Temperature Control Unit Installation
Above-the-Room Installation BENEFITS OF AN ABOVE-THE-ROOM INSTALLATION When the HydroMassage is installed in a closed room without a sufficient supply of cold air (300 CFM supply-and-return per machine), an external temperature control unit (ETCU) is required in order for the HydroMassage to be operated continuously without the risk of overheating. - Page 35 Two¾" conduits (separate conduit for water and power lines) are required within the wall adjacent to the HydroMassage unit, feeding a single gang box with a faceplate near the foot end of the HydroMassage Bed or rear of HydroMassage Lounge.
- Page 36 HydroMassage Chimney / External Cooling System Heat Exhaust ® (Optional for 450 series) L-400 Lounge Quick Start Manual V2.0 20180312 JTL Enterprises, Inc 1-727-536-5566 • www.HydroMassage.com Page 34 of 38...
-
Page 37: Hydromassage Maintenance Schedule
HydroMassage Maintenance Schedule Weekly: 1. Reboot the HydroMassage (instructions below). 2. Clean waterproof cover sheet according to your normal cleaning procedures for all other equipment. Every 3 Months: Add Defoamacide to ensure the water pressure stays consistent and clean. **ONLY USE HydroMassage Defoamacide.**... - Page 38 Leave unplugged for 60 seconds. 3. Plug back in the 220v power and the touchscreen will power 4. Once the HydroMassage® software loads on the touchscreen, the HydroMassage® unit will start initializing. 5. Wait approximately 45 seconds to finish initializing.
-
Page 39: Hydromassage® Installation Checklist
IMPORTANT: For liability reasons, HydroMassage® technicians are not permitted to install or modify the External Cooling System above a customer’s room. Installation Follow the steps in the table below to professionally install HydroMassage® unit(s) at a customer site. NOTE: Refer to the appropriate HydroMassage® Quick Start Manual for full instructions. - Page 40 Provide staff training and guidance in the following area(s) prior to leaving site: • User Interface – Operation & Functionality IMPORTANT: Include a 1-3-minute HydroMassage® tour demo. • Cleaning and Maintenance • Basic Troubleshooting Confirm our goals of a Neat and Proper installation with authorized personnel prior to leaving premises.
Need help?
Do you have a question about the L-440 and is the answer not in the manual?
Questions and answers
How do I use the hydro massages on my feet? Please provide me a picture
To use the HydroMassage L-440 for foot massages, adjust the lower massage limit so the massage area reaches the feet without extending below them. This ensures proper targeting of the foot area during the session.
This answer is automatically generated